Lay dry screed - DIY instructions in 9 steps

- What is dry screed "> Lay dry screed
- Advantages: Dry screed
- advantages
- disadvantage
- The impact sound insulation
- Prices for the dry screed
- Tips for quick readers
Dry screed is a simple and easy way to create the surface for the new flooring. The plates are individually laid, glued and screwed. Especially when renovating old buildings, you benefit from the reduced amount of water that has to be added. In our guide, you will learn how to effectively lay the dry floor slabs and thus create the basis for the floor covering.
The application of liquid screed is a great effort and takes a lot of time. Therefore, dry screed panels are a good alternative. The time required is reduced considerably and even beginners effortlessly lay the boards with the right guidance. But quickly, the question of the costs arises. Here, however, the liquid screed has advantages because it is cheaper in the material. Therefore, we have included a cost calculation in this guide so you can weigh the benefits and the drawbacks.
What is dry screed?
Dry screed is a variant of the screed, so a preparation of the floor for the subsequent subsequent coating. It is used in dry construction and is easier to install than liquid versions. One of the biggest advantages is that it prevents large amounts of water from accumulating.
Especially in the renovation of old buildings, it is crucial not to bring too much moisture into the building. Here scores the dry screed, as it avoids overloading with water. However, it must first be checked whether the soil is suitable. Above all, the vibration behavior of the substructure must be checked.
Lay dry screed
For the laying of the dry screed plates no special previous knowledge is required. However, you must be able to handle the jigsaw well, to saw off the relatively narrow rabbet on the side. The work can be done by one person alone, because each plate weighs about 4 to 5 kilograms and can therefore be laid well. However, the work of two goes faster by hand.
You need these materials for laying:
- screed elements
- Edge insulation strips
- special screws
- dry bulk
- Crimp adhesive
- corrugated cardboard
You need these tools:
- steel float
- leveling rails
- shovel
- skip float
- jigsaw

Step 1: Testing and preparation from the underground
It is important that the substrate is prepared for laying, so that the slabs gain optimal hold and the floor remains level. You must pay attention to various points.
Are all planks firmly attached or are they loose ">
If necessary, you must screw loose boards so that a secure and stable surface is created. If individual planks were loose, then it could come in the course of time to further shifts. In addition, vibrations would occur, which are transmitted over the entire floor. Safety during running is also at risk due to a loose substructure.
Do the boards have any damage?
If there are holes or other damaged areas in the floorboards, then you have to make a repair. If the spot can not be filled with a leveling compound, you must make an exchange.
Tip: Unevenness can not be greater than 1 centimeter. If necessary, use a leveling pad to create a flat surface.
Can you find damaged areas in the ground?
Test the substructure for any visible damage. Old buildings in particular can cause rotten spots and other risks that need to be rectified.
If the load capacity is sufficient ">
Tip: A 0.75 square meter and 3 centimeter high plate weighs around 4 to 5 kilograms. However, always pay attention to the manufacturer's instructions, as the values depend on the exact structure and the height.
Does the ground spring too strong?
If the structure of the substructure has too strong suspension, then there is a heavy burden of dry screed. Since the individual elements are glued and screwed, there is a risk of breakage or cracking. But even if the soil remains intact, too strong suspension is not desirable. The movements would be transferred to the entire floor and thus always be noticed when running the screed.
Is the underground too strong?
If the surface sinks too much, then the dry screed does not receive the necessary support from below. Therefore, in this case, the structure of the substrate must be revised.
Step 2: Attach edge insulation strip
Before you start laying, you must attach the edge insulation strips on the sides.

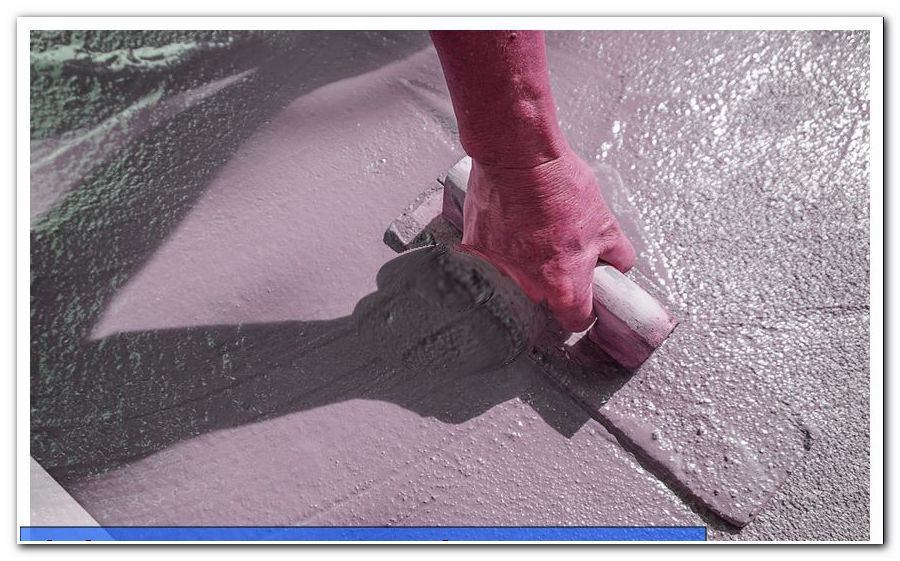
Step 3: Apply leveling compound
The leveling pile should now be piled up in parallel dams about 20 centimeters away. Now put on a stripping plate and fill in the gaps with the leveling pad. This ensures that you distribute the bed as evenly and evenly as possible. Due to the size of the area and the missing reference points, it is otherwise difficult to keep track.

Tip: Check the result in between often with the help of a spirit level. The auxiliary device indicates if the surface is straight. Place the spirit level in different places. It is important to control in several directions - that is, in both north-south and east-west directions - to prevent the leveling ground from falling.
Work from one side of the room to the other side of the room in order to get as close as possible to the already completed bed.
Step 4: Remove the leveling pad
With the help of the peel gauge you now pull off the leveling pad . Make sure that the strippers do not remain in the leveling pad.

Tip: In any case, you should check the final result again using the spirit level.
Step 5: Laying the first plate and sawing off the stepped rebate
Start laying the panels on the wall opposite the door. Before you lay out the first plates, you must remove the rabbet edge from the edge plates.

Since these meet directly on the wall and coincide with on the page concerned with no other plate, here is the wide stepped rebate not desired. This would provide for a large gap and must therefore be removed. Work with a jig saw and saw off the protruding elements.
Tip: Lay the boards in the slipping bandage. This means that you avoid a continuous gap and work offset. This increases the stability and the power is distributed optimally.

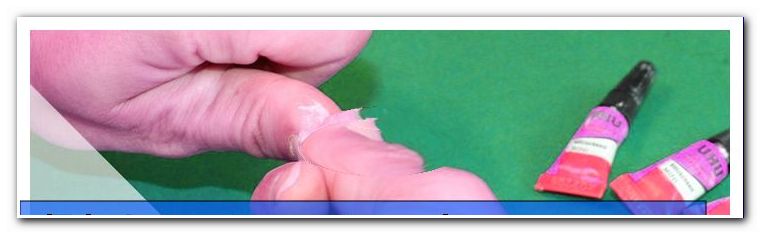
Step 6: Gluing the plates
Apply a sufficient amount of screed glue to the rabbet fold .
Tip: The most effective is a double adhesive cord.

Step 7: Screwing the plates
Screw the components using drywall screws .

Step 8: Curing
Let the glue harden for around 24 hours . Then eject the sticking adhesive. The adherence to the curing time is decisive, so that there is no loosening of the splices. Therefore avoid entering the room during this time and thus the load on the floor.

Step 9: Flooring
Now you can start laying the flooring . For example, you can apply carpet or laminate over the screed. Pay attention to any necessary footfall sound insulation.
Advantages: Dry screed
advantages
1. Less moisture is introduced into the room. The water could get into the ground and thus lead to subsequent damage.
2. Lengthy drying times eliminated . Conventional screed must undergo a drying time and hardening time of several weeks. These phases are eliminated in the dry floor, so that the premises can be completed faster and the further work can begin.
3. Laying the dry screed is faster than applying the liquid screed.
In addition, auxiliary equipment is necessary for the introduction of the liquid substances and the work requires a higher level of expertise. If the screed accidentally splash on the walls, then this means an increased effort when cleaning or repair.
4. No CM measurement is necessary. The CM measurement serves to determine the residual moisture in the screed. These measures are eliminated in dry screed.
5. It is possible to lay the dry screed at lower heights than liquid screed. The individual plates have a well-defined thickness, which improves the control of the height. Depending on the substructure and the planned floor covering, you can even realize low heights.
6. The weight is lower than in the liquid version. If height differences exist, then the compensation can be done by pouring. This is low in weight. The weight load on the building is therefore also reduced in this area.
7. Since the mass of dry screed is lower, the underfloor heating has to work less. This saves heating costs and the room is heated up faster.

disadvantage
1. There are high demands on the substrate. So the substructure must be particularly stable.
2. The costs are higher than for liquid screed.
3. The ground must be level. If necessary, a fill or a filling is required.
4. The load capacity is lower in many areas. For example, wheelchairs can quickly wear out. Dynamic loads are generally a problem.
5. The standard tables for impact sound insulation are not valid for dry floor.
6. Since the underfloor heating also heats the substructure, you must observe the upper limits for the temperature here.
7. It must be checked to what extent the screed is affected by moisture and how sensitive the floor becomes.
The impact sound insulation
Many dry screed panels have a multilayer structure . They are equipped with impact sound insulation, which reduces the resulting vibrations. Possible materials include the following materials for insulation.
- Mineral wool: very effective in sound insulation, but very soft
- Wood fiber lamination: lower insulating effect, but stable
Tip: When selecting the insulation, you must pay particular attention to the planned floor covering. If you want to attach large-surface tiles, then a stable structure is required. Wood planks, on the other hand, do not require so much stability.
Prices for the dry screed
To decide whether to choose a liquid screed or the plate variant, the prices are also crucial. With 3 centimeter high dry screed you have to expect a cost of around 21 euros per square meter.
With a delivery to your home, the plates are often offered on pallets, about 50 to 60 pieces. Due to the high weight and size you should therefore have a suitable for trucks access. So a pallet can weigh up to 2 tons.
The prices for the leveling floor for the screed
Before you can lay out the dry screed panels, in most cases you will need to apply a leveling compound. In the specialized trade you can buy the material for approximately 0.25 euro per liter. Per centimeter of dumping height you need about 10 liters per square meter.
Example calculation for the equalizing fill:
A sack with 50 liters compensation bed costs 12.50 euros. If you set the bed an inch high, then the bag is sufficient for an area of 5 square meters.
Prices for a room of 20 square meters:
Below is a sample calculation of the price of dry screed installed in a 20 square meter room.

1. Dry screed plates
20 m² x 21 euros per square meter = 420 euros
2. Leveling Compound
The square meter costs around 2.50 euros. This results in an investment of 2.50 euros * 20 = 50 euros for a 20 square meter room. The bill assumes that you choose a dump height of 1 centimeter.
Tip: You should in any case buy a sufficient stock of equalizing fill. It is crucial that you fill the substrate well, otherwise the dry screed panels can not be optimally laid.
3. Screed glue
The individual plates are joined together using glue . This is offered in bottles and must also be purchased in large quantities. On average, 1 kg of adhesive is sufficient for an area of around 20 square meters. The cost in this case is about 13 euros per kilogram. Thus arise for the room from the example calculation expenses of 13 euros.
4. Total cost of the room
420 euros + 50 euros + 13 euros = 483 euros
The cost can increase even more if more leveling is needed. If you need to fill up to 2 centimeters, then the expenses increase by 50 euros.
Tips for quick readers
- Substructure must be level
- Compensate for unevenness before starting work
- Make leveling
- Starting point: wall opposite the door
- Apply glue to the stepped palate
- Apply double adhesive tape
- Lay the panels
- fix with screws
- Let it dry for 24 hours