Sewing a blanket - DIY instructions for a cute cuddle cloth

- material
- Instructions: Sew on a cuddle cloth
- Prepare base area
- Prepare the tips and ribbons
- Sew on a blanket
- variants
- Instructions for quick readers
A nice blanket is always a great idea for a birth gift or even for your own newborn. Here, the little ones have something to cuddle and grab.
Our Schnuffeltuch also has a holder for the Nuckel and how you get it, we show you in our guide.
There are no limits to your imagination. Already at the fabric selection you can really let off steam and make the cuddle pretty and colorful playful or quite simply edit it to your taste.
It takes a good hour of time and patience for this sewing project because the cuddly blanket is made up of many individual parts that must be carefully assembled. A pronounced beginner project is thus not; Basic knowledge is absolutely necessary. With patience and care, however, this project is good to create.
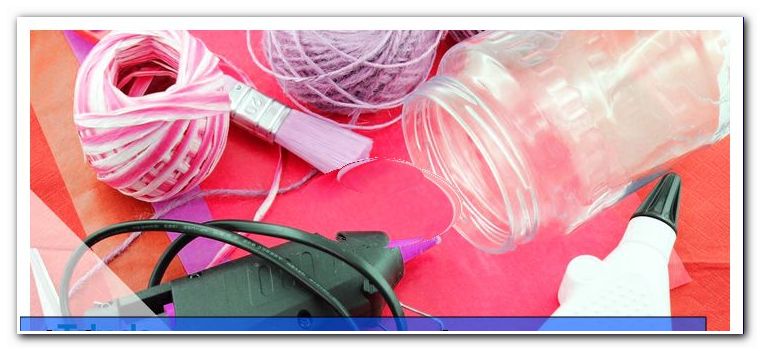
First, we have listed what you need for a cute Schnuffeltuch to conjure up a nice result:
material
- sewing machine
- matter
- Ribbons
- Push-button and accessories
- pins
- Scissors and yarn
- marker

The sewing machine
Basically, no special machine is required for this project. It can all be sewn with a simple straight stitch. For the outer seam, however, a beautiful decorative stitching can be chosen according to taste. Our machine is from Silvercrest and costs about 100, - Euro.
The fabrics
Of course, almost all fabrics can also be used here. The only rule: The substance must be "baby-fit". The fabric should not lint, for example. For the basic form we used a cotton fabric with stars and for the bottom a fleece fabric. For the individual parts, we have chosen differently patterned cotton fabrics. One meter of fabric you get for 5, - Euro.
The woven tapes
Here we have chosen a few different straps to make the cushions varied. The tapes should be nice and tight. Woven tapes are already available from 1, - Euro.
The push button
To close the pacifier holders, we have inserted a push button. Of course, the corresponding tool must be available for this purpose. Of course, a Velcro would be conceivable.
The shear
Basically, almost any pair of scissors can be used. However, we recommend to use 2 different scissors: On the one hand a pure scissors is useful. This should only be used for fabrics, otherwise the scissors will quickly become dull and thus unusable. In addition, a small pointy scissors is advantageous to cut small threads and fabric corners. This pair of scissors is much more manageable and you can get closer to the threads.
The marking pen
We have used this to mark the individual pieces of fabric. It is removable with only a few drops of water and is available from just 4, - Euro. Of course, a tailor's chalk or a soft pencil can also be used.
Instructions: Sew on a cuddle cloth
Now prepare all the materials and read through the following instructions completely. So usually any emerging ambiguities can be eliminated in advance.
We now wish you a lot of fun sewing the Schnuffeltuch.
Prepare base area
1. Draw a square of 24 x 24 cm on the two base materials. Be very careful here. This will give you a nice result.
2. Then cut the two squares.
Prepare the tips and ribbons
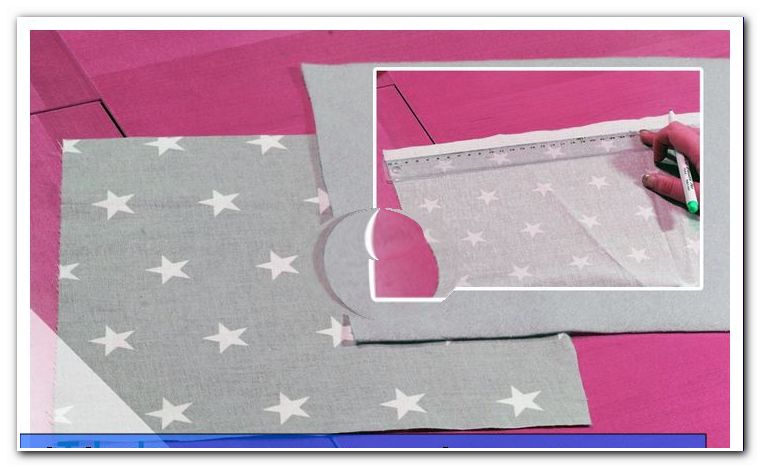
3. Draw a rectangle measuring 5.5 cm x 17 cm . Round off one of the short sides.
4. Fold the fabric over so the marker is on top.

5. Insert the whole thing afterwards. Practiced seamstresses and seamstresses can work safely without needles.
6. Sew now 1 cm along the mark along. The short straight side remains open.
Do not forget to always "lock" your seams. To do this, first sew a few stitches forward, then press the back button located on the front of your sewing machine, sew back a few stitches, and then continue to work the seam normally. Finally, each seam should be locked to prevent loosening of the seam.
7. Then cut out the fabric piece along the marking.
8. Apply the fabric part. Here you can use an elongated object such as a fabric or a knitting needle.

9. Repeat steps 3 through 8 three more times so that you have 4 corners.

10. Now draw 4x a square of 7 x 7 cm and cut them.
11. Then cut the squares into 2 triangles each by working from one corner to the diagonally opposite corner.
12. Place two triangles one on top of the other and then pin everything down.

13. Sew the triangles together on the two short sides. The long side stays open.
14. Repeat step 13 until you have 4 triangles and cut off the excess filaments.
15. Cut off the top tip straight. So the corner can be worked out better when turning. Take care not to cut in the seam.
16. Then apply the triangles.

17. Now cut a rectangle about 15 cm long. This will be the holder for the teat.
18. Fold the rectangle right to right lengthwise.
19. Then sew a short side and the long side. The other short side remains open for turning. Cut the corner straight off here as well.
20. Then apply the fabric part. Use a pen or knitting needle here.
21. Now you can attach the push button. A push button consists of a total of 4 parts. Press both sides firmly with the pliers so that they will not come off later.

Tip: Close the push button. This makes sewing easier later.
22. Now the woven tapes are cut. For this we have each measured 10 cm. Cut a total of 12 pieces. We have chosen 3 different bands, each 4 pieces.
Sew on a blanket
23. Now we come to the hardest part of the project. First, all parts must be pinned on one of the big squares. The 4 long corners are arranged diagonally at the corners. The woven tapes and triangles we have evenly distributed on all sides. Important: All parts must point inwards. Take a look at our photo.
24. Then sew completely around the work with a simple straight stitch.

Attention: Do not work in the second big square here.
25. Next, fix the second large square right side down onto your work.
26. Then sew completely around. Work here in the same existing seam.
Attention: Leave about 10 cm open for turning. If in doubt, you can also make a mark.
27. Cut the corners straight afterwards.

28. Now we turned everything carefully. Be careful when working out the corners.
29. Finally, the outside is sewn completely around the work. In this case, the turning opening is closed. Again, work is being done on the existing seam. At this point, a beautiful decorative stitch with a yarn in contrasting color can be used.

Her cuddle cloth is now ready and ready to cuddle with a new earthling.

variants
- Pacifier holder with velcro instead of push button
- Sew in baking paper so that it rustles nicely
- Plug out outer tip with filling cotton
- Embroider the name of the baby
Instructions for quick readers
- Cut 2 squares a 24 x 24 cm
- Mark 4 rectangles 5, 5 x 17 cm with a short rounded side
- Fold 4x fabric and sew 1 cm next to the marker, the short side stays open
- Cut out 4 times along the marking and turn
- Cut 4 squares 7 x 7 cm and divide into triangles at an angle
- Sew together 4x 2 triangles right to right, the long side stays open, then turn
- Cut 15 cm long rectangle, fold lengthwise and sew a short + the long side together, then turn + attach push button
- Cut 12x Weave Tape to 10 cm
- poke the small pieces of fabric on one of the big squares and sew them once
- pin the second big square with the right side down and sew on it again, do not forget the opening
- turn
- Sew one last time completely around in the existing seam while shooting the turning hole - FINISHED