Sewing Baby and Kids Stuffed Animals - DIY Guide

- material
- patterns
- cut out
- Sew on cuddly toy
- apply
- Ears and head
- tail
- arms and legs
- Endspurt
- variants
- Short manual - Sew on cuddly toy fox
You always wanted to make your own stuffed animals for your little ones ">
Stuffed cuddly toys - The cuddly fox
When sewing cuddly toys you can let off steam. Especially in the field of currently very popular monsters of the imagination are no limits. Also, the bat enjoys not only on Halloween back to popularity. Today I would like to show you how you can easily sew a fox according to your own ideas, so that your children have something to make their own cuddling.
If you are sewing your stuffed animals yourself, you have the great advantage that you can create unique pieces. This is a special gift not only for your own children, but also the wider family, the friends and acquaintances will be happy about it. However, as simple as sewing cuddly toys yourself, it takes a bit more time to consider in your project planning: along with creating the pattern, cutting and stitching, you'll need to plan four to five hours of work, because a lot is sewn by hand here.
Difficulty level 2.5 / 5
(moderately suitable for beginners)
Material costs 1/5
(depending on the choice of fabric between EUR 0, - from the remaining utilization and EUR 25, -)
Time required 3/5
(including pattern depending on the exercise 4 to 5h)
material
In principle, all materials can be used. Especially with stuffed animals like this one, but I recommend a non-stretchy material, because the fabric can bulge in the long term and that does not look nice. For my stuffed fox I chose an old guest towel in orange. Add some white sweat (this time with the roughened, soft, white inside out) and some dark brown baby cord fabric for the eyes and nose of my fox.

How much you need from each fabric depends largely on your subject and the size your stuffed animal should have. So let's start with the design:
patterns
When I want to sew stuffed animals, I first draw some sketches on a piece of paper, how my animal should look like. I like to be inspired by both the "real" template (the right animal) and cartoon drawings. When I'm satisfied with the basics, I transfer everything into my cut, and right in the right size. Checkered paper is a good choice here, as certain units of measurement can be better adopted. Of course, even smooth paper. I already draw this pattern "in the break", ie only half of the animal, so that both sides become symmetrical.
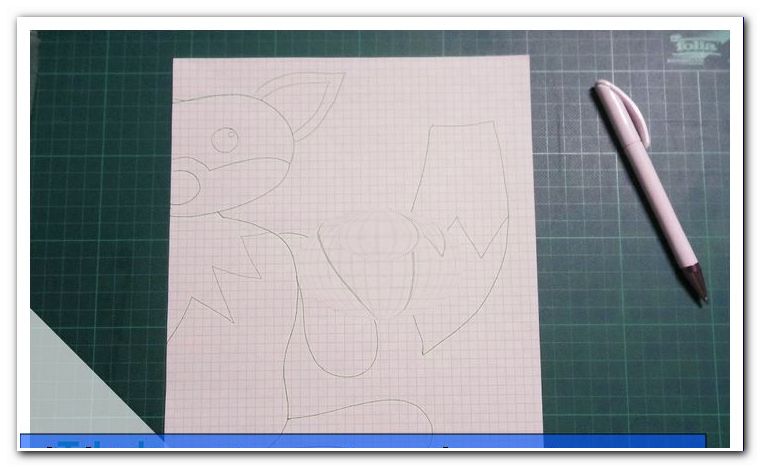
The tail of the fox is attached to the back, so I draw it separately next to it.
Should it go a bit faster and you are a bit awkward when drawing, here is the Fox also to print:
Click here: To download the pattern
Tip: At the points where parts of the body touch, continue to draw slightly further into the other part of the body, then you will see later where these parts need to be put together. Advanced users can do without it.
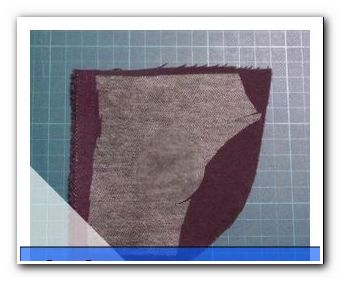 cut out
 cut out
 When sewing stuffed animals, cropping can be a bit tricky at times. For my subject, I work with applications that I sometimes need with and sometimes without seam allowance. This depends very much on the pattern and thus on your personal preferences.
Tip: Before cutting, think carefully about how to sew your stuffed animals and where seam allowances are required. For applications, it is ALWAYS recommended to reinforce the fabrics with non-woven fabric so that they do not fray.

First, I reinforce the cord fabric and the sweat fabric with ironing fleece. From the brown baby cord fabric I cut eyes and nose without seam allowances. From the sweat substance I cut several parts:
- Once each of the right and left parts (fold fabric once) from the inner ear without seam allowance
- Once the white area around the snout in the fracture - top without seam allowance, below with seam allowance
- Once the breast fur in the fracture - top with seam allowance, bottom without seam allowance
- The white tail tip for both sides of the tail (fold fabric once) - top (zig-zag) without seam allowance, everything else with seam allowance.
From the orange towel I cut out all parts including the white areas. In this case, the front part of the body should be cut in one (in the break), the back, however, consist of two parts with seam allowances all around and in the middle, since we will still sew the tail here.
Sew on cuddly toy
apply
First, I apply all white pieces of fabric on my orange towel, then the eyes and the nose. You can find detailed instructions for applying in my article about applications.

Ears and head
In the next step I sew the ears together on the sides (they stay open at the bottom), right to right (the "nice" sides to each other), cut back the seam allowance in the top and turn the ears. I do not want to feed my ears. If you want to feed the ears, please do it now. With my cut template, I now look for the position on the head where the ears are to be attached, fold them inwards and fix them.

Then I put the back of the head right to right on it and put the clamps over. Now I can sew all around - the neck area I leave open. After sewing, I turn and the head is almost ready.

tail
It continues with the tail: I put the two parts right to right on each other, put them firmly and sew once outside. For beginners, it is better not to sew completely around and to save a slightly larger opening. Then turn and the tail is almost done. Now the tail is stuffed, placed at the desired position, covered with the second back side and pinned.

ATTENTION: there is still a seam allowance at the bottom, which you must take into account - preferably attach an inch further up
Then the center seam can already be attached and the tail is attached to the back.

arms and legs
Now follow the extremities. As these become closer to the body, I do not close all around, so I can easily turn them around. Thus I sew after turning by hand with the ladder or magic stitch the last centimeters (see tutorial ladder seam in my instructions to the Dinkelkissen) and fill the extremities. In the next step, I fix all four filled parts on the back as I would like to sew them on and fix them. The tail needs a lot of space here, so I have to push back and forth a bit until I have everything stored. Finally I made it and can hang my front right to right and fix everything.

Endspurt
Now it is sewed all around, from one shoulder to the other. Leave as much space as possible for the turning opening! Now turn and fill, then the head can be connected at the neck with the body. Here, too, I have opted for the ladder or magic stitch. I start at the shoulder and close to the white chest part of the shoulder seam, then past the neck already the connection of the chest and chin, on the other side again the shoulder seam and then the connection of the neck and back - and already is our little vixen finished!

variants
Advanced users can also cut and sew the respective fabric pieces in one layer instead of the appliqués. However, with many points and curves, this does not require a lot of exercise with inextensible materials and can easily result in unsightly wrinkles.
Buttons or other accessories can be used instead of nose and eye applications. Also embroidered details give your cuddly toy that certain something.

Short manual - Sew on cuddly toy fox
1. Draw a sketch and create a pattern.
2. iron fleece (if necessary or desired)
3. Cut fabrics (with or without seam allowances - depending on cut)
4. Attach applications (if available)
5. Sew, turn and feed the items
6. Assembly of the individual parts
7. Done!
The twisted pirate