Crafting with wire - ideas from old wire hangers

- wall mount
- Crochet coat hanger
- Holder for kitchen roll
- Art Garland
- Hanging lantern
- Fairy wings made of wire hangers
Wire hangers only break the clothes ">
Now and then, when you bring clothes to the dry-cleaning department, it's no news to you that you often get wire hangers when you pick up your precious pieces. Theoretically, you could bring them back to cleaning, but who does that ?! Instead, the hangers, whose wire would permanently deform and destroy the good clothing, often end up in the dustbin. But that does not have to be, because the utensils can be wonderfully used elsewhere. One does not believe what can arise from the unpleasant aids so everything! In this guidebook, we reveal five creative ideas to make from unsightly and useless wire hangers highly attractive accessories for all seasons!

wall mount
You need this:
- a wire hanger
Step 1: Pull the hanger apart with your hands. The straight cross-connection is pulled down for this.
Step 2: Then fold the bracket together. The former straight connection is simply folded up to the hook.

Step 3: Now the wall mount only needs to be attached - the hook's hook is perfect for hanging on a sturdy nail. If necessary, you can also bend the hook a bit more roundly so that it can not slip off the nail.
Now you can push letters, papers or important notes into the suspension.

A cloth can be kept just as well, whether in the wardrobe on the pole or on the wall. Ties, tights or even scarves can be stored perfectly with this DIY holder.

Crochet coat hanger
You need:
- a wire hanger
- Wool
- crochet hook
- scissors

Step 1: At the beginning, tie the thread end to the wire hanger. Then take a loop with the crochet hook.
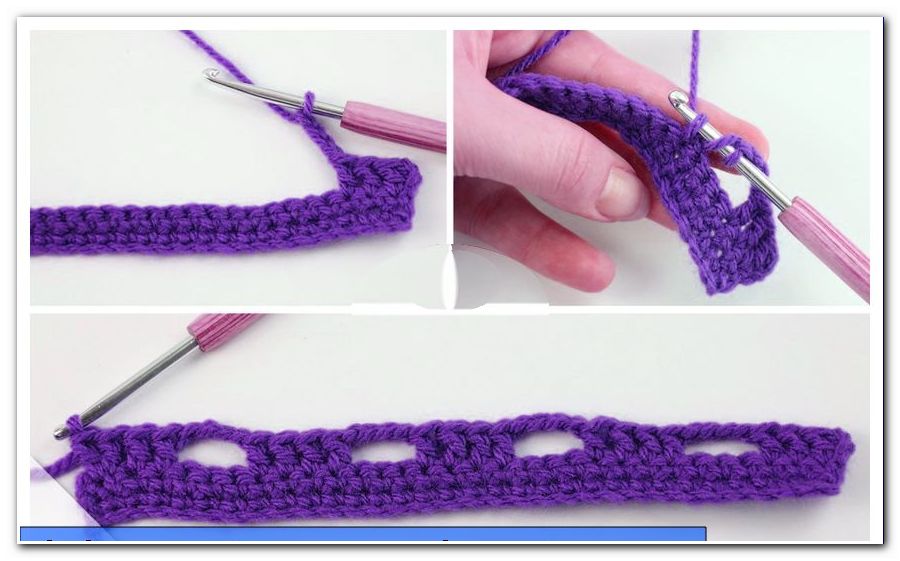
Step 2: Crochet around the wire as usual - you can crochet crochet or chopsticks. We decided on simple sticks - so the crocheting of the hanger is a bit wider.
Here is a detailed guide to crocheting chopsticks: Crochet chopsticks

Crochet this way completely around the hanger. When you arrive at the end, finish the crochet with a slit stitch. The thread is then cut off.

Holder for kitchen roll
You need:
- a hanger made of wire
- pincers
This DIY idea is really easy. Pinch the cross connection in the middle once apart.

Now pull the two halves apart. Then place a roll of kitchen paper on both ends and bend everything together again. So the role keeps perfect. Done is the lightning fast kitchen roll holder!

Art Garland
You need this:
- wire hangers
- many artificial flowers
- wire cutters
- tongs
Step 1: Cut the wire hanger to the right or left of the hook. For this you should use a wire cutter.
Step 2: Bend the bar to your preferred shape, such as a circle or a heart. If necessary, operate with pliers.
Step 3: Pick up one of your artificial flowers and wrap the stem like a needle eye.
Step 4: Repeat the second step with all other artificial flowers.
Step 5: Thread the first artificial flower with the "needle eye end" on the wire hanger.
Step 6: Repeat the fourth step with all other artificial flowers.
Tip: Arrange the flowers close to each other so as not to leave any gaps. In addition, the wreath in this way is particularly lush and radiating.
Step 7: When the wire is completely covered with artificial flowers, push them firmly towards the closed wire-bow side. At the same time rotate the wire ends together to close the bracket.
Step 8: Reshape the artificial flowers to make the underlying wire invisible. Finished!
Hanging lantern
You need this:
- wire hangers
- Glass with brim *
- tongs
- wire cutters
* Note: Use a glass with a small brim at the top where you can place the wire around the glass.
Step 1: Pick up a wire hanger and use the wire cutter to cut off a sufficiently long piece of it.

Tip: Sufficiently long means the cut piece can easily fit around the glass, adding a few extra inches (for the eyelets that will be created later, and contingencies).
Step 2: Place the cut pieces of wire on the glass - under the small brim in the upper area. Then begin to bend the wire around the glass. Gradually bend the ends towards each other until they meet and overlap. Use pliers if the wire can not bend with bare hands.
Important: Use care not to destroy the glass. If you are unsure, you can bend the wire ring without direct contact with the glass. In this case, you have to repeatedly put the resulting ring on the glass to check whether you are on the right track. Here a lot of patience may be needed.
Step 4: As soon as the ring shape fits well around the glass, cut off the protruding ends.

Step 5: Now it is time to create a suspension hook. Just take the rest of the hanger. Pass the ends to each other. Bend the two rounded tips left and right round and run them around the wire. If everything is in the right place, bend the ends completely with the pliers.

Step 6: Put the lit tealight in the glass and hang your lantern in a nice place. Finished!

Fairy wings made of wire hangers
You need this:
- 2 wire hangers
- 1 or 2 bright nylon tights (s)
- 1 incense candle
- Gaffer tape or other fabric tape
- Acrylic paints and brushes
- Glitter colors and glitter
- Rhinestones
- satin ribbon
- tongs
- hot glue
- hairdryer
Step 1: Each of the two wire hangers forms a wing. So bend the two straps so that they take on the shape of a wing. To do this, use your hands and / or the pliers.

Tip: To achieve a nice result, put the two wings together again and again, compare them and make the necessary adjustments.
Finally, the wings should look something like our picture:

Step 2: Using the pliers, snap the curved element (hanger) of the original hangers so that the two wings converge flat in the middle.

Step 3: Wrap the tape completely around each of the two hangers. Then connect the wings with several layers of crepe in the middle.

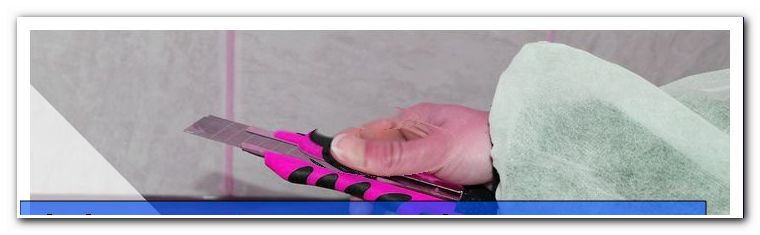
Step 4: Pick up a bright nylon tights, cut both legs apart and put a trouser leg over each wing. Do not forget to tense the whole thing tight. Then cut off the superfluous part and firmly tie the two pantyhose leg ends to the wings.

Step 5: Decorate the wings to your heart's . Here are some tips:

- Burn smaller and larger holes with a lighted incense burner
- Paint with acrylics plus brush (Attention: not too thin, otherwise the colors drip through the fine fabric)
- Spray with spray paint
- Apply glitter
Step 6: Let the wings dry overnight or immediately after with a hair dryer.
Step 7: Once the paint layer is dry, you can add accents with glitter colors and / or glitter. Even glued rhinestones look great.
Step 8: Glue a matching satin ribbon around the center of the wings.
Step 9: Then tie two longer satin ribbons around the area. They serve that the wearer of the fairy wings can bind these front and attach it to the own body. Finished!