Knit socks - the heel - easy DIY guide
- Material and preparation
- Knit heel - instructions
- Classic heel with heel cup
- Knitting boomerang heel
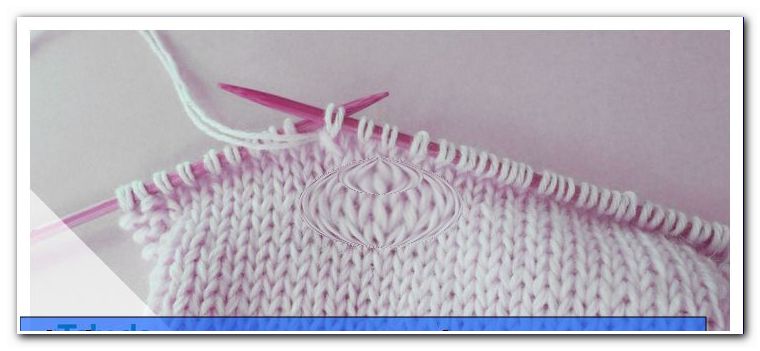
Hand-knitted stockings have their own character and will never go out of fashion. Even though the handling of a needleloose needs some practice - with the right instruction, socks are knitted quickly and easily. In this description you will get to know different types of heel knitting and can follow it up step by step.
Material and preparation
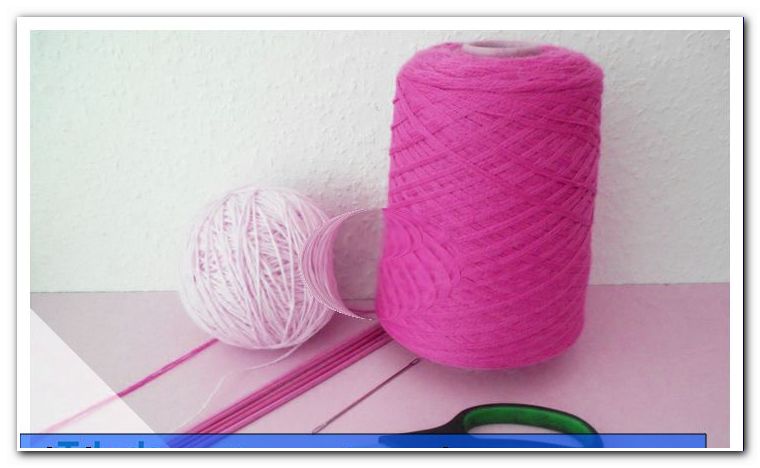
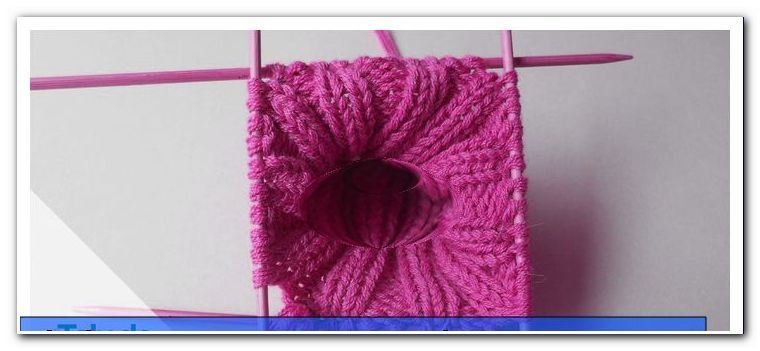
For socks you can use any yarn of your choice. From industrially spun sock wool over thin cotton for hole pattern socks, to thick jacket yarns for cuddly winter socks - everything is possible and usable. In general, the harder it is twisted, the harder the wool is. Thick wool threads usually consist of very loose twisted individual threads, so that the wool gets a very soft feel. Socks from these yarns can go through quickly if they are being worked for constant use. Therefore, they are more suitable as a bed or over socks.
Commercially available sock yarn has an average length of about 250 meters to 50 grams of wool. They are available in monochrome or in variants, where the pattern is created by changing color sections directly during knitting. In terms of price, there are enormous differences, so researching on the Internet and browsing during seasonal sales are worthwhile.
Sockwool is usually made from 75% virgin wool and 25% polyamide for dimensional stability. Many knitters also appreciate the benefits of pure sheep's wool, which, when processed into socks, provides the perfect feel-good climate for the feet. On average, you need a hundred grams of wool for a pair of socks, and a little bit more for thick wool or big feet. According to the wool strength, it needs the matching needle game, which consists of five individual needles.
You need this:
- Needle game in matching strength
- 100g sock wool or wool of your choice
- scissors
- Needle for sewing the threads
Knit heel - instructions
The heel area of stockings can be knit in different ways. Here we present you the boomerang heel and the classic heel with heel cap.
Classic heel with heel cup
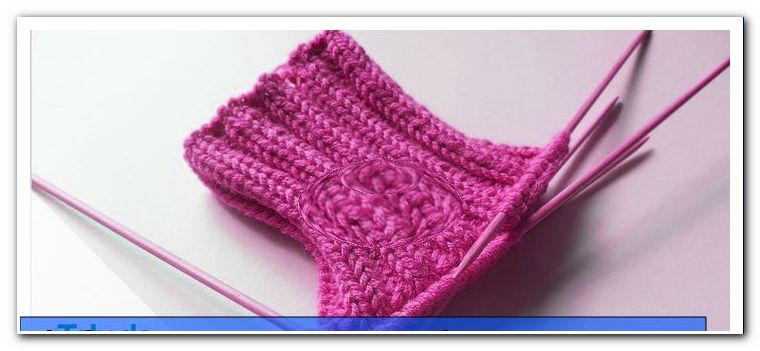
For the shaft of the sock, hit the appropriate size of stitch and knit the desired length in the rib pattern or cuff pattern of your choice. For each size, there are "Sock Tables", in which for the respective wool thicknesses, the amount of stitched stitches and the number of increases and decreases for the sock tip are clearly displayed, so you can start immediately. Our sock charts can be found here: //www.zhonyingli.com/socktisch/
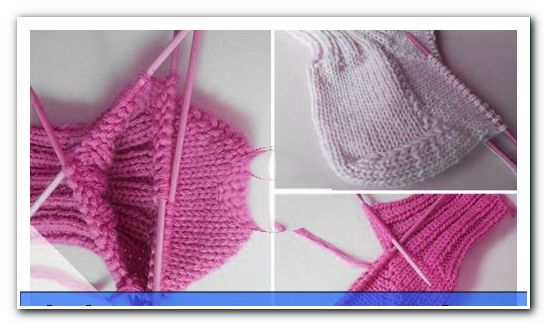
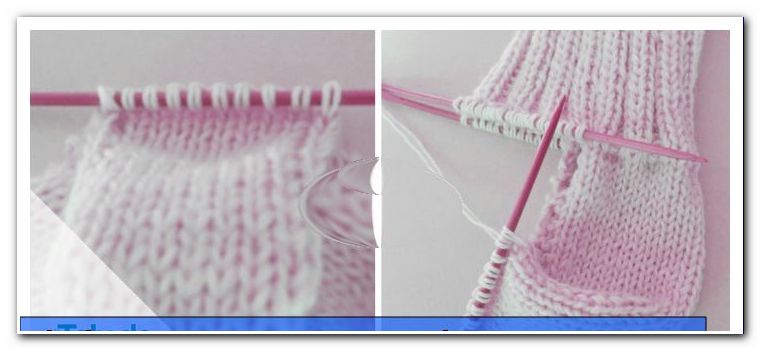
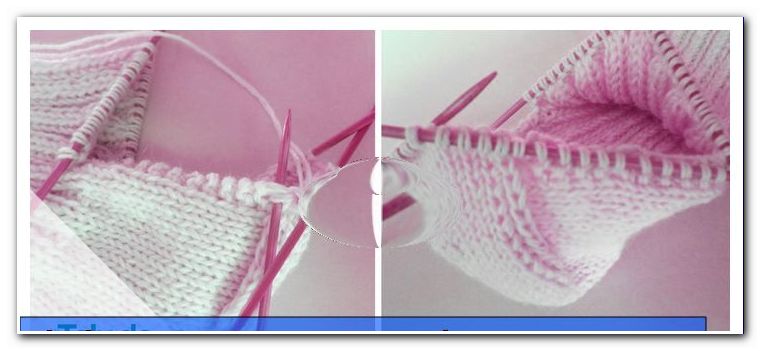
 In this example, 60 stitches were struck and 15 stitches each on a needle. After the desired waist length is reached, the stitches are re-classified. The starting thread is used as orientation. To the left of this is Needle Number One, to the right of which is Needle Number Four. The stitches of both needles are placed together on a needle, on which the so-called heel wall will emerge.
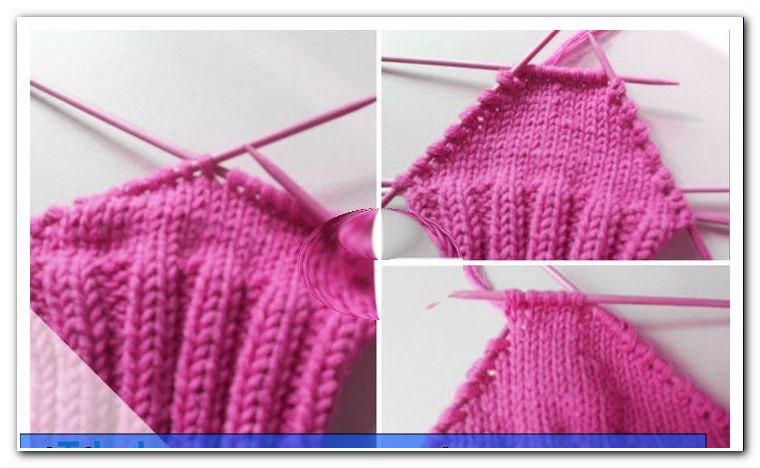
In straight right knitting (right row, back row left) is now knitted over the 30 stitches. While doing so, always knit the first two and the last two stitches on the right (knit on the right). This creates optically ribbed stitches on the edge, which later make it easier to pick up new stitches.
You knit the first two stitches on the right and in this way until the end of the row. The work is turned. Now show the left stitches to you. The first two stitches are knitted on the right. The remaining row work with left stitches, the last two stitches knit right again. Turn and knit in this manner until you have worked 28 rows. As a rule of thumb, the heel wall should have the same number of rows except for two rows as you have stitches on pins 1 and 4. With a total of 60 stitches, there are 15 stitches on each needle, and by folding pins 1 and 4, you have 30 stitches on the needle for the heel wall. Two rows less means then that 28 rows have to be knitted for this sock part.
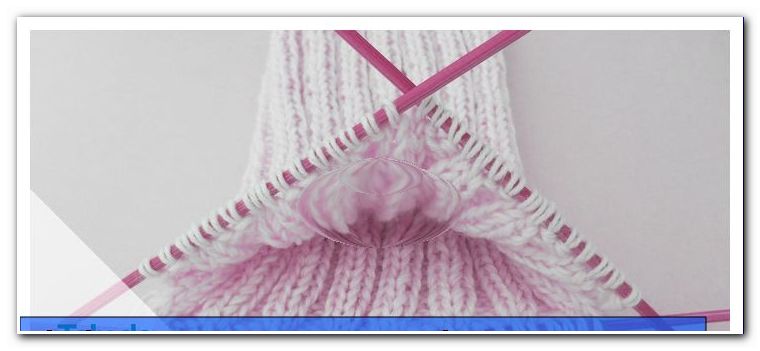
When this number of rows is reached, the so-called cap is knitted. It forms the lower part of the hacking and provides the required foot width. They divide the number of stitches on the needle into three parts. With 30 stitches this would be 10 stitches per third.
The right knit side points to you and you start by knitting the first stitch on the right. Then work to a stitch before the last third (19 stitches are knitted). The 20th stitch is lifted off to the right, the 21st stitch is stitched to the right, and then the previously lifted stitch is pulled over the stitched stitch.
Then turn the work over. The left stitches now point to you. Lift off the first stitch as if left-knit with thread.
Knit all other stitches left. If 11 stitches are left on the left needle, knit the 11th and 10th stitches together on the left. Turn the work over.
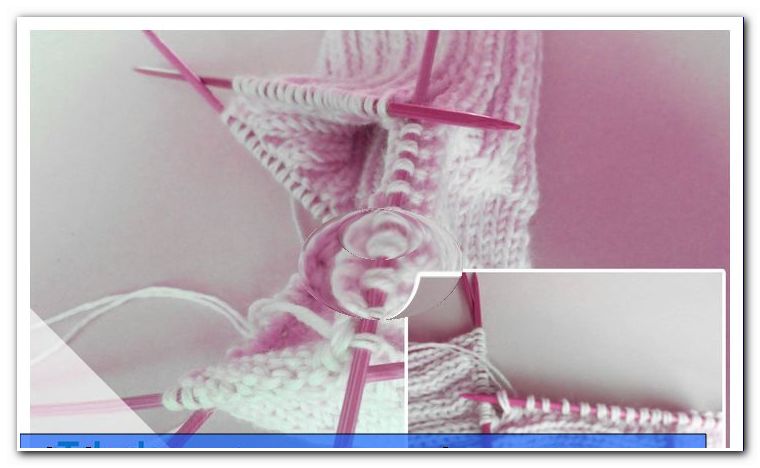
Now you can visually recognize the tripartition. In the middle, the heel center develops, the side stitches are now knitted piece by piece to maintain the right angle in the sock. Continue to knit until the stitches of the two outer thirds are exhausted. You start each row with the lift to the left knit and at the end of each row knit the double stitch with the following stitch together. In the right rows, the double stitch is lifted off to the right and lifted over the subsequently stitched stitch. At the end of the left rows, knit the double stitch with the following left stitch on the left. Work in this way until only 10 stitches remain on the needle.
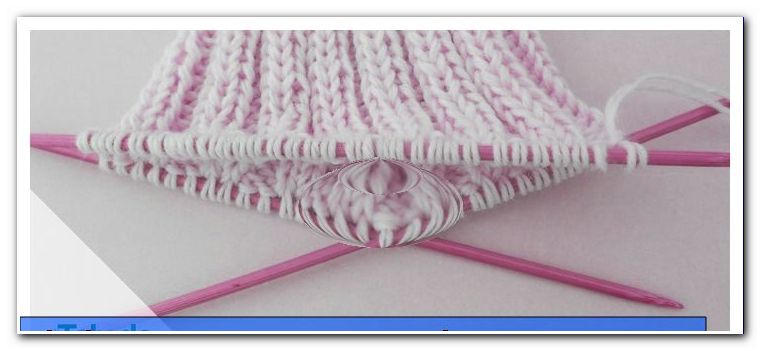
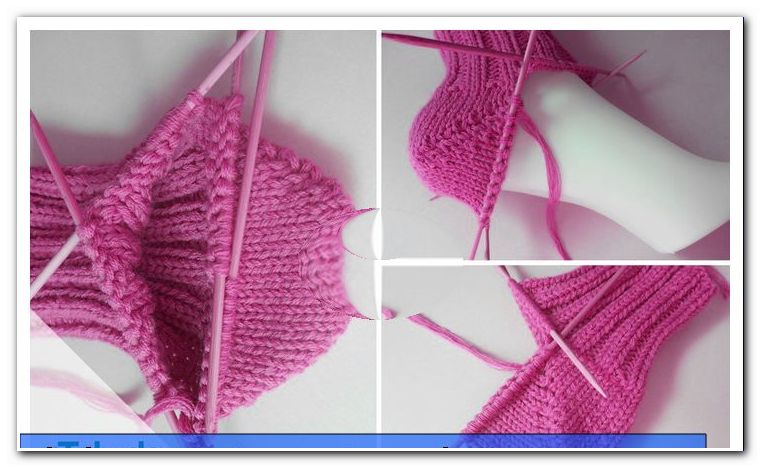
Now all four needles come into play again. First, divide the ten stitches you still have on the needle from the cap kick. Five stitches are on needle 4 and five stitches on needle 1. 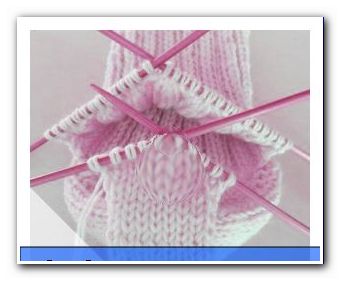
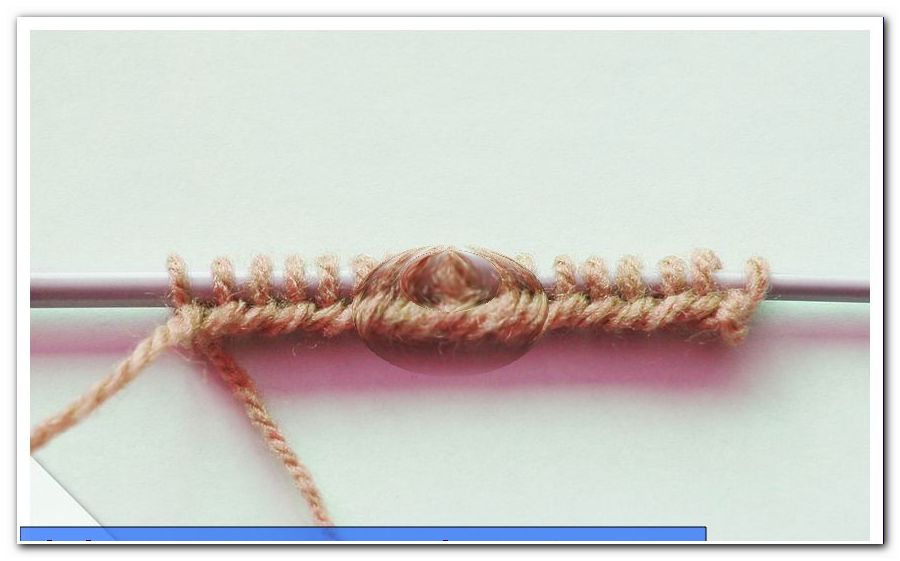
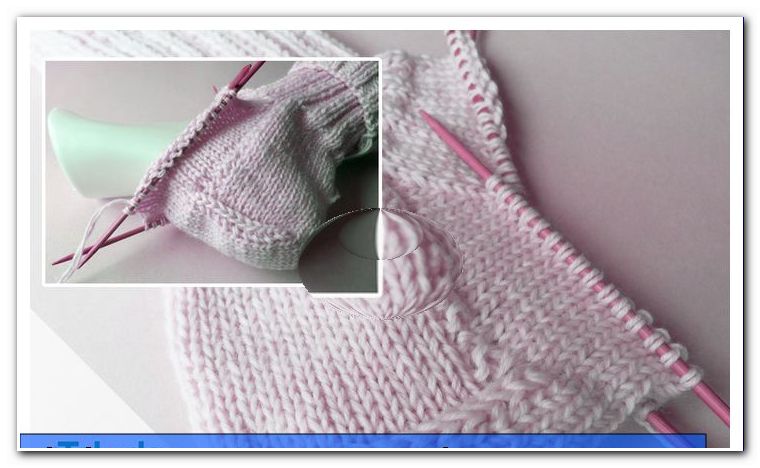
At the end of Needle 1, start taking stitches from the heel wall to close the sock. In addition, the nodules come into play. They take a stitch out of each nodule. In 28 knitted rows 14 nodules have formed, which are created in every second row. In addition to these, take one stitch at the very beginning of the row (before the first knot) and another stitch at the end of the row (after the last knot). This is done in order to be able to work the knitted fabric in these areas closely and without holes.
 With needle 1 you have now taken stitches, the stitches of needle 2 and 3 are all knitted on the right. Use needle 4 to pick up stitches from the heel wall again. From each nodule pick up a stitch, at the beginning and then at the end of the row each knit out an additional stitch.
For these stitches, make sure to stab in the stitch so that no holes are formed. For this you can use the edge row - these are the stitches that were always knitted at the heel wall as the first stitch - or you stab in the second row - in the stitches that were knit at the heel wall knitting as the second stitch on the right.
If you pick up stitches from the outermost row, the second row of stitches will look like a row of ribs as a pattern in the stocking. If you pick up the stitches from the second edge row, you get a smooth right-hand stitch transition.
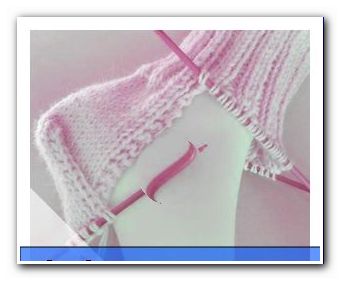
Now you have the stitches for the side panels, the sole and the instep spread on all four needles and knit one round right over all stitches. There are more stitches on needle 1 and needle 4 than on the other two needles. For this reason, decreases are necessary, which form the "Spickel".
When you have knitted the stitches of needle 1 on the right and you have two stitches on this needle, knit these two stitches together on the right side.
Knit the stitches of needles 2 and 3 on the right. The first two stitches of Needle 4 are worked on the right side - take the first stitch as if to the right knit, knit the second stitch on the right and lift the lifted stitch over the knitted stitch. In the following round all stitches are knitted without declines. In the third round the knitting takes place again at the end of needle 1 and at the beginning of needle 4. Continue this change until you have 15 stitches on needle 1 and needle 4 again, so that the starting number of 60 stitches is reached again.
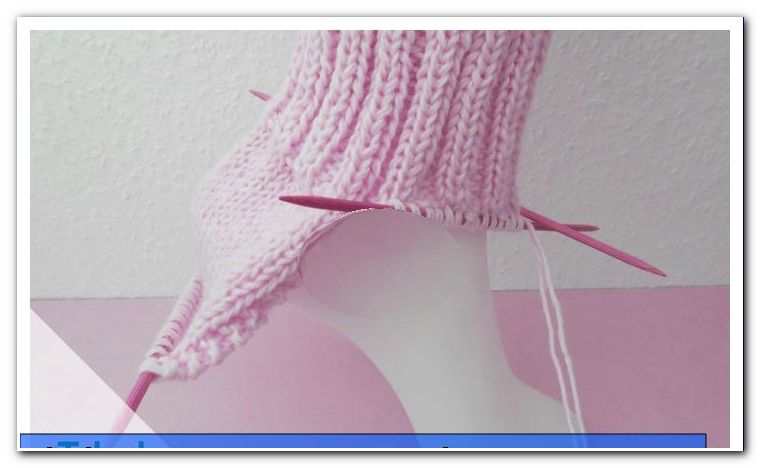
Knitting boomerang heel
For this example, 44 stitches were struck and spread on four needles of 11 stitches each. Knit the ribbed sock shank with two stitches on the right and two stitches on the left. After reaching desired height over all stitches a row of right stitches work.
Now the boomerang heel begins. You work only with the stitches of needles 1 and 4. Again, orient yourself at the beginning thread of the sock. The needle to the left of this thread represents the first needle, the needle to the right of the starting thread represents the fourth needle.
Start with the stitches of needle 1 and knit them to the end. Turn the work over. The first stitch is then lifted off. To do this, make a stitch in the stitch as if to the left, leaving the thread around the needle. The result is again the so-called "double mesh".
 All other stitches of needle 1 and 4 are knitted on the left. Turn the work over again. The first stitch to lift off to the left knitting, it creates the double stitch. Work all other stitches on the right until the last stitch on needle 1. This is the double stitch and remains unthreaded on the left needle. Using the first stitch, lift off to the left and knit the left stitch until the end of the fourth needle. The last stitch is here now a double stitch, which remains on the left needle and is not knitted. Turn and continue to work in this way.
In this way, the smooth knit stitches become less and less and the double stitches increase. They knit a bevel that forms the heel area.
The double stitches form the edge area of the slope, while the smooth-right stitches in the middle form the heel width. These can be customized. As a rule of thumb, one-third of the mesh size of a needle remains in a smooth right-hand shape. In other words: for a total of 44 stitches and 11 stitches per needle, reductions in the form of shortened rows are made on needle sizes 1 and 4 until there are still 3-4 normal knitted stitches on each of the two needles. All other stitches have become double stitches. The lower heel center thus consists of a total of 6-8 stitches, which are distributed on needle 1 and 4.
If you want to do it easier, stitch the stitches of needle 1 and needle 4 onto a single needle just after the desired shaft height, knit as shown in the diagram until the end of the row and leave the double stitch untwisted. Turn as with the thread to lift left and continue in this way, until in the center of the needle still 6 or 8 smooth knitted stitches remain left.
Then a row is worked over the stitches of all four needles. The stitches of needles three and four form the top (instep) of the sock and can be further knit in the stock pattern, plain right, or any pattern of your choice.
In the next step, the omitted stitches (double stitches) are incorporated again. To do this, knit the straight knitted stitches of the needle 1. The first double stitch from the next to last row is added and also knitted on the right.
Turn the work over, take the first stitch as if to knit it to the left, then knit all the other stitches to the left until you reach the first double stitch of the penultimate row at the end of the row. This is knitted on the left side. Turn the work over, lift it off to the left and continue in this manner. At the end of each row, they knit one stitch more than in the previous row, and in this way continue to stitch at stitches. Make sure that all double stitches are knitted correctly with the thread so that no holes are created.
When all the stitches of needles 1 and 4 are knit again, one more round is done smoothly right over the stitches of all four needles. And the boomerang heel is ready.
Tip: Watch out for the increases and decreases on a firm knitting method. The knitting thread must always be tightened so that no holes can form.
Now you just have to finish your socks.