Filling technique - instructions for an individual wall design
- What is the spatula technique "> Materials and tools
- preparation
- Filling technique: Instructions
- Smooth surface: instructions
The wall design is one of the oldest forms of human decoration. Already in the Stone Age people can be found the cave paintings and over the millennia numerous techniques and objects have been developed, with which the walls can be attractively presented in various ways. One of the oldest forms is the so-called spatula technique, in which putty is applied to the wall and then decorative processed.
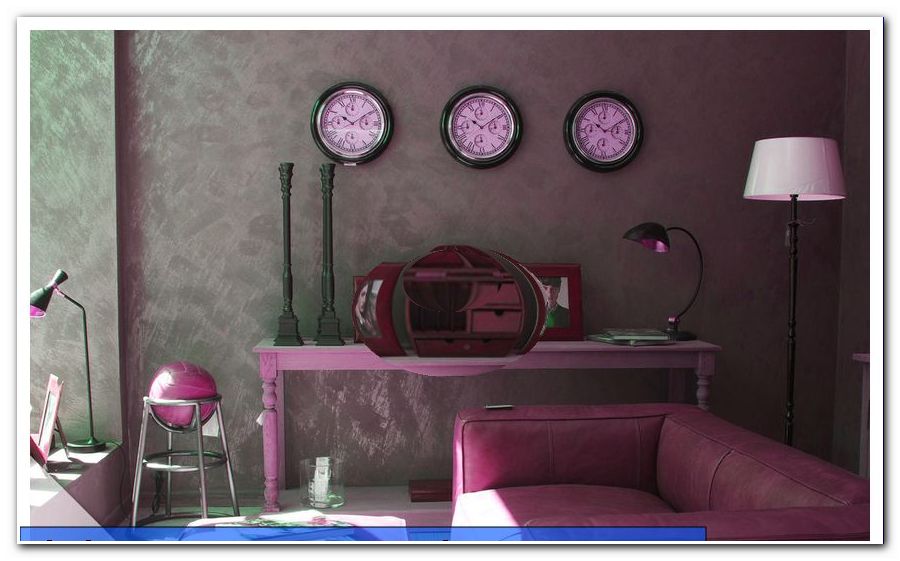
You want to give your living room a fresh style, but classic color is too boring? The spatula technique is ideal for this reason, because it not only applies wall paint, but also changes the structure of the surface. Depending on the technology used and the color combination, this creates a unique style that can be integrated into the living environment in an appealing way and provides a completely different character than conventional wall paint. Often this form of trowelling is more difficult than it actually is, because the end result is extremely artful and elegant. That's what makes the technology so popular at the same time.
What is the filling technique ">Materials and tools
In order to implement the technique, you must use the right tool and material. The following list provides information about the required utensils:
- Leveling compound: primer and effect spatula
- stainless spatula
- sponge
- spray bottle
- Deep or mineral ground (better suited)
- Wallpaper scratch if wallpaper needs to be removed
- Lambskin role (short pile)
- Painters film
- masking tape
- Shell for the putty
- Sandpaper with a grain size of 180 and 320 for the coarse and 600 to 1200 for the fine finish
- brush
- spatula trowel
- Polyester color paste
- Bucket for mixing the filler
- electrically operated hand polisher
Of particular importance is of course the selected filler. Dispersing fillers, also known as ready-to-use fillers, are best suited for this purpose. These are already finished and easy to apply. A disadvantage is the color, because they are available exclusively in white. If you want to combine one or more colors, you should choose a classic putty that needs to be mixed and mixed into this polyester color paste. This allows you to color the filler completely black or in a lovely yellow or pink. Some putties are naturally colored in other colors, such as white. These include mainly beige, yellow and gray. These do not have to be colored beforehand, which prevents additional costs. However, you should add the color in small portions, so you do not use too much at once. The cost as follows:
- Dispersion putty (base putty): 4 - 6 Euro per kg
- Classic putty for mixing: 1 - 2 Euro per kg
- Effect spatula: 10 to 30 euros per kg
- Polyester color paste: 45 to 50 euros per kg
Of course, you do not need a kilogram of color. Typically, the color is offered in bottles of a size of 100 milliliters, which is sufficient in most cases. Since especially the self mixable filler is very economical, not much color needs to be used. Sponge, spray bottle and wallpaper scratches are only needed if you have to remove wallpaper before applying the spatula technique. The important tool, the spatula, should be stainless as described above. As a result, you will not damage the wall and can very precisely apply the putty with the tool. Here, especially a spatula with handle offers. Recommended are Venetian spatula, whose blade is designed exactly to the spatula technique. The cost is, depending on the quality, between 20 to 50 euros.
Tip: If you particularly like the Italian style, you can also use so-called gloss or lime putties on a mineral base, which are above all brilliant techniques suitable; they are not suitable for structures. These are a bit more expensive, but allow the addition of marble powder and slaked lime easy processing and the popular glossy surface, which sets the room noble and sophisticated in scene.
preparation
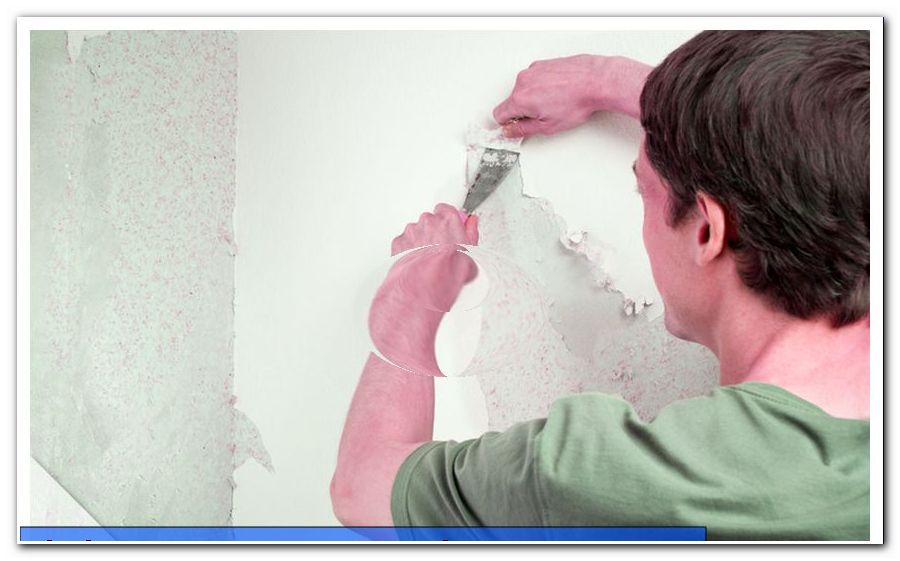
After you have purchased the right filler, you can start with the preparations. There are two different preparations used. If you still need to remove the old wallpaper, because on this the putty sticks only badly. Especially on Raufasertapete the spatula technique is not useful. High-quality wallpaper with a smooth surface and no damage can theoretically remain on the wall, but a freshly processed substrate is recommended. Proceed as follows:
Step 1: At the beginning the wallpaper has to be soaked. Use either the sponge or the spray bottle filled with water and treat the entire wallpaper. Let the water soak for a while. It can be worn away after it seems slightly loose or swollen.
2nd step: Now the wallpaper is removed with the wallpaper scratches. Remove all residues completely, because wallpaper residues can negatively affect the result. Then let the surface dry.
Step 3: After drying, brush off the wall and check if the substrate is porous. If this is the case, apply Deep Foundation and allow to dry. For this you use the lambskin roller.
If you have already prepared the wall, all you have to do is mix the filler if you do not use ready-made mix. To do this, use the specified amount of water specified by the manufacturer on the packaging. You should pay attention to the following things:
- use clear and cold water
- Room temperature should never be below 10 ° C
- Humidity must not exceed 80 percent
- do not unnecessarily stretch with water, putty is quite tough
- Powder must be sprinkled evenly to avoid lumping
Finally, prepare the floor in close proximity to the wall with painter's foil. These fasten with masking tape. You should also clean the spatula beforehand if it has been used previously. This allows the tool the highest effectiveness.
Tip: if you are a subtenant, you must obtain written permission from your renter before applying the putty technique. Remember, however, that removing the technique is extremely costly, time-consuming, and requires complete papering after removal.
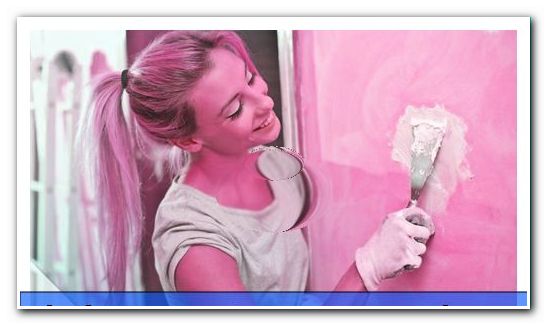
Filling technique: Instructions
The following instructions will show you how to create a classic structure that has a Mediterranean touch. For these are bright and warm colors, especially white, gray, yellow, beige or ocher. Decisive in this style is the shape of the structure, which provides the appealing style and the colors chosen. The color should be the same for this spatula technique for the base and effect trowel. It is also possible to use structures in black, for example for small dots or lines, or slightly lighter shades in contrast to the base filler. Only the gradient should not be too blatant, so no color-blocking. Proceed as follows:
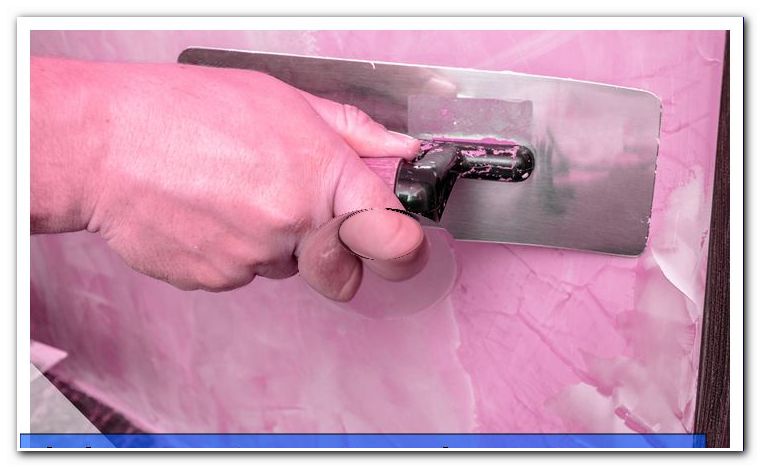
Step 1: At the beginning, apply single "stains" spatula. To do so, apply a maximum of one-third of the tool with putty and spread it over the entire wall in spots without touching the individual patches. To do this, pull the spatula down in a direct movement.
2nd step: After all stains have been applied, the gaps are closed in the same way. Already shows a small pattern. The wall should then be completely filled with putty. Do this work absolutely alone, because even small differences in the movement of the hand can have a negative impact on the finished overall picture.
Step 3: Sand the entire wall carefully with sanding paper in the 180 grit. Then wipe off the dust with a brush.
4th step: Now apply the effect spatula. Just put stains or stripes as you like, but in the same way as the base putty. Fill in the gaps as well, but you can influence the structure even more if you leave the gaps a bit more open. For example, different thicknesses of the effect spatula are very popular and provide a tactile structure. The possibilities here are limitless. If you want to set only small black dots, they can be better applied with a brush.
Step 5: Allow to dry completely. The drying time at 18 ° C to 22 ° C is about one hour per centimeter of the layer thickness.
Smooth surface: instructions
For the particularly smooth surface you need exactly the same tools per se as with the structured putty technique. However, this will eventually require a finer sandpaper. The putty is always slightly darker than the effect putty. Proceed as follows:
Step 1: Apply the putty with the trowel evenly in large lanes until the whole wall is covered. For this 1 to 2 layers are sufficient.
2nd step: machine with 320 grit sandpaper and sweep.
3rd step: Now apply putty in the above-described stain-filling technique. The gaps are filled. Then wait 20 to 30 minutes and then grind with a grain size of 600 to 1, 200. Sweeping.
4th step: Finally apply a layer of stain-filler technique, but this time do not fill the interstices. This creates an appealing effect. Wait and sand for 20 to 30 minutes. Sweeping.
Step 5: Now the polisher is used for fine grinding. Use the electric tool to go over the entire wall until the spatula glistens nicely. This effect looks great with black color.