Crochet a nice bag - free instructions for beginners

- Instructions - crochet (pouch) bag
- Material and preparation
- Häkelanleitung
- Crochet floor
- Crochet wall
- Crochet Henkel
- Join Henkel
- Beautiful ending edge
Crochet is trendy. Whether in fashion, as accessories or cuddly toys - crafts fans swear by the crochet hook. Therefore, we would like to show you in this manual how to crochet a bag. Of course you do not have to be a professional! Our illustrated step-by-step guide is perfect for beginners. It's really easy.
Crochet this bucket bag in no time - who wants to call such a crochet bag his own, really does not need too much time and material. The more experienced you are, the faster this bag will go by the hand.
In addition, you can customize the design and size to your liking. If you want to crochet such a bag for your 5 year old daughter, you can also crochet according to this manual - the bag can be adjusted round by round.
Instructions - crochet (pouch) bag
Material and preparation
For a shoulder bag of this type you need:
- 250 g of wool:
- 2 times Lana Grossa "Star" (white, 100% cotton, 50g, approx. 90 m run length, size 4 - 5, 5)
- 3 times favorite colors "No. 2 - Navy "(blue, 85% cotton, 15% kapok, 50 g, 100 m run length, size 4 - 5)
- Matching crochet hook (size 4)
- scissors
- wool needle

crochet:
For all beginners, here's a list of the basics you'll need for this shoulder bag:
- stitches
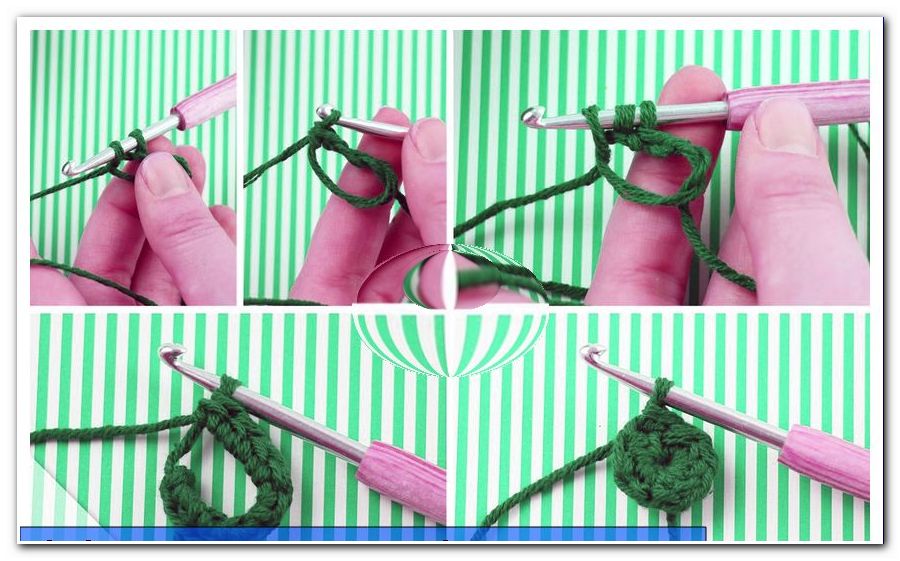
- thread ring
- Half chopsticks
- Fixed stitches
- chain stitches
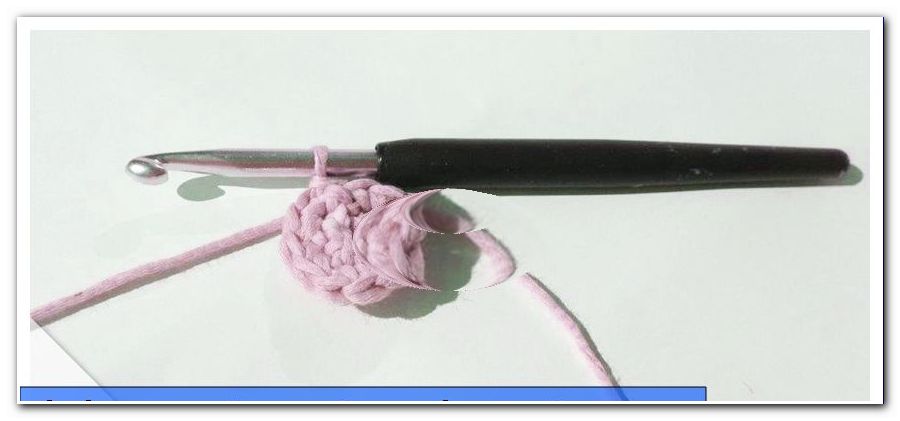
Häkelanleitung
Start : First, crochet a single crochet and 8 half sticks into a string. Then pull the ring together and close it with a chain stitch through the first half of the rod.
Crochet floor
1st round: Start the first round with an air mesh.

Then double the nine stitches of the preliminary round = 18 stitches . Crochet a sturdy loop as the first construction bag, then follow half a stick through the same stitch. Then crochet 8 x 2 half sticks.

Close the round with a slit stitch (this is crocheted by the first half piece, not by the fixed stitch).

2nd round: Start again with an air mesh. Then only every second stitch of the preliminary round is doubled. Start again with a tight loop as construction. Then crochet two half sticks into the next stitch, then just half a stick and then double again, etc. = 27 stitches .

Also finish this round with a warp stitch through the first half piece.

3rd round: Now every third stitch is doubled. But before that, start with an air mesh, as well as a solid mesh as a construction stick. Then crochet half a stick normal and double the number in the next stitch. Then crochet two half sticks through every third stitch = 36 stitches . Close the round with a chain stitch.

4th round to the desired size: Now crochet all the other rounds as explained above always with half sticks. In the fourth round, every fourth stitch is doubled, in the fifth, every fifth stitch, etc. Always start with an air-mesh, as well as a fixed stitch as a construction stick. Each round is closed with a chain stitch.
The radius of the circle increases in this way more and more. You can customize the bottom of the crochet bag accordingly. We crocheted until the 12th round, where every 12th stitch was doubled.

Crochet wall
Once the floor has reached the desired radius, the pocket wall is crocheted.
Tip: Now would be the perfect moment for a color change. If you want, you can also crochet the bag in a color.
1st round: Start the first round of the wall, as every round of the ground, with an air mesh and a fixed mesh as a construction stick. Then crochet half a stick into each stitch of the preliminary round.

So the bag bulges upwards. Close the round again with a slit stitch through the first half stick.

Now crochet this way round by round until the bag reaches the desired height. You can also design this measure as you wish. Occasionally change colors - this makes the bag truly unique.
We crocheted the wall of the bag 33 rows high.

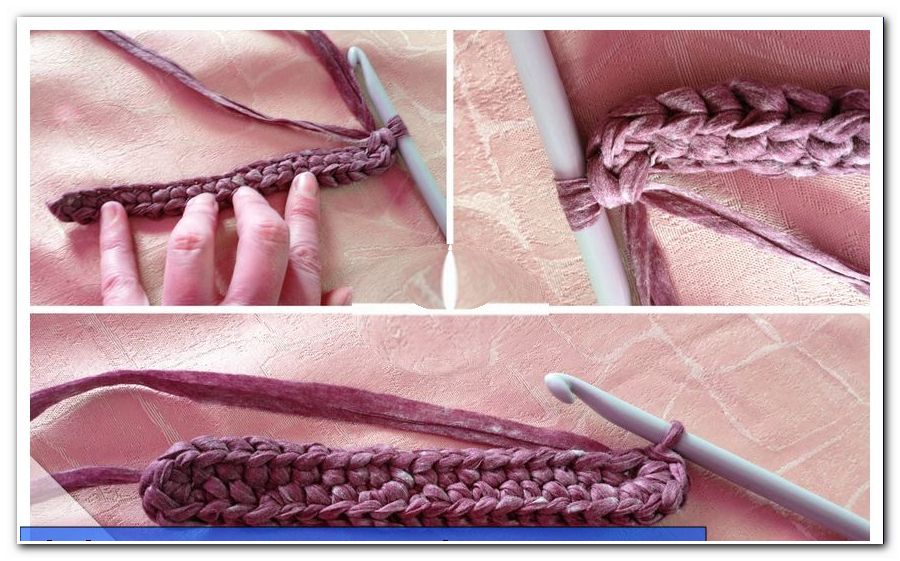
Crochet Henkel
Before you can crochet the handles, lay the bag flat on the table and look for the two opposite stitches on the left and right - of course this works best when you count the stitches. Now mark these two stitches with a piece of thread.

1st handle
Start on a page with the first handle. From the marker thread, move 10 stitches to the right and put on a new thread with the crochet hook:
To do this, pierce the loop with the crochet hook, pull the thread through it and crochet a mesh of air.
1st round: Then crochet half chopsticks again. The first half-stick is crocheted through the stitch, through which you have just taken the air-mesh. Crochet over the marker and on the other side also 10 stitches = 21 stitches .

Crochet two turn-around meshes as a round-transition (as a substitute for half a stick). Apply the work.
Round 2: So that the handle runs diagonally together, the first two stitches and the last two stitches of each round are now off-cuts. Start with the first two stitches, stitch them together. Then crochet half the sticks into each stitch as usual until you come to the end of the round and cut the last two stitches together again.
3rd round to 8th round: Crochet these rounds like the second round. As a transition always two spiral air meshes are crocheted. Remember to stitch the first and last two stitches together.

9th round to 32nd round: Now the handle is only 7 stitches in width. At your discretion, you can make the handle wider or thinner. That's up to you. Work two spiral air meshes and turn the work. From now on, continue to crochet regular, half sticks without chopping. The handle should run in an arc to the middle of the bag. Decide on the design and wearing feel, how long the handle should be.

Arrived at the end, the thread is cut off and fastened with an air mesh once.
2nd handle
Henkel number 2 crochet exactly the same way as the first Henkel. This should of course have exactly the same dimensions in width and length. But do not cut the thread at the end, but crochet the two handles directly together.

Join Henkel
Then the two handles are crocheted together at the ends. To do this, place the two ends together and crochet a tight loop through the two stitches. Now that you have done this with all seven stitches, the thread can be cut and sewn.

Beautiful ending edge
To make the bag opening and handle finer and more stable, crochet a row of tight stitches around them.
For this you simply put a new thread at any point. Just get a new thread through the stitch and crochet an aerial stitch. Then crochet the opening and the handle completely with sturdy stitches. Of course you have to repeat this process on the other side as well.

Finally, only all thread ends are sewn and the shoulder bag is ready!