Crochet cell phone pocket - easy DIY guide

- Material for a mobile phone pocket
- Instructions - Crochet your mobile phone pocket
- phone case
- Crochet flap
- Owl design for the cellphone bag
- Quick Start Guide - Crochet your mobile phone pocket
"Do it yourself" is more popular than ever and, thanks to the Internet, there is the most up-to-date help and guidance available for tried-and-tested crafts, which we can access at any time and any place. We are happy to be overwhelmed by this self-made wave. Here is a wonderful example of how well handcrafted work and progress can be reconciled. We show you how to crochet a cell phone pocket. This gives the ultramodern smartphone a protective case, made according to ancient tradition.
Even for DIY beginners, it's not difficult to crochet a cell phone pocket. If you want to, you can finally come up with decorative details. The instructions below show decorative variants.
Material for a mobile phone pocket
What should your mobile phone pocket look like: simple and classic - modern and color-coordinated with your current wardrobe - strikingly colorful and with the right pinch of "good mood" ">
- 1 ball of wool or various wool remains in the same strength, which can be processed together (ideal is wool, which is crocheted with a crochet hook of about 3-4) - the mobile phone pocket in this manual is with new wool with a length of 120 m / Crochet 50 grams
- matching crochet hook - for this instruction we worked with a crochet hook 3.5
- possibly button or push button (if the crocheted cell phone pocket should be closed)
Instructions - Crochet your mobile phone pocket
phone case
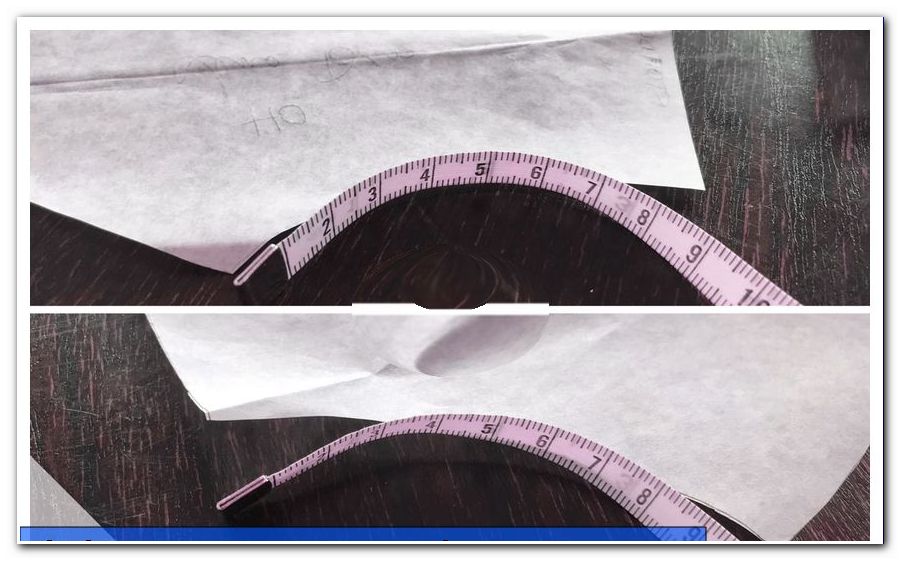
To start: Of course, the cell phone pocket should fulfill decorative purposes. First and foremost, however, it represents a protective shell. To get the right size, either the mobile phone model can stand directly. You can also create a template from your phone and work with it. Place the phone on a piece of paper and trace the outline.

Crochet pattern: The mobile phone case is here crocheted consistently with fixed stitches.
First, crochet an air chain in the width of your phone or in the width of the pre-made template. Then double this number of stitches and still calculate 1 stitch for the side height of the phone. The chain of stitches on the photo now measures 15 stitches. So I sew another 15 stitches for the back and 2 stitches for the side rise = 32 stitches.

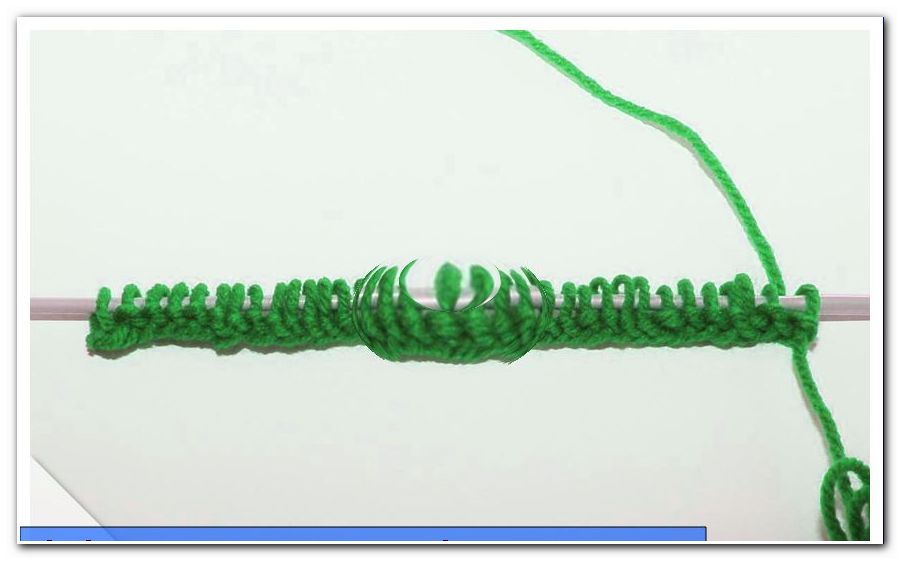
Then crochet a transitional air mesh and along the chain of air stitch a series of 32 strong stitches.

Now the work is closed to the round. Crochet a sturdy stitch into the first stitch of the previous row.

It continues with spiral rounds. (The lower opening will be sewn together later)
Spiral rounds are very easy to work with: simply crochet solid loops. Pierced is in each case in the entire mesh head of the preliminary round. There is no round crossing, the laps are screwed up like a spiral.

A "try-on" after a few laps shows if the size of the cell phone pocket is right. If the crochet work gets too tight or too loose, you can respond now. Separate the work again and start with more or less initial meshes.

As soon as the cell phone pocket has reached the desired height, it could already be used as a full-featured protective cover. Sew on the upper work thread. Then apply the crochet and close the bottom seam.

Crochet flap
Alternatively, the mobile phone case can still be provided with a flap. Starting point for this is the last stitch of the actual mobile phone pocket. If we look at the cell phone pocket from the back, this stitch is on the top left.

Step A:
Continue crocheting in rows: Crochet 2 air stitches first and do the work. Then crochet another air stitch (Transition Air Mesh) and then crochet solid stitches along the back edge. Arrived at the end of the row, two air meshes are attached here as well. As a result, the flap widens first. In the further crochet course is taken off to the right and left, so that they tapers towards the front. (Exact notes on the acceptances see next but one paragraph)

Step B:
Left and right has the crocheted Handyklappe by the step IIA a small projection. If you do not like it, you can of course do without the left and right on the two additional air meshes. Pick up the cell phone pocket so that the crochet hook is at the top right edge and crochet tight stitches along the back edge. Arrived at the end of the row, the work is turned. From the following row 2, the following picks are crocheted:
Decreases: At the rear edge, the penultimate and penultimate stitch are mixed together and the last stitch is left unkettled. Then, at the front edge, make the first stitch (that is the stitched head made from the two stitched-together stitches) and crochet the first piece of stitch straight into the second stitch (do not crochet the transitional air stitch). Crochet back and forth until all stitches are used up. The working thread is pulled through the last stitch and sewn inside.

A series of fixed stitches surround the flap, making it more decorative. Some meshes at the top of the cap can serve as a buttonhole. Alternatively, the cell phone pocket can of course be closed with a push button.

Owl design for the cellphone bag
Eyes: Crochet a round of 8 stitches into a loop (color 1). Then change the color and crochet another 2 round of 16 sticks. The second eye is also crocheted.
Now the two eyes can be sewn to the left and right of the tab, which is easily converted into an owl headdress. A matching button replaces the nose.

Quick Start Guide - Crochet your mobile phone pocket
- Measure your mobile phone or correct the corresponding template of the mobile phone
- Crochet an air chain that once reaches around the phone
- Crochet a series of stitches along this chain
- close the crochet to the round
- Crochet in spiral loops until the height of the mobile phone is reached
- close lower seam
- At the rear edge of the cell phone pocket, a flap can now be crocheted
- the flap runs through decreases at the beginning of the line and end of the line pointed
- fixed stitches circle the flap
- Air meshes at the top of the flap replace a buttonhole
- sew a button

The mobile phone bag is ready and ready for use!