Crochet Basket - Free DIY Instructions for a Basket

- Crochet Pattern - Crochet the basket
- material
- Step by step
- Crochet basket bottom
- Crochet basket wall
Crochet has been on the rise for some time now. Whether hats, scarves or even whole jackets - the crochet trend makes a lot possible. So you can also crochet home accessories, such as seat cushions or baskets. In this crochet tutorial, we show you how to crochet a practical, roundish basket - the dimensions can be adjusted as you wish to make baskets of different sizes.
Crochet Pattern - Crochet the basket
material
The basket must bring some stability, so that he can keep the little things together well. Therefore you need stable, thick crochet thread. As far as the color of the yarn is concerned, all the doors are open to you - it is best to follow the style of the room in which the crocheted basket will once find its place.
You need:
- Crochet hook (8 mm)
- 1 skein katia ribbon yarn WASHI (run length 100 m / 100 g - 70% polyester, 30% viscose)
Note: For the basket size in our guide you will need less than a whole ball of wool.
Step by step
These crochet techniques are needed for the crocheted basket:
- stitches
- strong stitches
- slip stitch
- rod
- relief chopsticks
Crochet basket bottom
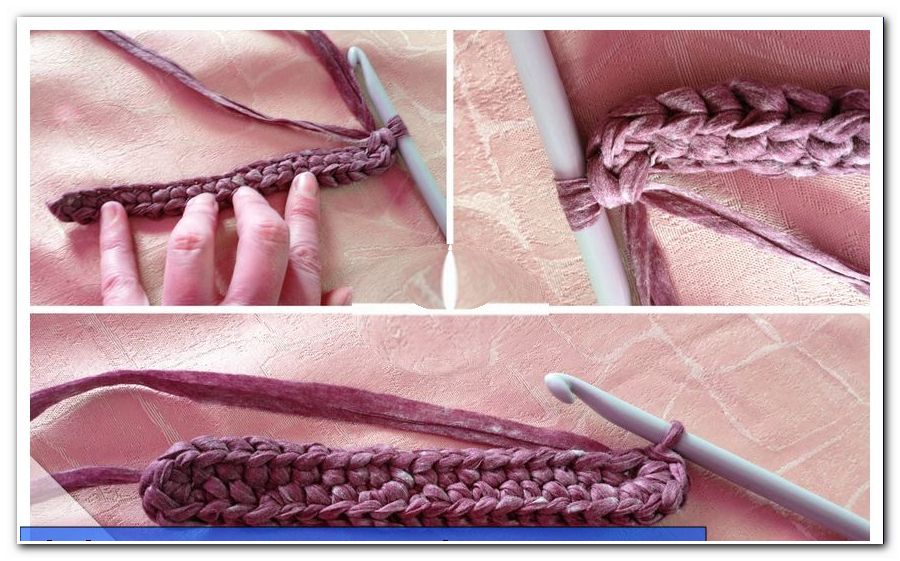
We start with the crocheting of the ground - to do this, we propose an air chain with 20 air stitches. This chain then forms the middle of the floor.

The entire floor is now crocheted in rounds.
1st lap: Start the first round with a transitional air mesh and continue with 19 fixed stitches along the chain. Then crochet 3 stitches into the 20th stitch of the chain. Then it continues on the bottom with 19 other fixed stitches. Crochet 3 sts in the 1st stitch at the right end again. Finally, this round is completed with a chain stitch = 44 stitches (without transition air mesh ).
2nd round: crochet a transitional air mesh again. Then crochet 19 stitches to the curve. The rounding is then crocheted: 2 strong stitches into a stitch, then 1 stitch and then 2 stitches into a stitch. Now it goes on the other side with the same: 19 fixed stitches, 2 fixed stitches in a stitch, 1 fixed stitch normal and again 2 strong stitches in a stitch. Close this round with a chain stitch = 48 stitches .

3rd round: Start with a transitional air mesh. Then crochet 19 sts, 2 sts in a loop, then 3 normal sts and 2 sts in a stitch. The other side is also crocheted: 19 strong stitches, 2 stitches into a stitch, 3 plain stitches and 2 stitches into a stitch. Finish with a slit stitch = 52 stitches .
4th round: Start as usual with a transitional air mesh. Then crochet 23 sts, 2 sts in a stitch, 25 sts, 2 sts in a stitch and 2 sts. Finish the round with a chain stitch = 54 stitches .
5th round: First a transitional air mesh is crocheted. Then work 22 sturdy stitches, 2 stitches into a stitch, then 2 normal stitches, 2 stitches into a stitch. Now there are 24 stitches, again 2 stitches in one stitch, 2 normal stitches and another 2 stitches in a stitch. The round is then closed again with a chain stitch = 58 stitches .

The bottom of the basket is already finished. If you would like to make the basket bigger, simply crochet a few more rounds in the same way as described above. In order to keep the rounding, you only have to accept 4 stitches in each round. To do this, double two stitches on each side, to the left and right of the center stitches.
Crochet basket wall
The basket wall is now crocheted in the other direction. The floor is turned once for it. So you look at the basket while crocheting.
1st round: Start with 3 transitional air meshes. Crochet a whole round of chopsticks. However, only pierce through the rear mesh link - this will make the round turn upwards. Close the round with a chain stitch.

The first round of the basket wall should now look like this:

The next rounds are worked with relief sticks. Change the puncture direction for each relief rod - once from the front through the mesh limb and once from behind. This gives a nice pattern and spice up the basket a little bit. How to do it:
Relief sticks inserted from the front
Take an envelope on the needle, then prick the front of the stick through the preliminary round and crochet the relief stick as usual.

Relief sticks inserted from behind
Take an envelope on the needle, then pass it from behind through the chopsticks of the preliminary round and then crochet a relief stick.

After only 3 rounds with relief sticks, the basket is already ready for use. The thread simply has to be cut off and sewn after finishing with a chain stitch.
The flat basket is particularly suitable for storing small items, pens or cosmetics. Of course, you can also make the basket wall larger by continuing to crochet several rounds. Just try it - it's easy!