Make autumn arrangements yourself - ideas for the table
If you want to make autumn arrangements yourself, you do not need a lot of experience with handicrafts or expensive materials. Using general instructions, we will show you exactly how you should proceed when decorating an autumn arrangement as a decoration for the table. In addition, we provide three specific ideas for very beautiful arrangements that you can implement directly or use as inspiration.
The special thing about arrangements in autumn is that you will find the majority of the materials in nature or in your garden: branches and grasses, flowers, autumn leaves, chestnuts, acorns and so on and so on you will discover on autumn walks in the forest or yours Gardening - just keep your eyes open at all times.
As a rule, you only need to get a few basic utensils for the arrangements from the craft shop you trust - but these are usually inexpensive. In short, you can make magical autumn table decorations with little financial effort. Take a look at our instructions and the concrete suggestions for harmonious combinations - and then start with the newly acquired knowledge to make your autumn arrangements yourself!
content
Make autumn arrangements yourself
General instructions
Autumn arrangement | Idea 1
Autumn arrangement | Idea 2
Autumn arrangement | Idea 3
Make autumn arrangements yourself
General instructions
Before we give you the general instructions for making autumn flower arrangements, a quick note: There are several ways to make such arrangements - ours is just one possible option, but one that everyone can easily copy, which ultimately is not important true "> Design options for an autumn arrangement
Here's how to do it:
Step 1: Choose a vessel.
It is best or simplest to arrange the autumn arrangement in a container. Bowls, vases and flower pots come into question. Whether they are flat or high is basically up to you.
Tip: The selected container should neither be too flat nor too high. If it turns out too flat, the flowers may not have enough hold later. If you use a vessel that is too high, the actual arrangement will probably go a little below and / or block the view. Accordingly, as is so often the case, you are well advised to seek (and find) the golden mean.
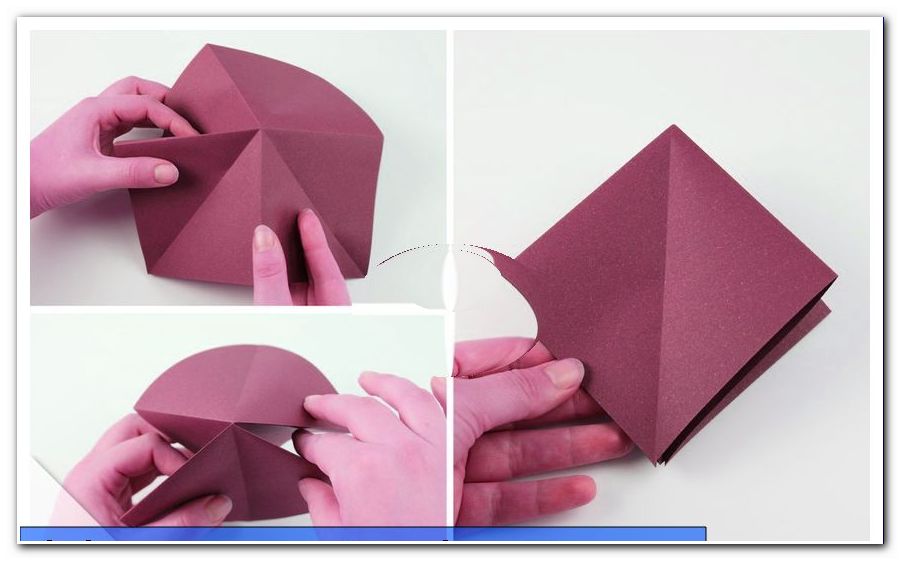
Step 2: Prepare the container with the sponge.
Have you found a suitable container in which you want to make your autumn arrangement yourself ">
Tip: Use a green sponge for fresh flowers and leaves, which also forgives or hides smaller gaps. If the arrangement should consist more of dry and / or artificial flowers, you can also use a brown-gray sponge.
With a sharp knife, you will certainly be able to get your sponge into the right shape very quickly and effortlessly.
Important: Are you planning to make autumn arrangements yourself, which are largely composed of fresh flowers? In this case, we recommend that you water the sponge before you actually use it. The reason for this is logical and understandable: the measure keeps the flowers longer.
Place the cut (green!) Sponge in water - in a bowl or very easily in the sink. Wait a short time until the sponge has become soaked with water. Take the sponge out of the water. Put the sponge in the jar.
Step 3: Take care of flowers, leaves and decorative materials.
It should be a nice, sensual pleasure to make autumn arrangements yourself - this also means that you have to be able to put together the flower arrangement in the river without interruptions. Accordingly, it is advisable to prepare all flowers and leaves as well as the decorative materials before the actual act.
Here is an overview of the most important stages:
Shorten flowers and leaves with hard stems and cut them diagonally - gardeners know that the diagonal cut helps the flowers to absorb the water from the sponge better
Give flowers and leaves with rather soft stems a stabilization of floral wire - just cut some wire and wrap it around the stems - careful!
For long tendrils, make small clips from floral wire - cut short pieces off the wire and bend them into a U.
also fix rods, branches and flat decorative materials with U-shaped wire clips
Tie bows and ribbons and wrap them skillfully with flower wire - be sure to attach the wire so that you can later stick its ends into the sponge
For balls orfigures, in turn, create holders made of floral wire and attach them using hot glue - alternatively, you can staple these elements directly onto the autumn arrangement using the hot glue
Thread small pearls on silver or gold-colored decorative wire and later incorporate them as a delicate chain
Spray cones and / or dried leaves with silver or gold-colored spray (if you have an extravagant arrangement in mind)
pruning
Step 4: Implement the actual autumn arrangement.
As soon as you have prepared all the materials you want to use for your arrangement so far that they only have to be taken and placed correctly, you can finally devote yourself to the most enlightening part of the handicraft . Make the autumn arrangement!
If you haven't already done so, put the sponge soaked in water into the jar. Reminder: The sponge only needs water if you use fresh flowers. Otherwise, you can save yourself the irrigation.
Cover the sponge with decorative moss . With this step you make sure at the beginning that the sponge will not be visible in the end in potential spaces. Arrange the flowers, leaves and all complementary decorative materials - how you do it is ultimately up to your imagination. Allow yourself to be carried away - this is how the most beautiful arrangements are often made.
With all the love of freedom - we want to give you a little guidance:
First, put the element in the middle of the sponge that should form the center of your autumn arrangement, for example the largest, most splendid flower. In general, it makes sense to place the highest material in the middle and “build” the other details around it.
Implementation of a floral arrangement
Then you can let off steam. Fill the entire surface of the sponge with flowers, leaves and other natural objects from the outside in . If you also want to add tendrils, ribbons and other “non-natural” elements, you should attach them last.
For everyone who likes to do crafting very systematically, another tip: think in advance about how your autumn arrangement should be stylistically. If you are unsure whether the flowers and complementary elements that you are aiming for really harmonize well with each other, you can create a sketch and experiment "dry".
In general:
the elements used should match in color - either be from the same color family or complement each other in high contrast (light-dark and so on)
It is ideal for fresh flowers to make sure that all types used have a similar need for watering - then you will enjoy your arrangement for longer
An important tip at the end: Of course you wish that the autumn arrangements that you make yourself last for a long time. To ensure this even with fresh flowers, you should water your pretty creations regularly or spray them lightly with water.
Specific ideas for autumn arrangements to make yourself
Now we present you a few special autumn arrangements that we personally like. Maybe there is an idea for you too.
Note: Two of the concrete ideas follow a different principle than the sponge method described here. This shows once again that there are many great ways to make autumn arrangements yourself.
Autumn arrangement | Idea 1
(Idea 1 - Delicious autumn arrangement with vegetables and fruit)
Materials for the first autumn arrangement:
Jug, jug or similar vessel
floristic
wooden skewers
floral wire
Cuttermesser
scissors
tongs
Fruit as desired (apples, small pears, grapes etc.)
Vegetables as desired (small cucumbers and peppers, garlic, onions etc.)
optional additional decorative elements such as fresh or dried flowers, cereals etc.
Method:
1st step: Cut the sponge with a cutter knife to match the vessel.
Step 2: Water the sponge if you want to use fresh flowers (otherwise not necessary!).
Cut the sponge to size and water
Step 3: Put pieces of fruit and vegetables on wooden skewers. Step 4: Spread the deliciously decorated wooden skewers evenly on the sponge.
Tip: Let your creativity run free. Which colors harmonize, which types of fruit and vegetables contrast in an attractive way "> Finished autumn arrangement idea one
Autumn arrangement | Idea 2
(Idea 2 - autumnal arrangement on a piece of tree bark)
Materials for the second fall arrangement:
bark
walnut shells
branches
moss
other natural decorative elements such as chestnuts, autumn leaves, cones, ...
Candle plate with a short, thick plug on the underside (serves as drip protection)
Stumpenkerze
Acrylic paint in white and red
brush
Cordless screwdriver (with drill attachment)
hot glue
Method:
Step 1: Adjust the thickness of the drill bit to the thickness of the candle plate connector.
Step 2: Drill a hole in the bark with the drill (the cordless screwdriver with drill attachment). This hole should match the dimensions of the candle plate connector.
3rd step: Put the candle plate plug into the hole. 4th step: Place pillar candle on the plate.
Provide tree bark with candle holder
Step 5: make toadstools.
Make toadstools as follows:
Use the brush to paint the walnut shells with red acrylic paint
let dry
place small dots on the red with the white acrylic paint
let it dry again
Glue the inside of the painted walnut shells onto thin branches - use hot glue
Step 6: Drill suitable holes in the bark for the toadstools (i.e. the branches) (adapt the attachment!).
Tip: If the mushroom wobbles a little, the easiest way is to put some hot glue in the respective hole.
Step 7: Finally, spread dried moss on the tree bark and apply other decorations such as autumn leaves, chestnuts or cones with hot glue.
finished autumn arrangement idea two
Autumn arrangement | Idea 3
(Idea 3 - simple autumn arrangement of moss and berries)
Materials for the third autumn arrangement:
Tarteform
moss
Rosehip branches and various berry branches such as hawthorn berries, holly or privet berries
Method:
Step 1: Pour a thin layer of water into the tart pan (extends the shelf life). Step 2: Put plenty of moss in the tart pan. 3rd step: Loosely insert various berry branches into the moss.
finished autumn arrangement idea three
Conclusion (s)
Our general instructions give you the wonderful opportunity to make individual autumn arrangements yourself. The described method can be used absolutely flexibly, so that you enjoy full freedom when it comes to the choice of materials. In short, the instructions function as a “basic tool” with which you can do a variety of things. Just make sure to choose autumn ingredients, unless you want to make chic flower arrangements as table decorations in other seasons too.
In principle, the arrangement, in which the tree bark forms the basis, can also be implemented in many variants. Instead of the toadstools, you can also use any other autumnal elements, such as colorful leaves or berry branches, as in our third idea.
Materials for autumn arrangements
If you have upbeat ideas for autumn arrangements yourself, please let us know. Just write us a comment and share your creations with us in the Talu forum with all readers of our magazine and forum members. We are looking forward to your contributions!