Fill borehole / dowel holes properly and seal - that's how it works

- Materials and tools
- preparation
- Fill drilling and dowel holes
When moving, refurbishing or redesigning your own home, drilling and dowel holes are among the classic annoyances that must be eliminated. If you find holes that disturb the living environment because of their obviousness, it's worth filling up to continue using the wall. The project can be mastered even with little experience in this field.
When screws or dowels are removed from the wall, holes remain. These are not only unattractive to look at, but restrict the use of the wall depending on the amount of existing dowels and holes clearly, since it is difficult to use new screws or dowels. The only solution is filling, closing and finishing the holes until they are no longer visible. For this work, you only need a little time and the right materials, because the process itself is not difficult. So you can even with little experience drill holes and dowel holes effectively disappear.
First: do not use a temporary solution
Dowels and boreholes are among the touch-ups that really every one has to do. For this reason, methods have developed over the years to quickly fill holes that are usually only counterproductive and ultimately cause more work and costs than desired. These include above all the following three materials:
- chewing gum
- wadding
- paper
These are used to fill up the holes and then repaint or repaint the hole to make the tracks as blurred as possible. However, you should definitely refrain from using such methods as they are harder to remove from the wall, especially chewing gum. In addition, this can lead to considerable additional payments as soon as you are a subtenant and your former landlord finds these wrongly filled dowel holes.
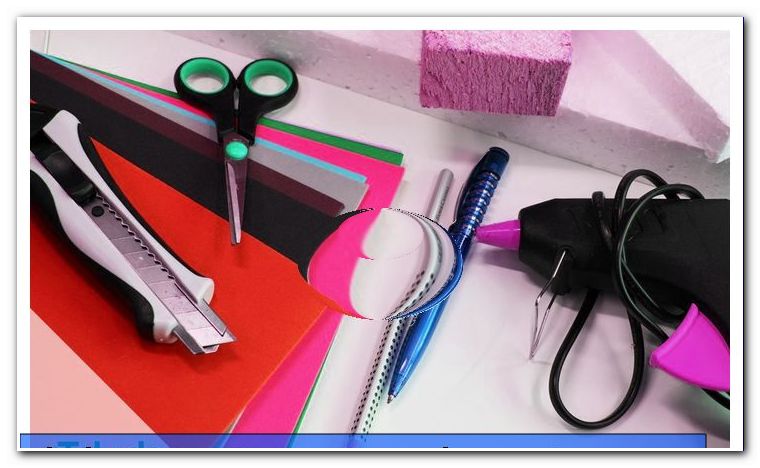
Materials and tools
Especially important for filling and closing the holes are the right materials and tools. With these you can tackle the project professionally and quickly, without having to rely on additional utensils. You need this:
- finished putty
- Deep reason (only for deep holes)
- abrasive paper
- Pliers, pliers or screwdrivers
- spatula
- Vacuum cleaner with thin attachment
- spray bottle
Make sure you use a high-quality version of the putty. Also, these should be filled in small holes in a bottle, the opening of which fits into the holes, so that the filler can simply be injected into the holes. A classic spatula usually does not fit in the dowel holes and for this reason, the finished filler offers much better for your project. In addition, you do not have to touch the mass yourself, which saves working time and possible costs.
preparation
Of course, before filling the holes, they must first be prepared to make the job possible. Particularly important is the removal of existing screws, nails and dowels, which are still in the wall. Proceed as follows:
Step 1: Look at the individual holes and see if they still contain nails, screws or dowels. Screws and nails are usually visible from the outside, while dowels are more difficult to see, especially if they are the same color as the wallpaper or transparent. Look or feel as a precaution in the dowel holes to locate them.
Step 2: Select the appropriate tool to remove the remaining building materials. Screwdrivers are used for screws, nippers for nails and combination pliers for dowels and screws, which are still bolted in dowels. You do not have to be very careful, as the hole will be filled with putty at the end anyway. If the hole widens and the plaster drops in moderate amount, that's no problem.

Step 3: Dowels can be easily pulled out of the wall as soon as they are still provided with a screw. Then simply take the combination pliers and carefully pull the screw together with the dowel out of the wall. Although dowels can be pulled out without screws, but is much more difficult. If a dowel does not have a screw, you can simply screw it in. These are worthwhile ones that you have removed from other holes of the same size.
Step 4: Then use the vacuum cleaner and suck out the holes. Be very careful here, so that in the end no wall residues or dust can get into the filling.
Step 5: Now spray some water into the holes. The moisture helps that the putty does not dry so quickly and thus easier to distribute. In addition, it is easier to stick to the surface.
Step 6: If you need to fill many dowels and holes, you should first remove all building materials, but do not immediately prepare each hole with water. The dowel holes will dry over time and you would need to use more water. It is best to spray them before filling.
Tip: Corkscrews can also be used as an alternative to the screw in the dowel removal. These are harder to use, especially in the wall, but work quite well as soon as they grab the dowel.
Fill drilling and dowel holes
Now you can fill in the dowels and holes, completing one of the last steps before the move or your project. Proceed as follows:

Step 1: After preparing each hole, pick up the finished putty, open it and remove the small foil used on most products. You do not need to shake off putty before use as it is viscous.
Step 2: Now check again if the holes are still wet and spray some water if necessary. Then attach the tube to the drill holes and fill it up to the stop. Make sure that the dowel holes are really completely filled. For this reason, putty must survive, because only then are all bumps filled.

3rd step: Excess paste smooth with the spatula or remove it from the wall. The wall and the hole should now form a surface that should not be uneven, as this would interfere with subsequent wallpapering or painting. Do not let too much time, as the putty dries very quickly. Remaining putty should simply be scraped off with a foil or a cloth.
4th step: Now let the filler completely dry out. Depending on the manufacturer, the waiting time can vary, but this takes on average 30 to 60 minutes. Stuffed dowels and holes need to dry longer.
Step 5: Finally, you must machine the drill and dowel holes with sandpaper. Before sanding, the putty must be completely dry. Grind until the filler is smooth. If there are bumps or small cracks, these are filled up with putty, dried and sandpapered.
Step 6: Finally, you can edit the wall, that is, repaint it or paint it, as the holes are now removed.