Tinker advent decoration - 8 ideas for advent decoration

There are many great ways to make Advent decorations yourself. Our Talu-DIY magazine presents eight beautiful and very varied ideas that are guaranteed to enhance your home.
Of course you can buy Advent decoration in almost every shop - whether online or offline. However, two points now speak clearly against doing this: the accessories are not very creative - and often incredibly expensive. We therefore recommend that you make chic Christmas decorations yourself . In most cases you only need a few (special) materials. In addition, the projects do not require much time and can also be easily implemented by beginners in the handicraft world. Let yourself be inspired by our eight instructions!

content
- Make Advent decorations
- Instructions 1 | Advent bouquet from branches
- Instructions 2 | Advent tower made of clay pots
- Instructions 3 | Tinker ice lantern
- Instructions 4 | Ice wreath for the garden
- Instructions 5 | Woolen thread star
- Instructions 6 | Miniature Christmas Tree
- Instructions 7 | Make glitter snow globes
- Instructions 8 | Pillar Candle & Cinnamon Sticks
Make Advent decorations
Instructions 1 | Advent bouquet from branches
What you need for your Advent bouquet of branches:
- evergreen branches
- wicker balls
- pinecone
- floral wire
- red acrylic paint
- brush
- secateurs
- large flower vase or large pot
Tip: You can get willow balls in various shops, for example in well-stocked handicraft shops, pet shops or online. It is best to search for the terms "willow ball" or "rattan ball" on the Internet to find what you are looking for.
Here's how to do it:
Step 1: During a leisurely walk through the forest, collect a few branches of evergreen bushes or trees that have a winter-like advent - for example from Nordmann and other fir trees. In addition, you should take a few pine cones with you.
Step 2: Cut the branches to size if necessary - using secateurs.
Tip: Ideally, the branches are approximately the same length. But an arrangement with larger and smaller branches can also have charm. Then, however, you should arrange the large specimens at the back and the small ones at the front so that they all come into their own.
Step 3: Tie the branches together with some flower wire if you want to make a compact bouquet.
Note: This step is ultimately optional. You can also place the branches loosely in the flower vase or in the pot, provided everything is solid and does not threaten to fall out.
Step 4: Place the bouquet in the vase or pot.
Step 5: Paint the pine cones red. Use acrylic paint and a brush for this.
Tip: Of course, you can also paint the cones in a different color, for example in gold. You also have the option of using a suitable spray instead of a brush and liquid paint.
Step 6: Let the paint dry on the cones.
Step 7: Cut off small pieces of wire.
Step 8: Attach each painted cone and wicker ball to the branches with a piece of wire.
Important: Make sure that all elements of the bouquet are visible at first glance. In addition, the accessories must be firm.

The attractive Advent decoration is ready and can be placed both inside and outside in the garden or on the balcony.
Instructions 2 | Advent tower made of clay pots
What you need for your advent tower made of clay pots:
- three clay pots in different sizes
- three matching bowls made of clay
- evergreen branches
- Beer branches
- Decorative element (for example an angel made of clay or porcelain)
- secateurs
Important: Set up your Advent tower right where it should end and reap admiring glances. Once completed, it is relatively difficult to move it to another location.
Here's how to do it:
Step 1: Set up the largest bowl as a base.
Step 2: Place the largest clay pot with the open side down in the middle of the bowl.
Step 3: Place the second largest bowl on the "butt" of the previously placed clay pot.
Step 4: Place the second largest clay pot on the bowl from step 3. Again, the open side must face down.

Step 5: Place the smallest bowl on the clay pot from step 4.
Step 6: Place the smallest clay pot on the bowl - this time with the open side up.
Step 7: Decorate the bottom three floors of your clay pot tower with evergreen branches and berry branches as you wish.
Tip: do not be too economical - the tower should look neat green.
Step 8: Put a few small twigs in the smallest clay pot at the top.
Step 9: Put your chosen decorative element - such as a white porcelain angel - as a tip in the bed made of branches in step 8.

The tower made of clay pots is finished, which now resembles an extraordinary Christmas tree. This Advent decoration also feels good indoors and outdoors.
Instructions 3 | Tinker ice lantern
What you need for your ice lantern:
- two plastic cups in different sizes
- LED Candle
- small green leaves
- wintry berries
- water
- Gravel or coins
- freezer
Note: Choose the plastic cups so that the smaller one fits into the larger one without any problems. There should be a "margin" of about one to two centimeters. And: the cups have to endure the freezer.
Here's how to do it:
Step 1: Fill the smaller plastic cup with gravel or coins to weigh it down and make it more stable.
Step 2: Place the filled, smaller cup as centrally as possible in the larger plastic cup.
Step 3: Spread some green leaves and a few berries in the larger cup (i.e. in the edge area).
Tip: You can find the leaves and berries on a winter walk in the forest or maybe in your garden.
Step 4: Pour water into the larger cup.
Step 5: Place the entire package in the freezer.
Step 6: Wait a few hours.
Step 7: Carefully pull the small inner cup out of the larger one.
Tip: Add lukewarm water to the inner cup to remove it.
Step 8: Remove the larger cup from the ice block.
Tip: It helps to wet the outside of the cup with lukewarm water. Otherwise, separating the two parts can be tedious.
Step 9: Place the frosty wind light in the intended location.
Step 10: Insert the LED candle.

This special Advent decoration is ready, but you can only use it outside (for logical reasons) - in the garden, on the terrace or on the balcony. In addition, cool temperatures must prevail so that the ice wind light does not melt.
Instructions 4 | Ice wreath for the garden
What you need for your garden ice wreath:
- Cake Tin
- Ivy leaves
- wintry berries
- water
- freezer
Important: Use a cake tin that can withstand not only the heat in the oven, but also the frosty temperatures in the freezer. Otherwise the tinkering does not work.
Here's how to do it:
Step 1: Fill the cake tin with water.

Step 2: Add berries and ivy leaves.
Step 3: Put the whole thing in the freezer.
Step 4: Wait a few hours.
Step 5: Get the cake tin out of the freezer.
Step 6: Remove the ice wreath from the cake tin - possibly using lukewarm water (see instructions 3).

Your ice cream wreath is ready for the garden . As you can see, this appealing Advent decoration can be tinkered like the ice lantern before.
Instructions 5 | Woolen thread star
What you need for your star made of wool yarn:
- five thin wooden sticks
- yellow wool
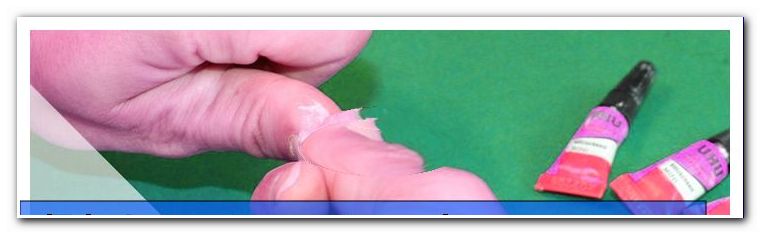
- Hot glue gun
- scissors
Note: The wooden sticks must be of the same length.
Here's how to do it:
Step 1: Arrange the five wooden sticks so that they form a well-shaped star.
Step 2: Glue the wooden sticks together in this arrangement. Use the hot glue gun for this purpose.
Step 3: Let the glue harden. This usually only takes a few minutes.
Step 4: Pick up the yellow wool and start wrapping the yarn around the wooden sticks.

Tip: Calmly criss-cross. It is important that at the end all areas are wrapped as evenly as possible - and that the star looks nice and "bushy" or soft at the end.
5th step: Are you satisfied with the look of your Wollstern "> 
Of course, you can use different colored wool instead of yellow. Our star can be used in many ways: for example as a table decoration, as a wall decoration or as a self-made, alternative lace for the Christmas tree .
Instructions 6 | Miniature Christmas Tree
What you need for your mini Christmas tree:
- paper cone
- green thread
- beads
- White glue
- Cling film
- Hot glue gun
- scissors
- fork
- small bowl
Here's how to do it:
1st step: Cut off a generous piece of cling film with the scissors.
Step 2: Wrap the film around the paper cone.
Tip: You can make the paper cone yourself without any problems and with little effort. Roll up a piece of paper in a cone shape and fix it with Tesa.
Step 3: Pour white glue into the small bowl.
Step 4: Cut the thread to the required length (preferably longer than shorter).

Step 5: Dip the thread in the glue.
Step 6: Grasp the end of the thread and start wrapping it around the cone until the paper is very green.

Step 7: Let the glue dry well - preferably overnight.
Step 8: Remove the paper cone together with the film, so that only a green thread tree remains.
Step 9: Decorate the green tree with pearls. Simply glue them in place with hot glue.
Tip: You can of course also use other materials for the advent decoration.

And already a beautiful Advent decoration is made, which looks great on the table or on the shelf .
Instructions 7 | Make glitter snow globes
What you need for your glitter snow globe:
- Jar with screw cap
- glitter
- Mini decorative figure (e.g. angel, snowman, moose, etc.)
- beads
- Buttons
- water
- Hot glue gun
Here's how to do it:
Step 1: Decorate the screw cap with beads and buttons. Glue them on using the hot glue gun.
Tip: The following also applies here: You are welcome to use other decorative elements. We only give you suggestions.
Step 2: Glue the miniature decorative figure to the inside of the lid - also with hot glue.

3rd step: Fill the glass with water.

Step 4: Sprinkle in plenty of glitter.
Step 5: Close the jar with the screw cap.
Step 6: Shake the glass - and look forward to the wild dance of the small glitter particles.

You can tackle this magical DIY project well with your children. Incidentally, such a snow globe is also a wonderful gift that adults as well as kids are happy about.
Instructions 8 | Pillar Candle & Cinnamon Sticks
What you need for your pillar candle with cinnamon sticks:
- bright pillar candle
- eight sticks of cinnamon
- two decorative ribbons in different colors (for example red and gold)
- Hot glue gun
Here's how to do it:
Step 1: Spread out one of the two ribbons in front of you.
Step 2: Glue the cinnamon sticks next to each other on the ribbon.

Step 3: Let the glue dry.
Step 4: Wrap the cinnamon stick ribbon around the pillar candle.
Step 5: Glue the ends of the tape together using hot glue.
Step 6: Tie the second ribbon as a loop around the advent decoration to refine it.

You can make stylish Advent decorations so quickly!