Lay polygonal panels yourself and grout - that's how it works
- Alternative to tile, plate and brick
- requirements
- Concrete floor as a substructure
- Gradient is important
- What do you need "> Lay polygonal plates
- Step 1 - Preparations
- Step 2 - Apply cementitious slurry
- Step 3 - Lay Polygonal Panels
- Step 4 - Fill in spaces
- Conclusion
Polygonal panels, rustic and durable - If you are looking for a special solution for your terrace or your footpath, then take a look at the polygonal panels. Behind the bulky name hide natural stone slabs, which are as aesthetic as weatherproof. With polygonal panels you get a permanent cover, which is also timeless. Their installation is a challenge, but it is a good thing for a brave home improvement.
Alternative to tile, plate and brick
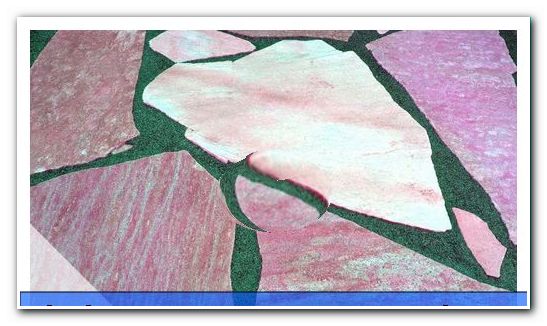
Terraces and walkways can be covered with many ceramic products. Widely used are glued tiles, washed concrete slabs or bricks. With Polygonalplatten the selection is extended by a particularly durable and very aesthetic product. A polygonal plate is an irregularly shaped natural stone plate. They are different sizes but always the same size. Their width is chosen so that they are still easy to work but maximum unbreakable. The special attraction of covering the ground with polygonal plates is their optical contrast. The irregularly shaped outlines of the polygonal plate are laid in a bed of equal width joints. The "order in the disorder" makes the optical result particularly attractive.
requirements
Concrete floor as a substructure
Before you think about laying and grouting polygonal panels, you need to make a suitable base. A concrete floor as a substructure is the only sensible option. Despite its thickness and breaking strength, a polygonal plate can not absorb any static forces.
Gradient is important
The substructure must have a slope of about 2% away from the house. The rainwater runs reliably only at this gradient. Although more downhill makes the drainage of the water safer, however, an excessively steep slope affects the accessibility of the terrace. So that the place does not become an uncomfortable pitfall, the 2% slope of the substructure should be kept as good as possible, but under no circumstances be fallen below.

Note gradient An incline of 2% means that a straight track of 100 meters will drop by 2 meters. Converted to 1 meter, the slope of the substructure is 2 centimeters.
What do you need ">

- Tool
- Trowel (about 12 Euro)
- Rubber mallet (about 12 Euro)
- Pencil (about 2 Euro)
- Felt pen (about 1 Euro)
- Cutter knife (about 2 Euro)
- Joint iron (about 5 Euro)
- material
- Crepe tape (about 5 Euro)
- water
- Cement Veil Remover (from approx. 5 Euro)
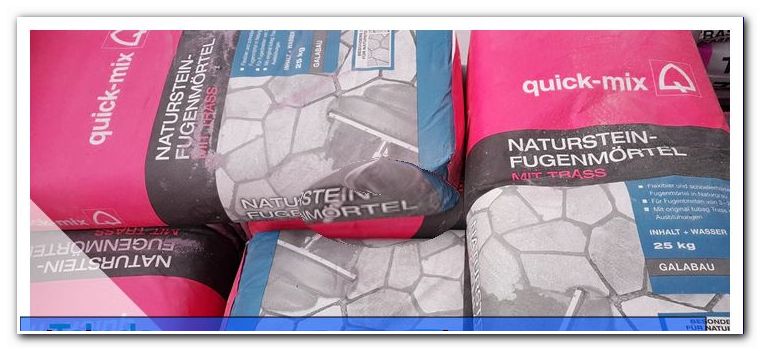
- Laying mortar for natural stone slabs (about 35 Euro / 40 kg bag)
- Polygonal plates (about 13-30 Euro / sqm)
- Cementitious slurry (about 45 Euro / 40 kg bag)
- Natural stone silicone (about 10 Euro / cartouche)
- Mortar for plaster for grouting (about 28 euros / 20 kg bag)
- Ornamental gravel for the border design (about 0.08 to 0.62 Euro / kg)
- Joint and plaster sealing (about 7 Euro / liter)
- Plastic foil (30 Euro / roll)
- machinery
- Agitator (borrow if necessary, a drill with stirring attachment is overstrained with the tough mortar and can be destroyed) (prices from about 15 € / day or 150 € in the purchase)
Lay polygonal panels
Polygonal plates are laid in several steps. The process is:
- preparations
- Lay mortar layer
- Put stones
- Backfilling joints
- Remaining and connection work
Step 1 - Preparations
The surface must be absolutely clean. There must be no loose spots or holes on the base. It has to be swept thoroughly. However, it is not necessary to fill in smaller dents. Deep holes must be closed with concrete or cement mortar. Lime mortar or gypsum are not permitted for this work as they are not weather-resistant and frost-proof.

Number polygonal plates beforehand It is advisable to distribute each polygonal plate before final laying and grouting in the mortar bed previously dry on the substructure. So the pattern is set and you prepare a guaranteed successful result. The plates are then covered with small creping tape strips and numbered with the felt tip pen. Stones with right angles come to the corners of the ground, stones with long, straight edges to the edges. The joints should all be the same size. Mortar testers not only look ugly and unprofessional, they are also a trip-trap and a point of attack for frost damage. You always work from rough to fine. If all plates are in their approximate position, the remaining plates may be smashed to fill in the nests and large gaps.
Afterwards, complete and detailed photos are taken and each polygonal plate is sorted according to their position numbers. This preparation is tedious but pays off immediately when laying and grouting.
Then the substructure is thoroughly swept and freed from all delamination.
Step 2 - Apply cementitious slurry
The cementitious slurry is mixed according to the instructions on the packaging and spread with the puff on the substrate. The laying mortar is applied damp-on-wet on the cementitious slurry. Therefore do not work on the entire substructure with cementitious slurry, but always only as much as immediately afterwards covered with mortar.

Safety note:
When mixing and distributing cementitious products, always wear safety goggles! A cement splash in the eye can lead to blindness! If cement slurry gets in the eye when stirring or spreading, rinse immediately with clean water and drive to the hospital on the quickest route. If you are alone, call the ambulance!
Step 3 - Lay Polygonal Panels
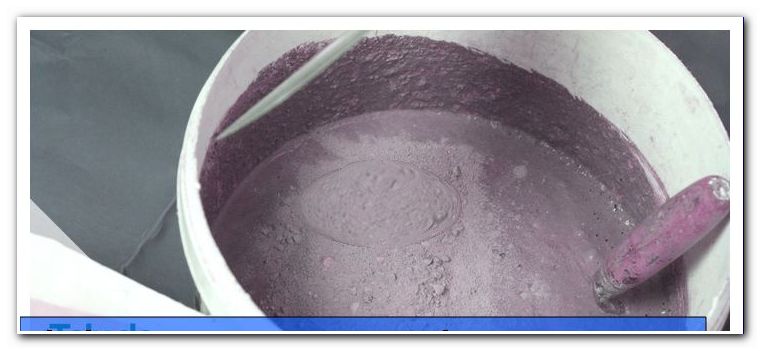
Half a sack of laying mortar is mixed in the mortar trough with the stirrer. The relationship between water and dry mortar is on the packaging and should be respected. What is needed is a plastic consistency.
Lay the two slats on the ground at a distance of approx. 1 meter parallel to each other. It is important that the slats abut the house, so they do not move when peeling. If necessary, the slats can be secured against slipping with a heavy stone or a steel nail. Between the slats, the laying trowel is spread over the whole surface with the trowel. Then the mortar is removed with the help of the slat. It can also be used for the spirit level. However, the slat and spirit level must be washed off with clear water after removal.
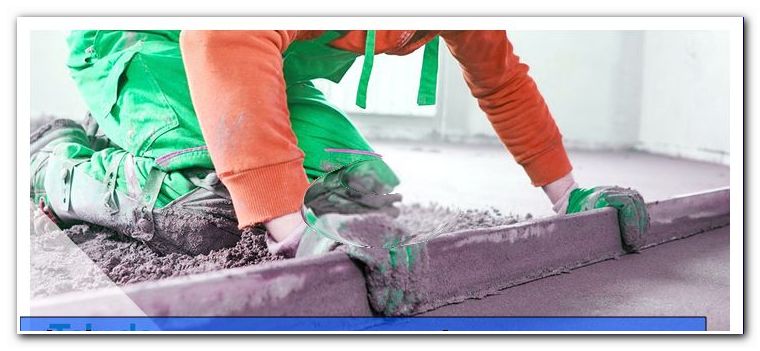
Now the polygonal plates are placed on the ground just as they were previously aligned and documented dry. Always relocated step by step. It is important that the tops of the plates form a uniform plane. That's why you should start with the thinner plates. When laying, you have to check again and again with the slat or the spirit level the even height of each polygonal plate! With the rubber hammer the plates can be carefully tapped deeper into the mortar bed. The laying mortar should be removed down to the edge depth of the panels.
When knocking in, the gaps between the panels fill with laying mortar. These are emptied immediately with the jaw iron. There should be no mortar on the top of the plates. If this happens, remove it immediately and wash off the cement with a spray bottle and sponge.
The laying mortar bonds very quickly. Therefore always process only half a bag after the other. This is how it works piece by piece.
Step 4 - Fill in spaces
Since the floor is grouted for grouting, the laying mortar must be completely set and hardened. To be sure, one day should be waited after moving the stones. The newly laid floor must be protected against rain, so cover with the foil!
grouts The joints are filled with mortar for paving joints. The consistency must be fluid, but not watery. The mixed mortar is filled with the trowel in the pouring cup. Before grouting, the interstices and the stones are moistened with the tassel and water. With the help of the beak, the mortar can be poured precisely between the joints. The grout is then leveled with the sponge and washed off the corners of the adjacent stones. Here, too, may be proceeded only step by step. At the wall connection, no grout is filled. There, at the very end, an expansion joint made of natural stone silicon is introduced.
After the grout has hardened, the whole terrace is thoroughly washed. Any existing cement veils can be treated with the Cement Veil Remover. Then, with the joint and plaster sealer, permanently protect against weathering and moss attack. The corners of the terrace are filled with ornamental gravel.
Conclusion
The setting and grouting of polygonal panels is a work whose result depends above all on the preparation. The setting itself must be relatively fast, so the dry presentation of the plates is a good way to save time afterwards. The work is not very difficult, but requires conscientiousness and cleanliness, especially when grouting. With the sight of an aesthetic and permanent terrace one is always well rewarded.
Tips for quick readers:
- Apply polygonal plate dry and mark
- Install gradient of 2%
- Check the thickness of each polygonal plate
- Not at the hardware store, but at the building materials retailer. Cheaper prices
- Lay mortar and sludge moist-in-damp