Make grain pillows yourself - instructions for sewing
- material
- cut
- sew
- Turn, fill and sew
- Hotel terms
- herbs addition
A self-sewn grain pillow of fabric brings relaxation and relaxation. The pliable pillow fits perfectly to the body and stores long-lasting heat. In our guide, we show you how to easily sew and fill such a pillow with a removable cover. Depending on your needs, you can choose the size, color and shape as well as the filling of the pillow. Whether to sleep or as a heat pad for the back and feet, this pillow is very versatile.
Whether professional or beginner, the following instructions are very easy and understandable for everyone. Even without sewing experience, you can easily sew your own grain pillow yourself:
material
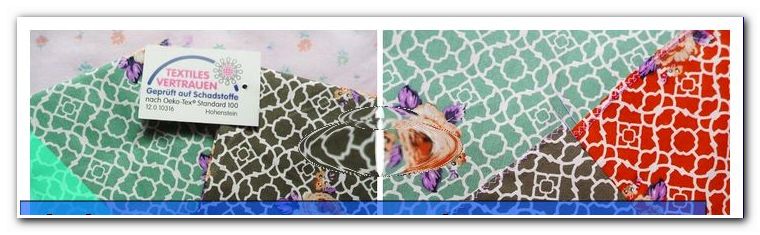
Since you are in contact with the pillow for a long time while you are sleeping or sitting on the sofa, you should be careful when choosing materials. Not only the filling should be compatible for you, but also the substance of the grain pillow. Well-tolerated natural products without pollutants are best suited as cotton fabrics with Oeko-Tex® Standard 100 and in the best case with GOTS certificate.
Information can be found here:
oeko-tex.com
global-standard.org
Since the pillow has to endure a harder filling, then stronger 100% cotton fabrics, which are hard-wearing, would be suitable at this point.
The amount of fabric, of course, depends on the size of the granule pad. Plague neck pain, take a cylindrical pillow. For abdominal discomfort fits a conventional, square heat pad perfectly. Depending on preference, a seam allowance of 1 to 1 ½ centimeters should be sufficient for the desired cut shape.
- Small cushion for heating in the oven and the microwave: This should have a maximum size of 25 cm x 50 cm and then not be so bulging that you can fold it up and put it in the microwave. Perfect for the microwave is a pillow size of 25 cm x 25 cm.
- Large pillow for sleeping and not warming up: You can make this pillow as big as you like. For comfortable sleeping offers a size of 40 cm x 50 cm. But then you have to note that you can not put this pillow in the microwave anymore. Dinkelspelz is ideal for this type of pillow due to its fragrance and its malleability. Here you can learn more about making a spelled pillow: //www.zhonyingli.com/dinkelkissen-selber-machen/
Tip: For rectangular and square pillows, pay attention to the right angle. So the covers of the cushions are perfect at the end.
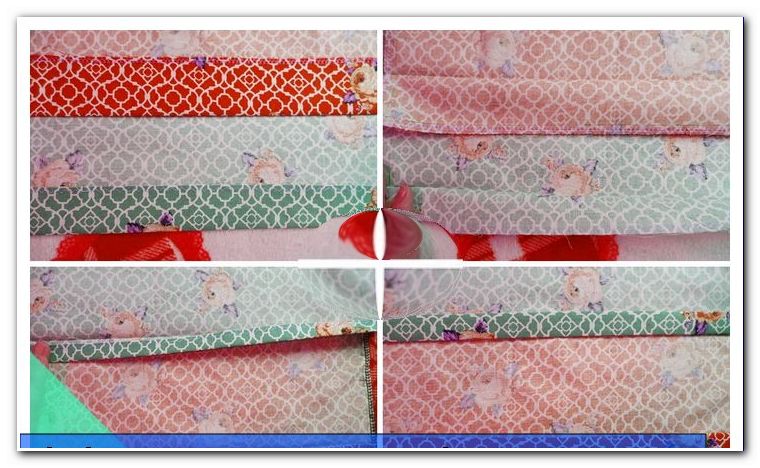
cut
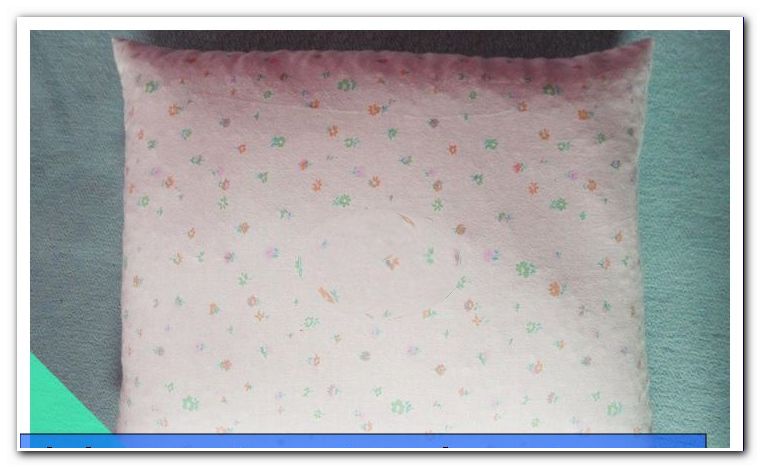
In this guide, we would like to show you how to sew a classic grain pillow yourself. The dimensions of the pillow are 40 cm x 50 cm - it will be a large pillow on which you can sleep comfortably. A seam allowance of 3 cm is sufficient. If you have another shape in mind, make a pattern on paper and transfer it to the fabric with the seam allowance.
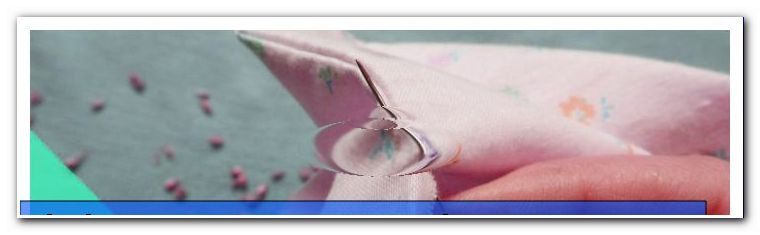
Tip: For rounded corners, which can be turned around well, you should sew the fabric at an angle of about 1 mm in front of the corner at the seam allowance. Such curves look better in the end and are easy to turn around.
sew
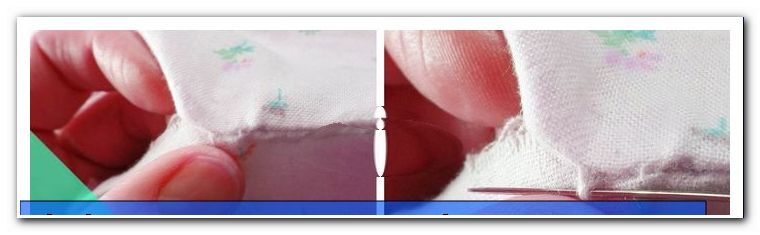
With cotton fabrics, it is always advantageous to close the edges so that they do not fray. For those of you who are not yet sewing professionals:
By "endeln" is meant the hemming of a substance. The fabric is at least once wrapped and sewn so that the edge of the fabric is smooth and can not fray.
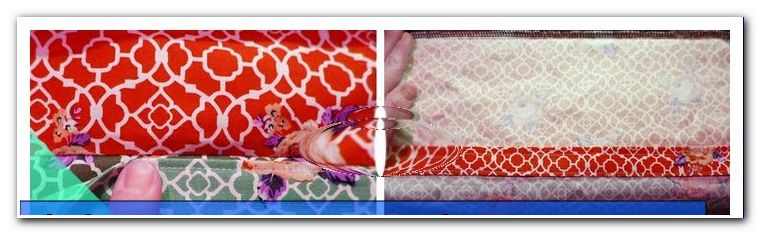
Once this is done, both cut pieces (ie front and back of the pillow) are sewn together right to right (the beautiful outsides). Pins attached to the corners fix the whole thing and so nothing can slip when sewing. For the last quarter of a page, start with a straight stitch and sew to the first corner. The other three sides are completely sewn and again a quarter of the first side, leaving an opening. This has approximately the length of half a page and serves as a turning and filling opening.
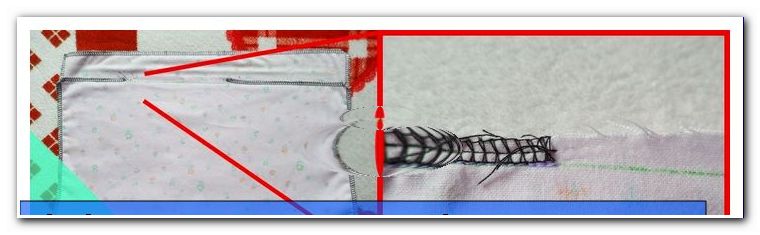
If you have an overlock, you can cheat when sewing. Once sewed almost all around, you can stitch along with a straight stitch (light green thread) along the seam. It is used at the marked corners. End and beginning are sewn together and the overlock seam on the left and right of the opening is separated again up to the sewing points. The threads are shortened. Now only the turning opening has to be finished with a wide zig-zag stitch (black thread) right up to these stitching points.
Turn, fill and sew
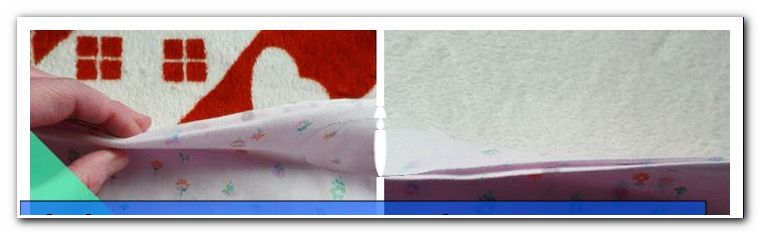
Now the pillow can be turned and the corners carefully pushed outwards. To see where you can sew the opening later, iron the edge of the fill hole inward. Then you will see where you need to sew on the ironing edge.
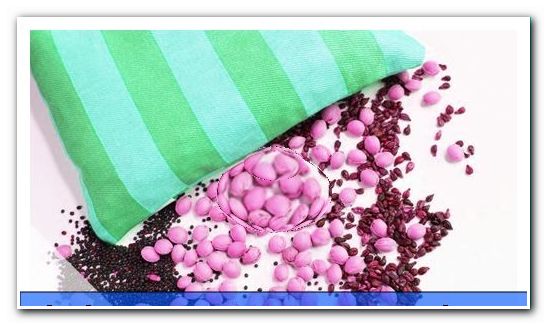
With a funnel or a rolled-up piece of paper, the desired kernels or grains can now be filled into the pillow.
Tip: Commercially available plastic funnels often have too small an opening in which the cores and grains can get stuck. Therefore, the variant with the sheet of paper is definitely recommended.
Experience has shown that filling the pillow alone is not always easy. In this case, you can put the rolled sheet of paper in the opening of the grain bag and tape it to it. So the pillow can be filled even without helping hands.
Tip: Hold the cushion at the opening and test its capacity and formability. If the amount does not meet your expectations yet, simply top up or remove something. Caution - the pillow should not be too full, it has to be sewn up after all.
Which filling you use best and which is best suited for your requirements can be found here: //www.zhonyingli.com/koernerkissen-fuellung/
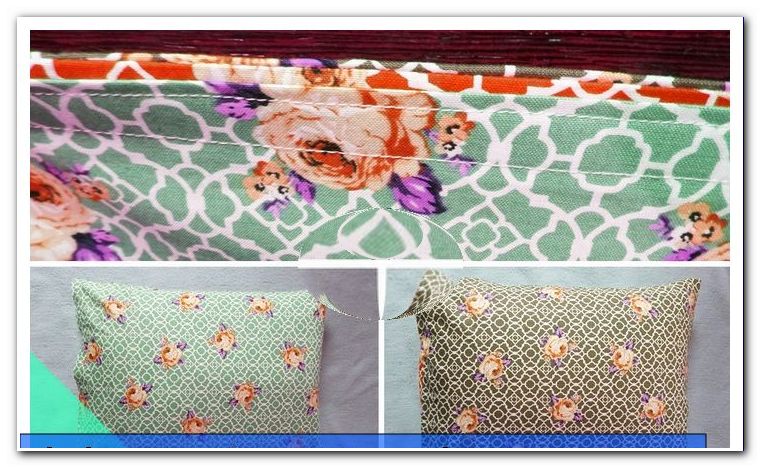
If the pillow is now filled perfectly, it now only has to be closed. There are two variants, the second is definitely recommended, because this is visually beautiful:
- Loose filling: If there is some space left in the pillow, the filling can be pushed aside, pushed down, for better sewing. The best way to fix the filling hole with pins is to sew it from the outside over the entire length of the page with a simple straight stitch. The beginning and end must then be sewn. Finished!
- Pralle filling: In this variant, you have to hand. Also plug in the opening with needles and take the crease for orientation. The seam of the opening should not be visible in the best case - a so-called magic seam, but also mattress or conductor stab, offers itself here:
It starts with needle and thread exactly at the end of the machine seam from the inside. At the left seam opening the first stitch is then set and knotted.
Now the pillow is turned so that the thread is on the right. Now this is placed over the opening - pierce now exactly at the crease just before the thread in the fabric, before you come out with the needle just behind the thread again.
Now the thread is put over the other side and continued. The shorter the stitches, the less you can see the seam at the end. So with some patience, you can hide the seam so perfectly. In the end, only everything has to be sewn and the thread cut short.
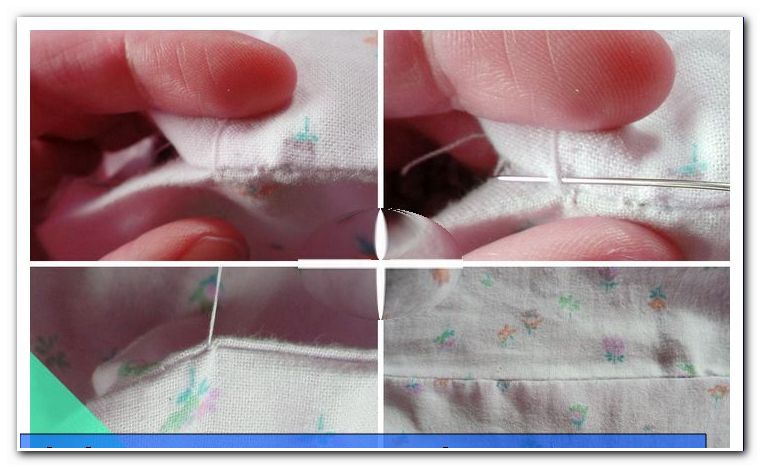
Tip: If the remaining thread is too long and conspicuous, simply push the end of the thread with the needle into the seam.
Hotel terms
If you have already used the desired material for your grain pillow, you need not follow the instructions for a reference in the following. But some may want to change the cover of the heat pad to wash it. In this case, the hotel is suitable.
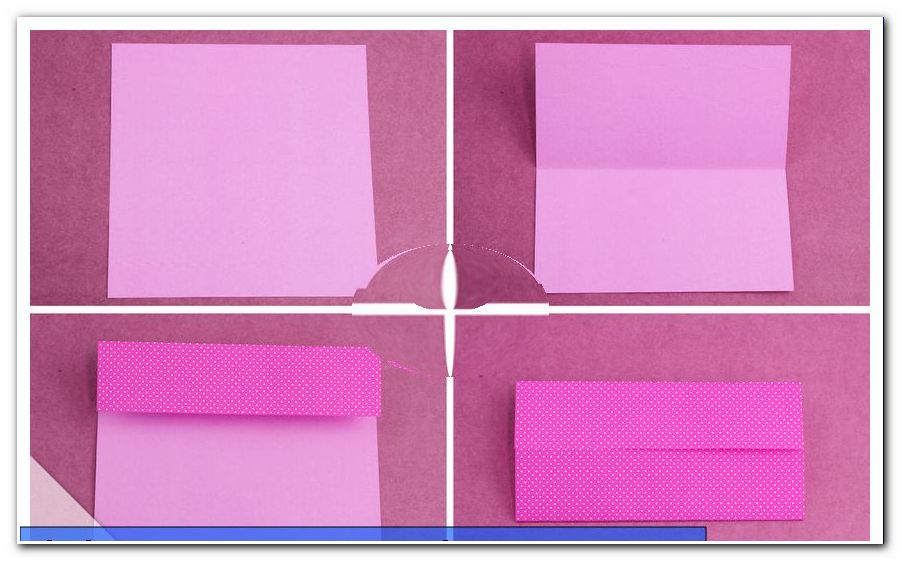
This lightning-fast stitched cover has the same dimensions as the pillow. If the cover is to sit a little looser, you need to add a bit more space at the seam allowance - 5 mm are sufficient. The cutting of the fabric takes place in comparison to the pillow itself slightly different. The cover consists of a small piece of fabric and a longer piece of fabric, which is then later required for wrapping.
- measure the smaller piece of fabric like this: 43.5 cm x 57 cm
- the long piece of fabric including the weft: 43.5 cm x 72.5 cm
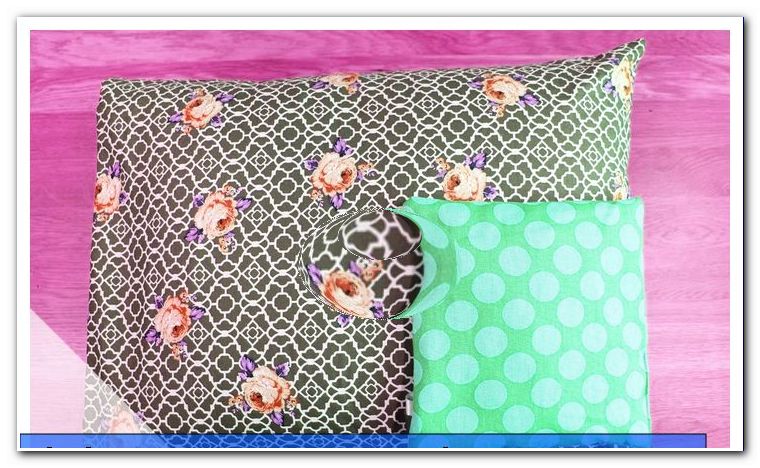
For a better understanding of the pictures, we have the long piece of fabric pieced together - this consists of a red and a brown-purple colored part. If you sew the pillow, you can of course make all parts, including the front and back in the same color.
First, both pieces of fabric are lined again. Now, the short side of the long piece of fabric (red-brown) is beaten twice by two 2cm and sewn with a straight cut on both edges of the fabric. This is also done on the short side of the smaller piece of fabric (light blue). Now put the smaller piece of fabric on the bigger one and mark the size. This place is ironed. At this fold, the two left sides of the fabric lie on each other.

Now the right (nice) sides of the two parts are stacked. Do this so that the edge of the short side comes to lie exactly in the crease of the long side. The now overlying fabric end is folded down and pinned well. Starting from the crease is then sewn over both lengths and a short side, while the side with the fold remains open.
Now the cover only has to be turned over and the pillow upholstered. Finished!
herbs addition
Grain pillows can be spiced up, no matter what kernels or grains are in them. If you add some dried lavender or rosemary to the filling, a great scent will spread in your bed. Likewise, the effluent, essential oils will do you good.
Tip: When heating the pillow with herbs, make sure that it is not heated too much. This heat could destroy the essential oils of the herbs.

For a sleeping pillow, the soothing and relaxing fragrance of lavender offers. In case of restlessness and fatigue, this miracle can work, especially because of its antibacterial effect.
Rosemary is as wonderful. Its antiseptic effect helps with flatulence or menstrual problems, as it has a positive effect on the circulation and blood circulation.
How to heat the grain pillow and what you need to pay attention to here: //www.zhonyingli.com/koernerkissen-erwaermen/
Tips for quick readers:
- Make cutting pattern
- Cut fabric + seam allowances
- Sew up, fill and close the inner pillow on 3.5 sides
- Make hotel relation
- Get grain pillows and enjoy!