Learn Crochet - the basics guide for beginners

- Material - wool and crochet hook
- attitude
- Fasten the thread
- The most important stitches
- Crochet
- Crochet the chain stitch
- Crochet tight stitches
- Crochet chopsticks
- Half chopsticks
- Whole chopsticks
- double rods
- relief chopsticks
- Instructional Video
- Thread ring / Magic Ring
- crab stitches
- Crochet the round crossing
- color change
- Increase mesh
- Abmaschen
- Cut off fixed stitches
- Cut off the chopsticks
- Further instructions
Crocheting is indispensable in the world of DIY. Everywhere you look crocheted - in fashion, as a small accessory or as a decoration. There are many creative ideas. Would you like something like that ">
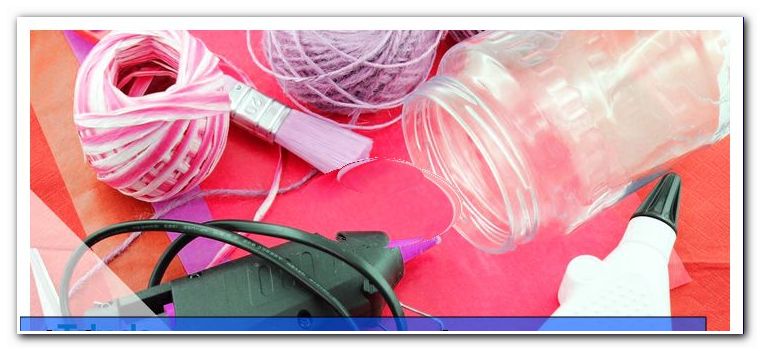
Material - wool and crochet hook
In addition to the right wool, the crochet hook and its size are important when crocheting. The size of the crochet hook and the wool thickness always depend on what exactly you want to crochet. Use sturdy yarn, for example, if you want to crochet a bag. Very soft yarn lends itself to caps and scarves, so it is also nice and cozy. The manufacturer's instructions tell you all the details of the wool. Basically, you can not go wrong with the purchase of wool and the needle. Once you have decided on a ball, you can see the key data on the band:
On top of that, you can read down the weight and run length of the wool, the color and composition, as well as the appropriate needle size. The symbols tell you what the meaning is. If the banderole shows a needle size of 4 to 5, you should get such a crochet hook.

Tip: If you want to make your crochet piece larger-meshed and more airy, use a crochet hook that is 0.5 to 1.5 sizes larger than the wool specification.
For the start and the learning of the most important techniques a medium yarn and a crochet hook with a needle strength of 4 to 5 are sufficient. This is not too filigree, but not too thick and perfect to learn crocheting.

attitude
Before you can start, you should know how to hold crochet hook and wool in your hands.
There are two options for holding the needle: either you hold it like a knife or a pen in the respective guide hand (right-handed people hold the needle on the right, left-handed people hold the needle on the left).

The wool is logically run with the other hand. There are many ways you can wrap the wool around your index finger - from the front or back, just once or several times. Start intuitively and you will quickly find the best option for you. There is no right or wrong in the wool leadership.

Fasten the thread
The thread is attached to the crochet hook by means of a simple loop.
The most important stitches
Crochet
The air mesh is the simplest of all crochet meshes and the most important basis for every crochet piece. The crochet you need when crocheting an air chain at the beginning of a crochet piece as a first round or as a ring, at the beginning of a new round as spiral air mesh or even when crocheting arcs.
The chain of stitches is a series of many meshes that are simply crocheted one after the other. The chain of stitches is needed, for example, as the first round crocheting a pullover, shawl or headband.

Tip: If you want to crochet into the air mesh in the second round, make sure that you do not crochet these too tight. With loose air meshes, in which you can pierce easily, you manage the second round as if by magic.
In addition to the straight beginning of a crocheted piece, there is still the circular beginning - the ring. Air meshes are closed with a chain stitch to form a ring. This air mesh ring is used when crocheting hats, baskets or bags - so all Crochet pieces, which have a round base.

Wrapped Air Mesh - Once you have completed one round of Crochet and then want to start another round, the Air Mesh is often crocheted as a Wrapped Air Mesh. You simply crochet an air mesh and turn the work. Now crochet in the other direction, the air mesh serves as a turning axis.
Air mesh arches are interconnecting chains of heavy mesh in more complex crochet patterns, which are in an arc, as in this shopping net.
| language | designation | abbreviation |
| German | Luftmasche | LFTM |
| English | stitch | st |
| German | Air mesh chain | Lftmk |
| English | chain stitch | ch |
Here is the detailed instructions for crocheting of air meshes: crochet loops
Crochet the chain stitch
The warp stitch is used as a round end - it connects the first with the last stitch. It is very flat and sturdy, making it perfect for finishing a lap cleanly or joining different crocheted pieces, such as the Granny Squares. If these are connected with Kettmaschen, then you hold in any case.
Visually, the warp stitch is rather inconspicuous, but you can still crochet as a decorative border around a crochet piece.
| language | designation | abbreviation |
| German | slip stitch | km |
| English | slip stitch | LST |
The exact instructions for the Kettmasche can be found here: Crochet Kettmasche
Crochet tight stitches
Another important technique in crocheting is crochet stitching. As the name implies, these stitches are very strong and stable stitches that are often used on caps.

The crochet piece becomes even, stable and opaque with sturdy stitches. Therefore, fixed loops are also mostly used in Amigurumis, because these small stuffed cuddly animals have to be very hard-wearing and robust. The opaque pattern also prevents the filling wadding from being visible.
If you need a solid finishing edge, solid stitches are just as good.
| language | designation | abbreviation |
| German | solid mesh | sc |
| English | single crochet | sc |
Here is the detailed Crochet Pattern for Stitches: Crochet Stitches
Crochet chopsticks
In contrast to the fixed stitches, crocheted rods give a more airy mesh with larger holes. Depending on how loose the crochet piece should be, you can modify the stick and "enlarge". The height of the stick determines the height of the holes in the crochet piece. The tight stitches are small and stocky, while the stick is elongated. In the following we show you different variants of the stick.
Chopsticks are fixed loops on raised stilts.
Half chopsticks
We start with half a stick. This is a little bit higher than the fixed mesh. You get a third stitch on the crochet hook by means of an envelope and cover all three stitches together.

| language | designation | abbreviation |
| German | half a stick | hdc |
| English | helped double crochet | hdc |
Here's how to crochet half-sticks: Crochet half-sticks
Whole chopsticks
The whole or even simple stick is now much higher than the fixed loop and half the stick. It does not just consist of an envelope, but also of two solid stitches.

| language | designation | abbreviation |
| German | whole chopsticks | stb |
| English | double crochet | dc |
In this tutorial we will show you how to crochet whole sticks: Crochet whole sticks
double rods
The double stick is started with two envelopes. It is thus almost twice as high as a whole stick. After all, you have four stitches on the crochet hook, which are gradually brushed off until only one stitch is left on the needle.

| language | designation | abbreviation |
| German | double rods | dSTb |
| English | treble crochet | tr |
A crochet pattern for double sticks can be found here: crochet double sticks
relief chopsticks
The Reliefstäbchen is just like the whole stick crocheted. Here only the puncture site changes. A distinction is made between the front and the back of the embossed bumps. The sticks are not crocheted in the stitches of the preliminary round, but completely around the individual sticks of the preliminary round around. The alternation of the puncture site has the consequence that different patterns arise on the front and back. The term "relief" arises because in this way sublime structures can be crocheted.

| language | designation | abbreviation |
| German | Reliefstäbchen from behind | rStbh |
| English | back post double | bpdc |
| German | Relief sticks from the front | rStbv |
| English | front post double | FPDC |
The step-by-step instructions for the Reliefstäbchen: crochet Reliefstäbchen
Instructional Video
Thread ring / Magic Ring
Now we show you another start for round bases, next to the air mesh ring. Thereby a kind of loop is put into which the first round is crocheted. That can be fixed mesh or chopsticks - that does not matter. The trick with the thread ring is that the stitches can be easily pulled together after the crochet of the first round and the ring closes.

| language | designation |
| German | Thread Ring, Magic Ring, Flexible Ring |
| English | yarn ring, magic ring, flexible ring |
Compared to the ring of air mesh, the thread ring is not so thick at the beginning, as a complete first row is crocheted. At the air mesh ring, all the stitches of the first row are crocheted in a hole, which makes the start a bit thicker.
How to crochet exactly a thread ring, you learn here: Crochet thread ring
crab stitches
We recommend the Krebsmaschen with beautiful final edges such as a neckline, a pocket opening or on sleeves. They are as strong as solid stitches, which is almost logical, since it is crocheted backwards, fixed stitches. Crocheting back stitches can be tricky for one beginner or the other, but it's worth it.
| language | designation | abbreviation |
| German | cancer scam | Crab sts. |
| English | reverse single chrochet, crab stitch | rsc |
The basic instructions for crocheted Krebsmaschen can be found here: Crochet Krebsmaschen
Crochet the round crossing
A clean lap transition is not easy, especially for beginners - often you do not know where to crochet the last stitch, whether you close the round with a chain stitch or with a tight stitch. We now show you a great variant for a clean lap transition, which is especially important for hats or bags.
They have reached the last stitch of the preliminary round. Now crochet as follows. They do not stab in the last stitch of the preliminary round, but release them.
Close the round as usual with a chain stitch through the first loop of the preliminary round. So far so good.

The beginning of the next round looks like this. Replace the first stitch (no matter if it is a fixed stitch or a stick) with the appropriate number of stitches:
- Fixed mesh = two meshes
- Chopsticks = three air meshes

Now the first stitch is crocheted normal, but by exactly the same stitch, through which you also crocheted the slit stitch for the end.

Continue as usual with the round to the end. Once there, release the last stitch of the preliminary round again.
Tip: Set a lap marker. This can be a stitch marker or a piece of thread. This is pulled through the first stitch of the round. So you always know when the round ends.
color change
You want to make your crochet piece colorful "> 
Increase mesh
In many crochet tutorials, the increase of stitches is unavoidable. Especially with round bases you need this technique. The crochet circle must be evenly larger round by round. For this, the meshes of the preliminary round are evenly doubled, tripled or quadrupled. Depending on the instructions, different curves then result in the crochet piece.
In itself, the growth of mesh is child's play. All you have to do is crochet two stitches into one stitch of the preliminary round. The result = You made two stitches out of one stitch. In this way you can reduce every stitch.

Important in the mesh increase is the counting. You must not get confused.
In this crocheted hat instruction, you can learn how to use stitches directly: Crochet your hat
Abmaschen
Just as it is important to accept stitches, stitching is also very important in some instructions. The stitching is, so to speak, the opposite of the stitch gain. You make a stitch out of two stitches. The crochet piece gets smaller and narrower when you stitch stitches together.
Depending on which stitches you crochet, the Abmaschtechniken differ. In the following, we show you the variants for fixed meshes and rods.
Cut off fixed stitches
1st step: The first stitch of the preliminary round is inserted and the thread is taken. You now have two stitches on the crochet hook.
2nd step: Then the second stitch of the preliminary round is inserted and the thread is picked up again. You now have three stitches on the needle.

Step 3: Now pick up the thread and pull it through all three stitches on the needle.
In this way, you have made a firm stitch out of two solid stitches.

If you are crocheting this mobile phone pocket, you can learn the practice and practice: Crochet your mobile phone pocket
Cut off the chopsticks
Step 1: First, as always, an envelope is brought. Then you stab in the first stitch of the preliminary round. You now have three stitches on the needle.
Step 2: Then pick the thread and pull it through the first two stitches on the needle. So there are only two stitches left on the needle.

Step 3: Now repeat the process in the second stitch of the preliminary round. Make an envelope, stab in the stitch. You have three stitches on the needle.
Step 4: Take the thread and pull it through the first two stitches on the crochet hook.

Step 5 : Then pull the thread through the three stitches on the needle.

So you have made a stick out of two sticks of the preliminary round.
Further instructions
Now you know the most important crochet basics and can already start. Here are a few beginner tutorials for you using these techniques. With a little practice, you can soon crochet a hat or even a bag. You will see, crocheting will be foolproof over time.
- Crochet potholders
- Crochet your heart
- Crochet flowers
- Crochet star

- Crochet egg warmer
- Crochet your hat

- Crochet baby socks
- Crochet baby blanket
- Crochet baby shoes
- Crochet baby hat

- Crochet bag
- Granny Squares
- Amigurumi - crocodile

Other crochet techniques
Have we aroused your interest "> Filetti crochet