Tinker Fairy Lights - Instructions, Stencils & Ideas for Lampshades

- Basic instructions: Make a fairy lights
- Lampshades made of plastic cups
- Fairy lights with yarn balls
- More ideas for lampshades
- Idea for the winter
- Idea for the summer
- Idea for Halloween
- Photo Deco
Fairy lights are among the most popular decorative elements for Christmas and generally in the winter time. However, there are also great ways to use the inexpensive bulbs with homemade lampshades in the summer. We have put together many beautiful ideas for winter and summer (some with templates) and also provide you with a basic guide that will familiarize you with the most important "building blocks" for crafting individual fairy lights.
Basic instructions: Make a fairy lights
Although there are many variations to make fairy lights with lamp shades, the principle is the same for all versions.
You need:
- a LED string of lights
- Lampshade utensils (eg disposable cups, balloons plus yarn, cupcake forms, etc.)
- an element for perforating the lampshades (eg soldering iron, knitting needle, screwdriver, drill etc.)
In addition, depending on the specific idea, additional aids such as scissors, glue, paper and so on are needed.
This is how you always go:
Step 1: Make the desired lampshades and perforate them.
Step 2: Insert the LED string light through the holes.
Step 3: Hang up and enjoy the homemade lights.
Simple, is not it? "> Lampshades made of plastic cups
Here comes the classic, which aims to make a lampshade out of a disposable cup for each LED light of the fairy lights. The nice thing about the variant: As for the exact design of the lampshades, you have countless possibilities.
| You need this: |
|
* Disposable cups for marinades, finger food and the like are best suited as they already have an appealing shape. "Normal" cups can cut you down a bit to get more chic proportions for your lampshade. We use small shot cups.

How to proceed:
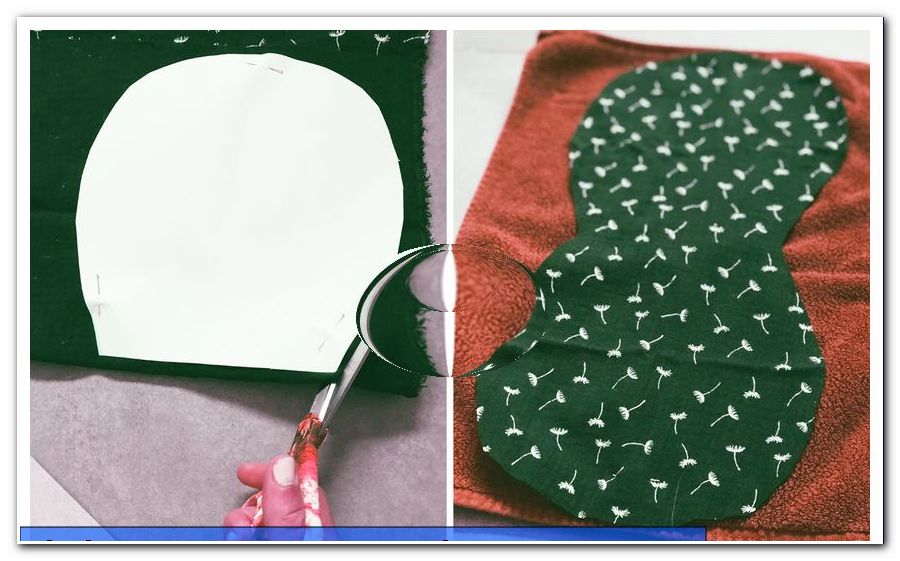
Step 1: Trim the fabrics. The strip must fit around the length of the cup and should look slightly above the cup at the top and bottom edges.
Step 2: Use a pin to staple the just cut strip to three to five layers of your chosen fabric. Cut out the fabric.
Repeat this until each cup has its two fabric elements. The required number of cups is based on the number of lights in your fairy lights.

Important: Work as carefully as possible - the more beautiful the result!
3rd step: Melt a small opening in each cup bottom. These accesses then serve the lights of the chain as "loopholes". Depending on the type of mug and the plastic you need more or less effort for this hole. The small schnapps cups are very stable - you need a lighter or a soldering iron to melt the ground. For simple drinking cups, a heated nail will do.

Note: The hole should be just so big that the bulb just fits through. Hold the heated knitting needle with a rag, it will be extremely hot and can cause injury.
Step 4: Stick the cups to the fabric strips. Use the hot glue gun to put a few glue dots on the bottom edge of the cup - there you put the fabric. Wrap the cup with the strip. The seam is also attached with glue.

Tip: Any protrusions on the lower and upper edge can now be cut off with scissors.
Step 5: Insert the lights of the LED light string through the holes. If the hole is too big, you can widen the bulb with a rubber band. So it does not slip through the hole.

Step 6: Hang up the finished chain and enjoy the great sight!

Fairy lights with yarn balls
Our second detailed guide is dedicated to a real trend, the so-called Cotton Ball Lights. You make each lampshade your individual light chain of a balloon and yarn or wool.

| You need this: |
optional:
|
How to proceed:
Step 1: Stir the glue or glue (0.5 liter is usually sufficient, follow the instructions on the package).
Step 2: Inflate the first balloon and knot it. The size is up to you.

Tips: An air pump is faster and easier. Stretch the balloon slightly before inflating. This makes the lampshade more rounded.
Step 3: Blow the balloon generously with glue or glue. Use a brush for this.

Step 4: Wrap yarn or wool several times around the balloon. You can wrap it all over - let your hands run wild.
Tip: Depending on how opaque the finished Cotton Ball should be, you have to wind more or less extensive.
Step 5: Cut the thread and stick the end under or between the yarn layers.

Step 6: Brush the balloon with glue again.

Step 7: Hang the balloon on the clothesline with a clothespin.
Step 8: Repeat steps 2 through 7 with all other balloons.
Step 9: Let the balloons dry for at least ten hours. The paste or glue must be well cured.
Step 10: Pierce all balloons with a needle and remove the remains with tweezers.

Step 11: Now you have two options: either leave the cotton balls as they are or decorate them - for example, with paint or craft glitter.
Step 12: Now push the small LED lights through a sufficiently large hole in the net. If you have wrapped the balls very taut and covering them, use a pin to punch in a small hole and push the small lamp into it.
Step 13: Repeat step 12 for all other balls.
Step 14: Hang up your Cotton Ball Lights, plug them in and enjoy the great splendor!

Note: The LED lights develop heat after a while, so you should never let them burn without supervision.
More ideas for lampshades
Now we introduce you to some more ideas for exciting fairy lights - divided into winter and summer. Each lampshade proposal comes with a mini-guide so you do not have to think twice about how to do it best.
Idea for the winter
Winter is the classic season for fairy lights. With the pretty bulbs, not only can the Christmas tree be decorated, but also the wall can be spiced up or the window illuminated.
Cookie cutter as a lampshade
You need this:
- LED Christmas Lights
- cookie cutters
- copper colored acrylic spray
- drill
How to proceed:
Step 1: Spray cookie cutter with copper acrylic spray.
2nd step: let it dry.
Step 3: Drill a hole at the top of the cookie cutter (must not be too small or too big!).
Step 4: Put the lights of the chain through the holes, hang them up, and you're done!
Idea for the summer
Even though fairy lights are mainly associated with the winter time, they also have charm in the summer - at least when they are designed appropriately. We provide you with funny ideas.
Cupcake or praline molds as a lampshade
You need this:
- LED Christmas Lights
- Cupcake molds or praline molds
- Lochzange

The size of the molds depends on the size of the lights. With small LEDs, chocolates are enough.
How to proceed:
Step 1: Punch a hole in each mold with the punch. This should be in the middle of the floor.

2nd step: Insert the bulbs through the holes. Finished!

Idea for Halloween
Table tennis ball as a lampshade
You need this:
- LED chain
- Table tennis balls with eyes
- Nail, lighter and cutter

These eye balls could be bought on Halloween in well-stocked hobby shops - perfect for a DIY fairy lights. Of course you can also make the fairy lights with white or colorful table tennis balls.
Tip: White ping pong balls can also be painted with edding.
How to proceed:
Step 1: First, each table tennis ball must be provided with a hole. Use the lighter to heat the nail and poke a hole in the table tennis ball with the hot tip. Then, starting from this hole, cut a cross with the craft knife into the ball.

Step 2: Slide the lights of the chain through the holes. Finished!

Tip: The variant with feather or table tennis balls is particularly good at after-parties after sporting events.
Photo Deco
Finally, we would like to introduce you to an idea without a special lampshade, which is suitable for every season: You use the LED light chain literally to put your most beautiful photos in the right light.
You need this:
- LED Christmas Lights
- developed photos
- clothespins
How to proceed:
Step 1: Attach the fairy lights in a wave or serpentine shape to the desired location.
Step 2: Distribute the photos over the fairy lights and fix them between the lights with wooden clothespins (look more noble than plastic). Finished!
In addition to the mentioned and described DIY fairy lights, there are of course countless other ideas. With a little imagination, you will come up with some creative solutions for the lampshade design. Have fun thinking and experimenting!