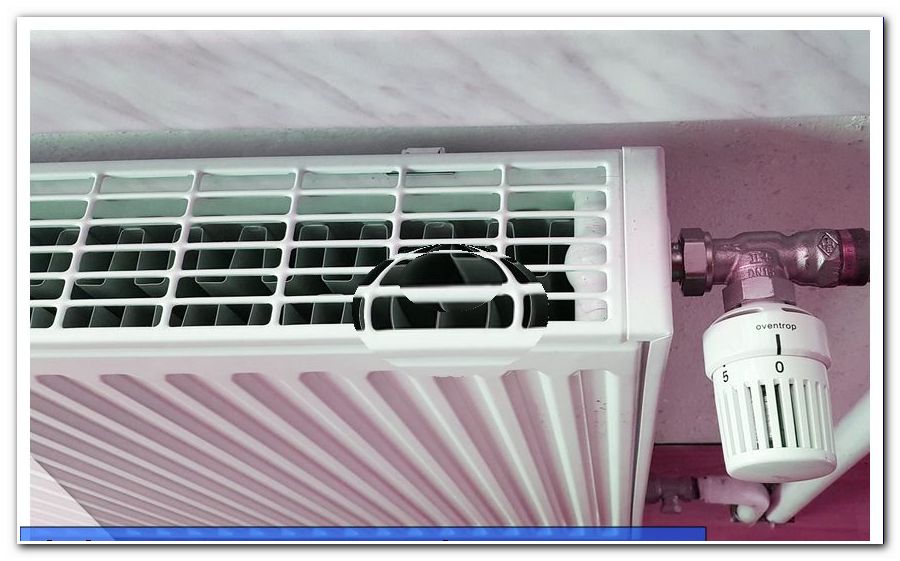
Cleaning the heater - instructions for finned radiators

- Material and preparation
- Clean slat heater: a guide
- Radiator brushes: is there a replacement ">
Lamellar radiators belong due to their design to the dust collectors under the heaters. They whirl up dust that immediately lays back on the heater and in the worst case even burns. In addition, throughout the year a variety of dirt in and get to the heating device, which looks unappetizing over time and the atmosphere disturbing. For this reason, you should at least once a year prescribe the cleaning of the radiator to make it shine again. If heaters are not cleaned, it can also lead to health problems and an increased electricity bill for you. Do not postpone this process.
Material and preparation
An effective cleaning is accompanied by the appropriate preparation and this consists of the following points:
1. Timing: It is important that you choose the right time to clean the heaters as this will prevent any possible dust or dirt from burning into the paint or metal. The louvre heater is cleaned before or after the heating period, never during this period. That is, on average, you have seven to eight months to cleanse. Depending on the level of pollution or dust in your living space, you should clean once or twice a year.
2. Materials: apart from the various items listed below, you will need additional materials to help you clean the fin heater. You need this:
- several washcloths or sponges
- Dish brush with softer bristles for the outside
- Towels to dry
- thin bristle brush
- bucket
- Gloves for sensitive hands
- Dishwashing liquid or all-purpose cleaner
- Oven spray against stubborn stains
- radiator brushes
Tip: Regularly wipe off the radiator with a damp cloth during the winter. This helps against accumulating dust over the cold season and facilitates cleaning in the spring.
Clean slat heater: a guide
Now that you've prepared your cleaning utensils, it's time to get down to business. Before you go with soap and sponge to the radiator, you must first solve the upper grid, if you have a plate radiator. To do this, locate the side of the heater with the turning mechanism to adjust the heating power. Grasp the finned heater and push the side cover up with sufficient force to release it. Repeat this on the other side and now the grid is free. Now you can clean the radiator:
Step 1: First clean the overlaying grid. Rinse with detergent in the shower or in the sink (small heaters only). If there is still dirt between the grooves, use a bristle brush dipped in rinse water. Stubborn stains spray with oven spray, let it soak for some time and then rinse it off as well. Then place the grid so that it can dry well. In the same way, also clean the side parts that you have removed before.
Step 2: Before you clean the outside of the heater, you should clean the inside. It is best to use your radiator brush, which can lead you between the radiator fins and thus remove a lot of dust. Take care to thoroughly remove all dust and dirt that has accumulated inside the radiators. Be sure to put damp cotton or special microfibre cloths under the heater so the dust does not fly around your ears. The cloths catch the dust and then only need to be washed.
Step 3: If necessary, immerse the brush in a solution of detergent and water, if in addition to the dust and dirt is visible.
Step 4: Check again to see if you really got the entire interior of the heater clean. If not, go over the said place again.
5th step: Now it goes to the outside of the heater. Depending on the degree of soiling, use either a dishwashing brush, a sponge or just a cloth. Be careful not to use too harsh or hard utensils as this could ruin the paint of the heaters. Clean the entire surface with sufficient rinse solution or an all-purpose cleaner.
Step 6: If stubborn stains, such as grease residues from the kitchen, are present, spray them with the oven spray, let it penetrate and simply wipe it off at the end. Please note that once the spray has been used, it must be cleaned again at the same place. To prevent greasy streaks and dark spots. Proceed in this way for the entire radiator.
Step 7: Then you have to dry off the radiator, which is best done with matching cloths. If stains or dirt appear after drying, you should clean and dry them again. You should rather spend a little more time cleaning, so that you can really remove all the dirt.
Step 8: Now you can put the remaining towels in the hamper and look for the side panels and the grid. Dry them with a cloth and then reinstall them. To do this, first place the grille on the radiator and fix one of the sides before mounting the other side.
Step 9: Finally, check the floor under the heater for dirt and clean it if necessary.
Tip: Be sure to keep the window closed. A gust of wind could unintentionally stir up all the dust.
Radiator brushes: is there a replacement ">
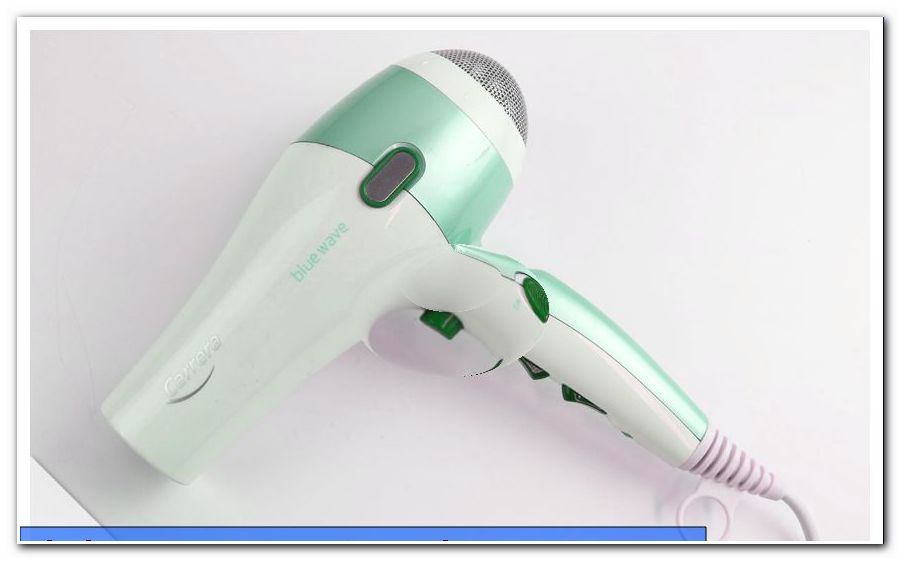
2. Hairdryer: you can use a hair dryer in the same way as the vacuum cleaner, but only transport the dust to the floor as the hair dryer swirls it up, releases it and sends it down. But do not start the hair dryer immediately. Place damp cotton towels directly underneath the heater to attract the dust due to moisture. Thus, the dust does not fly around in the room.
Costs: free of charge, if in the household
3. Steam Cleaner : Hand-held steam cleaners are a good solution to effectively counteract the dust in the finned radiator. To do this, first cover the wall behind the heater with a cloth or bed sheet, so that the moisture does not get to the wallpaper together with the dirt. Now you can blow the interior thoroughly with the steam cleaner.
Costs: free of charge, if in the household
4. Sponge and stick: it gets a bit more manual with this Life Hack. For this you simply need a thin stick, for example made of bamboo, even metal bars work. Attach a sponge to one end by cutting a thin hole and inserting the rod. You should make sure that the hole is not too large, so that the sponge does not get stuck between the heating ribs. The sponge should fit easily between the ribs. If you push two small sealing rings on the stick, the sponge can not get stuck or move. You can also staple very thin sponges just to the stick. Wet cleaning possible.
Cost: under 5 euros
5. Slat cleaner: this variant is suitable for small radiators. Slat cleaners are used for the slats of the roller blind for cleaning and work perfectly as a cleaning brush for your heaters. Just put them between the ribs and you can remove the annoying dust deposits. Lamella cleaners are usually provided with microfibre cloths that collect a lot of dust.
Cost: 5 - 10 euros
6. Bottle or pipe brush : these brushes come in numerous lengths and maybe you even have such an one available. If yes, use it to clean the heater only when you stop using it for any other purpose. An advantage: the smaller the heaters, the more effective the brush.
Cost: 5 - 20 euros
7. Dusters: with a feather duster, only the upper third of the radiators can usually be cleared of dust, but there are also variants that are quite long and thin and of the same purpose as the radiator brushes. Pass it between the ribs as far as you can and you will see how much dust can be collected with this household utensil.
Cost: 7 - 30 euros
Tip: As an alternative to the sponge and stick, you can also wrap a microfibre or dust cloth around one end of the stick and either fix it with rubber bands or staple it to the stick. This variant works extremely well, because the cloth fits snugly and can be easily guided between the ribs.