Install under rafter insulation - Assembly instructions
- construction
- materials
- Step-by-Step Guide
- costs
- The insulation with Styrofoam
- Insulation with rigid foam panels
- frequently asked Questions
They are planning a modernization of the thermal insulation layer on the top floor ">
Good insulation is very important for a building as energy prices continue to rise. On average, around 30 percent of heating energy is lost through a poorly insulated roof, which increases costs. But one's own well-being also suffers from inadequate insulation. If the sun warms the roof in the summer, then the heat penetrates unhindered and in the interior the temperatures rise strongly. Especially with an old building, this problem is not uncommon. If the old building has a bad insulation, then the temperatures in the summer can rise even at night over 30 degrees and the house cools off only badly. Whether old building or a newer year of construction - with the right tips, the insulation is quickly installed.
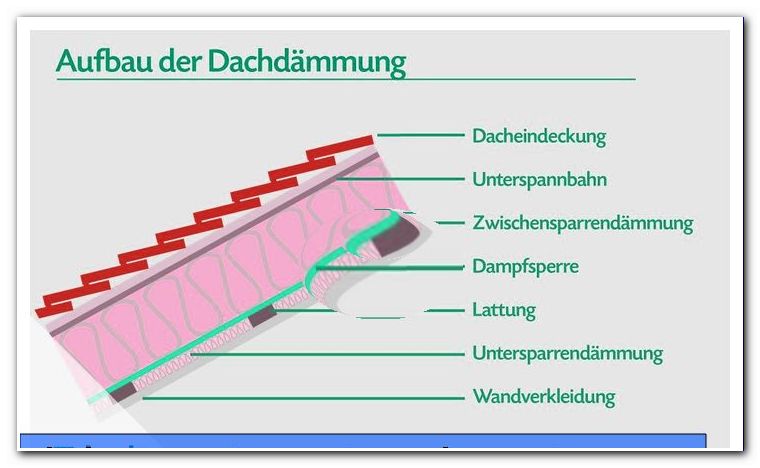
construction
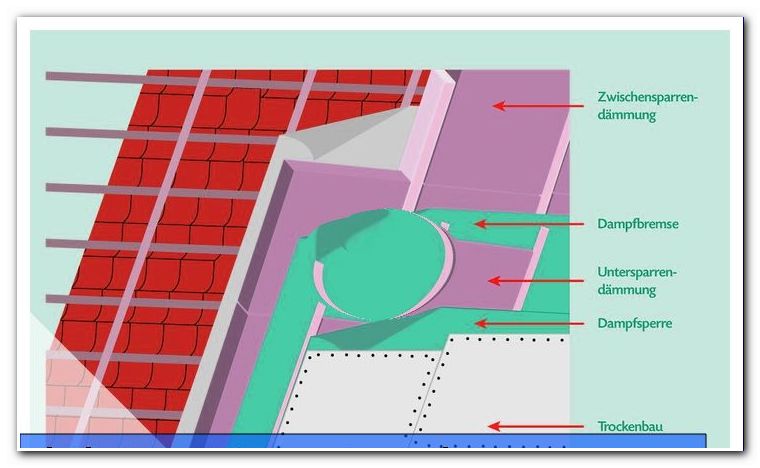
A sub-rafter insulation has the following structure in most cases:
- roofing
- Underlayment
- Insulation between the rafters
- Vapor barrier
- Under rafters
- wall covering
The under rafter insulation can be realized with different building materials. The most common insulation materials include:
- rock wool
- glass wool
- Rigid foam panels
- Styrofoam
materials
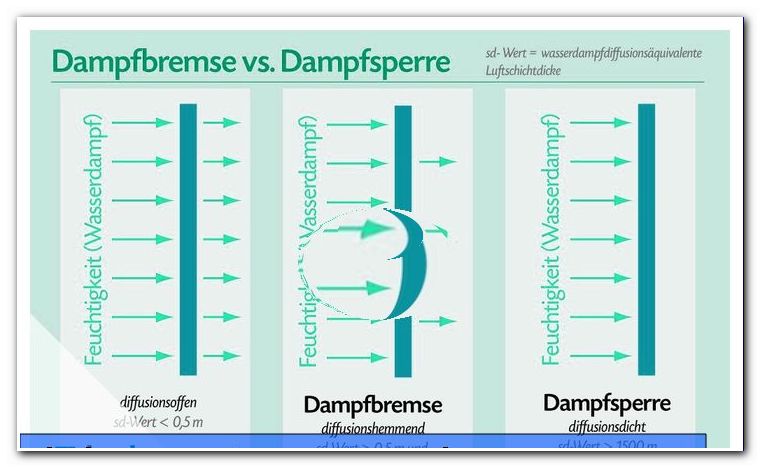
What is a vapor barrier / vapor barrier ">" vapor barrier or vapor barrier ".
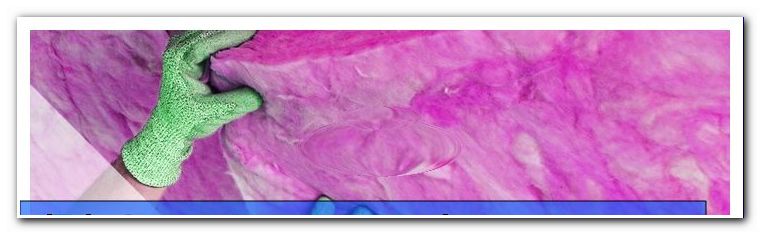
Under rafter insulation with rock wool or glass wool
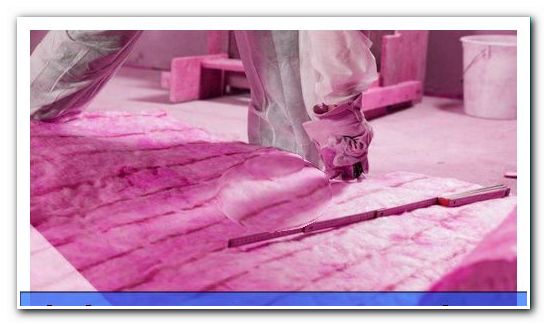
Rock wool is resistant to mold. It has a long shelf life and is easy to process. At the same time, the material is hardly inflammable and heat resistant. The health effects of processing have a disadvantageous effect. You must always wear protective clothing, as irritation of the skin and respiratory system may occur. If the insulation also comes in contact with moisture, then the insulation properties are lost.
Which requirements must apply ">
- The roof skin must not be damaged. The roof skin is mostly made of bricks. These must form a closed surface and there must be no defective areas.
- In order for you to be able to work optimally in the room, the ceiling must have sufficient height. The freedom of movement must not be restricted too much, so that you can work optimally.
- The insulating layer between the rafters must not be damaged.
- If the vapor barrier is damaged during preparatory work, it must be removed. Then attach a new vapor barrier film.

You need these tools:
- spirit level
- saw
- hammer
- Tape measure / ruler
- drilling machine
- screwdriver
- knife
- guide
- Screws / nails
- stapler
- caulking gun
- Safety glasses / protective clothing
- You need this material:
- mineral wool
- battens
- Vapor barrier
- Panels for the paneling
The slats
The slats must be as high as the planned insulation layer. Pay attention to the strengths. Roof battens are available in a thickness of 4 cm x 6 cm. If the insulation layer is to be stronger, then you can fasten two rows of slats on top of each other.
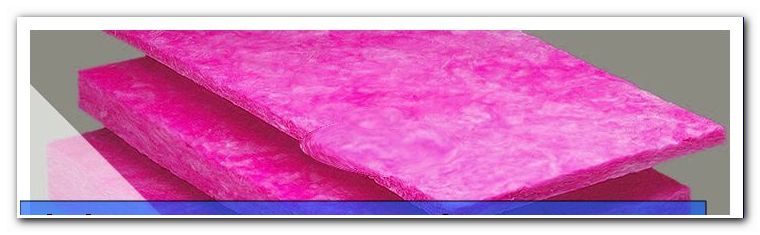
mineral wool
The mineral wool is delivered either on wheels or in a package. Packages of rock wool or glass wool are usually 125 cm * 62.5 cm in size. The rolls usually have a width of 60 cm. The material is available in different thicknesses, mostly 40, 60, 80 or 100 millimeters.
The costume
About the glass wool or rock wool, a cover is attached. Here, different materials are used:
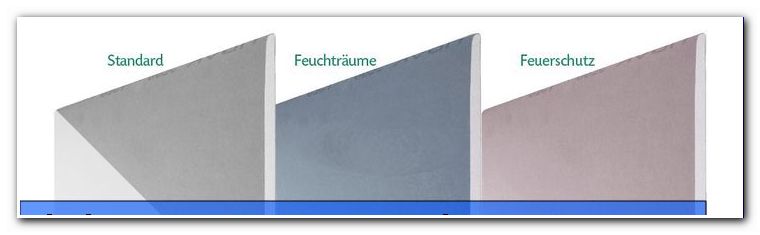
- plasterboard
- OSB
- panels
- profile woods
Related Links:
OSB
drywall
Step-by-Step Guide
Step 1 - First you have to attach the so-called baseboard. This is the lowest bar, which is mounted parallel to the floor. You can either unscrew or nail the crossbar and stand across the rafters.
Tip: With older roofs, it may happen that the distance to the roof does not remain the same over the entire length. In this case, it is best to attach the individual rows of slats dimensionally stable and to compensate for the last bar. This ensures that the entire structure is not accidentally installed in the wrong direction.
Step 2 - Now attach the other rows of slats. These must be parallel to each other. Here you have to calculate the distance exactly.
An example of the distance:
Suppose the mineral wool plates have a width of 62.5 centimeters. Then the battens must be placed at a distance of 61.5 centimeters. In general, you should always choose the distance one centimeter less than the insulation materials. This allows you to clamp the material between the battens. If you choose the distance too large, then the tracks or plates could fall out.
Tip: If it is not possible to choose the desired distance due to the structural conditions, then you can shorten the insulation materials accordingly.
Step 3 - As the sloping roof and floor usually meet at an acute angle, you have to screw a wide strip onto the rafters. This should be about 10 inches wide. Place wooden wedges so that the bar is at a 90-degree angle to the ground.
Step 4 - Now push the stone wool or glass wool insulation boards between the slats. Special attention is paid to the bumps. There must be no intermediate spaces here. Due to the cracks, the under rafter insulation could leak after completion and it would penetrate moisture.
Tip: Push the next plate tight against the previously attached plate.
Step 5 - Check completion if the mineral wool is laid correctly. Pay attention to visible gaps or gaps. Only if the insulation layer is laid correctly, thermal bridges can be avoided. Important is a uniform thickness and a homogeneous installation method.
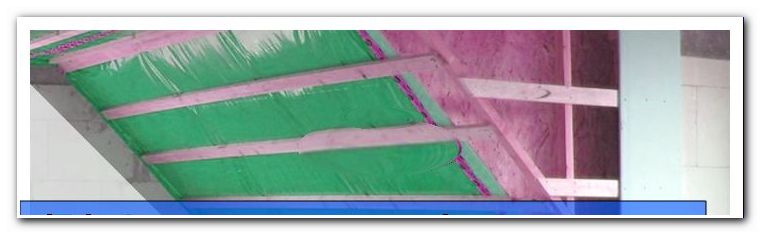
Step 6 - Now attach the vapor barrier film. It is bought in rolls and can be fitted by one or two people, depending on the width. The ideal width for a person is 1 m. Although many rolls have this length, it happens that the tracks are wrapped on the rollers and thus after opening a width of 2 meters is present. In this case, work together for two and align the film web exactly.
Tip: The vapor barrier film should protrude about 10 cm on the fist walls. This is important so that an ideal finish to the wall can be made later.
Tack the foil to one side of the slats. Here it is helpful if a second person keeps the film taut. Now attach the second web and work with a protrusion of about 10 cm. Also on the ceiling, the film should survive.
Tip: Watch out for penetrations in the roof, for example an exhaust pipe. In the specialized trade you receive cuffs, which are to be attached in this case. With the help of adhesive tape you ensure an airtight seal.
Step 7 - Now you have to seal the transitions. First, glue off the overlaps of the films. Use a special band, which is available from specialist dealers. Alternatively, a special adhesive is also suitable for the transitions to the ceiling or wall. It is important that you stick the foil to the wall completely.
Step 8 - Now plank the roof slope. Plasterboard is suitable for this because it can be filled well. After attaching, you'll need to level the joints to create a smooth surface.
Tip: If you want to paint over the plasterboard, you first have to apply a deep foundation.
In addition to plasterboard but also boards or panels are suitable. These can be mounted both horizontally and vertically:
Horizontal:
The horizontal attachment emphasizes the length of the room. First of all, apply a relatively thin additional battens compared to the other battens.
Vertical:
The vertical attachment leads to an optical increase in the room height. In this case, you can start with the attachment directly.
costs
The costs depend primarily on the materials used. On average, expenses amount to € 60 per square meter. They can be broken down as follows:
- Steam brake: 13 Euro per m²
- Insulation: 25 euros per m²
- Visual formwork: 22 per m²
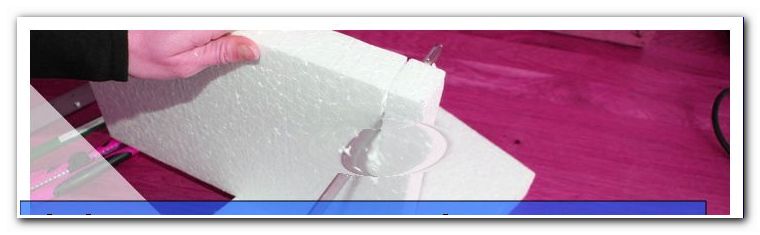
The insulation with Styrofoam
Styrofoam is an expanded polystyrene foam (short EPS or polystyrene). It is a synthetic insulating material, which is applied in the form of plates. It is based on mineral oil or petroleum. This is foamed with the aid of a propellant. The advantages are the good insulation and the long durability. However, Styrofoam is normally flammable, so variants with a higher fire protection are offered on the market. Another disadvantage is that Styrofoam is not sustainable. For environmental reasons, therefore, other variants are preferable. A big advantage is the low price, which is around 5 to 20 euros .
Insulation with rigid foam panels
To realize the under rafter insulation, you can also install rigid foam boards. The basis for this material is the raw material petroleum. There are three different types of plates:
- soft foam sheets
- semi-hard foam boards
- hard foam boards
The rigid foam panels can be subdivided into the categories PUR (polyurethane) and PIR (polyisocyanurate). Both variants have a high thermal insulation. The advantages of PUR insulation are its high elasticity. The PIR insulation, on the other hand, impresses with its particularly good fire resistance.
The advantages of rigid foam boards
- weatherproof
- water repellent
- good insulation properties
- light in weight
- pressure resistant
- low heat transfer coefficient (insulation thickness must be around 10 centimeters to reach a coefficient of 0.24 W / (m²K))
- low price
Disadvantage:
- PUR is flammable
- in case of fire toxic gases occur
- the energy-related effort is very high in rigid foam boards
- From the point of view of environmental protection questionable, since oil is used
The cost of insulation with rigid foam panels is around 10 to 20 euros per m².
frequently asked Questions 


Can and should I install the under rafter insulation in an existing intermediate rafter insulation "> 
In many cases KfW Bank supports the improvement of the energy performance of buildings. You can choose either a low-interest loan or a financial subsidy. It is important to submit the application before the start of construction. If you decide to receive the subsidy, you will be reimbursed 10 percent of the costs if approved. The maximum amount is 5, 000 euros .
Tips for quick readers
- Install rock wool, glass wool, polystyrene foam or rigid foam boards
- Install vapor barrier / vapor barrier
- Steam brake prevents the ingress of moisture
- pay attention to the thermal conductivity coefficient
- pay attention to the environmental compatibility of the materials
- Apply for funding for installation
- pay attention to the fire protection
- can be combined with intermediate rafter insulation