Craft carton - instructions + templates for creative boxes

- Folding box with flower clasp
- manual
- Folding carton in heart shape
- manual
- Tinker sheet folding carton
- manual
You want to wrap a present creatively ">
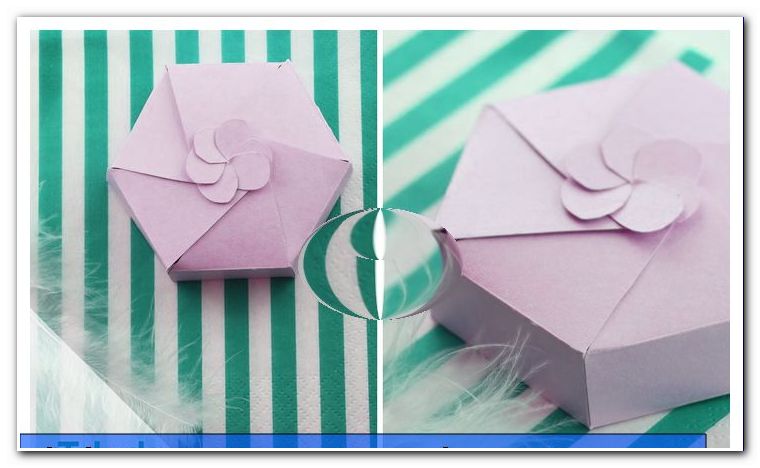
Folding box with flower clasp
This stylish carton pack is perfect for wrapping sweets or jewelry. The design is strongly reminiscent of the Japanese folding art "Origami" - the look is elegant and noble. Below we will show you how to make this carton - lightning-fast and very easy.
You need:
- our template
- printer
- scissors
- pencil
- Tonpapier or Tonkarton
- possibly a ruler
- duct tape
- double-sided adhesive strips
- bonefolder
manual
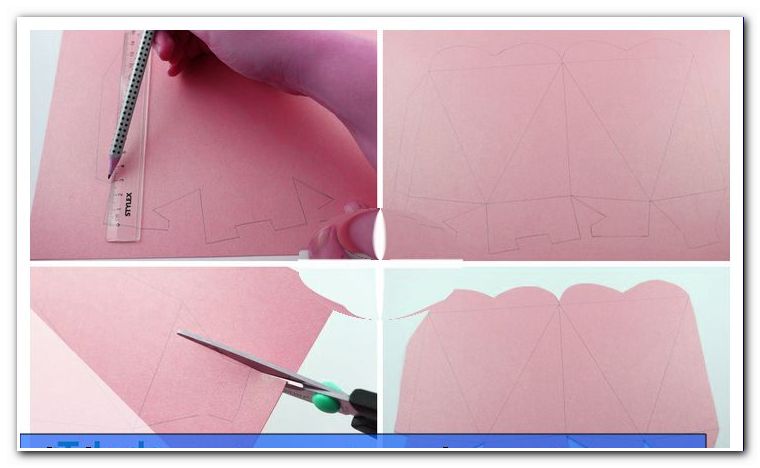
Step 1: At the beginning you print out our craft template.
Click here: To download the craft template
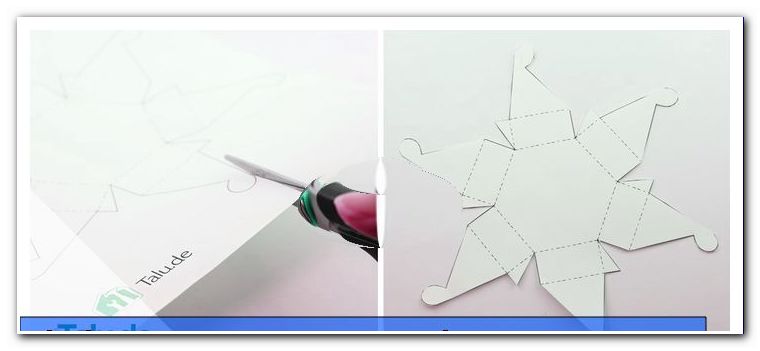
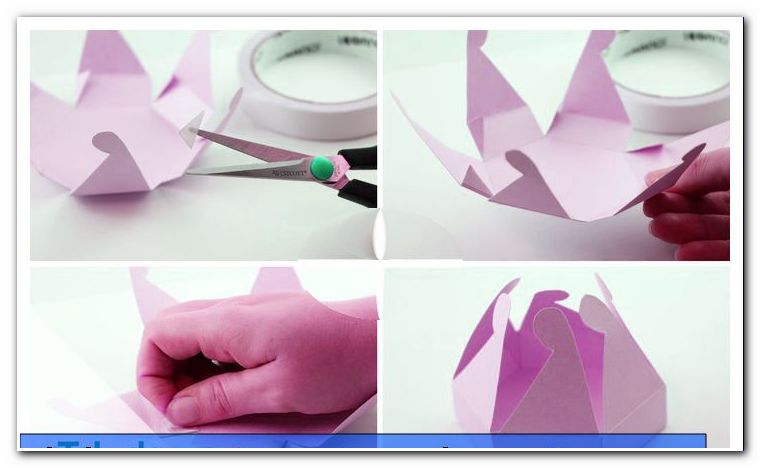
2nd step: Then cut out the template for the folding box cleanly with scissors. You only cut along the solid lines.
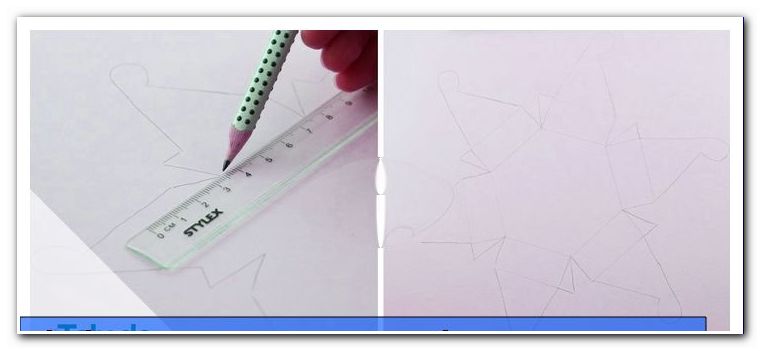
3rd step: Now it gets a bit tricky. Place the template in the middle of the sheet of construction paper - with a piece of adhesive tape you can attach the template. So nothing can slip. Now trace the outline of the template with the pencil. The straight lines can be tightened with the ruler.
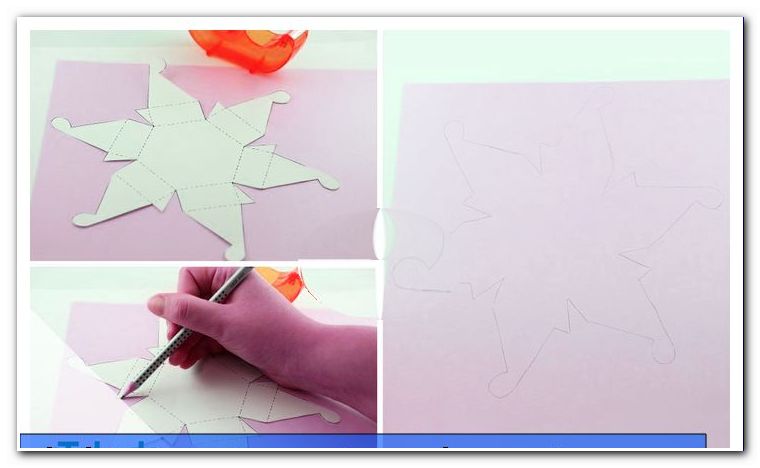
Step 4: Remove the original from the paper. Complete all dashed fold lines with pencil and ruler on the construction paper. The corner points serve as orientation for you.
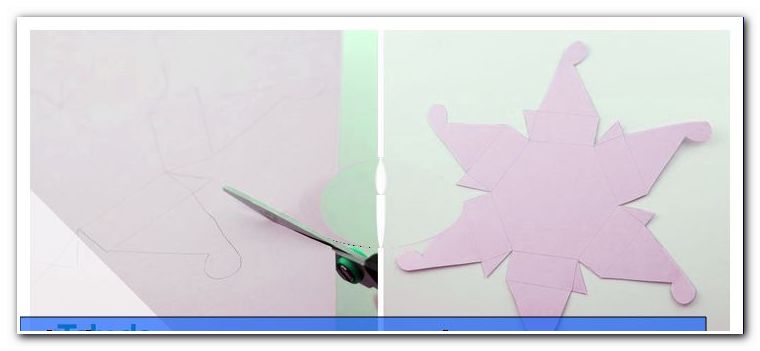
Step 5: Then cut the template again.
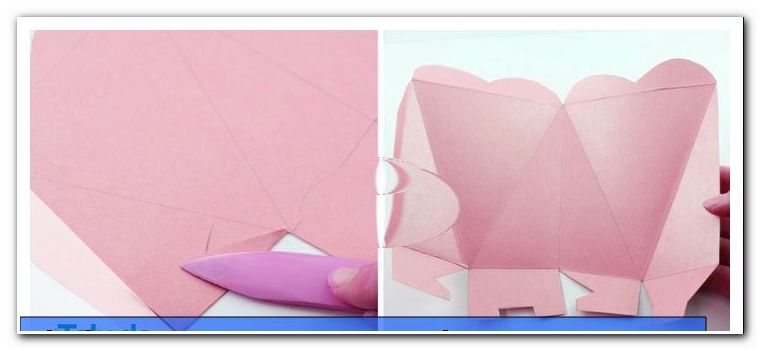
6th step: Now the fold lines are prefolded.

Step 7: Then cut six small triangular adhesive strips for the adhesive tabs. Attach these on the tabs. Then remove the second layer of the strip and glue the box together. The tabs are inside.
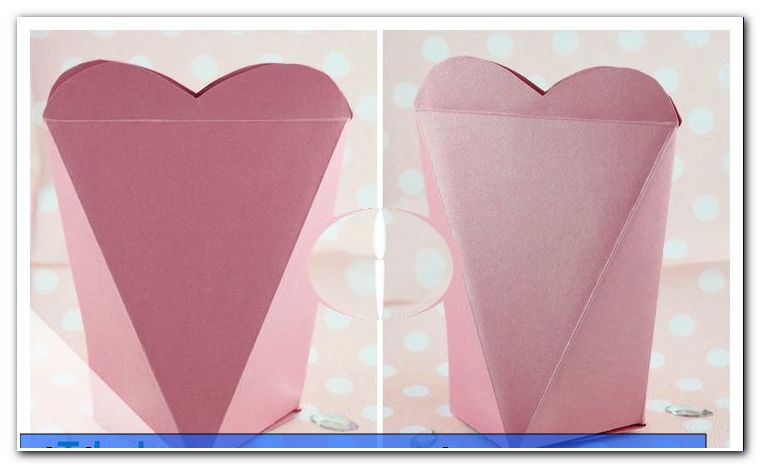
Step 8: Finally, the six lid elements must be closed overlapping one after the other in the middle. The small round hooks hold each other and the lid remains closed - the carton is finished!

Folding carton in heart shape
This romantic heart box can give away to your loved one or, of course, keep. Due to the height of something bigger can be packed in this carton. Again, this design is clear and not too playful. For this reason, the box is a gift for men and women.
You need:
- our template
- printer
- pencil
- scissors
- bonefolder
- Construction paper or cardboard
- ruler
- Adhesive tape and double-sided adhesive strips
manual
Step 1: First you need our crafting template again. This is printed out and cut out clean.
Click here: To download the craft template
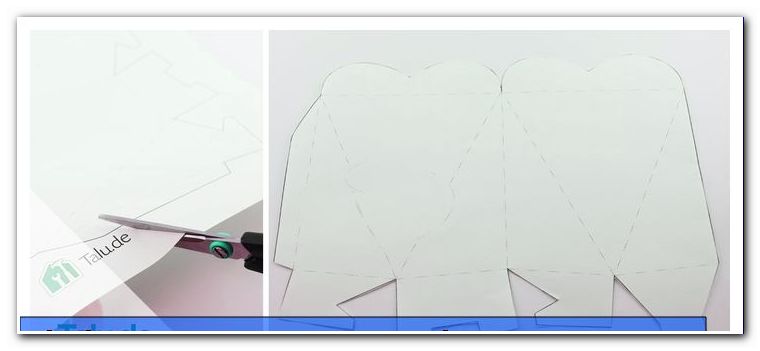
Step 2: Next, attach the template to a matching sheet of paperboard with a small piece of tape. For such cartons is stronger Tonkarton better than conventional printer paper - this would be too thin and too unstable. Now use a sharp pencil to circumvent the outlines of the box.
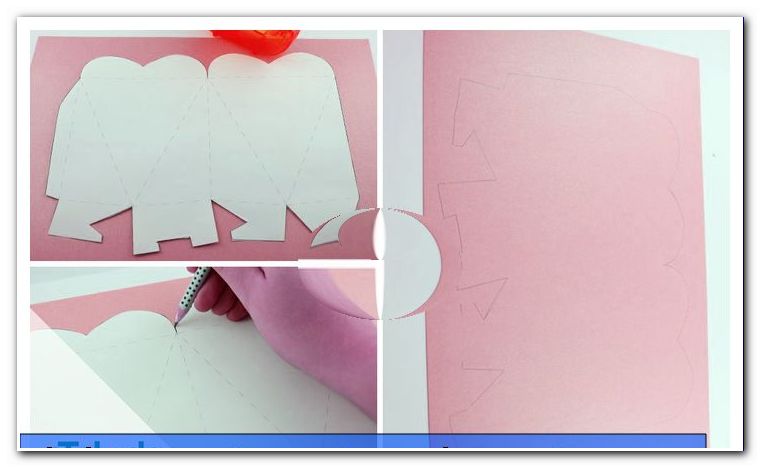
Step 3: After that, the fold lines, which are dashed on the template, are drawn with pencil and ruler on the cardboard. For orientation, take the corner points and connect them with the lines. Then this template will also be cut.
4th step: Now the just drawn lines are folded. Fold the paper so that the pencil lines are inside the box.
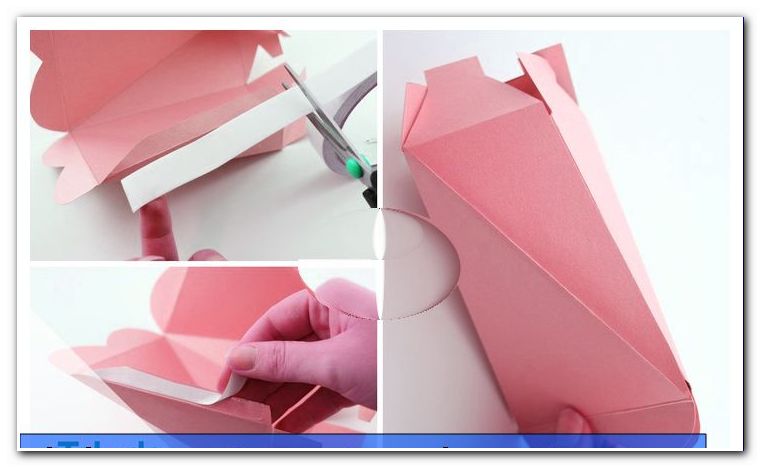
Step 5: Now the carton is already assembled. For this, cut a double-sided adhesive strip in the length of the connecting strip and glue it on. Then remove the second layer of the strip. The tab is now placed inside and the box glued together.
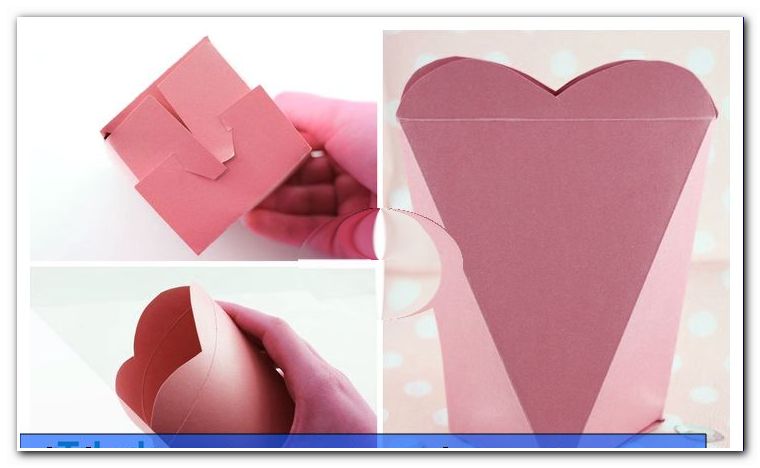
Step 6: Now the bottom of the box is closed. The two opposite tabs are clamped in the opening of the third page. The fourth floor element comes inside - the heart box is ready!
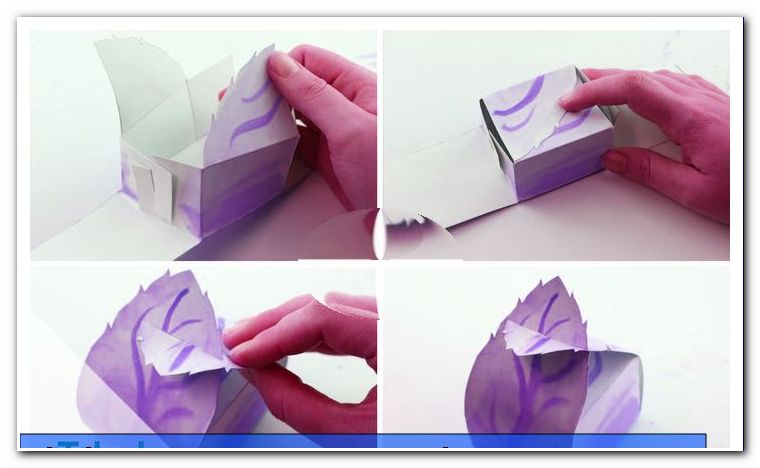
Tinker sheet folding carton
Another great folding box succeeds you - this leaf box is ideal for gifts in the spring and summer. All you need is just a piece of paper and of course our template.

You need:
- our template
- printer
- scissors
- Buntstife or brush and paint
- Tonkarton
manual
Click here: To download the craft template
Step 1: First print out our template, which you then cut out cleanly with scissors.
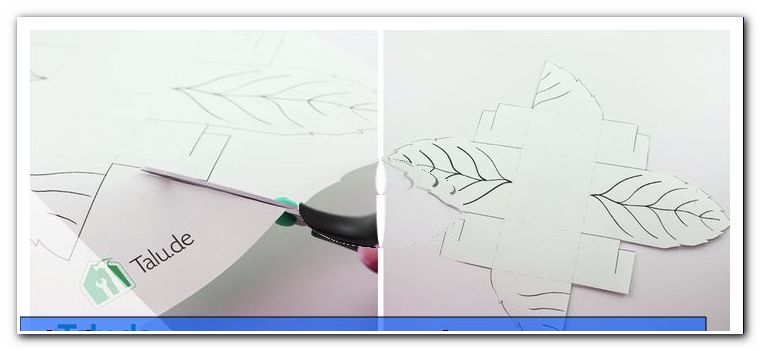
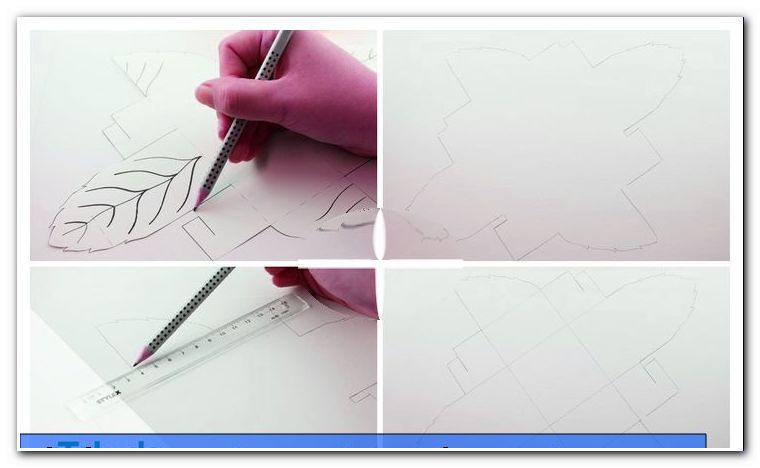
Step 2: The outline of the box is then transferred to the desired box with a pencil. Then also complete the dashed fold lines and the cut lines with pencil and ruler.
Step 3: Now the box template is cut out. Cut all cut lines as well.
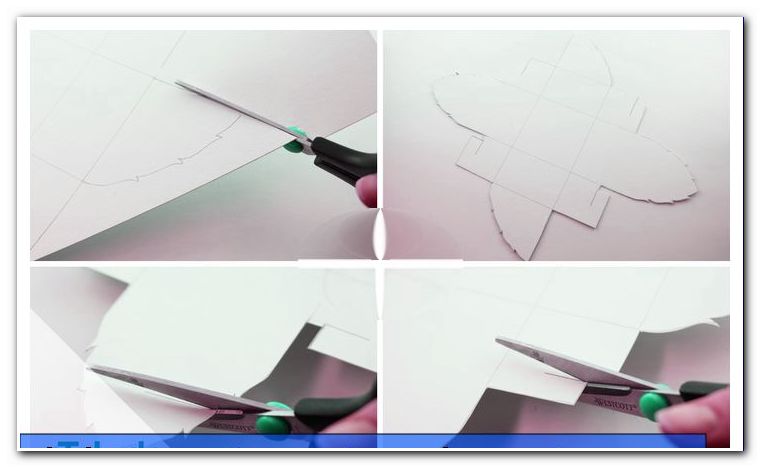
Step 4: Now fold - fold all fold lines. A Falzbein can help you a lot. Thick cardboard can be difficult to fold with bare fingers.

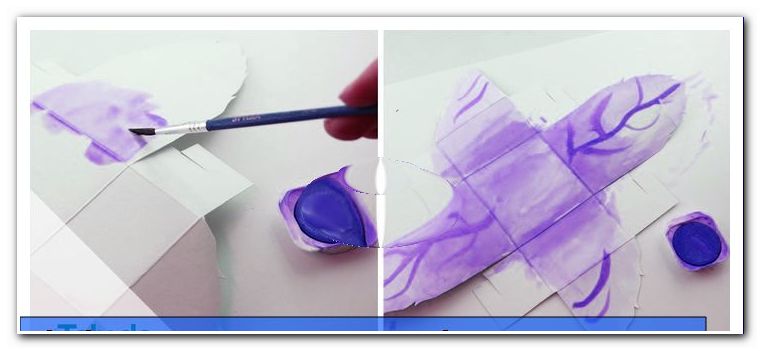
Step 5: Afterwards, the folding box can be painted or decorated as desired.
Step 6: Assembly - insert the small cut tabs into each other at the beginning. Repeat this on the opposite side. Then the two small leaves are folded over each other as a lid. Then you just have to put the two long sheets into each other and the carton is ready!