Set up a home network - set up your own W-LAN network

- Connect PC to the Internet
- Add a printer to the home network
- disorders
- Networking PCs via W-LAN
- Wi-Fi networks: theory and practice
Build your own Wi-Fi networks - exchange data, increase the range of signals or access to a common printer - there are many reasons for a stable and reliable home network. Normally, the setup is easy. We'll tell you how to set up your home network and what to keep in mind.
Build your own Wi-Fi networks
First of all, these instructions refer to the setup of home networks under Win 10. Older operating systems may still be suitable for individual computers. However, XP, Vista, and Win95 computers pose a significant threat in a network. Therefore, the first step in setting up a larger home network is to update the operating systems. This also facilitates communication between the computers.
Connect PC to the Internet
The connection of a PC (this designation is here used synonymously for computer, notebook or laptop) to the Internet happens today very fast and comfortably.
The WLAN router is connected to the telephone socket and to the power supply. There is a number on the back of the wireless router. This is noted.
The PC has either an integrated WLAN receiver or must be connected to an external device. These external devices consist of a USB port, a transmitting and receiving unit and possibly an antenna. They cost 8-15 euros and are simply plugged into the USB port. A WIN10 computer automatically installs the devices.

When the router signals that it is sending a WLAN signal, the PC searches for the signal. The router displays the connection to the Internet with an LED. Exact information is given in the manual of the router.
On the PC you will find the network settings under Start -> Settings -> WLAN
Alternatively, to the right of the speaker icon is the send / receive icon for the wireless connection. Double-clicking the icon will take you to the Network and Sharing Center, which will display all available WLAN ports. If that does not work, the browser will start. If he can not connect to the Internet, he will report it and offer a link to the Network and Sharing Center.
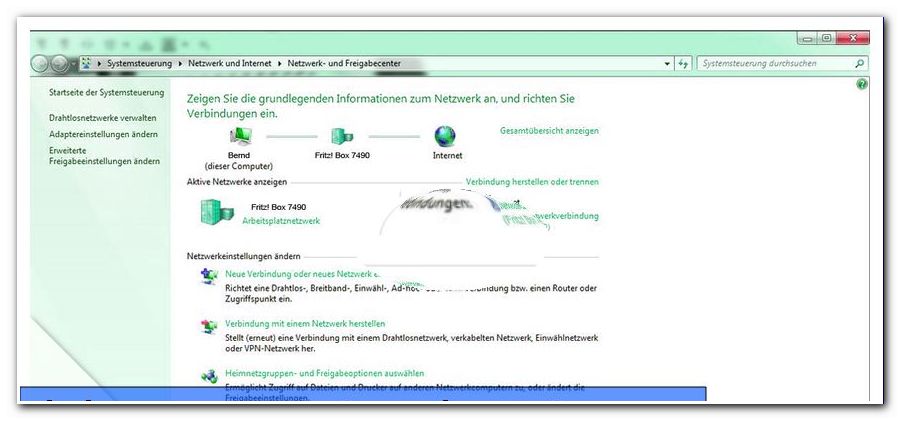
Now you choose the wireless connection, which has the same name as your own router. Do you have a Fritz! Box 7490, this is exactly what you see. A double-click on the own router leads then into the attitudes. There the password is entered. This is the multi-digit number, which is printed on the back of the router. The number is always given in full length with all symbols. After launching the browser, the vast world of the Internet is available.
This can be repeated as often as you like, depending on how many Internet-enabled devices are used in the house. These include the smartphones.
Tip: With a WLAN amplifier, the range of the signal can be significantly extended. These devices are set up on the router and then distributed anywhere in the house. This guarantees the security of supply with a W-LAN signal, no matter where you are.
Add a printer to the home network
The laptop has displaced the stationary PC in many households. It's just more practical to carry the calculator with you instead of just working from one place. In contrast, a printer needs its place. Ideally, this is near the router as the printer is connected to it by cable. For current printers, this is done with the normal USB printer cable (square port on the printer) and the USB port on the router.
Now the printer has to be found by the PC. To do this, call up the page "//fritz.box" on the PC in the browser. In the Settings menu, the printer now appears under USB Devices.
Tip: Update the IOS FritzBox regularly. A message will tell you when a new version is available. This effectively prevents disruptions in the network.
The printer is now recognized by the PC. In the Control Panel-> Printer the device is displayed with name and symbol. A right-click on the printer icon leads to the "Properties" menu. There, the check mark in "Activate bi-directional connections" is deleted. With "Connections" the "Standard TCP / IP" port is selected by "Add". After selecting "New Connection", click on "Next" to proceed to the next step.

For "Printer Name" or "Printer IP Address", enter the address displayed in the Router menu (from the browser side of the Router). Then click on "Next".
The "Additional port information required" window opens. The round window contains the item "User-defined". There, click on "Settings". Under "Protocol", "Raw" must be activated and "Port number" must be 9100. With OK -> Next -> Finish -> 2 × Close and OK again, the printer setup is completed.
This procedure is repeated with each PC connected to the home network. Then all family members can access a central printer.
disorders
When operating networks, there can be many problems on Windows. The sudden loss of network connection is a typical case. The connection is interrupted moment by moment and, luckily, can only be restored manually. There are many reasons for this. The simplest approaches are:
- Check cable connections
- Switch the router off and on again
- Turn PC off and on again
- Check network connection, if necessary assign a new password
A common mistake is a bit hidden but still easy to lift:
If the properties of the network indicate a missing IP4 connectivity, it is likely that a security feature has been enabled. These are found as follows:
- "Open Network and Sharing Center"
- Double click on "wireless network connection"
- Click on "Properties"
- Tab "Power Management"
- Check mark at "Computer can switch off device"
The led by the computer itself led separation from the connection is thus prevented. In most cases, the IP4 connectivity and thus the connection to the Internet are permanently stabilized.
Networking PCs via W-LAN
Exchanging files, sending short messages or playing games together on the network - there are many reasons for having your own home network. Under Windows 10, the networking of some computers in the common Wi-Fi home network unfortunately only seems to have become particularly easy.
1. Start Network and Sharing Center
In the sharing center you will find the keyword "homegroup" under "See also". This entry is clicked. Now if the message "Can not connect to this computer" comes, just follow the instructions. By clicking on "Change network address" comes the query whether the PC can be found in the network. Answer this with "Yes", then the PC is ready for networking.
Ideally, this will be done with all (at least two) PCs connected to Wi-Fi networking.
Then click on "Create homegroup". This is followed by a query to which should be accessible. By default, the "documents" are excluded, but this can be changed by clicking on the scroll down menu.
With "Next" a window is opened, in which a password is indicated. This must be noted well. Tip: Take a photo and send it to yourself by email. So you can find it again quickly.
However, the password can be changed at any time in the menu item "Homegroup" -> "Change homegroup settings".
In the next PC, which is to be connected to the home network, is now in the Sharing Center at "homegroup" the entry "available to enter". This is clicked.
The network is displayed with the username and outlook address of the owner. After another note, which is confirmed with "Next", you get into the connection menu. There, the previously specified password is entered. The PCs are now starting to communicate with each other via the WLAN connection.
Wi-Fi networks: theory and practice
However, what sounds so simple in theory often fails on the first try. The reasons for a failure to connect two PCs are Legion. The reasons for this all listed here is not possible. If the network connection does not work the first time, a lengthy research and trial is usually indicated. Reasons for a denied network connection may be due to setup errors, out-of-date drivers, or over-firewall firewalls. Although Microsoft also offers a "fixit" tool to download, but this does not always lead to the desired result.
Home networks in 2017 no no-brainer
Setting up home networks is unfortunately not possible in the latest generation of Windows operating systems. It may be understandable that when connecting multiple PCs high security functions must be set up, but at least a valid help should be given. However, any diagnosis and help research on the part of Microsoft usually leads to no result. However, the on-site local PC service provider is usually well-trained for such problems. Before investing a lot of time and effort into troubleshooting, it is better to seek professional assistance. This saves a lot of time and above all frustration. The look over the shoulder at the work of the service provider is always advised. The solutions are often surprisingly easy and it feels good to be able to help yourself next time.