Sewing Hair Band - Sewing Pattern + DIY Instructions for Headband / Hair Ties
- material selection
- Amount of material and the pattern
- Instructions: Sew hair band
- Instructions: Sew hair tie
- Quick guide
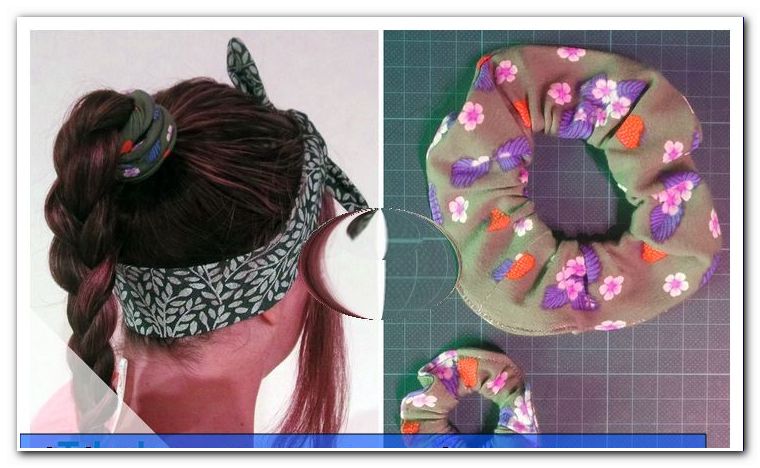
Hair accessories, such as hair tie or hair band, you can easily sew yourself. In our DIY guide, we'll show you how it's done.
Quick and easy to self-sewn hair jewelry
For little and tall long-haired girls, there is nothing more practical than a hair accessory that not only looks great, but also keeps the hair out of your face. Many have fun with it, if he still fits the newly sewn skirt. That's why I'm showing you today how to quickly and easily create your hair jewelry yourself.
If you have discovered the beautiful sewing for yourself, you quickly realize that there are always scraps left over. Of course, since the different motives are chosen with love, you do not want to dispose of these leftovers easily. So the question is getting more and more, what you could actually make everything out of it. Here is my contribution to the meaningful remainder utilization: A guide for a hair band and two hair ties.
Difficulty level 1/5
(suitable for beginners)
Material costs 1/5
(EUR 0, - from the remainder utilization, possibly EUR 2, - for 1 m rubber band)
Time expenditure 1/5
(including pattern all three parts together about 2 h)
material selection
The hairband can be made of solid fabrics such as woven cotton fabric. If you want to sew it out of jersey, you should shorten it by a few centimeters, so that it is not too long due to the elasticity.
In principle, you can choose any type of fabric for the two hair elastics. In my tutorial, I decided on cotton jersey, so that I can make meaningful use of the fabric scraps of my tutorial on the circle skirt. In addition, you need some rubber band for the hair elastics.

Amount of material and the pattern
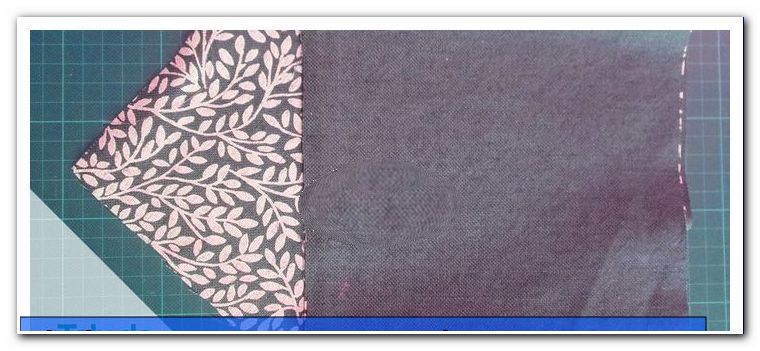
- Hair band: a piece of fabric measuring 80 x 20 cm, the 20 cm being the height and the 80 cm being the length (choice of subject)
- Big hair tie: a piece of fabric with the dimensions 10 x 40 cm and a rubber band with a length of 18 cm
- No hair tie: a piece of fabric measuring 5 x 25 cm and a rubber band measuring 10 cm in length
Note: A custom allowance is already included in all patterns!
Instructions: Sew hair band
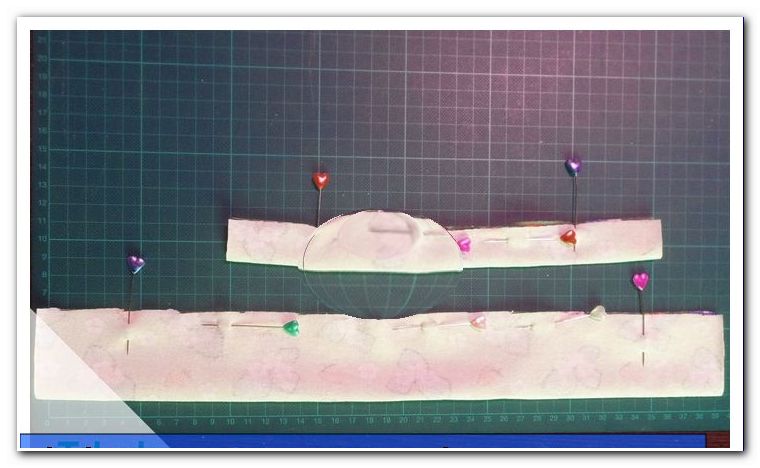
Fold the fabric for the hair band in the middle once longitudinally and once across, so you have four layers of fabric in front of him. Mark a distance of 12 cm from the open end and then draw a bow. Then cut along this line through all fabric layers.

Tip: If you are still a beginner, you can fix the four layers of fabric with pins before cutting them.
For fabrics that fringe heavily: please finish everything! Fold the piece of fabric back on and then back together in the middle. Mark in the middle a turn-around of about 10 cm and put the edges together to the tips. Now sew both layers together. If you are sewing with a normal sewing machine, use a simple straight stitch and sew at the beginning and at the end.
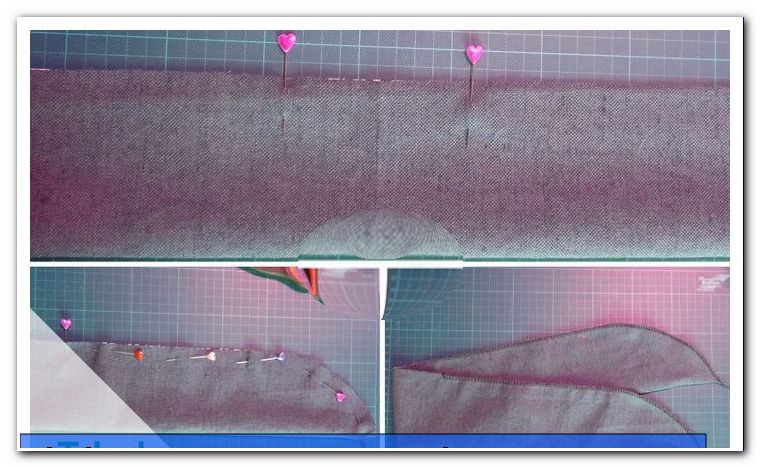
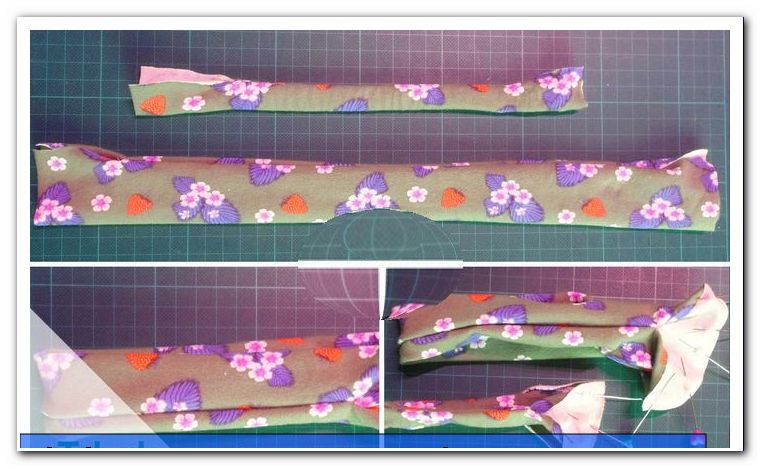
Tip: In a normal stitch, it may be advisable to cut the seam allowances in the sheets to about 2 mm, so that the tips can be formed more beautifully after turning.
Now apply both sides and shape the tips beautifully with feeling. You can do this with a pen, scissors, or other suitable object. Then iron the tape into shape. When turning, fold the edge inwards and iron firmly. Close the turning opening by stitching with a straight cut (in a suitable thread color). Lock your seam at the beginning and at the end.
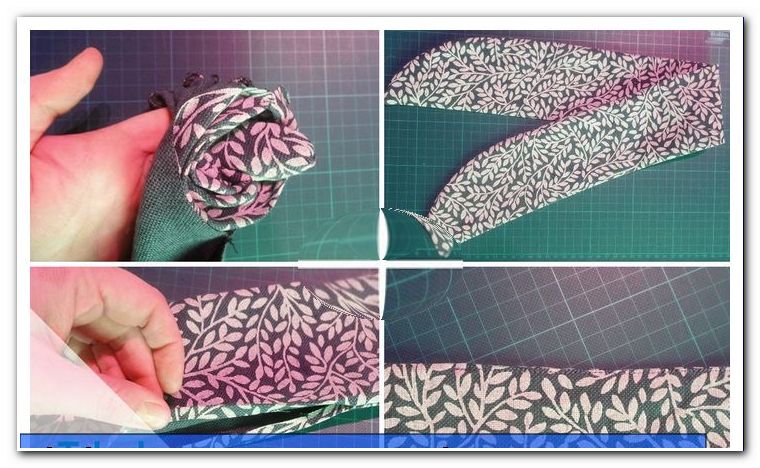
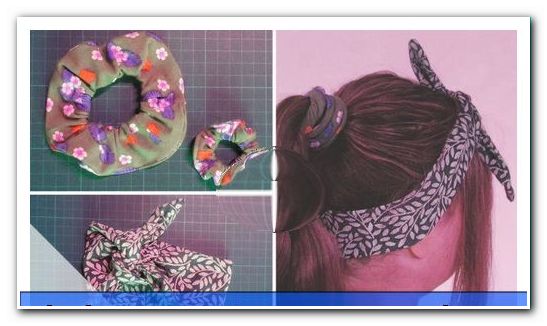
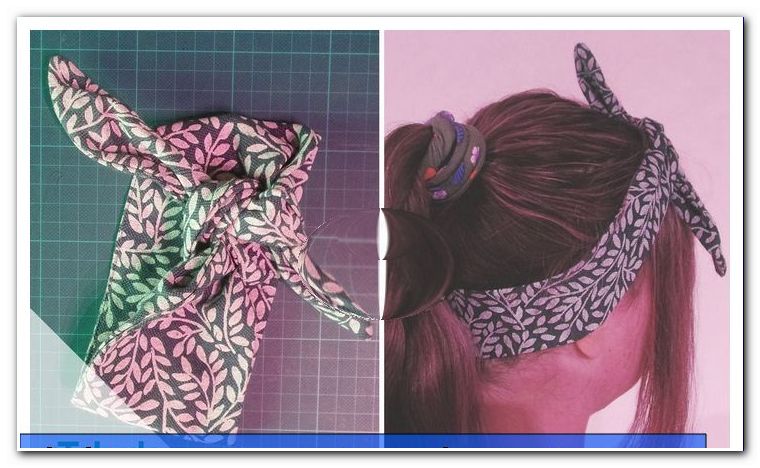
And the hairband is ready!
Instructions: Sew hair tie
(this guide is for the big and the small hair tie alike)
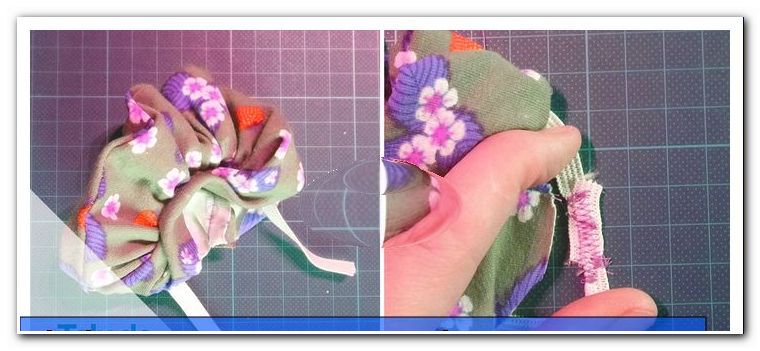
Lay the cut piece of fabric with the right (ie the "nice") fabric side facing upwards. Fold up the lower edge and insert it firmly. Mark right and left respectively a distance of 5cm to the edge (for example with a pin).
Now stitch the intermediate part with a simple straight stitch and your usual seam allowance (between 0.5 and 1cm). Apply the resulting tube (it quickly goes with a safety pin) and fold it in the middle so that the seam is visible on the outside. Open the tunnel on the tops and then insert the two side edges right to right on each other. Then top the two layers with your usual seam allowance and a simple straight stitch.
Now the rubber is pulled in. For the larger model, you can use a ballpoint pen by attaching one side of the rubber to the fabric with a pin (to prevent it from slipping) and knotting the other end to the ballpoint pen. The smaller model is easier with a safety pin. To do this, again attach one side of the rubber band with a pin to the fabric, through the other end insert the safety pin.

Pass the rubber band through the tunnel and then carefully loosen the aids. Overlay the two ends and sew them together with a simple straight stitch (with stitching). Now you can test if the length of the rubber band fits. If it is too long, you can cut it even more, otherwise sew the two rubber band ends together with a zigzag stitch so that they do not come loose. It does not matter if that does not look nice and the color does not fit, as the rubber band will just disappear completely into the outer shell. It's just important that it holds up well.
Fold the edges inwards on both sides of the "turning opening" (beginners can also iron them on) and stick them firmly in place. Close the opening. You can either sew it by hand with a ladder stitch (as described in the spelled pillow tutorial), then you will no longer see the seam, or you will sew on it with a simple straight stitch over it and sew the beginning and end. No one will notice this when wearing, so I chose the faster machine variant.
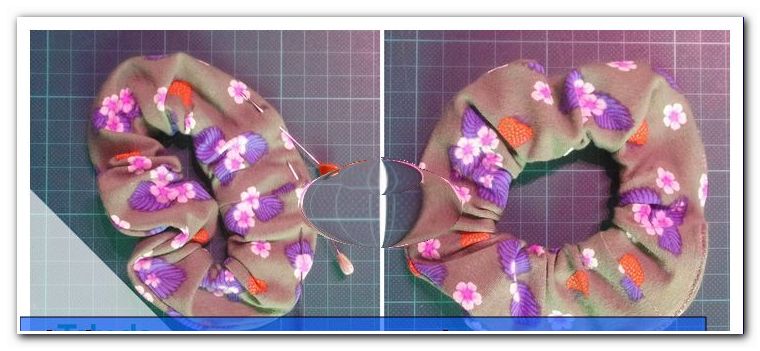
And the two hair ties are done!
Quick guide
1. Pre-cut fabrics and rubber bands
2. Fabric for the hair band "taper"
3. Fold longitudinally, mark turning opening, topstitch (if necessary shorten seam allowances)
4. Turning, forming corners, ironing in form, closing turning opening
5. Fold up the material for the hair ties centrally
6. Stitch together (leave 5cm at each end) and sew
7. Turn "Tunnel"
8. Sew ends together right to right
9. Pull in the gum, topstitch, try on, shorten if necessary, otherwise sew very well
10. Close "turn-around opening"
11. Done!
The twisted pirate