Sew Maxi skirt - free instructions incl. Pattern

- Material and preparation
- The pattern
- The material selection
- Sew maxi skirt
- variations
- Quick Start Guide - Sew Maxi skirt
You can always wear long skirts. They look elegant and hide a bit, which is very convenient for me. In addition, are also quite comfortable and so versatile: whether in winter for vernissage or in summer on the lake worn over the bathing suits, a maxi skirt always fits.
When it gets warmer outside, I also like to wear skirts, but often the wind is still too cool or I do not want to show off my white legs yet. Again, a maxi skirt is ideal. It just fits anytime you choose the right material.
Today, I'll show you how to sew a light, airy maxi skirt for the transitional period. If you prefer to sew a warm winter skirt, just change the material as recommended.
Difficulty level 1/5
(this pattern with a pattern for a maxi skirt is suitable for beginners)
Material costs 1-2 / 5
(depending on choice of fabric and size per skirt about 10-40 Euro)
Time required 1.5 / 5
(depending on experience and accuracy without pattern about 60-90 min per maxi skirt)
Material and preparation
The pattern
I'll show you today a very simple pattern for your maxi skirt in A-line form. I like to put on long skirts down so I can handle it well, I do not like it so much. How wide it gets down is a matter of taste. Everything is possible right up to the circle skirt. I take, as today, usually at least twice the width of the hip. We now draw this pattern together:

First measure your hip circumference. Mine is at 110 - 111 cm. So I have a little "air" and the skirt is not too crisp, I still add 1-2 cm. This is my new hip circumference 112 cm (which corresponds approximately to a purchase size between 44 and 46).
Then measure barefoot from floor to hip. That's 90 cm with me. As in the pattern then also equal to the seam allowance included, because I do not want my skirt when walking on the ground.
The front and back of the skirt will be the same and I will cut the pattern in the break, so I need now a quarter of the hip circumference, which are 28 cm, plus seam allowance, which are 29 cm for the upper skirt width. Below is my skirt about twice as wide. I have here 58 cm plus seam allowance, so set 59 cm. These two points I draw for my pattern 90 cm apart and connect them to a slope. So the skirt is cut twice in the break. Once for the front and once for the back.
Tip: If you are using a motivic fabric, make sure that the subject does not later stand "head, " but points in the right direction.
The material selection
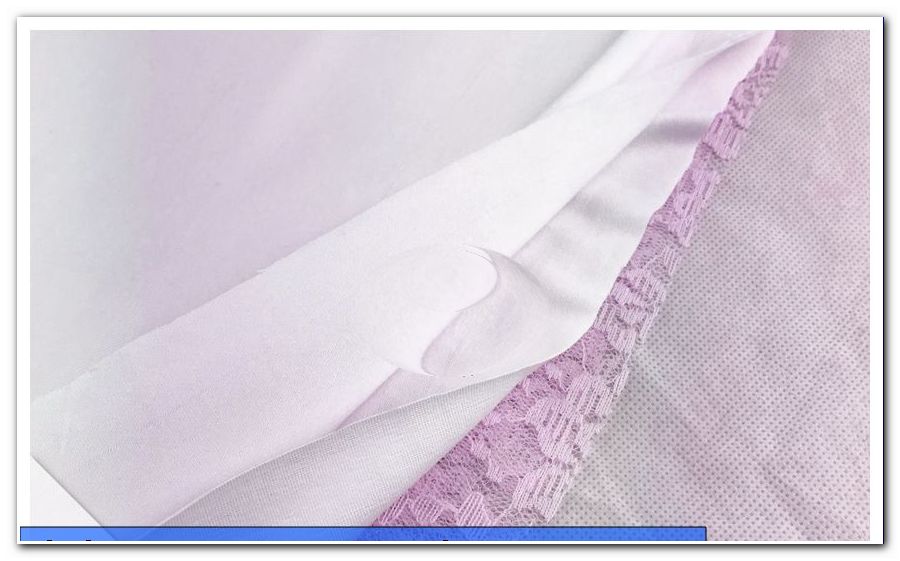
I opted for a maxi skirt made of creamy, stretchy lace. This is transparent, so I will feed the skirt. For this I use single jersey made of viscose, because on the one hand this material is also light and airy, on the other hand it is also very "slippery" due to the viscose and the two skirt parts will definitely not stick to each other. For the inner skirt I cut the cut part as well as for the outer skirt: once for the front and once for the back.
For a warmer maxi skirt I would take jacquard sweat, sweat or french terry (summer sweat) as these fabrics are very soft and nice to fall on. If necessary, you can also feed here, so that the skirt later does not "stick" or "crawl up" on any pantyhose worn underneath.
Sew maxi skirt
Now cut all four parts of the skirt (or two if you do not feed your skirt). Fold the skirt parts of the outside skirt apart and put them on right to right (ie with the "nice" sides together). Sew the two side seams together. Likewise, go for the inner skirt.

Tip: For stretchy fabrics always use a stretchable stitch. If the stitch is straight and you stretch the skirt along the seam, the thread will break and you will be standing "outdoors". For stretchable fabrics, therefore, you usually take at least a narrow zig-zag stitch. There are also special stitch types for stretchable fabrics, these vary from machine to machine. Please read also in the manual!
Iron over the seam allowances to allow the fabric to settle, then iron the seam allowances apart. Repeat these two steps also on the inner skirt.

Climb in the skirt and hold him at hip level. Mark the desired length at the bottom of the hem. Ideally, someone can help you with this and attach pins to the hem while you stand upright to make the hem edge straight. For this step, please also put on those shoes, which they will usually wear to the skirt.
Pin the hem with pins and then sew it tight. A good guide is 3-4 cm from the edge. If the folded part is too wide for you, simply stitch a bit further towards the edge and then carefully cut back on the excess fabric.

Iron the hem straight nicely straight.
Tip: With woven fabrics, the hem edge is folded twice, ironed firmly and then seamed by hand so that you do not even see the seam from the outside. Of course, you can still stitch with the machine if you want. A double impact is still recommended, because it just looks neater. In addition, webbings should be preceded before (so lined with a wide zig-zag stitch, so it does not dissolve).
For the upper part I would like to attach a cuff made of the material of the underskirt. This simply brings the greatest comfort and is also sewn quickly:
Measure the hip width of your finished skirt and calculate this amount times 0.7. For me it is 60 cm, so 42 cm new plus seam allowance. I like high cuffs because I can adjust the skirt length so much better. (If necessary, the cuff is simply beaten down and thus halved.) For a final height of 15 cm I need for the cuff 30 cm plus seam allowance, since it is sewn in the break. Thus, I cut a piece of fabric measuring 44 x 32 cm.
I put the two short sides together right to right and sew them together again with a stretchable stitch to form a ring. Then I iron out the seam allowances. I fold the cuff lengthwise left to left, starting at the seam allowance. I use four markers with pins (always a quarter of the circumference). Likewise I mark the quarters on my two skirts.

Tip: Beginners should sew the two open cuff edges within the seam allowance with an elastic stitch in so many layers. For two-ply skirts, these two plies can also be sewn together on the hip side within the seam allowance.
The individual layers are as follows:
At the bottom is the inner skirt with the right side up, on it comes the outer skirt, also with the right side up and on the outside comes the two-ply cuff. All open edges point in the same direction.

The four fabric layers are put together at the four marked points.
Since the cuff is shorter, it must be stretched continuously during sewing. Beginners therefore like to make additional markings for ease, so that not so long distances between the pins are to be bridged.
Now sew all four fabric layers together while stretching them until no more wrinkles are visible. Depending on the material, it is still nice to kick off the seam allowance from the outside.
And my new maxi skirt is ready!

Have fun sewing!
variations
Of course you can also sew all opaque fabrics without a petticoat, then your new maxi skirt will be finished even faster!
A popular variant in combination with lace fabric is also to sew the petticoat to just above the knees and to expose him a little less down, so you can see through the legs.
I think there are far too few skirts with pockets, so here is the tip to attach seam pockets. Detailed instructions can be found in my tutorial on sewing a wrap skirt.
Especially with two-ply skirts, there are still many ways to aufhübschen the maxi skirt. In addition to applications or plots or embroidery patterns on over- and underskirt, the upper layer can be gathered from below and sewn. This can be very great effects.
Even a contrary pattern under a transparent outer skirt can be very interesting, since the two layers are not fixed to each other and so can move.
Sewn details like little bows, stitches, flowers and a lot of glitter are very popular with little girls. For self-sewn flowers to apply, you will find a tutorial in my tutorial for the 3D application here. So you can use even your smaller scraps still useful and miss any garment still the special something.
From this pattern you can of course also sew short skirts. Simply adjust the length to your liking. For narrow, tight-fitting skirts, this pattern is not suitable for a maxi skirt. In addition, these are then usually sewn from woven fabric with lining material. In this case, a bunch processing with closure and darts must be scheduled.
Quick Start Guide - Sew Maxi skirt
1. Draw patterns for the maxi skirt
2. Trim everything, taking into account the seam and hem allowances
3. Sew side seams, iron seam allowances
4. Pin off hem and sew, iron edge of hem
Sew on cuffs
6. Stitch again from outside as desired
And done!
The twisted pirate