Laying and gluing the bitumen welding line yourself - Instructions

- Methods for gluing
- Instructions for the combined installation
- 1. Preparation and purchasing
- 2. Self-adhesive welding tracks
- 3. Stick bitumen welding sheets
- Instructions for gluing with cold glue
- 1. Preparation and purchasing
- 2. Pre-painting of the roof
- 3. Bonding of the webs
- Old methods for the bonding of bitumen
In order to seal a flat roof yourself or to occupy it completely with bituminous membranes, there are different ways. The normal method, as it were, is the laying of bitumen welding sheets, which are bonded to the substrate by heat. Another method is cold bonding or cold self-adhesive bonding. However, these two variants are often very effectively combined. Here are the instructions for your roof.
The bitumen welding line is glued to the burner, which costs time. The material, however, is considerably cheaper than the self-adhesive variant. If a combination of the two modes of operation is provided, often first a cold bond is applied as the lowest layer and then completed with a second layer of the welded bituminous sheet. Since the cold adhesive strip is significantly more expensive than the bituminous welding strip, which you have to glue to the burner, you as a home improvement, where it does not depend on the hourly wage, decide for yourself whether you would rather carry out the complex and time-consuming variant of welding.
You need this:
- gas burner
- broom
- scrubbing brush
- hammer
- Cuttermesser
- gloves
- mouthguard
- Bitumen sheet
- self-adhesive welding track
- Bitumen primer
- cold adhesive
- Turpentine / synthetic resin thinner
- galvanized roofing nails
- gas cartridge
Methods for gluing
Since the combined bonding of welded and self-adhesive bituminous membranes is used particularly frequently, we want to show them here in the first manual. In addition, this type of roofing still offers some additional benefits. If the first layer of the bituminous layer is applied as a cold self-adhesive strip, it is possible to work directly on heat-sensitive insulation materials without additionally applying an intermediate layer.
With the burner method many roofs have already burst into flames for exactly this reason. It was not just do-it-yourselfers who made this mistake, but very often it even happens to professionals who deal with matter on a daily basis. The cold glued liner is still a bit of caution, but the bond is no longer such a fire hazard. 
In addition to the cold self-adhesive strip and the hot-bonded bituminous membrane, there is another solution. This very safe method works with cold bitumen glue sold in buckets. What you should pay attention to when laying this special product, we have compiled once in the second manual. There are two other ways in which bitumen welds can be applied and glued by professionals, but these are hardly used today. We have therefore listed these variants at the bottom of the two instructions for the sake of completeness.
Methods of bonding bituminous membranes at a glance
- Hot glueing or welding
- Self-adhesive bitumen sheets
- Gluing with cold glue
- Gießklebeverfahren
- brushing
Instructions for the combined installation
1. Preparation and purchasing
When shopping, you should pay attention to quality. Not only will your roof last longer and be more robust, you will also be able to lay and weld the sheets more easily. When calculating the right amount of welds you should consider an overlap of at least eight centimeters. Before gluing the welding tracks, check once again whether the roof surface has enough slope and is dry. When cleaning the surface, you should also look again before laying the bituminous welding track, whether somewhere a splinter or a nail looks out. These tips would drill through the material as the weld passes and cause a leak.
Tip: In the hardware store, you may already have noticed that the welding tracks, like all rolls with roofing felt, are always vertical, even though lying storage would be much easier. In a horizontal storage, however, the rollers can not roll out later and can even stick together. That's why you should of course also keep the welding tracks vertical.
The torch for the welded bituminous sheet can be borrowed at most hardware stores. However, calculate the fees for a short time, some DIY stores are quite expensive with the loaner, especially if you need several days. For just a little extra money, you can often buy a cheap device yourself.
When calculating the required amount of bituminous welding membrane you should allow for a protrusion of about ten centimeters on all sides of the roof. Here the bituminous membrane is later turned over and nailed with the roof nails. Some roofers stick here but also the tracks. You have to decide this depending on the ground. In the case of a wooden under-roof, nailing or stapling the supernatants is, of course, the simplest solution.
Tip: What you need next to tools and material when gluing a welding track, especially is good weather. The preparation also includes a look at the weather forecast. Wet webs do not stick reliably and you would later need a lot of time to detect a leak.
2. Self-adhesive welding tracks
If you want to use a self-adhesive bituminous membrane as the first layer, you should also pay attention to good quality. The cover layer must be strong enough so that the second layer can be connected to it later. In addition, the adhesive layer of the manufacturer must be specially coated. Start at the side where the slope of the roof ends in the gutter. Here you lay out the first web of self-adhesive bitumen.
Tip: If you roll out the tracks a few hours before and just leave them in the sun, they will better position themselves and can be glued together more smoothly. This applies to all types of bitumen membranes and also to the other bonding methods.

The film on the bottom is then peeled off gradually. Press the adhesive edges particularly firmly with a broom against the underground. The next lane should then overlap about eight to ten centimeters over the first lane. At this overlap, you must glue the web very carefully. The big advantage is, of course, that you can stick these webs directly on polystyrene or OSB boards.
3. Stick bitumen welding sheets
Sticking hot bituminous membranes is a bit more difficult than bonding self-adhesive bituminous membranes. If you want to make both layers from the easier welded bituminous membrane, you should stick together only the overlapping strips of the webs in the first layer. In addition, you should work very carefully so as not to damage the ground or set it on fire by the burning gas flame.

Tip: Nevertheless, you can still slightly dry a slightly damp surface with the gas flame. But be careful and do not let the ground get too warm.
The overlap must be heated with the gas flame until the bitumen melts on the web. You should peck with a stick or similar in the molten bitumen, to check whether it is soft enough so that it sticks reliably. Then press the two lanes well. Do not use tools or clothing that you still need. The impurities of liquid bitumen will not be removed later. The broom used should therefore also be an older model.
While in the first layer only the overlap with the burner is heated, the second layer should be glued over the entire surface. To do this, lightly swing the flame back and forth across the width of the web until the bitumen has become so soft that it sticks. Press the web carefully with the broom. Later, only the edges have to be turned over. These fix either with nails or even easier with the tacker.
Instructions for gluing with cold glue
1. Preparation and purchasing
With cold glue, it is not possible to glue the first layer of bituminous membranes directly onto wood. These must therefore be secured with a tacker or with nails. But cold glue also entails considerably less danger and does not age. For a concrete or screed roof, however, the bonding of bituminous membranes with cold glue is already possible with the first layer.
Approximately one liter of cold glue is required per square meter of surface to be glued. Since this quantity may differ from the individual manufacturers, you should once again check the information and adjust the amount when you buy on the packaging. 
The prices for the cold glue differ extremely depending on the manufacturer from each other. While some manufacturers charge about ten euros for five kilos of cold glue, other cold glues cost more than 20 euros for only 6.5 kilos. Nevertheless, you should pay attention to quality here too. If necessary, you must first research on the Internet, which adhesive has the best quality for your purposes.
2. Pre-painting of the roof
The manufacturers of cold glue recommend painting with a bitumen primer to increase the adhesive strength of the product. The two levels of the roof structure can connect better and more reliably with each other. The primer for bitumen must thoroughly dry before bonding the sheets. You should therefore do this work on consecutive days in midsummer.
3. Bonding of the webs
The cold glue is applied with an old scrubber or a special bitumen scrubber. Then the glue has to be aired for about half an hour in order to dress well later. Again, you should refer to the instructions of the manufacturer again. Now place the cut bitumen sheet on this adhesive surface.  Also pay attention to the overlaps in this variant and additionally coat them with cold glue. Press the webs bubble-free into the adhesive and complain. For this you can use old boards on which you place stones to increase the weight. Do not lay the stones directly on the bituminous membrane, because this will then only be pressed into the adhesive at certain points and it will be able to peel off in other places. Allow the weights to rest on the roof for a few days until the cold glue has completely set.
Tip: The cold glue contains many harmful substances and solvents. It is therefore important that you protect your own health and also wear a mask in addition to the necessary gloves. The remainders of the glue unfortunately have to be brought to hazardous waste. There must be no residues in the environment.

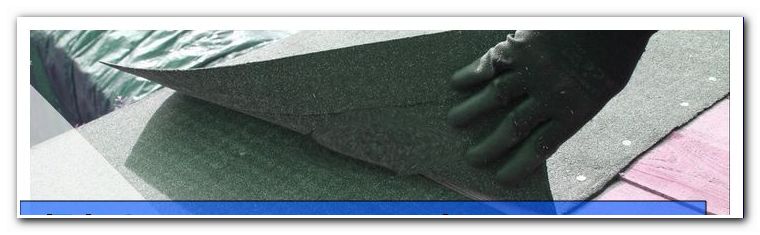
When wearing the respirator wear
Old methods for the bonding of bitumen
In the two old methods for the bonding of welding tracks liquid bitumen is poured onto the ground. In the casting process is then rolled out in the still liquid hot bitumen, the roofing felt. The liquid bitumen poured from a jug in front of the web thus forms a veritable sealing lip at the edge of the web. The brush coating method also applies almost liquid bitumen in front of the web, but with a thick puff or the eponymous brush. Both methods can only be carried out in particularly good dry weather. In addition, they are very expensive and are therefore used by hardly any roofing company today. Nevertheless, these two methods are considered very reliable, since the resulting bead seals the weld line very well at the overlap.
Tips for quick readers
- Prepare and calculate material
- Buying or buying gas and gas burners
- Always store rolls with welding tracks vertically
- Apply bitumen primer for cold glue first
- first layer apply self-adhesive web
- or weld the first layer particularly carefully
- Note overlap of about eight centimeters
- Let bitumen soften sufficiently
- Only use cold glue with mouthguard
- Press webs and overlaps well
- Check bonding
- Turn the supernatants over and nail