Heating valve jams - this is how you change the thermostatic valve

- Components of a central heating
- Troubleshooting
- Bleed the heater
- Thermostatic valve is stuck
- Replace thermostatic valve
- Upgrade heating
- Automatic bleed valve
- Digital temperature controller
- Hydraulic balancing
- Tips for quick readers
If the apartment stays cold - From October you can expect the beginning of the heating season. Now, if the heater is not working properly, action is indicated. A cold heating does not have to mean capital damage. Often enough, only the thermostatic valve is damaged. This guide explains how to repair it.
Components of a central heating
These elements belong at least to a typical central heating system:
- boiler
- cables
- pump
- radiator
- thermostatic valves
- Electronic temperature controller
In the boiler, the water of the heater is heated. The pump delivers the warm water through the pipes that end in the radiators. The thermostatic valves control the amount of warm water that should flow through the radiators. An electronic temperature controller in the apartment finally regulates the entire interior temperature. It consists of a small box with rotary knob or a digital display, on which the desired interior temperature is set exactly.

Theoretically, damage can occur to any of these elements. However, with a systematic approach, it is very easy to find out exactly where the problem lies when the apartment is cold.
Troubleshooting
... with a defective heating system
In the apartment it is cold, even though you have set the desired temperature on the controller ">
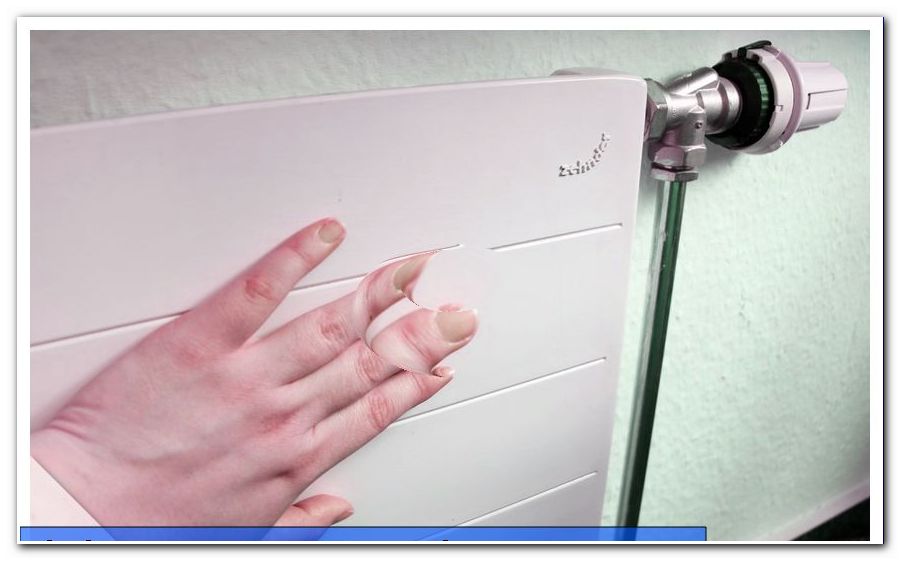
But if only one heater remains cold while the others are working well, then ears are pointed: if there is a gurgling noise when turning on the heater, there is air in the circulation system of the heater. Even if you do not hear a cluck, you can check if the heater only stays cold in the upper area, but heats slightly in the lower area. This also indicates air in the heater. This is an easy fix.
Bleed the heater
You need:
- Heating square wrench (about 5 Euro)
- Bowl or bucket
On the other side of the heater, where the thermostatic valve is located, sits the vent valve . Mostly it is still under a cap. For heaters that have an additional radiant panel or housing, this must still be removed. The disassembly of the case is sometimes tricky.
A little tip: Often a clip or a screw hides under the nameplate of the heating manufacturer.
If the vent valve is accessible, the heater is turned up to the highest level. When the heater starts to warm, go to the vent valve and hold the bowl underneath. Then the valve is slowly turned on with the square wrench. The air escapes and the heater fills with water again. When the water comes out of the vent valve, it will be turned back to - ready. Now only if necessary mount the housing again and the heating is repaired again.

Thermostatic valve is stuck
A thermostatic valve is not a simple faucet but a complex mechanical component. It controls with the help of a bimetallic spring or a gas pressure control unit and a small plunger exactly the flow rate of hot water through the radiator. It is the small pestle that can cause the failure of the thermostatic valve, usually at the beginning of the heating season. However, this does not necessarily mean that the entire valve needs to be replaced right away. In most cases, you can make the thermostatic valve with a few simple steps.
This is needed:
- 1 pipe wrench, ideally with rubber tongs (about 10 Euro)
- 1 tin creeping oil (about 5 Euro, eg "WD-40" or "Caramba")
The thermostatic valve consists of two parts: the rotary handle with temperature scale (thermostatic head) and the spring-loaded plunger.

The thermostatic head is attached to the heater with a union nut. Inside the thermostatic head is the bimetallic spring or the gas pressure control unit . This is fixed and will not fall out when the handle is unscrewed. The union nut should only be screwed on hand-tight. With years of assembly, but she can sit something tight. In this case, it can be easily solved by the pipe wrench. If there is no rubber gripper on the pipe wrench, it can be prevented with the help of a flap that the union nut is scratched by the pipe wrench.

If the thermostatic head is unscrewed, you can clearly see the plunger as a small pin. If he is not recognizable, then he is either broken off or completely retracted and is stuck there. A broken pestle is very unlikely. Normally, the spring pushes the plunger out when the thermostatic head is removed. If it does not come out, it jams or the pen is damaged. As long as you can somehow grab the ram with the pliers, you can still save the valve. It may also help to spray the valve with creep oil and wait to see if the plunger is released. Slight knocking on the valve with a rubber mallet is also helpful here. However, never use a steel hammer, this can damage the thread of the union nut!

When the plunger has come out, spray it again with creeping oil and push it in with the pliers several times and pull it out again. If the plunger is again so practicable that it can be pushed in with the finger and comes out by itself immediately, you're done. Now just mount the thermostatic head. But do not tighten the union nut with the pipe wrench! A strong bond is completely sufficient.
Replace thermostatic valve
However, if the thermostatic valve is so damaged that it can no longer be made passable, an exchange is necessary. For newer heaters is also unproblematic for a layman. For this purpose, look once at the bottom of the heater: If there are two control valves, with which you can lock the inlet and outlet of the heater, then the thermostatic valve can be changed in-house. The inlet valve can also be located directly in front of the corner thermostatic valve. It is opened and closed with a flat-head screwdriver or an Allen key. The set screw is often still behind a protective cap. But if it is such an old radiator that only the floor of the inlet can be turned off, a professional should take care of the matter.
This is needed:
- New, suitable thermostatic angle valve (about 15 Euro)
- Pipe wrench (12 Euro)
- Suitable spanner (sets from approx. 30 Euro)
- Copper brush (about 3 euros)
- Cleaning agent (about 2 Euro)
- Sealing tape (about 5 Euro) or hemp (about 5 Euro in a set with sealing paste)
- Bucket (2 euros)
- Wide slotted screwdriver or Allen key (5 Euro)
The inlet and outlet for the heating is switched off at the control valves. Now the radiator is depressurised and can be opened safely. The thermostatic head is unscrewed from the union nut. Then the angle valve can be removed with the open-end wrench. Before installing the new valve, thoroughly clean the threads on the pipe and heater. The threads are wrapped with hemp or with sealing tape and the angle valve is mounted. Now open the control valves again, mount the thermostatic head and turn the heating fully on. If you hear a cluck, the heater can be vented as described.
Tip: Instead of a normal angle valve you can use a thermostatic valve with adjustable presetting. This costs only a few euros more, but can pay for performing a recommended hydraulic balancing. Read more about this later in this guide.
Upgrade heating
If you are about to overtake the radiator, then you can also think about small improvements. The technology around the heating system is progressing steadily, so that very interesting solutions are available today. These significantly improve the comfort and economy of a heater. It does not even have to be the big investment. Even with small measures, the heating can be significantly improved.
Automatic bleed valve
An automatic vent valve keeps a radiator always free of air build-up. Once installed, manual bleeding is no longer necessary.
This is needed:
- Automatic bleed valve (about 7 Euro)
- Wide slotted screwdriver or Allen key
- combination wrench
- Key for vent valve
- bucket
- cloth
The heater is completely closed on the rotary handle. Subsequently, the process is also closed. The vent valve is opened with the key until the radiator is depressurised, ie no more air escapes hissing. Then it can be dismantled with the open-end wrench, ring spanner or socket wrench.
Automatic bleed valves have a rubber seal so sealing tape or hemp is not necessary. Nevertheless, clean the thread briefly with a cloth.
The automatic air bleed valve has an adjustment wheel. This must be completely closed before installation. It can be recognized by the corrugated surface, with which it can be opened and closed by hand. This wheel is used for additional, manual ventilation.
Now the automatic bleeder valve can be screwed in. It is tightened with the open-end wrench, but only a hand-tight seat should be made. Too tight a suit can damage the seal and in the worst case also the thread!
Then the heater is fully turned on and opened the drain valve. At the automatic vent valve can now leak a few drops that are caught with the cloth and wiped off. Check the replaced valve for leaks and, if necessary, retighten with the open-end wrench. Already one is finished and has a radiator with automatic ventilation for little money.
Digital temperature controller
Retailers today offer state-of-the-art thermostatic valves with digital display and extensive convenience features. Precise control, time settings, boost function for fast heating and much more is possible with these new but surprisingly inexpensive valves. They are simply exchanged for the existing thermostatic head and are ready for immediate use. Prices start at 15 euros each. However, such discouraging products are not recommended, as experience has shown that they can still have major quality and functional defects. A digital thermostatic valve in "Made in Germany" quality is available from about 40 euros.
Hydraulic balancing
Hydraulic balancing can significantly increase the efficiency of existing heating systems. This is especially true in older heating systems, where the size of the radiator has not yet been calculated as accurate as it is standard today.
When hydraulic balancing the angle valve, which belongs to the thermostatic valve, revised. Normal valves can only open or close. In order to adjust the amount of water to the needs more precisely, the actuator is replaced in the angle valve by an adjustable unit. This measure is quickly and easily feasible for a heating fitter and the component costs only a few euros. However, special tools are necessary, which are generally not accessible to laymen. Hydraulic balancing is an overall measure, which is preceded by extensive calculations. A professional implementation is therefore ideally produced by a specialist. An energy consultant and a professional heating engineer with knowledge about the hydraulic balancing, can give information here.
Hydraulic balancing saves between 100 and 250 euros in energy costs per year. The measure costs, depending on the amount of work required, between 500 and 1200 euros. The investment in hydraulic balancing has paid for itself in just a few years. However, very brave do-it-yourselfers can try to do a hydraulic adjustment themselves.
Tips for quick readers
- Thermostatic valves before replacement try to make it workable
- Carry out hydraulic adjustment
- Only use pipe wrenches with protection
- Always use suitable spanner
- Improve the heating with small measures
- Install automatic bleed valve
- Hitch thread properly