Quilling technique - instructions for crafting with paper strips

- Simple quilling butterfly for beginners
- material
- manual
- Pretty blossom of paper strips
- material
- manual
Whether the typical paper flowers, festive stars or cute animal shapes: Per Quilling can be made enchanting crafts that are perfect for decorating. For the big effect you need very little effort - both in skills and materials. In fact, the technique is merely screwing paper strips into multi-faceted little works of art. Two instructions show absolute beginners the way from the butterfly to the magnificent flower.
Quite simply: step by step to the quilling technique!
Granted: Quilling objects look difficult and expensive - so much the better that they are basically very easy to tinker. Provided that the basic technique was once understood and internalized. Our cute beginner butterfly will help you. He prepares you perfectly for the more sophisticated flower, which we will introduce to you step by step in the second manual.

First of all a few words about the main material: In addition to a quilling pen, which is available in every craft supplies for about five euros, you naturally need - and almost exclusively - one: paper folding strip! So-called quilling sets equip you with the pen and numerous pretty colors of said strips. But even without a set, the stripes are easy to get: Either you cut yourself out of cardboard or a similar paper. Or you can use the typical Froebel paper if you have any left over from the last poinsettia.

Simple quilling butterfly for beginners
As with most crafting techniques - and even in life - it is recommended to practice the entry into a new art on a particularly lightweight model. The cute quilling butterfly is wonderful to understand the typical approach of this craft. Once the grips are clear, more elaborate creations can be easily implemented afterwards.
Difficulty: 1/5 (5 is the heaviest level)
Time required: even absolute newcomers should be at their destination in half an hour!
Material costs: about five euros
material
a) 8 paper strips 1 cm wide (length between 30 and 45 cm - the longer the stripes, the larger the resulting butterfly, three harmonious colors to taste) in different colors
b) Quilling pen
c) craft glue
d) alternatively: double-sided adhesive tape
e) optional: Circular template (is included in most quilling sets - alternatively cheap to have in craft supplies)
manual
Step 1: At the beginning, pick up three differently colored strips of paper. Fold these together once in the middle. At this fold, the strips are then cut apart. Now connect three of the six strips at the ends with craft glue. So you get a long stripe, which consists of three colors. Repeat this with the other three quilling strips.

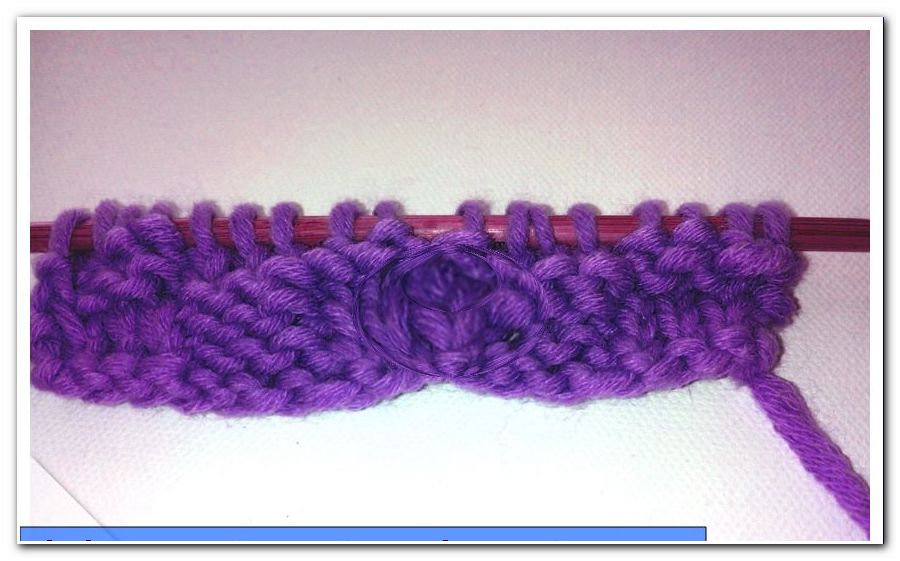
Step 2: Now pass the end of a piece of paper from step 1 through the small slot on the quilling pin. Note that this color will then be inside the quilling circle. Now wind up the strip - you have this rotation after a few times intus. The paper should not be too tight and not too loosely wound up, so that the circle can develop well in the next step.

Step 3: Place the wound paper strip together with the quilling pen in one of the stencils. Release the strip with your fingers to allow the paper to roll. Now pull the quilling bar outwards. In this way, the individual rings shift in the desired direction. Now attach the end of the strip with glue and wait until it has dried. Then you can remove the quilling circle from the template. Then squeeze the circle at the end where the pen used to be. This results in an oval shape, which is best suited for a butterfly wing.

Tip: The circle template helps you to bring both circles to the same size. If you do not have one available, it is sufficient to measure the final diameter of the first circle and use it as a guideline for circle number 2.
4th step: Now proceed with the other three-color strip. Pin the individual elements onto a piece of cork so that the paper does not lose its shape.

Step 5: The two large upper wings consist of a long, white and a long, light blue stripe. Proceed with these wings as well as with the two little ones. Glue the strips together, wrap them on the quilling pin and shape a wing into a template. But this template should be one size bigger than the small ones.
Then you arrange from the four components of your butterfly.

Step 6: Are you satisfied with the sight "> 
Step 7: Of course, the butterfly lacks something more characteristic - its feelers. To make these, cut your last remaining strip once in half with scissors two.
Step 8: Turn each of the two half strips to the middle with the quilling pin. The direction of rotation does not matter. Both copies should of course look as similar as possible. Although a feeler that is a bit more rolled up than its neighbor, it also has a nice effect, depending on your taste.
Step 9: While you take your paper from the pen, do not form a tight circle this time, but relax it a little bit. It creates an open spiral.
Step 10: Repeat steps 7 and 8 for the second sensor.
Step 10: With the open surface - ie where you have not rolled anything - stick each probe in the usual way at the top between the smaller parts of the butterfly. Whether the spiral should show inward or outward is up to personal taste. However, you should opt for one direction - otherwise the butterfly is literally very affected by the wind.

Step 11: Finally, you can stabilize the butterfly by brushing it completely on one side with Bastelleim. Once dried, the butterfly can easily be picked up.

Pretty blossom of paper strips
The more sophisticated of our two quilling tutorials is this paper blossom. But it's worth it! This great little work of art is perfect as a decorative element in the home and, of course, the elaborate decorating of gifts.
Difficulty: 2/5
Time required: between 20 and 60 minutes, depending on skills
Material costs: about 10 euros
material
a) paper strip about 1 cm wide; 45 cm long (three colors - put together according to taste)
b) Quilling pen
c) small plastic clips
d) craft glue
e) tweezers
f) scissors
g) double sided tape (about 2mm thin)
h) glittering stone (diameter about 1 to 2 cm) as a decorative element
manual
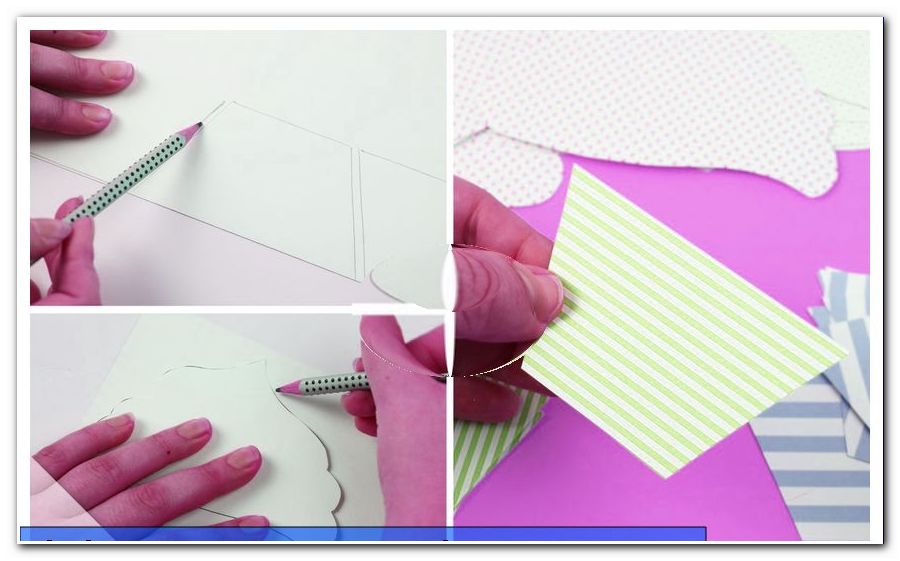
Step 1: First pick up three strips (in the color for the outer leaves - preferably a green shade for lifelike designs) and cut them with the pair of scissors in two.

Step 2: Now there are six "semi-strong" stripes in front of you. Half of that is folded - do not cut, only fold. Immediately fold it up again. The kink now marks the middle and divides the strip again into two: one of these two legs provide you the complete length with double-sided adhesive tape or Bastelleim.
Step 3: Remove the protective layer of the adhesive film. Then fold the non-sticking thigh towards the middle - in the direction of its sticky partner - so that it forms a teardrop shape. Do not kink, but fix it with the adhesive strip opposite, simply place it around the drop and gently press it down.
Step 4: Repeat steps 1 to 3 five more times to finally get six even outer leaves for your flower.

Step 5: Use the craft glue to put the six parts together into a paper flower - with the tips inside. Just attach some glue to the flat sides next to the tips and squeeze them together. With the mini-clips you fix each individual splice.

Tip: Already this very simple flower has a nice effect and could already be used as a finished decoration element!
Step 6: While the previously created work dries, you tinker the flower inside. To do this, take three strips again and halve them with scissors as in step 1.
Step 7: Halve this half strip again - this time only by folding it well, but without really cutting it. Open again and fold both thighs towards the center. Press firmly.
Step 8: Now unfold the whole thing, in such a way that the kinks all point in one direction - preferably all outwards.

9th step: Very close behind each kink, put a small dot of glue from the outside.
Step 10: Now fold each of the four sections in such a way that the empty half moves to the nearest glue point and is fixed in a teardrop shape.
Step 11: If this succeeds, hold a clump of four small drops in your hands. Clamp on the underside with a clamp and let it dry well.

Step 12: Repeat steps 6 through 11 with the remaining half strips until you have formed a total of six tufts.

Step 13: Now it's time to make little rings to decorate the outer leaves. Halve three strips with the scissors again. (A)
Step 14: Cut one and a half more strips into quarters. (B)

Step 15: Take the long strips (A) and fold in half once. Press firmly. Apply a little adhesive on both sides of the closed bottom. With this side you now put each strip in the middle of one of your tufts. Clamp and repeat with all strips (A).

Step 16: Now show two strips of each tuft in the air. Thread one of them into your quilling pen and turn it loose and without pressure to the outside - away from your neighbor. When removing the pen, lightly press the small paper roll between your thumb and forefinger.
Step 17: Repeat the same with the neighbor of the strip just rolled up and with all remaining clumps.

18th step: Then the short strips (B) are on it. These also fold in the middle and thus get as many times two open ends of equal length. With the quilling pen you now roll both ends outwards, until about one and a half centimeters of the strip are left - these remain smooth. Repeat with all strips (B).

Step 19: Glue the resulting parts in the now familiar way between the pieces made from the A-strips, which are clamped in the middle of the tufts. Fix splices again with clips.

Step 20: All that remains is to assemble all parts. To do this, apply glue to the insides of the first created scaffold and then simply place it in each cavity of one of the ornate tufts. You can then carefully fix the adhesive edges with the clamps again.

Step 21: Finally, put the crown on the center. It would be possible to roll up another strip very tight and simply stick it to the ornament in the middle of the flower. Alternatively, take your rhinestone and attach it to the center for a particularly shiny finish. Finished!