Heater Thermostat Change - DIY Guide

- Typical disturbances on radiators
- Air in the system
- A defective thermostatic head
- The heating valve does not work anymore
- Instructions for replacing the heating thermostat
- Step by step
- Instructions for replacing the heating valve
- Bleed instructions for the radiator
If the temperature on a radiator can only be limited or even not adjusted at all, this can have different causes. Either it is the heating thermostat, the heating valve or it is air in the radiator. As a skilled handyman, you can also fix these defects yourself. As an aid, we have created the appropriate instructions for you.
Typical disturbances on radiators
Hot water heating, which emit heat through radiators in the rooms, are among the most commonly used heating systems. The temperature is controlled by the heating thermostat. This rotatable thermostat usually has a scale from "0" to "5", where "5" corresponds to the maximum heating power. In particular, in heating systems that are already several years old, it can always come back to disturbances on the radiators:
- It is a rippling in the heater to hear
- the radiator will only partially warm
- Radiator can not be controlled exactly
- The radiator can not be switched off or can no longer be set to full heat output
- Radiator always stays cold
Air in the system
The rippling in the radiator or a partial heating of the radiator indicates air in the water cycle. Air has collected in the radiator, which now has to be vented.
A defective thermostatic head
On the other hand, if a radiator can no longer or only be adjusted inaccurately, the defect can be found in most cases in the thermostatic head. Due to the mechanical stress that leads to wear. But it is also possible that the heating valve, which is operated by the thermostat, stuck stuck. Under certain circumstances, the heating valve can be made to work again, but it may also be necessary to renew the valve.

The heating valve does not work anymore
If the radiator remains permanently cold, you should first check the other radiators. If these are also cold, the fuse for the heater may have blown out. Switch the fuse back on and then restart the heater. Does not help, you should consult a heating engineer. But if only one radiator is cold, it is either the thermostat or the heating valve.
Instructions for replacing the heating thermostat
Unfortunately, there are no uniform standards for heating thermostats. A new thermostat can often only be bought with the old thermostatic head as a sample. In this case, you must plan to visit a hardware store or a gas and water installation company with the old heating thermostat. If you know the manufacturer of the thermostat clearly, you can, of course, purchase it in advance.
To change the thermostat, you need the following materials and tools:
- a new heating thermostat
- a little creeping oil
- a water pump pliers (if knurled union nut)
- a rag (if knurled union nut)
- a wrench of appropriate size (if conventional nut as a throw)
- a screwdriver, (if old heating regulator, which is secured by a clamp with screw
Step by step
- preparation
Turn the thermostatic head to full heating (with most controls position "5") This relieves the pressure on the pin on which the cylinder is pressed by the thermostat.

- Loosen the union nut
Now you can loosen the union nut. If it is a knurled nut, which may also be chrome plated, place the rag over the nut. Now you can grasp the union nut with the water pump pliers without causing scratches on the mother.

- Remove from the thermostatic head
Once you have loosened the union nut, the heating thermostat can simply be removed. Of course you do not have to drain the water as the thermostat only adjusts the valve pin of the heating valve. Some thermostats snap in additionally, so you can solve them with a slight jerk. 
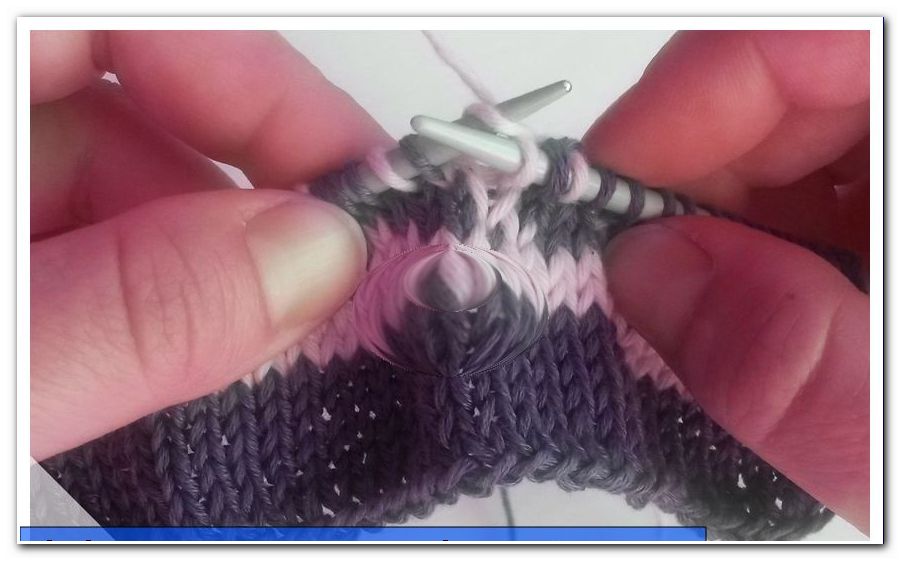
- Check from the heating valve
Now that the thermostatic head has been removed, you have direct access to the valve. You will now see the small pin that the heating controller pushes in or relieves, depending on the setting (inside is a spring, so that the pin is always pushed out of the way).

Use caution with the water pump pliers on the pen tip. Try to push the pin into the heating valve. If this does not work, this indicates a defect in the heating valve. For this, please follow the instructions below to renew the heating valve.
- Install new heating thermostat
If the pin pushes into the valve and also jumps out of its own accord, you can apply a small drop of penetrating oil to prevent it becoming stuck in the future (for example due to oxidation).

Also set the new thermostat to "5" before mounting. Then it is attached and the union nut tightened again. Tighten the nut properly, but not too tight.
Instructions for replacing the heating valve
To change from the heater valve you need the following materials and tools:
- a new heating valve
- Tool for releasing heating controller (thermostatic head)
- possibly a mounting tool for heating valves (then you do not have to block the radiator flow and also do not bleed it)
- Ring wrench for the nut holding the heater valve
- Wrench and screwdriver to lock the radiator
- a bucket for collecting heating water
- Block radiator flow
At the inlet and outlet is a lock (a ball valve, which can be turned off with a screwdriver). Often the valve is closed by a screwed lid. This lid can be opened with a suitable key. The screws are turned all the way to the right to close. You do not have to drain the water in the radiator.
- Replace the heater valve
After the inlet and outlet are locked, you can unscrew the nut above the heating valve. Position the bucket under the valve beforehand so that no water can run on the floor. Pull the valve out now.

Then check the inner part of the pipe section for deposits and dirt and remove it if necessary. Then the new valve is inserted and the fastening nut can be screwed in again. Then you can mount the thermostatic head again.
- Open inlet and outlet, vent radiator
Now the stopcocks for the inlet and outlet are opened again. Then you only have to bleed the radiator. Instructions for bleeding a radiator can be found below.
- Replace heater valve with mounting device
If you have a heating valve removal device, you do not need to lock the inlet and outlet. Of course you do not have to drain any water here, moreover, the venting is not necessary.
The exact mode of operation can be found in the instructions of the respective manufacturer of the dismantling device for heating valves.
Bleed instructions for the radiator
To bleed a radiator you need the following tools and aids:
- Breather key (square)
- Collection container for the water (bowl, bucket etc.)
- maybe a rag for drying
- Bleed a heating valve
The vent valve is traditionally located on the opposite side to the heating thermostat. Slightly loosen the valve with the breather key and then position your catch container underneath. Then open the valve and wait until only water comes.

- Check pressure of heating water system
This completes the actual venting process. But if you have vented several radiators, it is quite possible that now is no longer enough water in the heating system. Check the manometer at the heating system in the basement. The pressure should be within the green range of the manometer (between 1.5 and 2.4 bar, from 2.5 bar the system drains water via the pressure relief valve.
If the pressure gauge is below the target range, first up to 1.8 bar of water should be filled. Some pressure gauges have a second indicator needle that the heating engineer has set for the water pressure at the time of the last filling. If this is still correct, you can of course also orientate yourself. If you do not dare to use the heating system, you can also ask a heating engineer for help.
You will receive detailed instructions in our article "Ventilating heating properly" .