Knit Patchwork Blanket - Knit instructions to the squares

- Material and preparation
- Knit patchwork blanket
- seed stitch
- checkerboard
- Spiked ribbed pattern
- Sewing the patches together
A patchwork blanket radiates security and warmth, if you just look at it. These ceilings of many different squares belong in each corner of the sofa. There are many advantages to choosing to make a patchwork blanket yourself. On the one hand, the patchwork principle is ideal for processing wool remnants. In addition, beginners can practice different patterns on the patchwork blanket. And finally, the small squares go quickly from the hand, which creates many small success experiences.
A cuddly warm blanket not only warms the body but also the heart. This blanket is 150 inches wide and 195 inches long. It consists of 130 squares in three versions. Each color uses a different pattern. Here you can use the checkerboard pattern, the pear pattern and a modified rib pattern. The cheerful colors of the ceiling are emphasized by the dark blue border of the squares and ensure a good mood on dark, cool days. You can knit the blanket larger or smaller if you change the number of items specified in the manual. Also, the pattern is changeable, you only need to sew the squares together in a different order.
Material and preparation
For the blanket in this tutorial you need a thick, warm yarn. You can also knit the blanket from finer yarn, then it will be lighter. Note that each square must have a side of 15 centimeters so that the ceiling will be the correct size. Choose your material as you like, but make sure that all materials have the same thickness, otherwise the top will be irregular and wavy at the end.
The blanket will be especially pretty if you choose a different pattern per color. This tutorial is very suitable for beginners due to the simple patterns.
You need this:
- Wool needle size 6, color 1, 700 g
- Wool needle size 6, color 2, 700 g
- Wool needle size 6, color 3, 700 g
- Wool for the border, needle size 5 - 6, 250 g
- Knitting Needle No. 6,
- Crochet Hook No. 5 - 6,
- Stopfnadel with tip
Tip: work the squares alternately. When you stitch together what you have already done, you can see the progress and easily motivate to knit more items.
Knit patchwork blanket
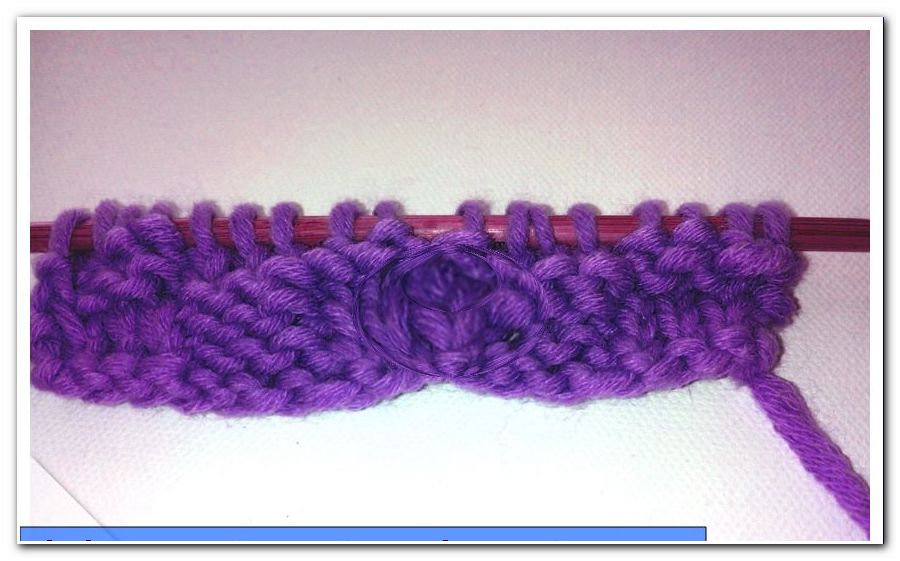
The patchwork quilt consists of 43 squares in colors 1 and 2 (squares A and B) and 44 squares in color 3 (squares C). Knitting the squares as described in this guide. All edge stitches at the beginning of the row are knit on the right, the edge stitch at the end of the row is simply lifted off and not knitted.
seed stitch
1. Square A: The first pattern is a simple pear pattern. For the square A, take 17 stitches.
For the pear pattern, knit one stitch on the left and one on the right in the row after the edge stitch. The last stitch is again an edge stitch. Knit 27 rows in a pear pattern and chain the stitches afterwards.

checkerboard
2. Square B: Take 17 stitches as in Square A. You have 15 stitches for the pattern set and 2 edge stitches. The checkerboard pattern will knit as described.
1st to 3rd rows: 1 edge stitch, 3 stitches on the right, 3 stitches on the left, alternating to the end, just take off the last stitch
4th to 6th row: 1 edge stitch, 3 stitches on the left, 3 stitches on the right, alternating to the end, simply lift off the last stitches
Knit the following 21 rows as above.
Spiked ribbed pattern
3. Square C: The staggered rib pattern gives the square a nice volume. It is very easy to knit. Again, the pattern set again consists of 15 stitches and there are 2 edge stitches.
1st to 3rd row: 1 edge stitch, 1 stitch on the right, 1 stitch on the left, alternating to the end, simply lift off the last stitch
4th to 6th row: 1 edge stitch, 1 stitch on the left, 1 stitch on the right, alternating to the end, simply lift off the last stitch
Knit the following 21 rows as above.

Each square is crocheted with the yarn in color 4. For this you use fixed mesh. Note that you are crocheting 2 air stitches at the end of each edge. So your edge becomes accurate and the corners do not warp.

When the squares are crocheted, you can think about a sewing order. With this tutorial for a rather cheerful patchwork quilt, the sewing sequence is easy. For the first row of this blanket you can sew together the individual elements A, B and C. Then continue with A, B, C. You need 10 elements to achieve the desired width as specified in the instructions.
Sewing the patches together
By crocheting the parts you have received a very nice edge finish. Now sew the individual sheets of your wool blanket together with simple stitches.

You will receive a total of 13 tracks of 10 individual parts as shown in the photo.

You start the next lane with part B, then follow C and A. Thus the individual pieces are shifted diagonally.
If you want, crochet the blanket all over again, either plain or with the leftovers left over.

Are you interested in a knitted baby blanket with a patchwork look?>> Knit baby blanket