Heating / underfloor heating is not warm - common causes!

- The 6 most common causes
- 1. Too much air in the system
- 2. Water pressure is too low.
- 3. Defective heating valves
- 4. The oil level is too low.
- 5. The control system is defective
- 6. Malfunctions
- Checklist in case of cold radiators
- Difference to the floor heating
- Related Links
If the heating is not warm, then first of all good advice seems to be expensive. Most people immediately contact the heating engineer in this case, which inevitably leads to costs. But often behind the supposedly big problem are just simple things that can be fixed quickly. We will show you which causes are common and in which cases the commissioning of a specialist company is necessary.
The heating system consists of individual sections such as the boiler, the radiators and the piping system. At all these points, problems can occur and the radiators do not get warm. Regular maintenance reduces the risk of heater failure and should therefore be performed at least once a year by a specialist firm. In addition, you must perform your own visual inspections at fixed intervals in order to identify problems in advance. Therefore, you will find a checklist in our guide where you can check the heating system. In an emergency, possible causes can be identified and sources of error eliminated. They exclude many causes or limit the problem before commissioning a specialist company.
The 6 most common causes
1. Too much air in the system
Over time, there is an accumulation of air in the heater. The individual radiators are then no longer sufficiently flooded with warm water. They do not heat up and stay cool until lukewarm. In some cases, a portion of the radiator is heated, the rest is cold.
In most cases it is sufficient to vent the radiators. If there is a vent valve on the side, the work is done in a few simple steps. At the hardware store, you will receive keys for around 50 cents, which will turn the valve on. Position the opening from the valve downwards first. Hold a cup or cup under the valve and let the air escape. You hear a hissing sound. As soon as there are no large amounts of air, water drips out of the opening. Now turn the valve closed again.

Tip: Bleed the radiators at least once a year. It is best to carry out the procedure at the beginning of the heating period. In order to ensure the optimal state of the heating, you should carry out the bleeding of the heating and the refilling of heating water in succession.
2. Water pressure is too low.
Too little water pressure prevents the radiators from heating up to a sufficient degree. You should therefore check the water pressure regularly and if necessary top up with heating water or refill.
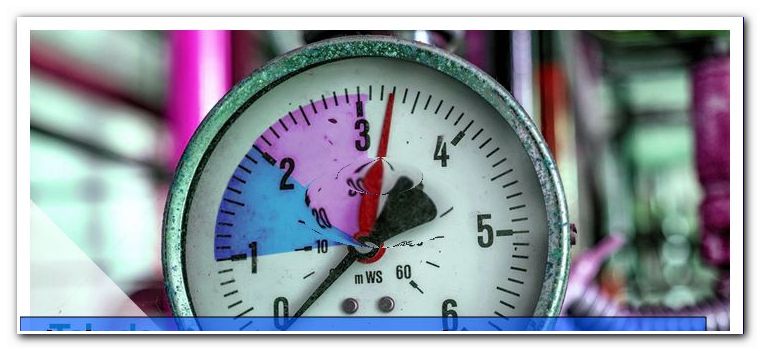
The operating manual of the heating system tells you which water pressure is optimal. In most cases, a pressure of 1 to 2 bar is ideal. The height difference between the heater and the highest radiator is important. Per meter of altitude, the water pressure is increased by 0.1 bar. On the heating system you will find a pressure gauge on which you can read the pressure. If there are green and red areas, you have another orientation guide.
Tip: Modern heaters are often provided with a fixed device for refilling the heating water. They open the corresponding valves and the connection between the fresh water and the heating water is briefly opened. As soon as the desired pressure is reached, close the valves again. A permanently open connection between both water systems must not persist.
3. Defective heating valves
The most common defects in heating systems include defective valves. They are relatively easy to turn off and replace. In case of doubt, however, a specialist should be consulted so as not to cause any damage. If it is a modern heating valve, so the exchange is usually straightforward, as with a handle the valve is turned off. For fixed valves, it may be necessary to insert a pipe wrench.

Tip: In case of doubt, you should consult a specialist company to avoid damage.
4. The oil level is too low.
Although there is still a residual amount of oil in the tank, the heater can fail. On the one hand, the suction hose can sit too high, as a result of which the oil is not reached. In this case, you will notice a minimum level on the tanks below which the oil level must not fall.
Tip: Especially with older and yellowed oil tanks, it is often difficult to read the actual oil level. Use a flashlight and shine directly on the tanks. Gently pat the container so that the oil starts to move slightly. Now you recognize the upper edge of the oil quantity. Many tanks open at the top so you can look inside.
Attention: If the oil level is too low, dirt can be drawn into the system and the heater can fail. Therefore, you should always refuel in time. If the heater has failed due to low oil level, refill with oil and have the system inspected by a heating engineer to prevent damage.
5. The control system is defective
If it comes to an irregular heating behavior or a complete failure, then the control system may be affected. It regulates the control of the heating circuit. Modern control units are programmable, so you can have the heating automatically down-regulated in the evening. But the heating control is still responsible for much more basic functions: Different areas and components are coordinated with each other, such as the water circulation, the fuel supply, the outside temperature sensor and the heating burner. Only the optimal supply of hot water ensures the proper functioning of the heating system. Since there are many individual electronic components in the components, defects can occur over time. The material costs for a control unit are around 300 to 450 euros, depending on the exact model. 
Defective control system: What costs of defective heating is covered by the insurance ">
Tip: Not all insurance contracts cover this type of damage. You can find out about the scope of insurance by means of the insurance policy and the insurance conditions.
 Many insurances let an appraiser check whether it is actually an overvoltage damage or whether the heating control has become inoperable due to age-related reasons. Therefore, you must not dispose of the defective equipment but must allow the insurer to verify. According to statistics, about 30 percent of all overvoltage damage reported has a different cause. In all other cases, the insurance is covered by the insurance.
6. Malfunctions
In the event of a malfunction, it may be provided according to the protocol that the heater shuts off for protection. If the pressure is too high, if irregularities in the gas supply have occurred or if the supply of fuel oil is interrupted for a short time, then the complete heating system can automatically switch off. If you enter the boiler room and find that the system is no longer running, you must find out what causes it.
Modern heaters are provided with a control computer which stores error messages. The error messages must be read and the necessary measures must be taken.
Attention: Many heaters, for example older models from Sieger, initially show only one flaw. Only when this error message has been cleared from memory will an existing second error message be displayed. Even if the first error message is "harmless", the heater must not be reset immediately. You must first clear the message and check for a second error message.
If no source of error can be identified, the heating system can be switched on again. If it turns off again, you must consult a professional to rule out safety problems, to find the source of the error and to avoid damage to the heater. 
If warning lights are lit on the heater, the system must never be switched on again. If there is an accumulation of failures, you must also have a check made.
If it has come to a high voltage, the fuse may have jumped out. The heating system is usually protected by a separate circuit . Modern anti-tippers can be switched on again with a simple movement. There should be a label on the fuse box so that you can tell which fuse belongs to the heater.
Checklist in case of cold radiators 

- Check how the thermostats are set. If a certain temperature is already reached in the interior, the radiators turn off.
- Wait a while. Older heaters may take around 10 minutes to heat up the radiators. If the heating has been switched off before, new water must first be heated again.
- Enter the boiler room and carry out a visual check: Is the heating still switched on?> Difference to underfloor heating
If it is an underwater floor heating, then the principle of generating heat remains the same. Therefore, similar problems occur, which can lead to failure of the heater. Heating valves may be present in the individual rooms or they may be electronic controls. In the case of electric heating, there are different conditions. In this case, you have few options to influence because you only have access to the controls. If the supply of electricity is ensured, you must check whether error messages exist. If only parts of the room are heated, the cause may lie in defective areas on the heating mats. If the entire room is cold, you should check the controller.
Related Links
Bleeding the heater
Refill water in the heater
Change heating thermostat