Knitting cap - Instructions for a knitted balloon cap

- Material and preparation
- Basics
- Knit cap
- Cap
- umbrella
- Complete
- Possible variations
It blows an icy wind, but at the same time the sun is dazzling - in such cases, a knitted cap is optimal. The thick wool fabric warms and the screen protects the eyes. In this guide we show you how to knit the practical headgear with little effort.
A knitted balloon hat seems to be a difficult project for you "> Material and preparation
For a knitted cap you need about 200 grams of wool . So that the headgear warms optimally, it is advisable to rely on material blends with new wool. When buying, make sure that the yarn is easy to wash in the machine. You can find information about this on the band, as well as information on the appropriate needle size. We used strength five and six for the knit balloon cap in this guide. Thus, the good piece is already ready for use after two evenings of manual labor. Plan around ten euros for the material.
swatch
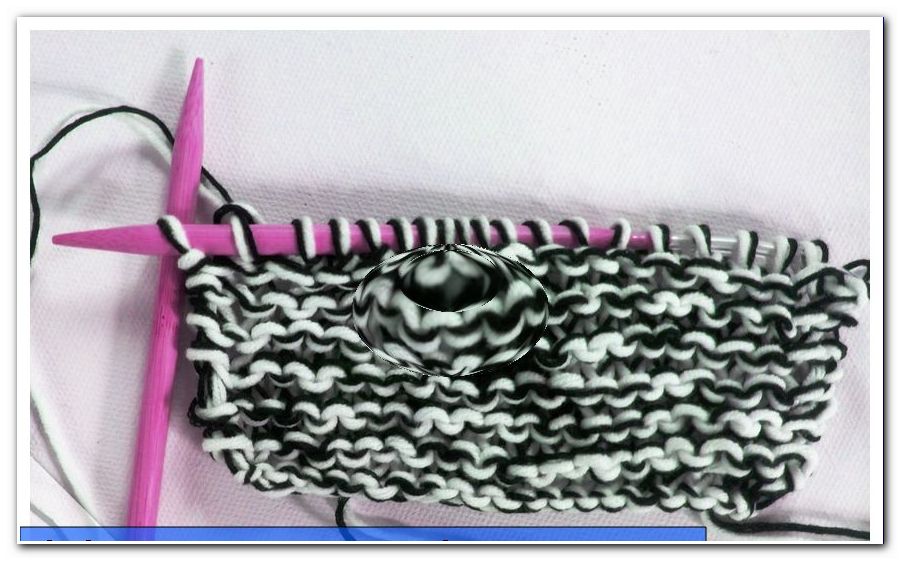
Before you start knitting the visor cap, make stitches . This will ensure that the finished piece fits. Knit small pieces with different needle sizes in the rib pattern and find out which ones give you the desired strength in your knitting style.
You need two different strengths for the knitted balloon hat: With the thicker you should be able to entangle your wool comfortably, but between the mesh should be only small gaps, so that the wind does not pull unpleasantly through the cap. The thinner needles are needed for the bottom edge and the screen. These parts must be knitted very tight, so that the headgear fits well and the umbrella does not hang down. We recommend a millimeter difference between the two strengths.
After selecting the appropriate thicknesses, measure how many stitches and rows you will need to knit with the thicker needles to get a square of ten by ten centimeters . Leave out the first and last stitch in the series, because they would often continue to fail and thus distort the result. Do not stretch the fabric while measuring. The numbers given in this manual are designed for a mesh of 18 mesh and 16 rows and a circumference of 56 centimeters . If your results differ, follow the measurement instructions in brackets.
You need for a knitted cap:
- 200 g of wool
- 2 needle games in different strengths
- Pair of knitting needles in thinner needlepoint size
- Needle for sewing

Basics
rib pattern
The rib pattern results in a firm and at the same time stretchable knit, which does not curl up at the edges. You work alternately a right and a left stitch. Remember: Right stitches form a knot behind the work, left stitches in front of it. On the other side, the thread sets to a V-shape. In each round (or row), knit the stitches as you saw in the previous round. As a result, the superimposed V-forms ribs between which the nodules disappear.

Double stitches
Knit a stitch as required by the pattern to the right or left, but do not let the limb slip off the left needle. Work the same stitch again in the other knit. Your mesh has increased by one.
Knit two stitches together
Pinch in two stitches at the same time and knit both as if it were a stitch. You can knit the stitch right or left. Note the structure of the adjacent meshes to decide. The goal is to continue the rib pattern as precisely as possible during all increases and decreases, so that as few as possible two equally knitted stitches lie next to each other.
Kettrand
The edge of the chain we use for beautiful edges on the screen. Lift the first stitch in each row onto the right needle, laying the thread before you start to work. This stitch is left untroubled. The last stitch is always knit on the right regardless of the pattern.

Knit cap
Cap
Use the thinner needles to hit 82 stitches (or the number of stitches you'll need to get around your head circumference).

Distribute the stitches evenly on four needles of needlestick and complete the round.

Knit two rows (or up to two inches high) in the rib pattern before beginning to use stitches for the balloon shape of the hat.
Tip: Knit the first stitch on each needle to avoid a loose transition between the needles.

3rd row: the first stitch of the first and third needle double = 84 stitches
4th row: the first stitch of the second and fourth needle double = 86 stitches
5th row: without increases, then change to the thicker needle play
6th row: the first stitch of the first and third needle double = 88 stitches
7th row: the first stitch of the second and fourth needle double = 90 stitches
8th row: without increases
9th row: the first stitch of the first and third needle double = 92 stitches
10th row: the first stitch of the second and fourth needle double = 94 stitches
11th row: the first stitch of the first and third needle double = 96 stitches
(Or change the needles to a total of three centimeters and add up to a height of 6.5 inches evenly distributed 15-20% of the initial mesh count.)
Knit up to and including the 24th row without any changes in the number of stitches (or until your piece of knitting is 15 centimeters high).

From now on, remove stitches for the top of the peaked cap.
25th row: knit the first two stitches of the first and third needle = 94 stitches
26th row to 32nd row: knit the first two stitches of each needle = 4 stitches removed per round, at the end 66 stitches
(Or knit in evenly spaced stitches so that after 20 centimeters in total, you will have about 20% fewer stitches than when you hit the needles.)

In the last row, knit two stitches together, halving your stitch count.

For the upper end of the peak cap thread the work thread with the help of a wool needle once through each stitch. Remove the knitting needles and tighten the thread until the hole is completely closed. Sew the end on the inside.
Tip: If a small hole remains after being pulled together, sew it invisibly with the thread.

umbrella
The umbrella is knitted in rows. That's why you do not use a needle-punching game, but the pair of normal knitting needles. Take 36 stitches (or the number that corresponds to 22 centimeters) directly from the stop edge of the hat. To do this, wrap the yarn around your hand as you are used to from the stitch stop. Lay the piece of knitting in front of you with the point of the hat facing you. Now insert a knitting needle between two stitches in the first row of the piece.
In the rib pattern, you can easily recognize the gap: it lies between a nodule and a V. Wrap the piece of thread between forefinger and thumb around the needle, as with the stop. However, do not pass the needle through the thumb loop. Instead, pull it back between the two stitches. Now you have a new stitch on the needle. Insert into the gap to the left of the first one and repeat the process continuously.
Tip: Mark the mesh area with differently colored wool threads, so you do not have to count when recording.

Work in rib pattern with Kettrand four rows without declines. In the fifth to tenth rows, knit the two stitches together on both sides, next to the edge stitch, which means you take a total of twelve stitches . Chop off the remaining 24 stitches . (Or work the screen six inches in length and remove one third of the mesh evenly.)
Complete
Sew on all threads. Guide the thread from the screen along the edge stitches to the inside of the hat and fasten it there.
Tip: Use the thread from the top of the hat to stitch the gap in the stop edge created when the lap is closed.

Possible variations
1. Decorate your knitted cap with buttons, flowers or similar. Sew the decoration, for example, at the transition between the side edge of the umbrella and the cap.
2. In addition to the rib pattern, there are other suitable patterns in which you can knit the cap. Try it for example in the pear pattern . For this you knit in each round or row the opposite of the previous row, that is, on the knot of a left stitch comes the V of a right stitch and vice versa. Note that the dimensions of the mesh sample change significantly depending on the pattern.


