Knitting Teddy - Free instructions for a strickteddy

- Material and preparation
- Knitting Teddy - basic pattern
- body
- poor
- legs
- The paw
- head
- ears
- Finish teddy bear
Have you ever thought of knitting a teddy yourself ">
Is there actually a nursery where the little brown friend has no place? Certainly not. The teddy bear can be found in every house where it has children. You can knit such a teddy bear with us now. Step by step, we will show you the individual stripe hats. What looks complicated turns out to be very simple at work. You need no special knowledge to knit this small, cuddly friend himself.
Our teddy bear is about 40 inches tall with outstretched legs. He is very soft, so children will love him as a cuddly toy. There are no materials used to hurt the child. Nose, muzzle and eyes are embroidered, so nothing can be lost.
For knitting you need no special requirements. You should only be able to knit with a double-needle play and master right and left stitches.
Material and preparation
Basically, you can also choose to knit Teddy among different materials. It always depends on the use of the knitted teddy bear. If he can only sit on your couch and you want to enjoy him, then a cuddly wool can be used. For example, an alpaca wool or a knobbed wool. If adults offer a home to the cuddly bear, every wish is possible.
Again, it is true that only the wool can influence the character of the knitting deddy.
But as soon as a child wants to play with their knitted teddy, you should pay attention to the choice of a choice. Here it is recommended to knit teddy only to use soft cotton.
Cotton is a soft yarn, very durable and easy to clean. And what should not be underestimated, the cotton yarn gives the teddy a particularly clear mesh pattern.
We used a cotton blend for our strickteddy. It consists of 50% cotton and 50% acrylic. It is a very soft yarn that children can use to play well. It does not fuzz or scratch and is very easy to care for.
As filling we used a polyester filling material.
The amount depends on how much the teddy is filled. Whether he should just be soft, or so tightly filled that he looks rather bulging.
According to our instructions you need:
- 120 grams of cotton yarn brown
- 20 grams cotton blended yarn beige
- Both yarns have a running length of 130 meters / 50 grams
- 1 knitting needle game with needle size 3
- 2 normal knitting needles needle size 3

For the needle game we decided on short needles. They are only 15 inches long.
With them, the small arms and legs can be knitted easier. It is not a must. You can also knit the teddy with a standard needles game.
Knitting Teddy - basic pattern
The strickteddy is knitted with right and left stitches. Our Teddy is knitted in lots of individual pieces. That is, head - ears - body - legs - arms, each part is worked out for itself and in the end they are all stuffed with the stuffing and sewn together. As the main color for the strickteddy we have chosen a beautiful medium brown. The paws or paws and the muzzle are worked in beige. We have embroidered the eyes, the nose and the muzzle.
body
When knitting the body, we start at the neckline and work from top to bottom.
1 round
- Cast on 60 stitches on a double pointed needles
Tip: Knit the stitches all on a needle. Split the stitches on 4 needles in the second round. Only then close the round.
2nd round and following
All rounds are knitted with right stitches. Of course you can decide the height yourself. We decided on a medium size. Here, the height is 1 centimeter higher than wide. Our body is up to the leg decrease 11 centimeters high + 1 centimeter = 12 centimeters height.
After these knitted rounds, the leg loss begins. In every second round, reduce the stitches as follows:
To do this, knit at the 1st and 3rd needle:
- knit all stitches to the right
- knit the 3rd + penultimate stitch on the right side
- knit the last stitch on the right
The 2nd and 4th needle:
- Knit 1st stitch on the right
- Knitting 2nd + 3rd stitch together right side =
lift off the 2nd stitch - Knit the 3rd stitch and pull the lifted stitch over the knitted stitch
Tip: Put a stitch marker in the weight loss rounds - this can simply be a short thread. So you can see immediately whether you have already lost weight or perhaps knit too much.

Take off the stitches in the rounds until there are only 3 stitches left on each needle. Bind off all stitches. Sew the middle short seam together.

poor

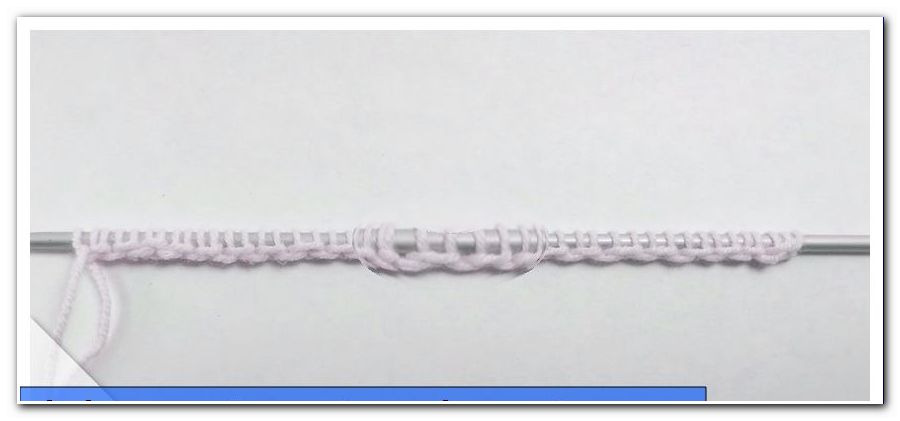
1st round: Cast on 32 stitches on a double pointed needles and knit 13 cm with right stitches.
Put the stitches of the needle 1 + 3 on a needle, as well as the stitches of the needles 2 + 4.
It will now knit 6 inches in rows on. Continue to work needle 3 + 1 in the basic color brown. Knit back and forth rows in right stitches, creating a Kraus-Right pattern. Knit needle 2 + 4 in beige. Knit back and forth row in Kraus-Right pattern.
The arm now has a total length of 19 centimeters. Bind off all stitches.
Knit the second arm exactly the same. Turn the work to the left side and sew the bicolour paw piece around.

legs
We knit the leg from the thigh down to the paw. Our pictures show you only the lower part of the entire leg, the paw. Thus, they can understand the instructions of the paw better.

1 round
- Cast on 32 stitches with the double pointed needles
- Knit 9 centimeters in rounds with right stitches
The paw
Disconnect the 3rd and 4th needle. Put the stitches of the needle 1 + 2 on a needle. Knit 15 rows of stocking sts with these stitches. That is, knit right stitch in the back row, knit left stitch in the back row.
So that you can continue working in laps, take 8 stitches on the knitted edge. Place needle 3 + 4 on needle = 16 stitches and knit right. Now take 8 stitches at the next edge stitches and knit off the needle 1 + 2 that you have folded together = 16 stitches.
You have occupied all 4 needles again.
- Needle 1 = 16 stitches
- Needle 2 = 8 new stitches
- Needle 3 = 16 stitches
- Needle 4 = 8 new stitches
Knit 3 rounds of right stitches with this new stitch combination.

Continue to work for the paws inside in beige.
1 round right stitch. At the end of needle 4 turn the work. It is now knitted in rows. That means the rounds are not closed anymore. All rows are knitted on the right. Back and forth row only right stitches. This creates a Kraus-Right pattern.
Knitt 6 rows = 3 Kraus-Right Pattern Series.
In the following series:
- 1 stitch on the right
- Knit 2 stitches together to the right
- 1 stitch on the right
- Knit 2 stitches together to the right
Continue the whole round like this. Turn the work over. Knit only right stitches in the back row. Turn to work. Knit another round of acceptance.
- 1 stitch on the right
- Knit 2 stitches together to the right
Continue this round as well. Knit back all stitches in the back row. Take off so many turns until you have 5 - 3 - 5 - 3 stitches left on your needles. Bind off all stitches.

Turn the leg to the left side and sew the round opening to the paw. Loop through the remaining stitches and tighten. The paw is now closed.
Turn back to the right side. The second leg work the same way.
head
The head consists only of a knitted triangle. This is sewn together and then the muzzle is knitted. Sounds complicated, but it is very simple.

attack
- Cast on 66 stitches
- Knitted 2 centimeters smooth right.
This means:
- Outline right-hand stitches
- Back row left stitches
Following is the decrease to the triangle: For this you knit in each row the last two stitches together on the right.
In each back row the last two stitches left together. Take off until only 14 stitches are left on the needle. Bind off these in the whole.

The lower narrow seam - 2 centimeters - sew together. Fold the top chipped tip - 14 stitches - inwards and sew the sides together.

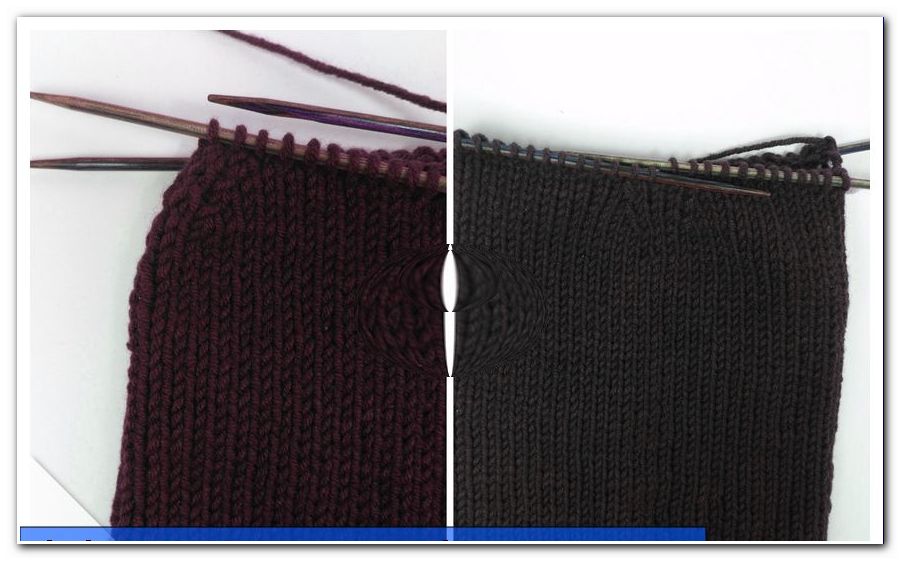
The middle open part is now knitted to the muzzle. There are 3 equal sides. Take 13 stitches on each side of brown yarn. We have just added these stitches in beige for a better view. However, it is better if you work the stitch and the first round in brown. Then change colors and continue with beige.
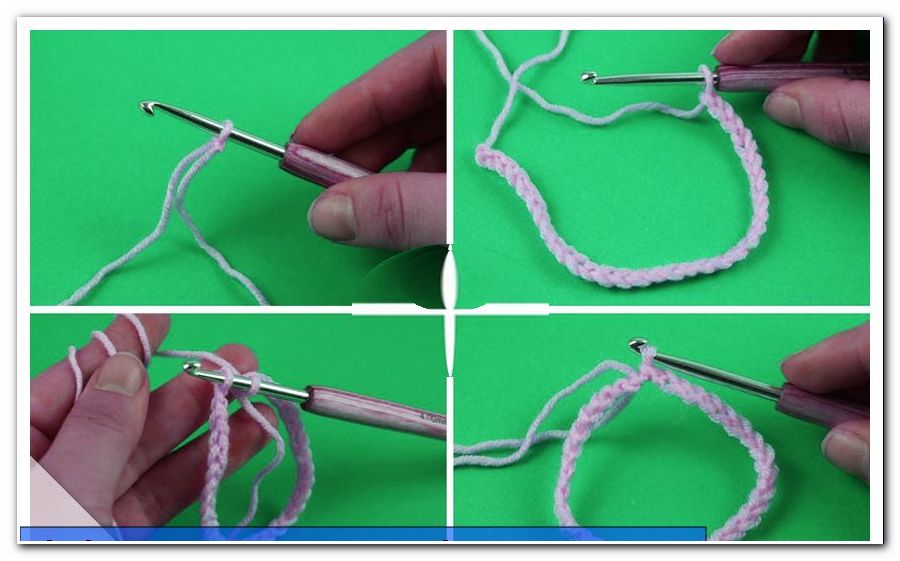
Tip: Pick up the stitches for the muzzle with a crochet hook and place the picked stitches on a knitting needle. This is easier than picking up the stitches with the knitting needle.
Knitt the muzzle 2.5 centimeters long with right stitches. Then knit 2 stitches on the right side. Work 3 rows without removing all stitches normal to the right. In the last round always knit 2 stitches together. Cut off the work thread. Thread the remaining thread into a needle and pull it through all remaining stitches. Tighten the thread and sew immediately.

ears
For the ears just knit a rectangle.
- Cast on 20 stitches in brown
- Knit 14 rows in stocking st
Now change the colors and work another 14 rows in beige. Bind off the stitches. Put the work on the left, fold it at the color edge and sew it round. The second ear work the same way.

Finish teddy bear
Now all the pieces are knitted for the strickteddy. Fill the items with your filling material. You may calmly refill vigorously, the teddy should already be well stuffed. Then the work of sewing begins. We used a solid thread in the color of the body. Close the legs at the opening with a clean straight seam. Then you can sew the legs firmly to the leg picks of the body.
The arms are slightly contracted at the opening. Just like the neck opening on the body. Now you can sew the arms to the right and left of the opening.

When stuffing the head you should make sure that also in the muzzle enough filling material comes. Also pull the opening of the head slightly together. Now connect the body with the head with a seam. To make sure it fits well and does not wobble, you should sew it up again in a second round. Finally, put your ears to the two head corners left and right. Now the fine work begins. We did not use buttons on the eyes and nose, but instead embroidered our eyes, nose and snout.
Of course you can also sew craft eyes. Test it out how you like it better.

Now it's up to you if you still want to dress your little friend. Here you can let your imagination run wild. Teddies also like to wear sweaters or vests and chic trousers. Of course, stockings should not be missing.
Have fun equipping.