Crafting with pipe cleaners - 4 creative crafting ideas

- spring
- Easter Bunny from pipe cleaners
- summer
- Flower from pipe cleaners
- autumn
- Squirrel from pipe cleaners
- winter
- Snowflake from pipe cleaners
Pipe cleaner, chenille wire or bending plush - the so versatile (and extremely inexpensive) material used in crafting has many names. We have put together a small journey through the wide range of pipe cleaning craft worlds: In our comprehensive DIY guide with four detailed (and well-illustrated) instructions you pass the fresh spring, blooming summer, colorful autumn and white winter and find great creation and Decoration ideas for every single season!
Who wants to tinker with pipe cleaners, does not need any prior knowledge or special exercise. Anyone who feels like it can enjoy this fun-filled task - and will definitely succeed. The utensils can be bent at will - which in the creative context (unlike humans) is quite desirable. So the best and funniest motifs succeed - from fluffy animals over beautiful flowers to enchanting little angels. Our selection consciously follows the four seasons, so that you can create and give away suitable decorative elements for the respective season or even enjoy them yourself!
spring
Our journey through the vast pipe-cleaning-craft world begins in the spring, the time of awakening - and the Easter bunny.
Easter Bunny from pipe cleaners
You need this:
- 4 x pipe cleaners in white (each 50 cm long)
- 1 x pipe cleaner in pink (about 15 cm long)
- 1 x wooden sticks
- 1 x wooden bead in black (4 mm diameter)
- 1 x half pearl in pink (6 mm diameter)
- thin black wire (length at will)
- Decorative Easter egg
- scissors
- Hot glue gun
- sharp knife
How to proceed:
Step 1: Braid three of the four white pipe cleaners together (like a braid). The result is an approximately 50 cm long part (as the pipe cleaners have this length).
Step 2: Cut 15 cm from this 50 cm long piece. So now you have a 15 cm short and a 35 cm long part.

Step 3: Roll up the two parts in a spiral or spiral shape. The 35 cm long part forms the body, the 15 cm short piece the head of the Easter Bunny.
Step 4: Fix the ends of both parts with a little hot glue.

5th step: Glue the head and then the body on the wooden stick.
Step 6: Now divide the fourth white pipe cleaner so that there are two 12 cm long parts (arms), two 10 cm long parts (ears) and a 6 cm long part (whiskers).
Step 7: Grab the 6 cm particle and roll it up in a spiral shape before fixing it to the lower part of the head.

Step 8: Half fold the two 12 cm long pieces and stick them as arms.
Step 9: Then do the same with the 10 cm long pieces, which you do not attach as arms, but as ears.

Step 10: Stick a strip of pink pipe cleaner into each little ear (looks much nicer than without).
Step 11: Halve the black wooden bead. To do this, place it with the hole on top of a stable table base, pick up a sharp knife and press it onto the bead so that it is split in half.
Step 12: Glue the resulting half pearls as eyes (over the whiskers).
Step 13: Fix the finished pink half-pearl as a nose (on the whisker).
Step 14: Take some black thin wires and stick them under your nose as a mustache.
Step 15: Finally, stick the decorative Easter egg under one of the hare's arms. Finished!

summer
We now cross a sunlit flower meadow in the bright summer ...
Flower from pipe cleaners
You need this:
- 2 x pipe cleaners in red (each 50 cm long)
- 1 x pipe cleaner in yellow (25 cm long)
- 1 x pipe cleaner in green (50 cm long)
- scissors
- clay pot
- Tonkarton
- Hot glue gun
How to proceed:
Step 1: To start, prepare the pot in which the flower will stand. To do this, transfer the outline of the pot opening with a pencil to a piece of solid cardboard. Cut it about 5 mm smaller so that the cardboard can be put into the pot. In the middle of the circle you prick a hole with the tip of the pencil.

Step 2: Now pick up the red pipe cleaner and start turning a screw at one end. Roll it together until you have rolled about a third, so about 16.5 cm, to a snail.

3rd step: Now form a second snail next to the first one. For this you have to bend the end to change direction. Also roll this auger together until only one third of the pipe cleaner remains. From this last third you also form a snail.
Step 4: Now grab the second red pipe cleaner and connect one end to the previously rolled snails. Did you do that? Repeat steps 2 and 3 with this pipe cleaner. Now align each petal correctly and the outlines of the flower blossom are already visible.

Step 5: Now take the 25cm long piece of the yellow pipe cleaner and make a spiral out of the complete piece. These stick with hot glue in the middle of the petal.

Step 6: The green pipe cleaner becomes the style and the blade. For this you form a loop after a few centimeters. Now loop two smaller loops over the first one and attach everything with hot glue. The end is now bent straight up.
Step 7: Now attach the style with hot glue on the back of the petal.

 Step 8: Now the stem of the flower has to be inserted into the hole in the cardboard box. Finally, just attach both in the clay pot - and the pipe cleaner flower is ready!
Tip: Of course you can also use other colors instead of the red and yellow pipe cleaners, depending on how your flowers should look like.
 autumn
 autumn
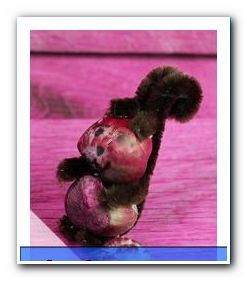
 Autumn is not just the transitional period from warm to cold. For many animals the months from September to December mean a lot of effort. This applies, for example, to the sweet squirrels who gather their supplies for the winter.
Squirrel from pipe cleaners
You need this:
- 2 x hazelnuts (one smaller and one larger nut)
- 1 x pipe cleaner in brown (25 cm long)
- Felt pen in blue or black
- scissors
- hot glue
How to proceed:
Step 1: Take the brown pipe cleaner with a length of 25 cm to the hand and cut him a 5 cm measuring piece (this then gives the arms of the squirrel).
Step 2: Bend the arm piece to a U.
Step 3: Turn the remaining pipe cleaner (with a length of 20 cm) in the middle.
Step 4: Cut short pieces (less than 1 cm) from the long pipe cleaner for the croissants.

Step 5: Bend over the ends of the long piece to look like 2 cm long feet. The best way to use a pen is to bend your feet.
Step 6: Grab the larger nut and stick it on your feet and the body behind it. The underside of the nut looks forward - it then forms the belly.

Step 7: Glue the U-shaped arms on the abdomen and the body. It looks like the squirrel is holding the nut from the top.
Step 8: Now grab the smaller nut (it acts as a head) and stick it on your arms and body. The tip of the nut points to the front.

Step 9: Now simply attach the two ears to the upper nut.
Step 10: Paint a face on your squirrel using a blue or black felt-tip pen. Draw two dots as eyes and once more on the tip of the nose as a point.

Step 11: Finally bend the free upper part of the squirrel body over a pin to the back. Now you have a pretty squirrel with a long fluffy tail!
winter
Now we arrived in winter. And what is there more beautiful than beautiful snowflakes. If they do not fall from the sky, you can use their pipe cleaners to conjure them directly into your home and use them as a pretty decoration - for example for the Christmas tree, the windows or walls.
Snowflake from pipe cleaners
You need this:
- 5 x pipe cleaners in shimmering blue (each 30 cm long)
- scissors
- ruler
How to proceed:
Step 1: Take two of the five shimmering blue pipe cleaners and cut them into six 10 cm long pieces.
 Step 2: Now fold all the pipe cleaner pieces (ie both the cut and the previously untouched ones) in each case in the middle, so that there are loud Vs.
Step 3: For the base of your snowflake, grab the three folded long pipe cleaners and turn them around in the middle - of course, so that all wires are stable.
Step 4: Next, attach the smaller pipe cleaner pieces to the base you just constructed, one 2.5 cm from the center of the base. Take your ruler to hand to achieve the most harmonious overall picture possible. This is how your snowflake looks after this step:

Step 5: Now rotate the V-ends of the short pieces between the long pieces. It's like having your arm hooked on your friend's.
Step 6: Cut 3 cm short pieces of the long pipe cleaner parts. If you do everything right, you now have six more small pipe cleaner pieces.
Step 7: Fold these new pieces into Vs.

Step 8: Attach the mini-Vs to the ends of the long pieces. Your snowflake is ready!

In addition to the Easter bunny, the flower, the squirrel and the snowflake, there are many other ways to use simple pipe cleaners to make creative decorative elements for the different seasons. Do not hesitate to let your own ideas run wild - with a little bit of imagination you will get great designs, without the need for a guide. Just get heaps of pipe cleaners and get started!
By the way: A pack of 100 colorful pipe cleaners à 30 cm costs around five euros. You do not need more than 30 minutes for any of our featured designs.
Tips for quick readers:
- Make fluffy motives with pipe cleaners, scissors and hot glue
- Seasons: easter bunny, flower, squirrel or snowflake
- Cost and work effort very low (under 5 euros and 30 minutes)
- No craft skills or prior knowledge necessary
- The motifs can be wonderfully created with children
- Cutting, folding, (interlocking) turning and gluing are the main tasks