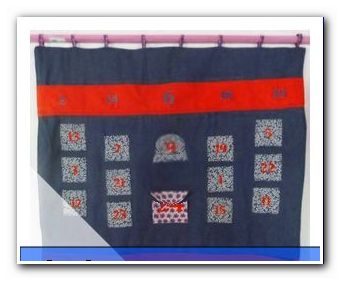
Sew Advent Calendar - DIY Instructions + Sewing Pattern

- material selection
- amount of material
- patterns
- Material for the bags
- It is sewn!
- The sewn bag
- The simplified bellows bag
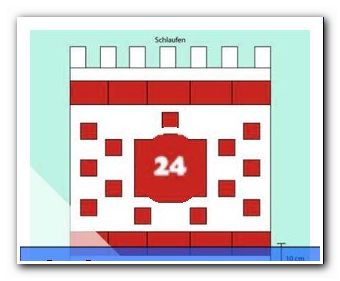
- The fan row
- The payment
- The suspension
- Merge the calendar
- The sewn-on bags
- The bellows bag
- The fan row
- The suspension
- Feeding and sewing
- How do I fill my advent calendar ">
Difficulty level 2.5 / 5
(suitable for beginners)Material costs 2/5
(depending on the choice of fabric between EUR 0, - from the remaining utilization and EUR 40, -)Time required 3.5 / 5
(including pattern depending on the type of selected pockets about 4-9h)material selection
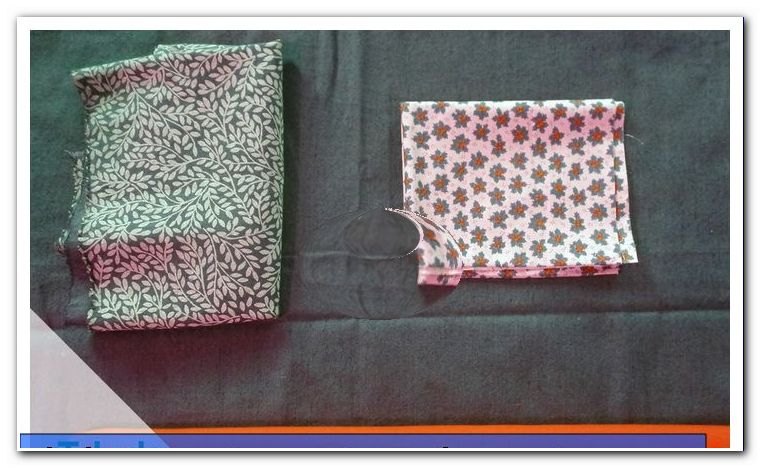
Preferably, non-stretchable fabrics are used in this project. The rule is: the firmer the better. In theory, even stretchable fabrics are feasible, but then only with appropriate reinforcement by extra strong ironing fleece. For this project I use linen and cotton fabric in solid fabric quality, which I additionally reinforce with non-woven fabric. For better grip and a better overall picture, the entire calendar floor is additionally reinforced with fleece.
To hang you can sew either fabric loops or use beautiful woven ribbon.
amount of material
Of course, the amount of material varies depending on the pattern. My Advent calendar should be 1 x 1 meter in size, so I need each 1 mx 1 m (plus seam allowances) each of the fabric for the background, the fabric for the back and the volume fleece. In addition, I also need sufficient material for the bags with the numbers, in which the gifts are put.
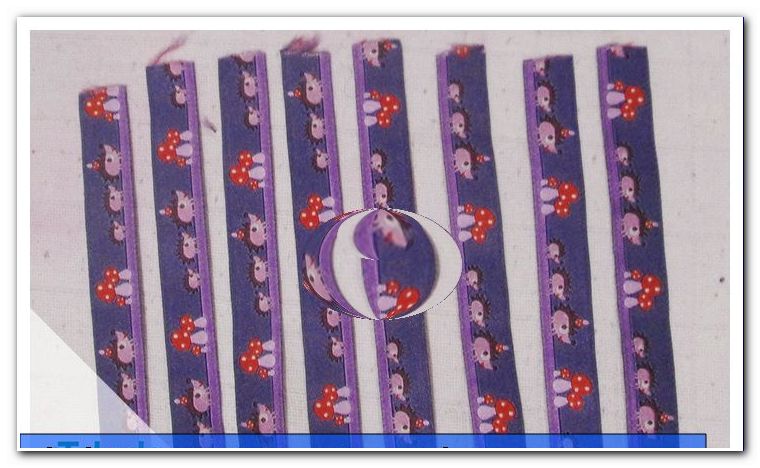
The numbering of the individual bags can be done in different ways. I opted for plotted numbers for iron-on. The numbers can also be applied, painted, glued or sprayed on.
patterns
My calendar should, as I said, be 1 × 1 meter tall. For the "bottom" I add to the 1 mx 1 m seam allowances. Normally I would add 1 cm per side. But since I use volume fleece, I double. Thus, my blanks are 104 cm x 104 cm in size (each 1x background fabric, backside fabric and volume fleece).
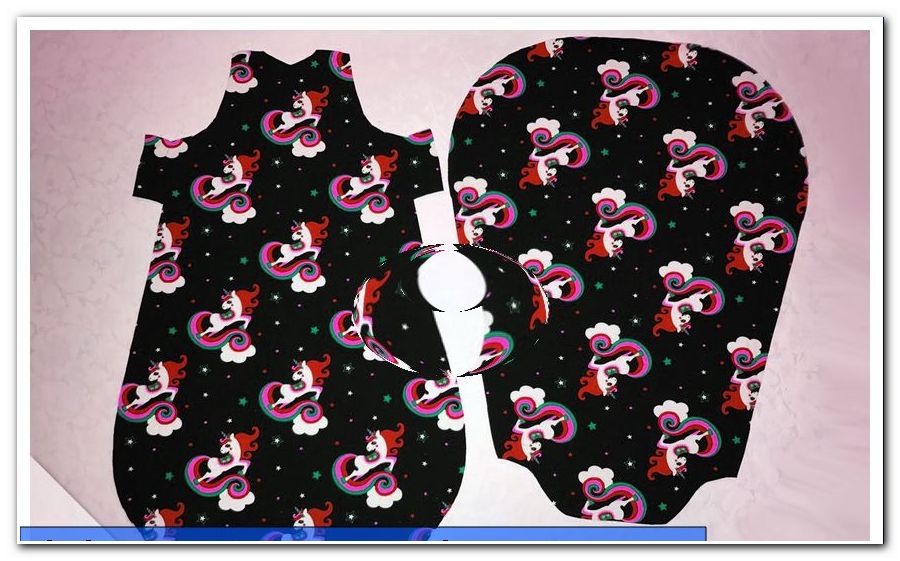
Material for the bags
The individual pockets / windows are different in material costs:
For the fan row, I expect in my example a width of 104 cm, including seam allowance, as they are to complete the side with the edge of the calendar. The height I have set to 12 cm, which I would like to attach "in the tube", so 24 cm plus 2 cm seam allowance, so 26 cm. I would like to attach two rows of five pockets each. So 2 x 104 cm x 26 cm.
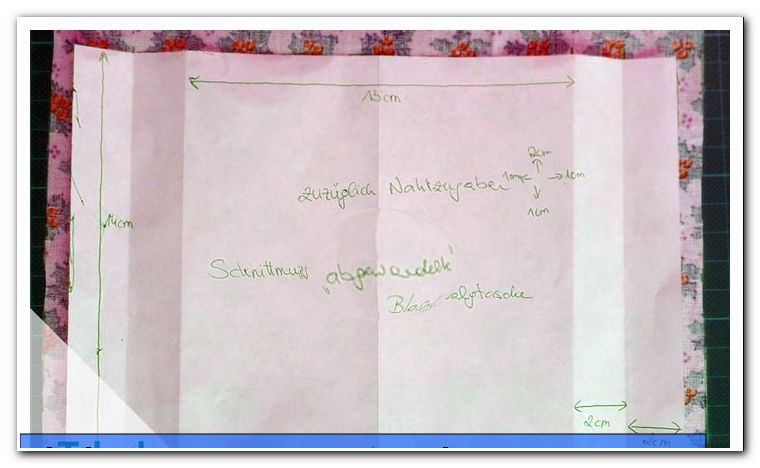
For the bag with the number "24" I would like to sew on a very nice and big bag. In order to fit more into the bag, I sew a simplified bellows pocket (without centerfolds). It should be 13 cm x 14 cm tall. On the sides, I add 4 cm for the fold and another 1 cm for the seam allowance. At the top, 2 cm seam allowance is included (folded 2x), downwards 1 cm seam allowance is sufficient. In sum, I need a piece of fabric with the dimensions of 17 cm high and 23 cm wide. This bag happens to me only once.
Tip: When specifying height and width, it is best to pre-set your own pattern on the fabric you want to use. Please always pay attention to the motif, including the names "top" and "bottom" in the information on seam allowances.
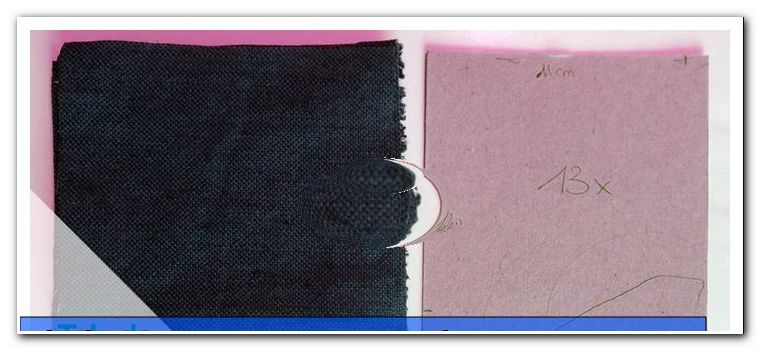
For the patched pockets / windows I estimated 10 cm x 10 cm, for this I need above 2 cm seam allowance (double hammered), left, right and bottom 1 cm seam allowance. Thus, the dimensions are 13 cm in height and 12 cm in width. Of this I need in my example 13 pieces.
Tip: First, I like to make a drawing of how the finished calendar should look like. I try to capture the proportions. This works best on checkered paper!
It is sewn!
Now I attach as needed ironing fleece and cut everything in the appropriate sizes according to pattern including seam allowances. Then the different windows / bags are prepared.
Important: Especially with thicker fabrics, which are processed without ironing fleece, it is very important to finish everything! This saves you a lot of time and effort during the further work steps!
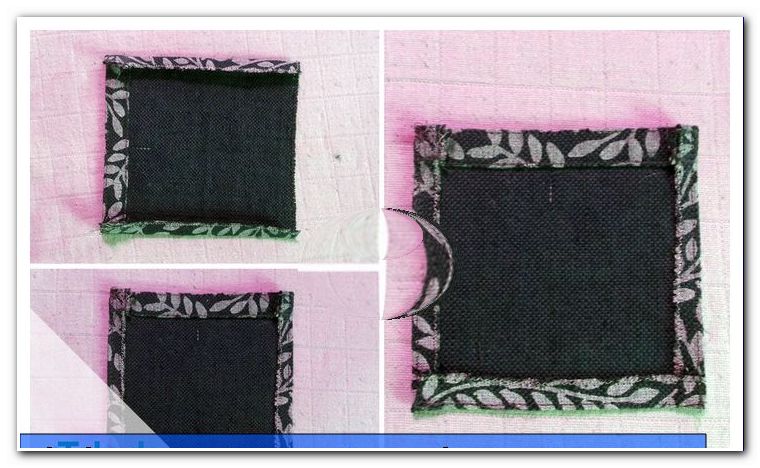
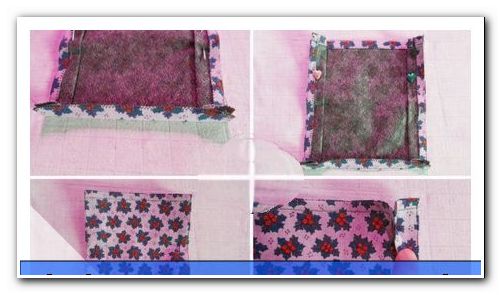
The sewn bag
I place the piece of fabric with the right (ie the "nice") side down in front of me and fold the top centimeter left to left down. Then I'll just iron it over and hit both layers down one more time. Now I iron well and step with a simple straight stitch both edges edged with the sewing machine. I realize the beginning and the end.
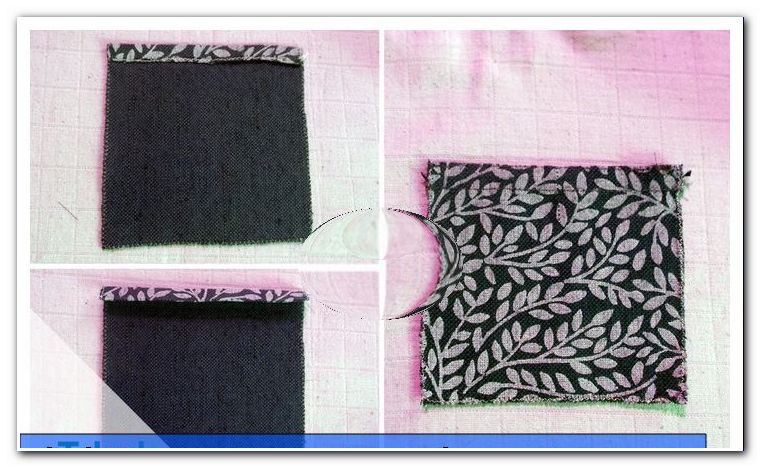
Now I fold one side in each case by 1 cm inwards, iron firmly and steppe from edged. Then fold over again at the bottom, iron and stitch. Also in these steps is sewn at the beginning and end.
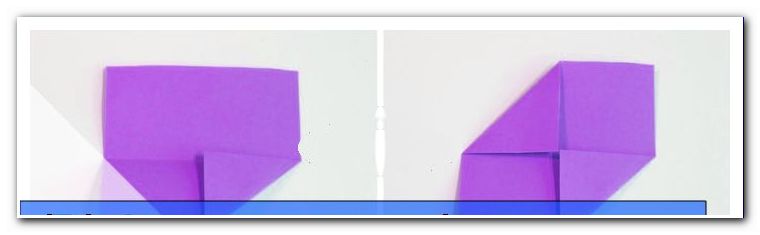
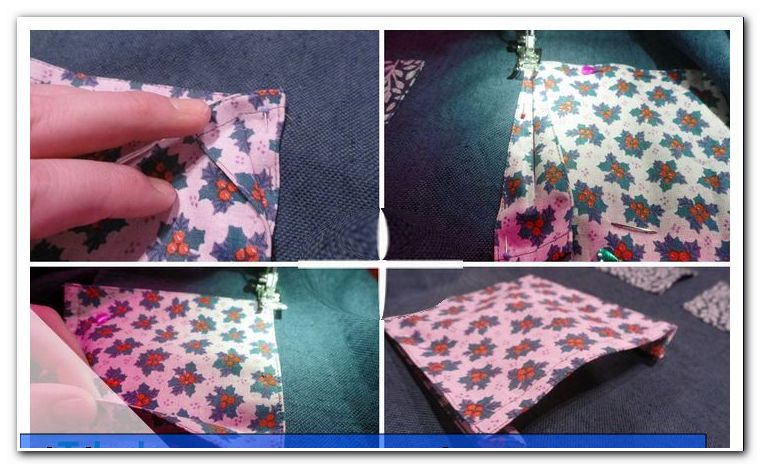
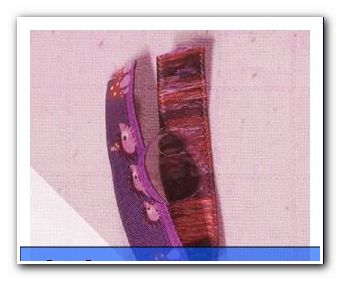
The simplified bellows bag
I lay the piece of fabric again with the right side down in front of me and flip over the top again twice. Then I'll quilt both edges (as with the sewn bag).
At the side I fold 1 cm inwards and steppe tight-edged.
Then I fold the edge 4 cm inwards and quilted edged. Then fold again 2 cm outwards (so that a concertina fold develops) and iron it firmly. This crease will NOT be stitched, but you can secure it with a pin.
Do the same on the other side. Finally, the lower edge is folded up by 1 cm, ironed and quilted also edged.
1 of 4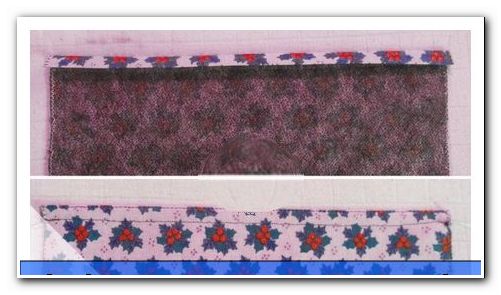
The fan row
Material blank:
For the row of subjects, I fold the fabric right to the right (ie the beautiful sides) along each other and step with seam allowance (at the beginning and end I sew again). This creates a tunnel that I turn.
1 of 2
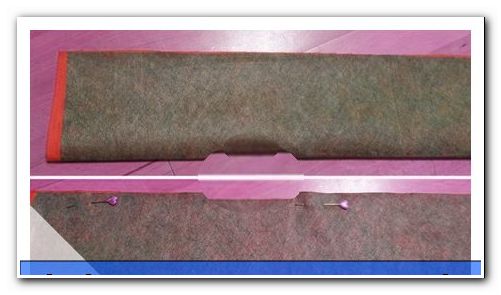
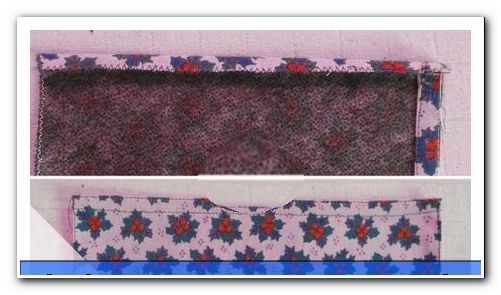
Then I put the seam on one side (this will be the bottom edge of my fan fields), so you can not see them from the front) and iron the entire fabric flat once.
 Here you can now also set the markers on which the subdivisions into individual compartments / windows should later be made. In my case I want to make 5 windows out of each fabric. So I mark 20 cm intervals at the edge. At these markings, I fold the fabric and iron over it. So I can orient myself later on the basis of these creases and it is easier for me to attach straight lines for subdivision.
Tip: It's up to you how many pockets / windows you make out of it. The individual subdivisions can also be different in size. Ideally, plan this in your overall sketch before cutting, so that really the right number of subjects / door is taken into account.
The payment
If you want to apply your numbers to the calendar, you should do so NOW. Once the bags / windows have been sewn on, you can only do worse. If you have opted for another variant, you can still attach the numbers later.
The suspension
Since the calendar is later also to be mounted on the wall, a suspension is still missing. I decided on a simple woven band, which I cut into 8 pieces of 8 cm each.
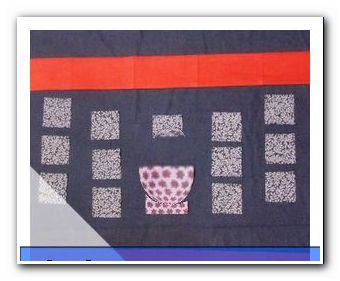
Merge the calendar
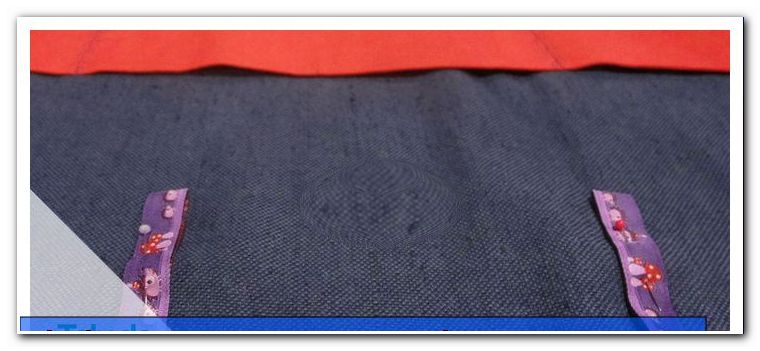
First, place the background with the right (the "nice" side up) in front of you and cut out all the wrinkles. Then you distribute your 24 bags and arrange them until you like the overall picture. Then you can pin everything with pins. I recommend at least two pins per bag, so that when sewing nothing slips or turns.
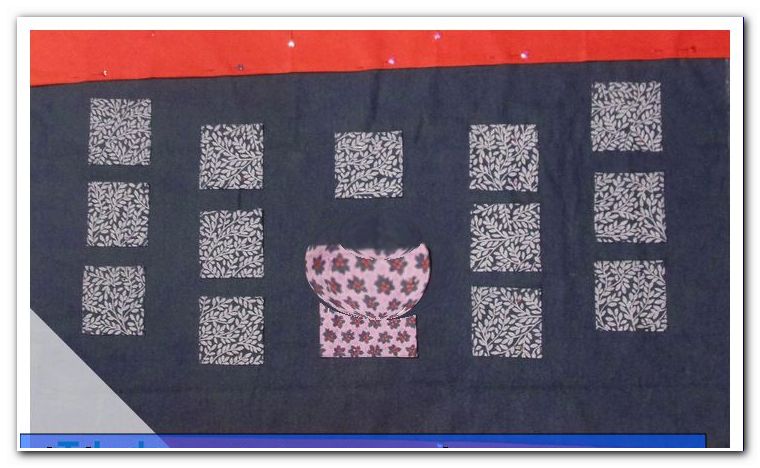
Afterwards, you can sew on your bags directly, as follows:
The sewn-on bags
These simply sew on both sides and down in the stitching. (See the markings with dark threads)
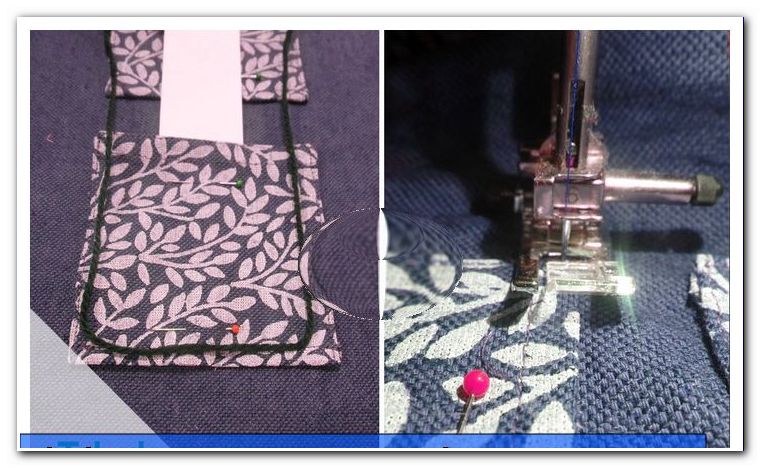
Beginners can insert a piece of paper to look at the top of the bag (where the bag should be open and two stitched seams are visible) as a sign that this page should not be sewn up. Please sew beginning and end.
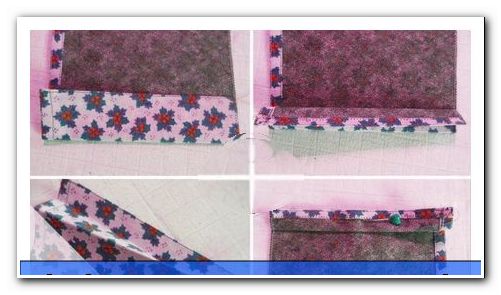
The bellows bag
First, the bag is well pinned up and down. Then gently unfold the accordion fold and fix the edge on the background. You do this on both sides. Sew as close to the bottom edge as possible in the stitching and sew at the beginning and end. Finally, fold the pages outward and sew once at the bottom in the stitching. Beginning and end are sewn again.
The fan row
The fan row is first quilted at the bottom edge on the background. This can be done with a normal seam. I opted for an ornamental seam, which looks great with my white-green leaves. Then the individual subdivisions are sewn (see creases). Again, please make sure that the top of the pockets must remain open, so you can fill them later. Finally, I sew the ends in the seam allowance with a simple straight stitch, so that later nothing can slip and cut the seam allowances. Finished are the fan rows.
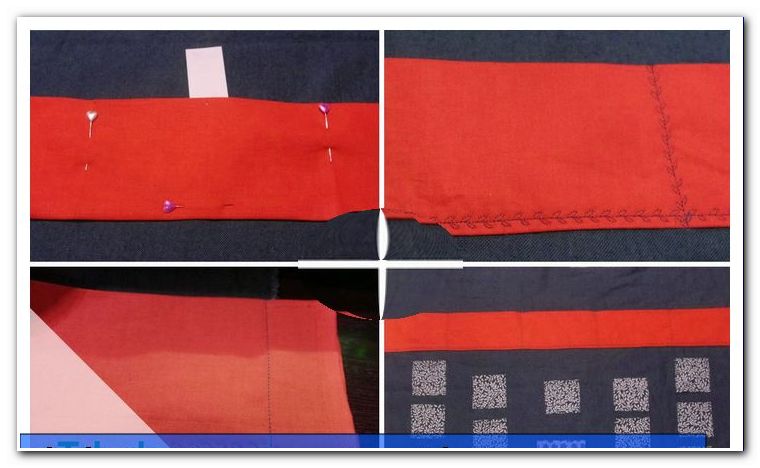
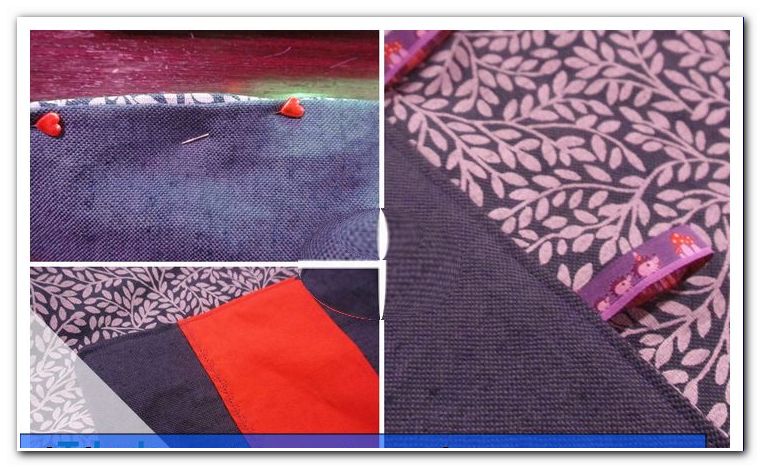
The suspension
 After all the pockets are sewn on, I put the calendar again with the right side upwards in front of me. Now I decide where to place the ribbons for the suspension. For this I put the prepared loops on a regular basis.
Note: The suspension loops may not be in the seam allowance - please pay attention to this before attaching!
I then attach the loops to the desired positions with pins and sew them in the seam allowance with a straight machine stitch on the background.
Feeding and sewing
Now it is almost done and you can already see what the final result will look like. I put the calendar in front of me again with the right side up. Then I put the fabric for the back, with the right side down. The last fabric layer is now added to the fleece. Then I pin everything around the edge well and mark with at the bottom (using "erected" pins) my turning opening, which should be about 15 cm - 20 cm wide.
I now sew around with the appropriate seam allowance. Then I cut off the corners diagonally, so that when turning is not too much fabric in the corners and this can be formed nicely.
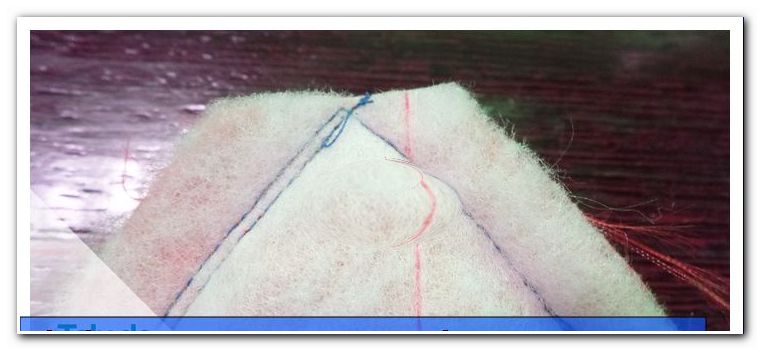
Now I turn the calendar so that the fabric layer with the volume fleece comes to lie inside, direct me the edges at the turning opening and put this off with pins. Now I sew around again with about 0.5 cm to the edge with a simple straight stitch.
Finally, I iron up the prepared numbers - and you're done!
 How do I fill my advent calendar ">
  For adults, you can also pack a small vial of vodka and the like. Even funny daily tasks are always well received (drink a punch today, embrace a loved one for a particularly long time, etc.)
Quick Guide:
1. Make a cut and design (mark on notepad)
2. Crop with seam allowances
3. Prepare and place bags (and apply numbers)
4. Sew on the pockets
5. Attach the suspension in the seam allowance
6. Put on all layers, fix and sew together - omit turning opening!
7. Cut off the corners at an angle and turn them over
8. Turn the opening and fix it, and stitch it all around
9. Attach numbers
10. Done!The twisted pirate


 Here you can now also set the markers on which the subdivisions into individual compartments / windows should later be made. In my case I want to make 5 windows out of each fabric. So I mark 20 cm intervals at the edge. At these markings, I fold the fabric and iron over it. So I can orient myself later on the basis of these creases and it is easier for me to attach straight lines for subdivision.


 After all the pockets are sewn on, I put the calendar again with the right side upwards in front of me. Now I decide where to place the ribbons for the suspension. For this I put the prepared loops on a regular basis.


 How do I fill my advent calendar ">
  For adults, you can also pack a small vial of vodka and the like. Even funny daily tasks are always well received (drink a punch today, embrace a loved one for a particularly long time, etc.)