Make soap yourself with children - a simple guide

- Basic explanations
- 1. Fragrances
- 2. Colorants
- 3. casting molds
- 4. Equipment for soap making
- First basic steps for soap casting
- 1. Soap pieces melt
- 2. Add color
- 3. Add scent
- 4. Fill the soap mass into shape
- 5. Let it harden
- techniques
- 1. Deposit for transparent soaps
- 2. Picture soaps
- 3. soap on the rope
- 4. Dotted soap
Making soap yourself is a great thing. You just know what's inside. Although liquid soaps are very popular, they have serious disadvantages for the user as well as for the environment. Soap is not the same soap, it always depends on the ingredients.
Liquid soaps are mostly made synthetically, which makes them cheap. They contain a lot of water, a lot of chemicals and only a few oils or fats and they do not have to be of good quality. Often, the pH is extremely high, which is not good for our skin.
Many consumers underestimate that the skin is our largest organ. They absorb tons of harmful substances without us being able to do anything about it. By using good soap, you can prevent it from becoming unnecessarily longer.
As a rule, soap is made from natural, solid and liquid oils. With the help of NaOH (sodium hydroxide) the mass is saponified, as the specialist or the expert says. Since NaOH is quite aggressive, dealing with it can be a bit dangerous. Not for nothing is it recommended to wear long gloves and goggles. For children, this type of soap production is not recommended.
If you want to make soaps with children yourself, you should resort to ready soap mass. Casting soap is available in different versions.
The three basic masses are:
1 of 3


- Clear glycerine soap mass - high-quality products are very gentle and extremely fragrance-neutral, making them easy to mix with fragrances. If a transparent soap is too cloudy after curing, it can be liquefied again and poured again. It makes it clearer.
- White colored glycerin soap - dyed with titanium dioxide, looks milky transparent
- White coconut oil soap mass - not colored, with coconut oil additive, contains vitamin E, creates a protective layer on the skin, moisture is retained, it creates a very hard soap
In addition, there is glycerine soap with additives, such as aloe vera, olive oil, avocado and cucumber additive, with hemp oil additive, with goat's milk additive and other additives. These can also be used. This soap is particularly nourishing. Soap is obtained in pharmacies, drugstores, in the craft supplies and in mass on the World Wide Web. On request organic products are also available. Good glycerine soap has no animal constituents, is skin-friendly, dermatologically tested and without animal experiments, has a gentle pH of 8.5 to 9 and is easy to process. Now and then you can also find glycerine soap made from tallow or lard, who does not like that, must be careful with the ingredients.
Tip: Glycerine soap pieces from bath product series are unsuitable, they can not melt!
If you are interested in what makes glycerine, this page is recommended: //www.naturalbeauty.de/magazin/artikel/article/glyzerin-good-stoff-schlechter-stoff/ When ordering the raw material can be ruled out that animal substances are included, as well as petroleum and other unhealthy ingredients.
Even with this kind of soap to do the children should be constantly supervised. Special care is necessary when handling the hot, liquid soap.
Basic explanations
- Casting soap should not come into contact with water. Water makes the soap slimy and prevents hardening.
- The work surface should be covered to prevent damage from the often very hot soap mass or to avoid color stains
- The liquefied soap and the vessels used for melting can get very hot!
1. Fragrances
For most users it is important that a soap smells good. Therefore, essential oils or fragrance oils are added. It is important not to use aroma extracts, potpourri oils or candle scents !!! Most popular are individual scents such as orange or fresh mint, but fragrances can also be mixed.
A broad distinction is made between fragrance groups:
- Lemon fragrances - orange, sweet orange, lime, mandarin, grapefruit, lemon, tangerine
- Spicy scents - cinnamon, clove, ginger, vanilla
- Herbal scents - chamomile, peppermint, eucalyptus, rosemary, pine, sage, juniper, tea tree
- Floral scents - lilac, jasmine, lily of the valley, rose, lavender, ylang-ylang, plumeria, violets
- Fruity scents - green apple, coconut, melon, pear, blueberry, peach, mango, kiwi
- Earthy scents - honey, musk, patchouli, sandalwood, frankincense, amber
- mixed scents
Tip: Some fragrance oils are very strong. They influence the final color. So, blue soap added to vanilla fragrance oil may turn green. This is due to the amber color of the fragrance oil.
2. Colorants

With paint, the appearance of the soap can be greatly changed. You can dye a soap completely, but also design patterns. One differentiates between liquid and solid colors. Colors can be used from the hobby shop, food colors (but quickly fade) and high quality colorants in cosmetics quality. For glitter effects one uses glitter colors and mica powder, best in cosmetics quality. They must be very fine, so as not to rub on the skin. The best are natural colors, such as ground beetroot, spirulina powder or ground turmeric root, but cosmetic pigments are also enough. In a transparent soap, the colors of the finished soaps appear very clear, as in a gemstone, whereas the white masses look softer and more pastel-like.
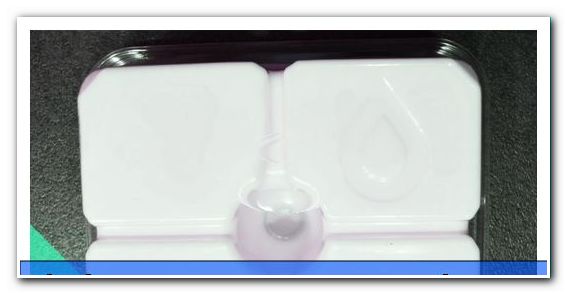
3. casting molds

Casting molds make for great soaps. Right works of art are feasible. One mainly distinguishes motifs, box shapes, cylindrical shapes and others. You have to know how high the temperature is, which these forms can tolerate. For most forms, these are between 57 and 63 ° C. Too hot soap deforms the molds. Especially coconut oil soap gets very hot because it has a high melting point. Very hot soap must be cooled before filling, preferably by stirring.
4. Equipment for soap making
You should prepare some things so that you can work away from each other in succession.
- Measuring cup made of glass - for melting in the microwave or for a water bath
- Measuring spoon - for measuring the colors and additives
- Stirring spoon - preferably a metal spoon for mixing molten soap
- Large pot - when the glycerine soap is melted on the stove, water is made hot in it
- Sharp knives - to crush the soap blocks and to cut the finished soaps
- Soap slicer - in principle, a potato peeler is sufficient, so that the edges of the finished soap are bevelled or even to smooth the soap surface
First basic steps for soap casting
After unpacking the Rohseifenmasse this is cut into small pieces, as it then melts faster.
1. Soap pieces melt
- When using a microwave, pour the mass into a suitable microwave oven and melt for 30 to 60 seconds at the highest power level. By melting in intervals of only a few seconds overcooking can be avoided
- Alternatively, melt the soap on the stove in a water bath. Do not heat the soap for more than 10 minutes.
- Fill a pot a few inches high with water and place it on the stove
- Hang a sieve in it
- Place a suitable container on top, which is filled with the soap mass


- The soap bars must have completely dissolved.
- Unused soap mass can be liquefied again and again. Repeated melting makes transparent glycerine soap mass even more transparent.
2. Add color
Once the soap is liquid, add the color. If you work with different colors, pour the soap mass into different containers and mix each with one color.
1 of 3


3. Add scent
Add so many drops of fragrance oil until the desired intensity of perfume is reached. If the soap already thickens, it can be liquefied again in a water bath.

4. Fill the soap mass into shape

Now the soap is filled in the intended form. It is best to try a simple, monochrome soap first. Later different colors and patterns are possible.
Note: Plastic or metal molds should be greased with a thin layer of Vaseline before filling. So the soap dissolves more easily after curing.
5. Let it harden
The soap needs to cool down and cure completely. If it is really tight, it will easily break loose from the mold. If you want to cool faster, you can also put the mold in the fridge.
techniques
Beginners should start with a single form. So you get a feeling for processing. After that you can start experimenting.
1. Deposit for transparent soaps
Clear glycerine soaps can be filled with various s. For a variety of things are suitable.
- Small soap bars, shaped or cut
- Little children toys
- Dried fruits, whole or sliced
- Dried flowers
- color pigments
- Shells, snail shells
- Sweets, eg love beads

With very simple things can make great soaps, if you have to say that some look very nice, but more of the decoration in the bathroom serve as usable. Eventually, the soap is gone all around and the objects inside come out. Mussels can poke, mica adheres to the fingers, the orange slices are hard and unwieldy. If you use soap deposit, the soap can be used up to the end.

2. Picture soaps
For this, preformed small soap bars are used. They are then arranged in a larger form. At the end, the transparent soap mass is poured over it. The deposits are clearly visible in the transparent soap.
3. soap on the rope
This soap is ideal for hanging in the shower. This will prevent it from falling down and also make the piece dry out well. Simply put a string, cord, gift ribbon or similar into the soap to form a loop. After drying, you can hang the soap on it. It is important that the cord is deep in the soap, otherwise it will go off after a short application.
The introduction works quite simply according to the following principle: Immerse the ends over a large area in the liquid soap mass, pull them out again and let them solidify. Repeat this process several times. At the end lay the two thick ends in the mold, fill the remaining mold and let it harden.
4. Dotted soap
For this you use a box shape or who has a cylindrical shape. What's more, thick straws are needed. The soap mass is melted, dyed and scented. Then a thin layer of soap mass is poured into the mold.

If this is quite solid, put the straws in it. They are holding well on the crowd now. You should stand as straight as possible. Then fill the mold with soap mass. After the soap is really hard, pull out the straws. Fill different colored soapsticks in the empty holes.
1 of 2

Get hard. Release soap from the mold. For very thick pieces, the soap can be sliced.
Homemade soap is something great. When making soap with children, you should do without the cold or heat-stirring process and use finished soap mass instead. The design options are enormous. Who does not want to buy extra forms and many additions, can manage with a few things from the budget and a few purchases in addition. Of course, caution is required, the molten soap mass is hot. In addition, soap making has addictive potential. Not a few who have started to make soap are now professionals in the field. With a little imagination and skill, it's easy to develop your own creations.
© Marion Kostorz


