Processing Silicone Correctly - Dry Times, Properties & Co
- What are silicone joints for? "> Expansion joints
- sealing joints
- drying times
- Joint-Hai
- scissors
- masking tape
- Fugenglätter
- rubber gloves
- caulking gun
- silicone cartridge
- Dish soap and rags
- Silicone cleaner and primer
- Pull joints
Silicone is the most widely used way to seal joints. Handling silicone properly is easy, but without the necessary knowledge, a lot can go wrong. So that you come to a clean and effective result, we have put together the most important tips for you.
Pulling a new or renewing an old silicone joint is a quick fix to restore the look and safety in a wet room. Theoretically, you can do this job with few resources that can be found in every household. However, there are now numerous, specifically for the processing of silicone-oriented tools. These inexpensive helpers can greatly simplify the work with the joint sealant and help to achieve a substantially clean result. We show them here how to proceed step by step to make an old joint with fresh silicone again visually flawless and technically safe seal. Because leaking, old joints can also be dangerous.
What are silicone joints for?
There are two indications where instead of a mineral-filled joint, a sealant made of elastic silicone should be chosen:
Expansion Joints
Tiles and slabs are made of baked clay or other mineral material. They expand slightly when heated and contract when cooled. This effect adds up to the size of a tiled surface until the normal, cement-based joints can no longer absorb the thermal movement. Then the fugue breaks and water can penetrate. Therefore, expansion joints made of elastic silicone are installed to prevent tearing.
sealing joints
Splashing water and dew formation can penetrate into very fine cracks and unnoticed there for a long time to ensure rot and mold. So that moisture can not penetrate through a joint at critical points, such as on the edge of shower trays, bathtubs or under windows, it is sealed with silicone. A fresh and clean silicone joint ensures safety for a few years. But once a year it should be controlled. If it is moldy, cracked or discolored, it should be replaced. 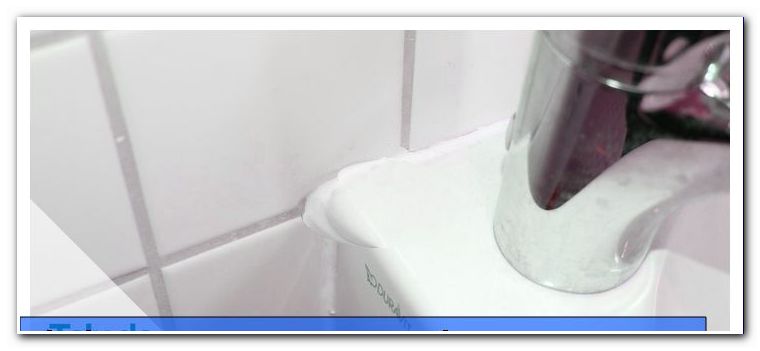
Properties of silicone
Silicone is a pasty sealant. Pasty means pasty or doughy. It is supplied in spray cartridges, which are emptied with a caulking gun. Silicone has a plasticizer that outgasses when in contact with air. As a result, silicone hardens until it has assumed rubbery properties. Sanitary silicone convinces with its good adhesion and elasticity.
drying times
After peeling, the silicone is allowed to fully cure and dry. On the surface, the drying time is only about 15-20 minutes . Thereafter, the mass is already dried and is difficult to work.
The rule of thumb for total drying time is: One day per millimeter of joint width. As long as the joint must have time to rest and must not be charged, or come into contact with water.
Silicone is very sensitive to water during curing. Moisture during drying renders the joint leaky because it reduces the adhesive properties of silicone. The temperature in the room should be around 20 ° C or below. All cleaning and beautification attempts while the silicone dries will only worsen the result. When the silicone is fully cured, it is easy to peel or cut off any protrusions or smears.
Silicone is very strong on curing. A good ventilation can reduce the odor and ensures optimal conditions for the drying process.
work equipment
Regardless of whether a new joint is to be set or an old joint is to be repaired, the procedure is identical:
- Clean and dry
- For natural stone slabs: mask the edges
- Put the joints
- follow
- let dry
- remaining work
The cleanliness of a joint is very important because foreign bodies in the silicone greatly reduce its sealing effect. Above all, this endangers its adhesion to the substrate and to the edges of the tiles due to dust and dirt. 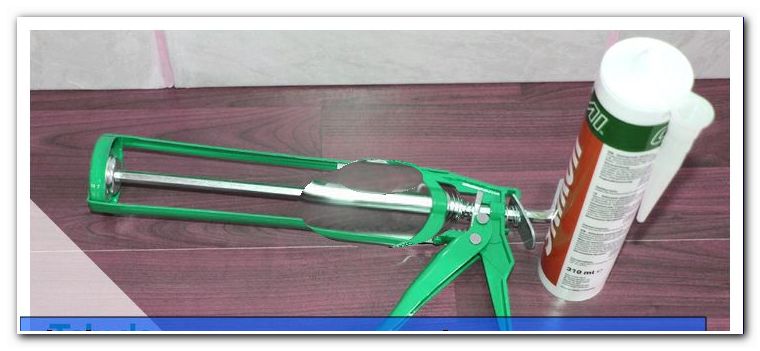
The following tool is useful for setting a new joint or replacing an existing joint:
- "Joint-Hai"
- scissors
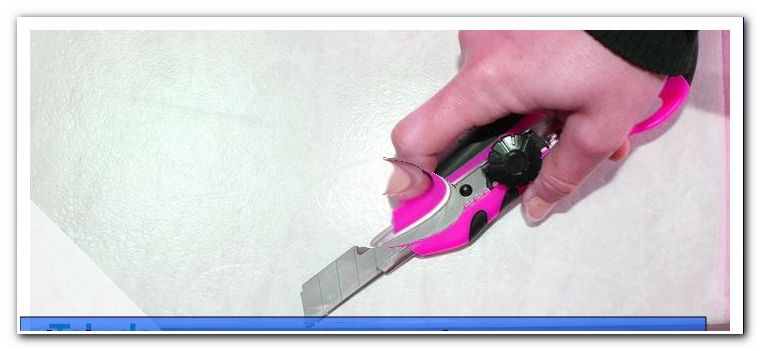
- Cuttermesser
- masking tape
- Fugenglätter / Fugenabzieher
- rubber gloves
- caulking gun
- Silicone cartridges in the desired color
- Dish soap and rags
- silicone
- Silicone Primer
Joint-Hai
The "Fugen-Hai" is a special tool that was explicitly developed for cleaning old silicone joints. It costs about 5 euros and is much more effective than the traditional cutter used. Above all, the grouse shark is much safer. Although it is also equipped with a sharp knife, this is much easier and safer to handle than the popular utility knife.
scissors
The scissors are used to open the silicone cartridge and to cut off the masking tape. A budget scissors for 15 euros is sufficient for this purpose.
masking tape
The masking tape is used for masking natural stone slabs. On slate or other uncoated and open-pored mineral smeared silicone is very difficult to remove. Therefore, the edges of the plates must be taped with masking tape. A roll of high quality masking tape costs about 5 euros . Parcel tape or Gaffer tape should not be used. These are very expensive, they also leave behind when removing residues that must be removed again. 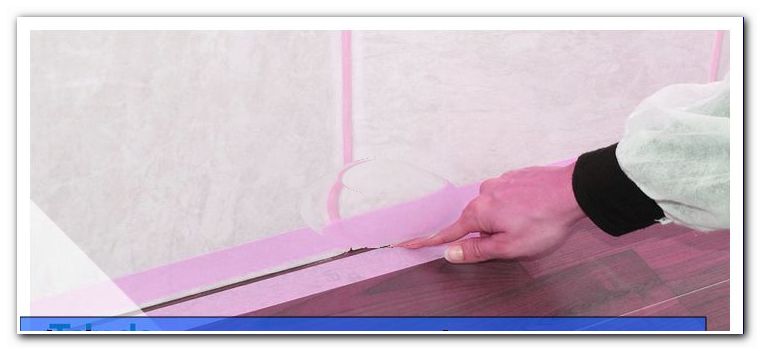
Fugenglätter
Joint smoothers are available in a set for 5-8 euros . They are a considerable relief when removing and smoothing the freshly placed joints. They make handling with bottles or the bare fingers unnecessary and provide much cleaner results.
rubber gloves
Rubber gloves protect the hands from the silicone. This is quite sharp in the fresh state and can lead to skin irritation. Disposable gloves made of latex are ideal because they are sensitive to the senses. A packet of 100 pieces costs between 3 and 5 euros.
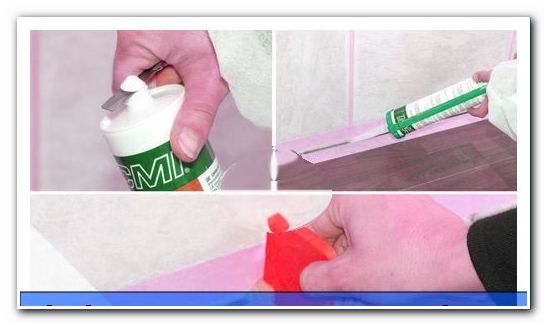
caulking gun
The caulking gun is used to squeeze out the silicone from the cartridge. The quality should fit the scope of work. Simple caulking guns are already available for 3 euros . However, wanting to work on a multiple dwelling is a tedious task. Electrically operated cartridge presses can be purchased from 50 Euro. A tip: These devices are often available second hand. 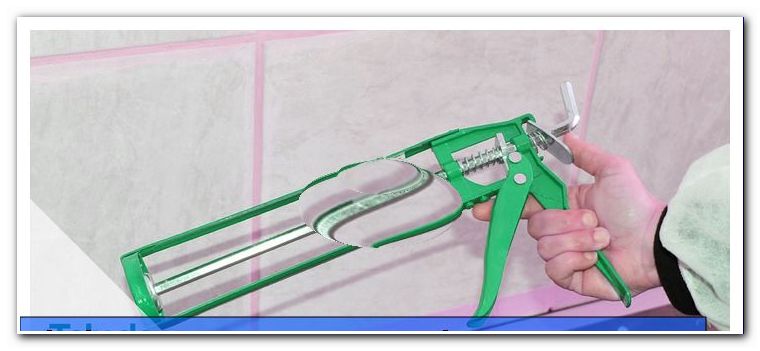
silicone cartridge
The silicone cartridge is the container in which the silicone is supplied and stored. When using the silicone cartridge, it is essential to pay attention to the expiry date. Even unopened silicone cartridges harden over the years. This is not only annoying, because then it is missing in use. Unusable silicone can, if it is not noticed in time, also damage the cartridge press. Joint silicone is available in many colors today. High-quality material from the brand manufacturer costs about 6-8 euros per cartridge with 300 ml .
Attention: Under no circumstances should silicone be confused with acrylic! Acrylic has the advantage that it is paintable and can be used well in dry rooms. Acrylic cartridges look similar to silicone containers. This material is not waterproof and not suitable for wet rooms.
Retailers also have mini-cartridges ready for small repairs, which are already under sufficient pressure. In these, the pistol is integrated with the same. Complete units with approx. 100ml cost approx. 5-6 Euro.
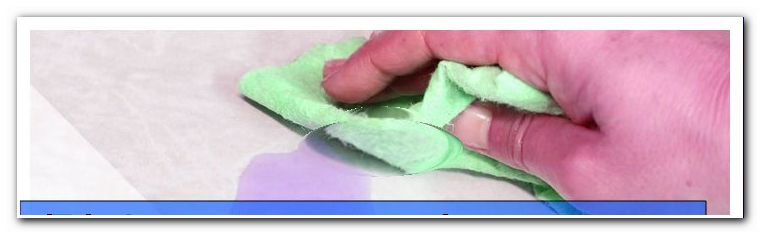
Dish soap and rags
Detergents and rags can be removed from the household. Here you can use what is available: everything from universal cleaner to bathroom cleaner spray bottle. It is only important that the joint is thoroughly rinsed after cleaning. 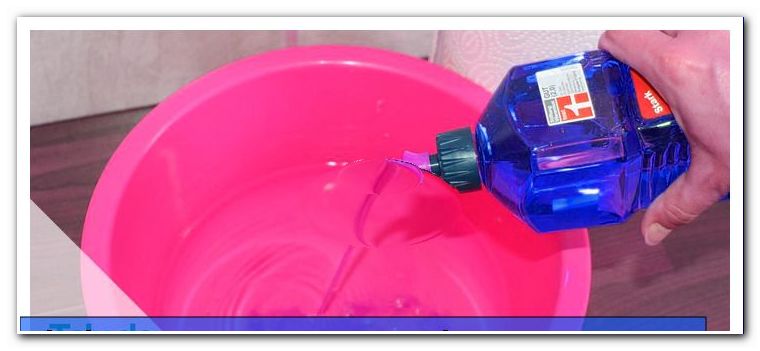
Silicone cleaner and primer
Silicone cleaner is a highly degreasing solvent. It serves to create the ideal adhesion between substrate, tile edge and silicone. The 250 ml bottle costs about 8 euros
Silicone primer or silicone primer is important for loose or highly absorbent surfaces and tiles. Even with galvanized and smooth but rusting metal substrates, the silicone primer is the perfect primer for silicone. For repairs in the bathroom, the silicone primer is usually not necessary. A 125 ml tin of silicone primer costs about 10 euros
Process silicone properly
Cleaning is done in three steps:
- Remove loose material
- Wash out joint
- Degrease joint
For newly tiled surfaces, therefore, the vacuum cleaner is the ideal tool to rid joints of the coarsest dirt. Then rinse the joints with soapy water, this binds the remaining fine particles. The soapy water must be completely removed, so rinse thoroughly with water after washing. With a hair dryer, the drying of the joint can also be accelerated. Then rinse again with silicone cleaner and let dry. Silicone cleaner is very volatile and dries quickly. However, as it contains strong solvents, adequate ventilation must be provided.
When replacing old joints, the old silicone is completely removed beforehand using the joint shark. For natural stone or other sensitive materials, scratch as little as possible on the surface. Therefore, it is better to work generously with silicone cleaner and a scouring pad made of plastic, which protects against unsightly scratches.
For natural stone slabs, the edges are masked with masking tape after cleaning, drying and degreasing the joints. The adhesive tape must only extend to the edge and never protrude into the joint. A vertical masking of the edges by the masking tape must be avoided. Excess masking tape is removed with the craft knife.
When the preparations are completed, the silicone cartridge can be placed in the press. For this you always cut a narrow, sloping point with the scissors. The opening should be slightly smaller than the joint.
Pull joints
Now finally the gap is filled with silicone. It says: proceed slowly. It is always worked millimeter by millimeter. Always squeeze enough silicone until the joint is completely filled. Only then hike a little further. 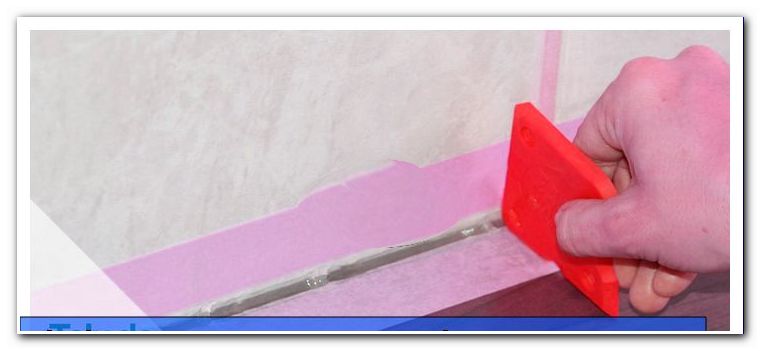 Even if a long and fast-drawn joint initially looks nicer and smoother: the most important thing is that the silicone rests against the side walls and the substrate over its entire surface, closing all gaps and cavities. A survival of the silicone of about 0.5 mm is not critical. Only when the entire web is filled over the entire surface, the joint is removed with the joint smoother. It should create a small groove.
Detailed instructions for pulling silicone joints: Replace silicone joints