Build your own drum - 2 ideas for crafting
- Flowerpot drum
- Tinker the rotary drum
Make your own musical instrument: either a creative flower pot drum with simple means from the household. Quite simply can also tinker a rotary drum with handle. Easily make musical instruments with your children - you'll be amazed how easy it is to make household-style instruments that still work.
Flowerpot drum
With a little patience, you can create a solid drum out of simple materials, the sound of which will last a long time. Thanks to a little tricks, the volume can even be attenuated neighborly.
Difficulty: Precision and patience are required, but the steps are easy to imitate even for beginners.
Time required: about one hour plus one night of drying time before painting
Material costs: under 10 euros
You will need that:
- a medium-sized flower pot made of clay (terracotta-colored, alternatively any flower pot will fit, but sound literally brings the most beautiful sound and can be decorated very nicely)
- Sandwich paper or baking paper
- a packet of wallpaper paste and a bowl for mixing
- Acrylic paints for later painting
- a roll of thin knit or sausage cord
- the widest possible flat brush (alternatively any big brush)
- a smaller brush for the color
- compasses
- pencil
- scissors
That is how it goes:
1. Let's start: From the sandwich or baking paper, cut twelve equal circles for the eardrum. These should exceed the diameter of the surface of your flower pot by about 5 to 10 cm, because they serve later for attachment. Determine the radius, add 5 to 10 centimeters (the larger your pot, the more inches you add!) And bring with the compass a corresponding circle on your paper. Example: For a flower pot with a diameter of 30 cm, the radius of 15 cm is supplemented by the necessary 10 cm for the edge, so that the circle should be set to 25 cm.
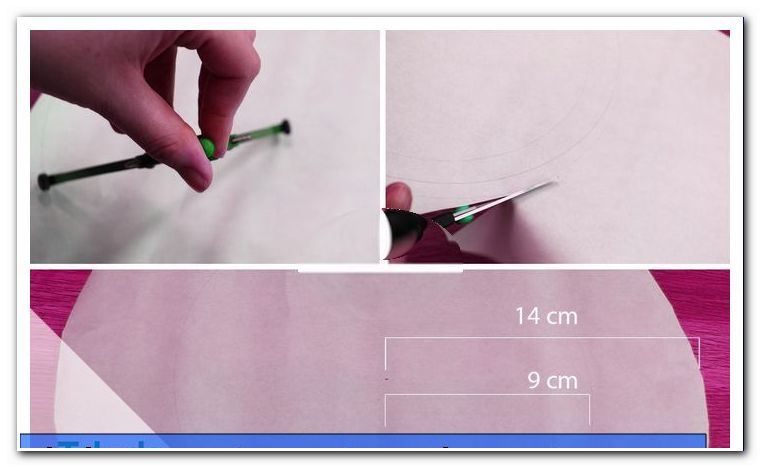
Tip: Alternatively, you can use a large pan lid from the kitchen as a template for your circles, if you find one that has the right dimensions!
2. Your twelve circles are in front of you ">
Tip: If you want a drum with a quieter sound, put a piece of cloth or a small piece of cotton cloth in the pot in advance. This acts as a natural damper from the inside.
4. Now comes the most important step: Glue the circle onto the surface of the flowerpot by firmly sticking the projecting circle edges to the pot. It is important to ensure that the paper is stretched as tight as possible! Bumps or too loose attachment would negatively affect the sound.
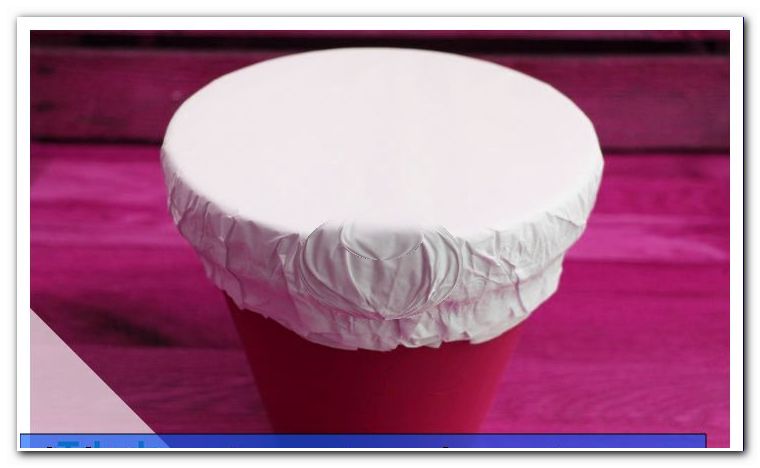
Tip: First stretch the circle between your hands and put two opposite sides on the pot in this way. Now smooth out the rest well and keep everything in shape until your eardrum is stretched smoothly and evenly over the flower pot.
5. Tightening the fur requires patience - but it should not be neglected if your drum should not only look professional later, but also sound like that. Repeat this step with all the other eleven circles: brushing and carefully stretching over the pot.
Tip: Any air bubbles can be gently brushed out with your thumbs. However, do not apply too much force so as not to jeopardize the tension.
6. If you fail a shift, if necessary, gently lift the appropriate paper and put it back on. Under no circumstances should you dissolve all layers from the pot. Then you would have to start from new, because the once connected layers would not be stretched clean.
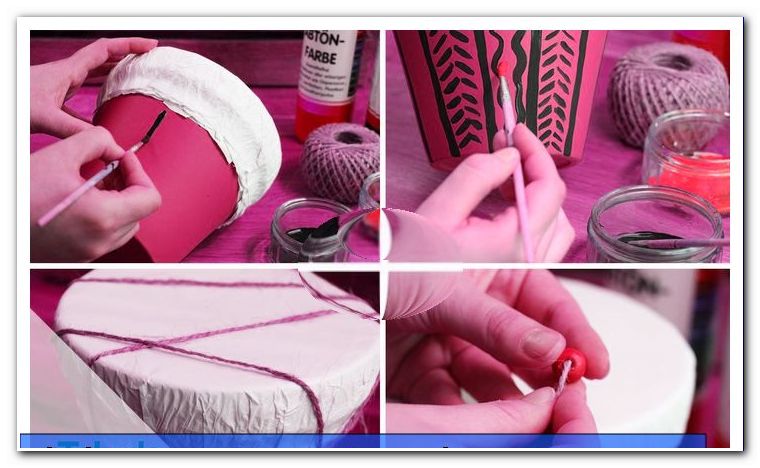
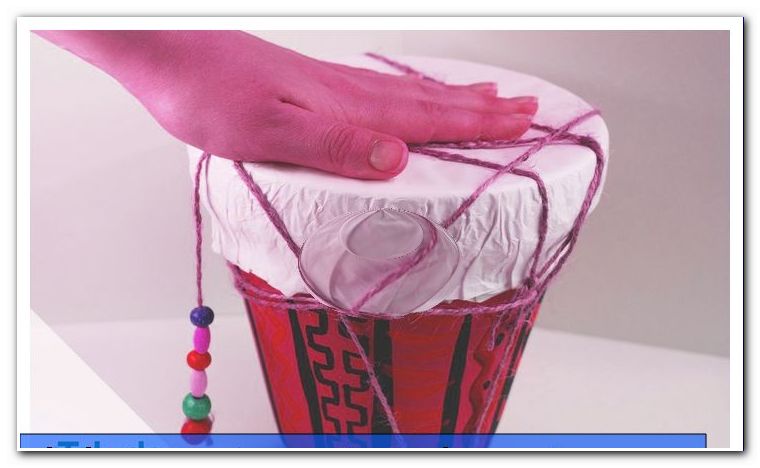
7. Then tie your cord or sausage cord around the edge of the pot, which is glued to the paper. This not only creates a rustic look reminiscent of the traditional djembe, but also leaves the paper with no chance to stand out or wave when drying.

8. Now let the eardrum dry thoroughly - preferably overnight!
9. Paint your drum as you like: Indian-inspired motifs fit very well as well as African patterns. When the paint has dried you can start playing!
An alternative to the eardrum is a balloon. Instead of the many layers of baking paper and a cut balloon can be placed over the drum body and attached to it with glue or tape.
Tinker the rotary drum
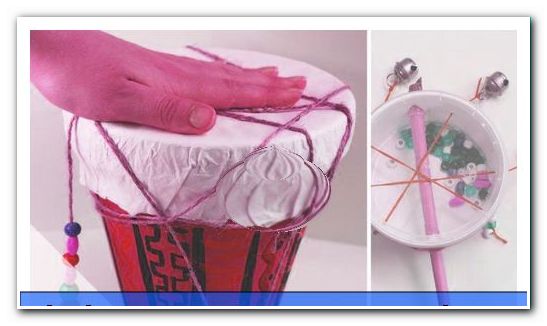
With a simple yogurt cup you can make a drum - the rotary drum with handle and little bell will especially delight your children.
Difficulty: easy, but small children could use help cutting and piercing holes
Time required: 1 h
Material costs: under 5 €
You need:
- Craft glue or hot glue
flat but wide cardboard yoghurt cups - Bells or pearls
- floor
- nuts
- scissors
- cardboard
- twine
- Metal needle, roulade skewer
- For example. Adhesive film, felt
Manual:
1. Start by taking the yoghurt cup - if possible, it should be flat and at least 7 cm in diameter so that the drum does not become too small. Pierce two opposing holes in the cup - approximately at mid-height. For a scissors, but also a sharp pencil can be taken.
Tip: Increase the hole almost to the thickness of the stick by turning the tip of the scissors.
2. Now push the stick through the two holes, so that a small piece looks out at one end. Fix in the stick with glue. Before you can continue tinkering, the glue should be completely dry.
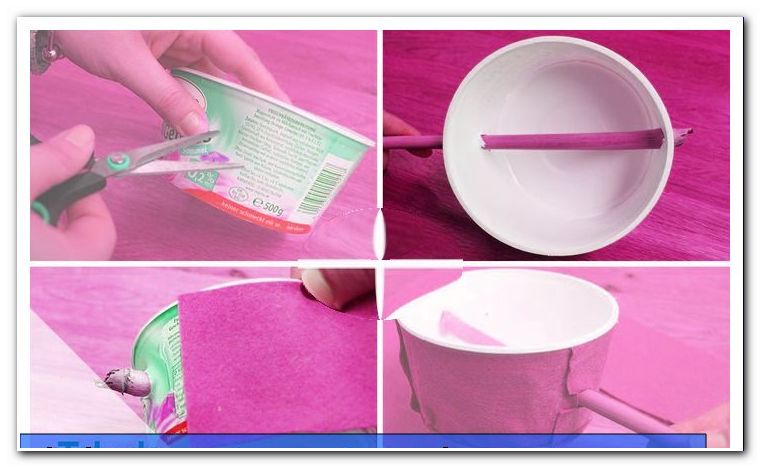
3. If the handle is firm and dry, the drum can be decorated. Now pierce several, small, opposite holes through the drum. Design the drum to your liking - either stick it on with colorful adhesive film or dress it up with craft felt.
4. Now pierce the holes again with a metal needle so that you can pull through threads without problems.
5. Now the drum can already be filled. For bells, rattling nuts, but also other small noise makers can be used.
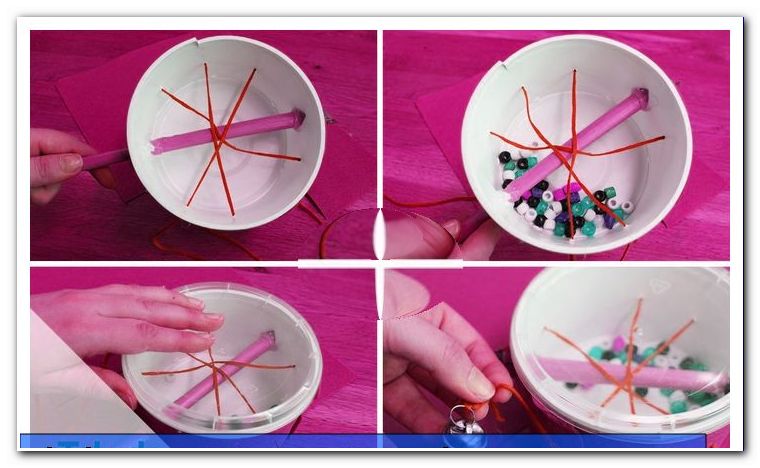
Tip: Do not make the cup too full, bells and nuts should be able to move back and forth without any problems.
6. Now measure the diameter of the cup exactly and cut a suitable circle out of the piece of cardboard. The easiest way to do this is by placing the cup on the cardboard and surrounding its outline with a pen. The cardboard circle is now cut out.
In our case, the cup had a matching lid, which of course can now be easily used for closing.
7. If you do not have a lid, glue the cardboard to the cup with craft glue or hot glue and seal the drum.
Tip: Try to assemble everything lying on the table, otherwise twine may slip out.
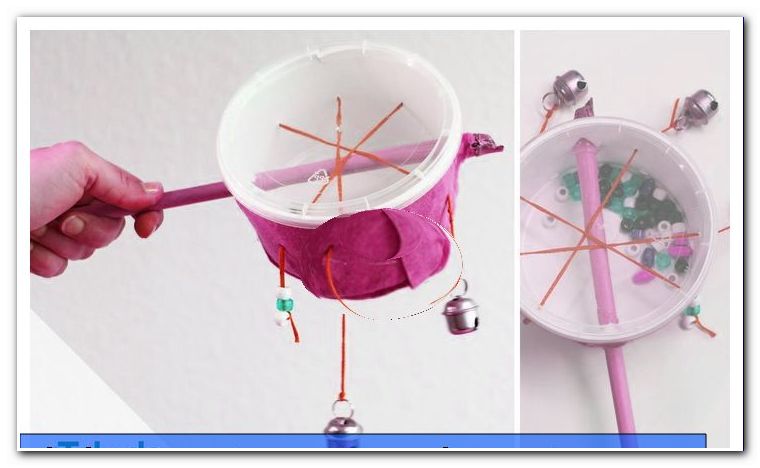
8. Finally, the bells are attached to the twine. Done is the rotary drum!
Tips for quick readers:
- Drum made of flower pot with baking paper
- Twelve paper layers on top
- Fix with glue and cord
- Let it dry and decorate
- as an alternative, use a balloon as the eardrum
- Rotary drum made of yogurt cups
- Punch holes in yogurt cups and attach stick to them
- Punch holes for bells and decoration in the cup
- Close the drum with cardboard
- Decorate the rotary drum