Tutorial: Sewing button placket - Instructions for polo closure
- Material and preparation
- Nähanleitung
- Quick guide
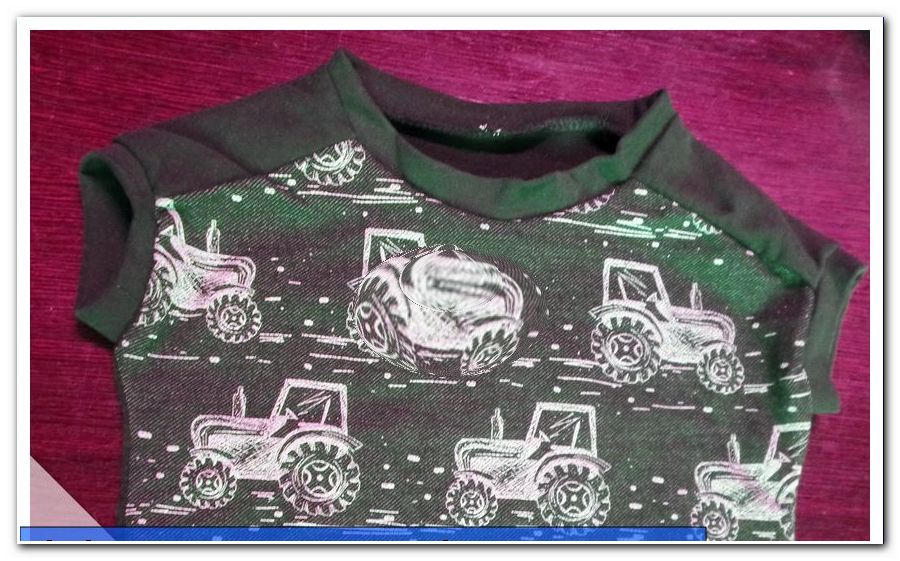
If the neckline is too narrow or a small detail to beautify the sight, then the polo closure is just the thing. Who has not happened yet ">
Especially if you do not have a cuff fabric in the matching color at home and just want to make a jersey fabric cuff, it may happen that it does not have the right width. This is mainly because many jersey fabrics have different compositions and therefore are different elastic - but always less stretchy than cuffs. If it's too big, it just helps to break up and sew on a tighter cuff anyway. But if it got too tight, so that the child's head does not fit comfortably, but the neckline looks good, you can help with this tutorial for a polo closure.
Difficulty 1.5 / 5
(with some stamina also suitable for beginners)
Material costs 1/5
(Remains of the material used or a small piece of plain-colored combination material are needed)
Time expenditure 1/5
(depending on the exercise variable, but at least within 30min to 1h feasible)
Material and preparation
The material selection
Ideally, you will use a remnant of the fabric from which you have also sewn the shirt or a plain fabric in a matching color. These may also be non-stretchable substances.
Tip: In order for the button placket to be a bit more stable, you should definitely use iron-on fleece.
The amount of material
A shirt is needed, in which you want to use the button placket and also two fabric rights of the desired fabric. My button bar in this tutorial should be 3 cm wide and 10 cm high, so I cut my rectangles in the size 8 x 13 cm. Here are the formulas for other size requests:
- Width = 2 times the desired width of the button placket + 2 seam allowances (calculated with 1 cm for me)
- Length = desired length of button placket + 3 cm seam allowance
Preparation for the polo closure
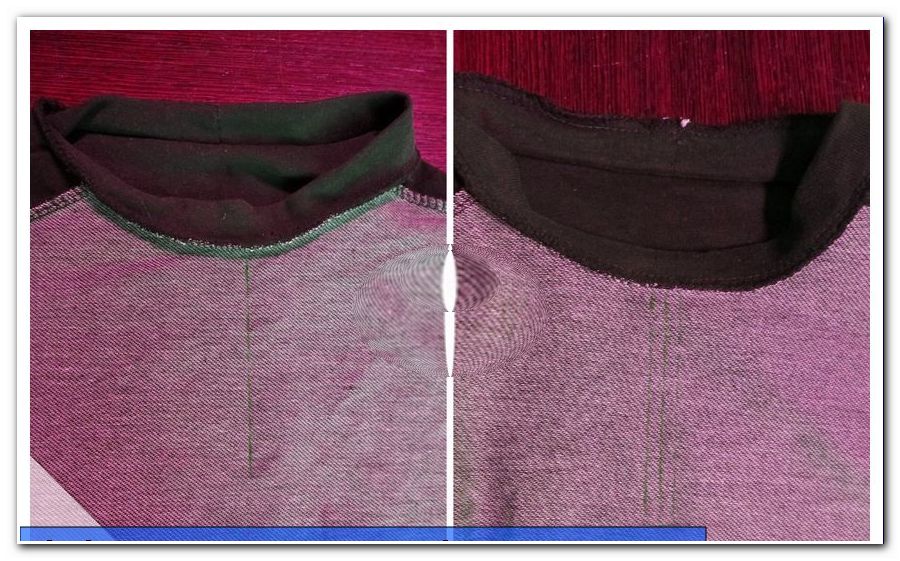
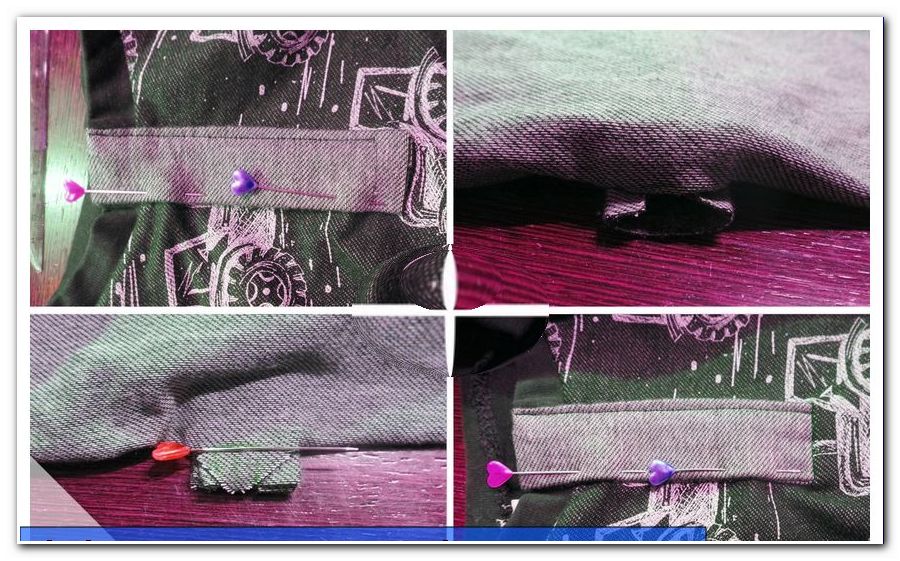
First the shirt is turned on the left side (ie with the nice side inwards) (fig. 2) and placed face up, so that a few auxiliary lines can be drawn. For this we need a straight line in the threadline, which is placed exactly in the middle of the front part.
For this, I mark the middle of the shirt with a pin and draw a straight line with a tailor's chalk or another washable marker of my choice. At the left and right next to each other at a distance of 0.5 cm follow two additional guides. The bar should be in total (including neck) 10 cm long, so I mark the lower end with a corresponding cross line.
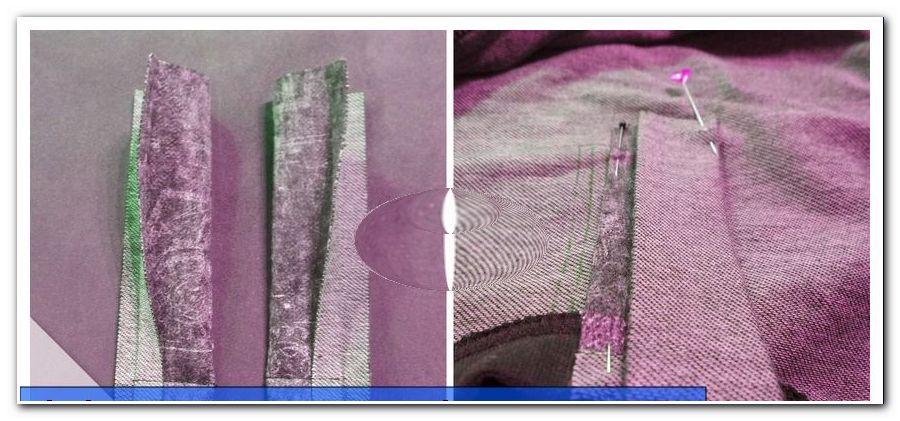
In the next step I prepare my rectangles for the button placket. For this, I fold both rectangles once in the middle left to left (ie with the beautiful side out) and iron on it, fold it again and iron one side about 1 cm to the center also. Now I fold this rectangle on the middle bow outwards and sew at one end with a simple straight stitch.
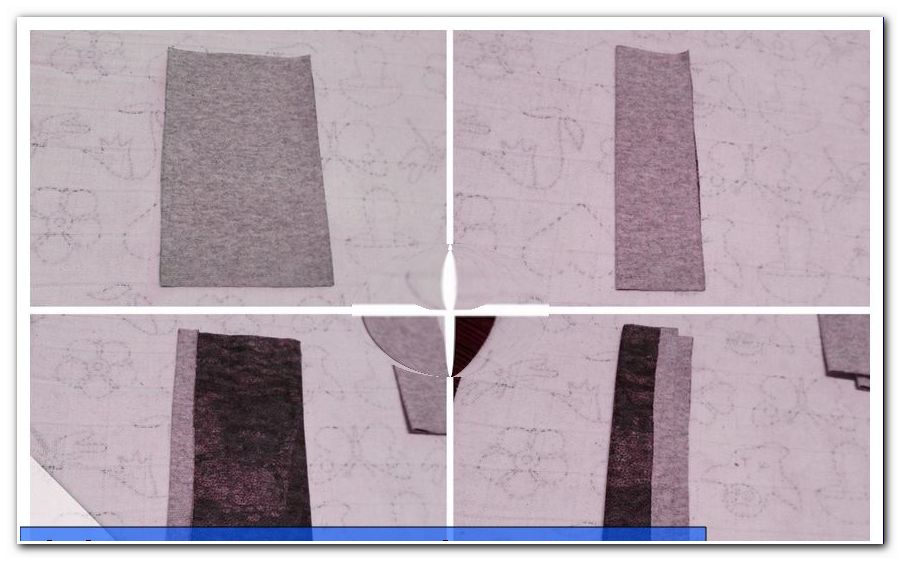
(Fig. 12) The second rectangle is exactly the same, but I put the seam on the other end, that is, the opposite. The beginning and the end are sewn in each case.
The seam allowances at the corners I cut off diagonally and turn both parts.
Tip: Well ironed is well known half sewn, so I form the corners carefully and carefully and then iron once again on my two bars.
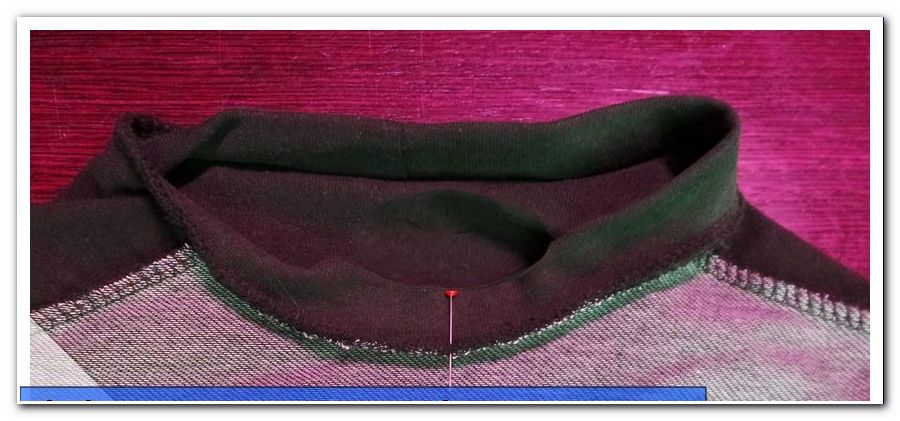
Now I put a bar with the closed end up to my neck so that the edges are flush. The bow side is on the outside and the open length is exactly at the outer auxiliary line below.
Nähanleitung
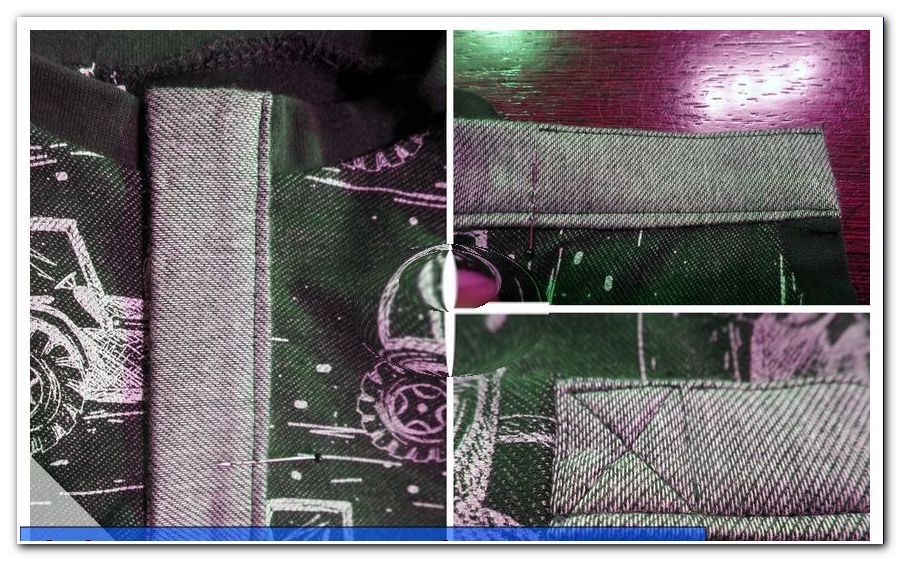
Starting from the top edge, I sew now with 1 cm seam allowance the entire length to the previously recorded end line. Beginning and end are sewn again. I fold the folded bug aside. Similarly, I sewed the second bar against the same.

In the next step, the outer fabric is cut along the center line up to 1.5 cm before the seam ends, then in each case diagonally outwards to 2 mm before the seam end. It really only cut the outer fabric. In the meantime, I fold the strip parts aside.
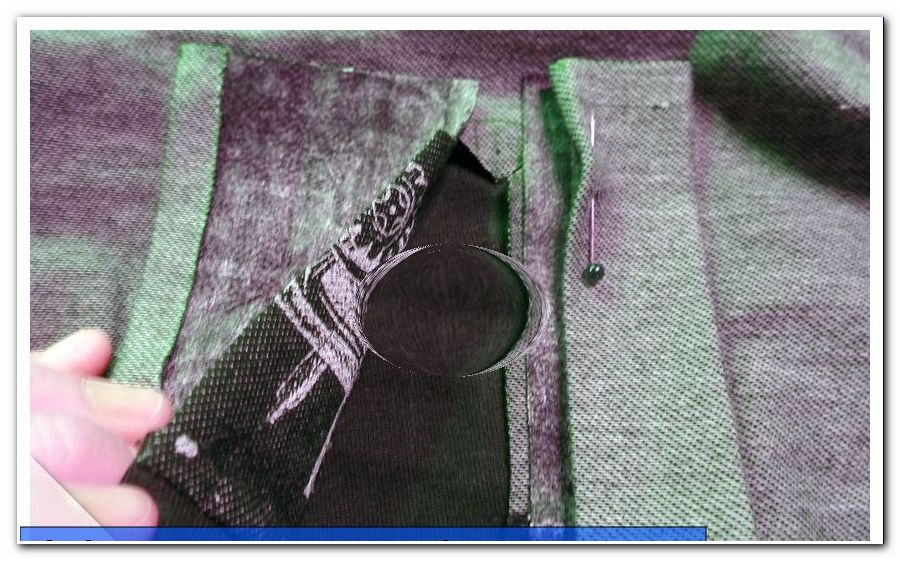
I cut the seam allowances at the top of both sides diagonally and fold both strips outwards.
Then I fold the outer fabric under the bar and put it just above the seam running underneath. I then pin down the strip, mark the previous seam end, and move away from that point to the top. Beginning and end are sewn again. And already my stepping is finished. For crossing the opposite bar is sewn just as.
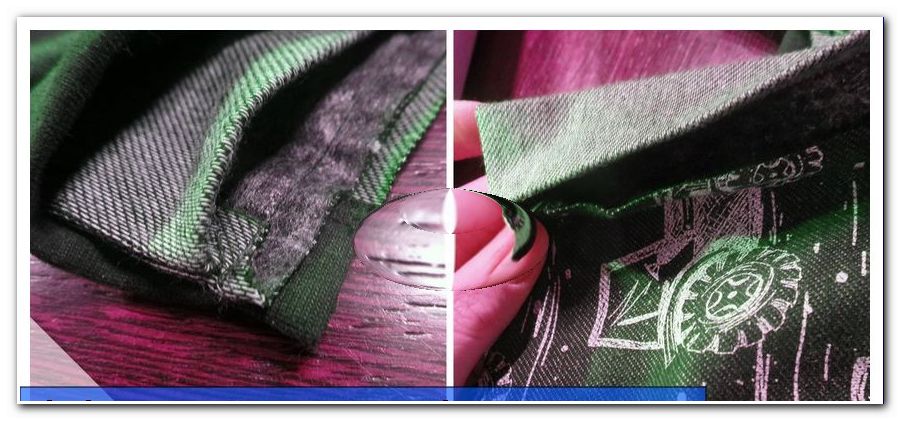
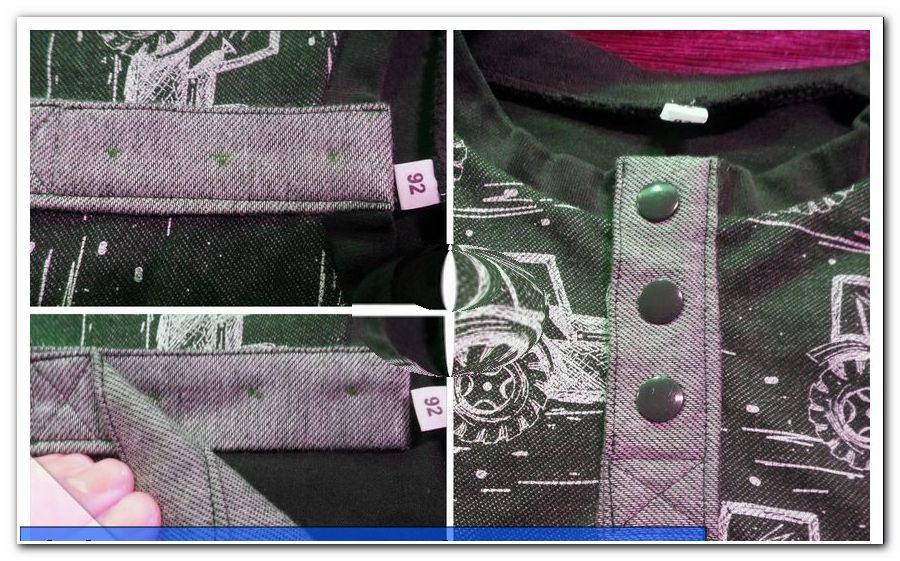
The transition I lay now exactly on the Untertritt (so seen from above right over left in men's cuts - in female cuts reversed) and stick all the layers firmly. I turn the shirt, carefully pull both ends and the small triangle through the hole into the interior and sew exactly between the two seam points. If the seam does not run absolutely straight, ugly wrinkles can develop - so here you need a sure instinct. Beginning and end are sewn again. Now you can already see how the polo closure will look when it's done.
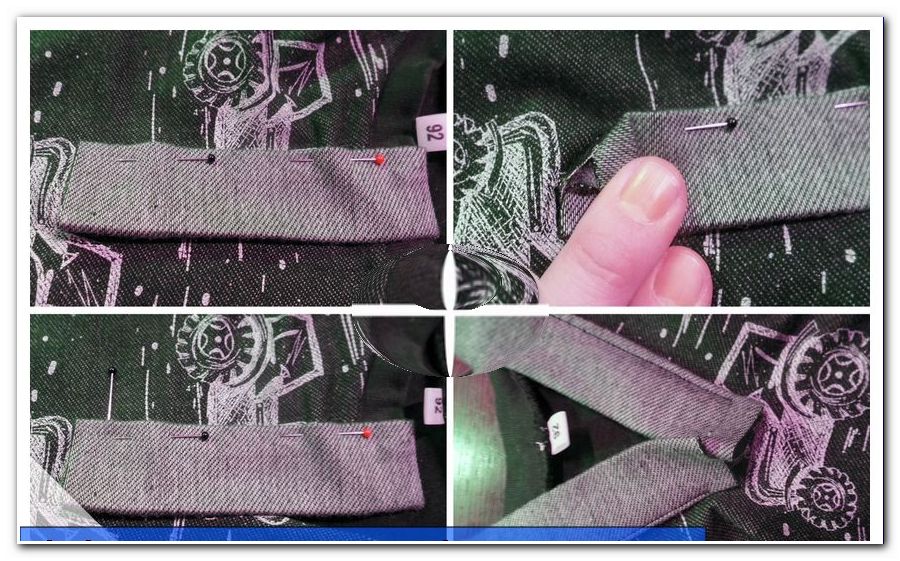
For fixation, I mark in advance a distance of 2 cm from the lower seam and sew away from this point narrow-edged from the outer bow of the crossing. The bottom step I flip aside. Afterwards, I place the crossing again exactly on the bottom step, sew the 2 cm mark across and below an "X" including the missing side edges.
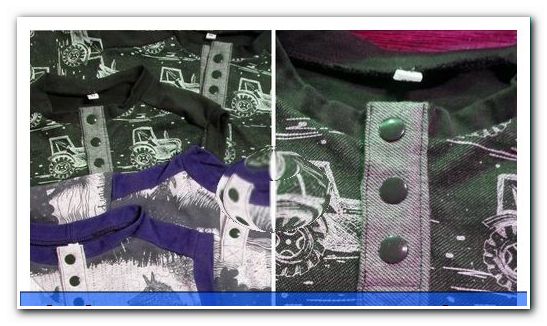
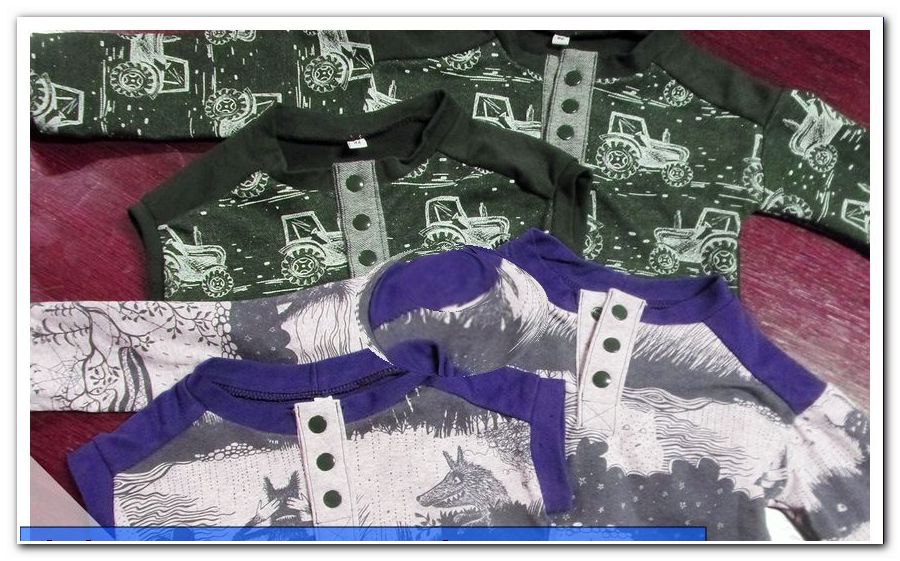
The button facing is thus already sewn. Finally, buttons or push buttons are attached. A detailed description of this topic can be found in our tutorial push buttons. Measure 1.5 cm from the top and from the top of the cross to the center to determine the position of the top and bottom buttons. The third button is placed exactly in the middle. Likewise at the bottom step. Then I put the buttons on - in my case snaps.
Quick guide
1. Sew T-shirt or sweater, reinforce last rectangles and cut
2. Iron rectangles left to left, unfold and iron in 1 cm from each side again
3. Fold the bow outwards and fix both strips against the same side
4. Shorten seam allowances, turn strips, place on the cutout
5. Stick along the outermost auxiliary line and stitch in a narrow edged manner
6. Cut outer fabric up to 1.5 cm before seam end, then diagonally to 2 mm before seam end
7. Shorten the seam allowances and fold the strips outwards, pin in place, stitch over
8. Pass over the step, fix it, turn the shirt over
9. Pull out the ends and triangle and sew them together
10. Mark 2 cm from the bottom and stitch over the crossing bow from here edged
11. Lay the strips on top of each other, fix them, sew "X" and missing stitching
12. Determine button positions and attach (press) buttons and you're done!
The twisted pirate