Advent calendar for children - DIY instructions for crafting and sewing
- Material and preparation
- To build
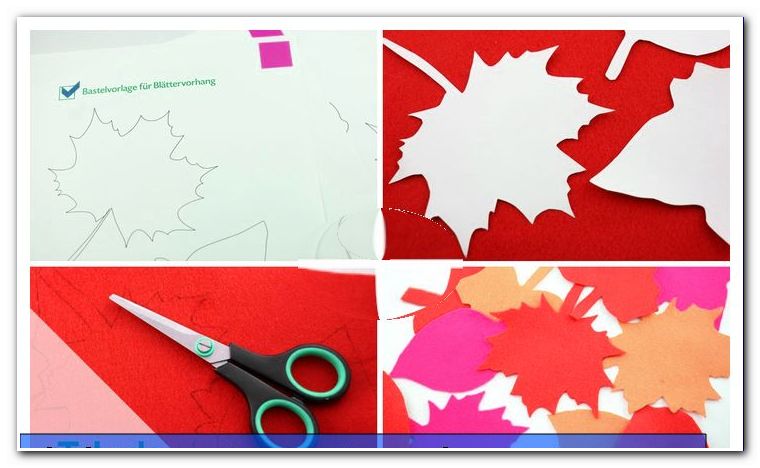
- To decorate
- The tree
- Sew the bag
- owl
- Sew bag with gnome
- Quick guide
In November, many parents are thinking about what the Advent calendar should look like for the children. Not everyone wants the child to eat chocolate every day. The self-made Advent calendars are ideal for filling. The parents can decide for themselves which gifts the children get. It is creative, personal and brings a lot of joy to both children and adults.
We will show you how to build a small tree, as an advent calendar, out of wood, decorate it and still be able to sew the bags for hanging. We sew the bags out of the jute cloth, which is very popular material at Christmas time. The fabric is beautiful, cheap and easy to sew. For the children, it is exciting when the bags have different shapes and they can always expect something different. We sew two different variants that came to mind.
Material and preparation
Difficulty level 1/5
suitable for beginners
Material costs 3/5
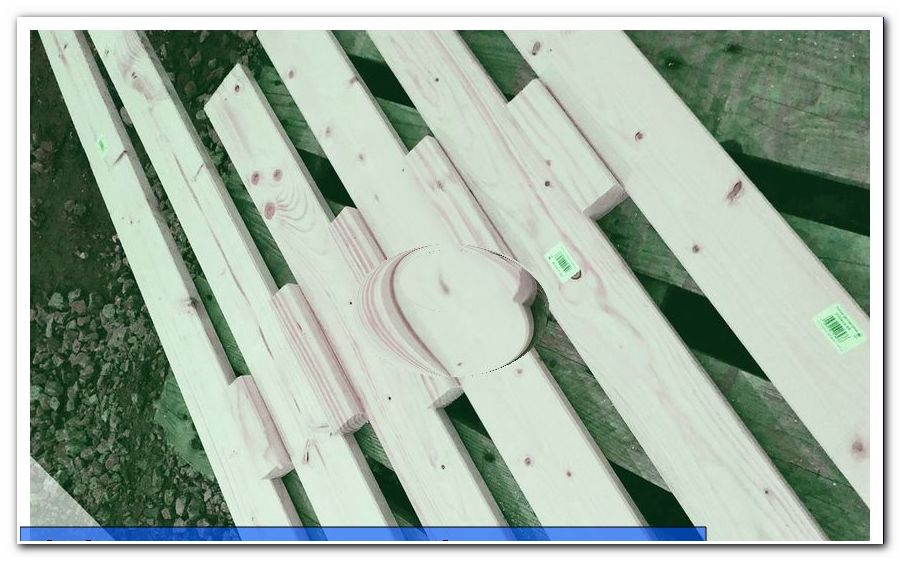
Pine boards from the hardware store, 2 m cost about 2.50 € / piece
4 × 4 cm pine square post costs about 5.20 € / piece
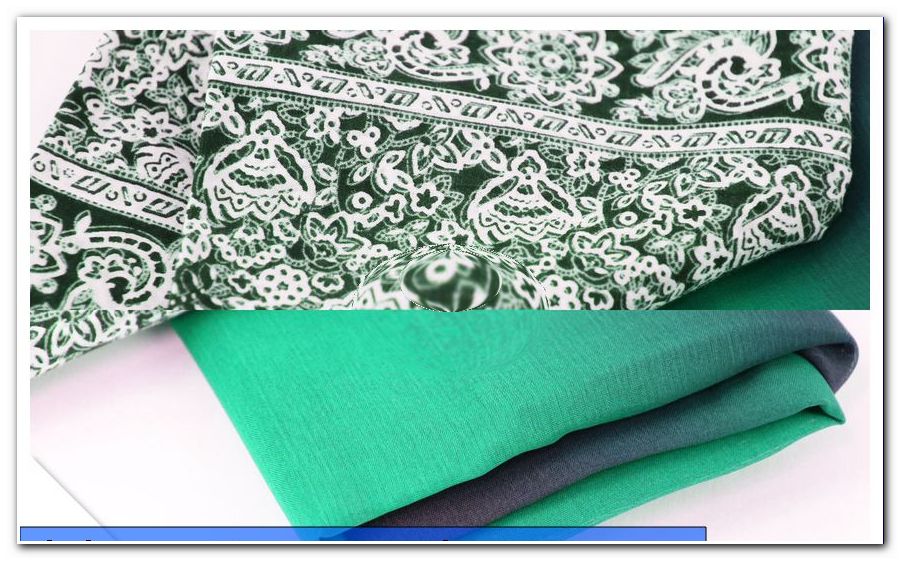
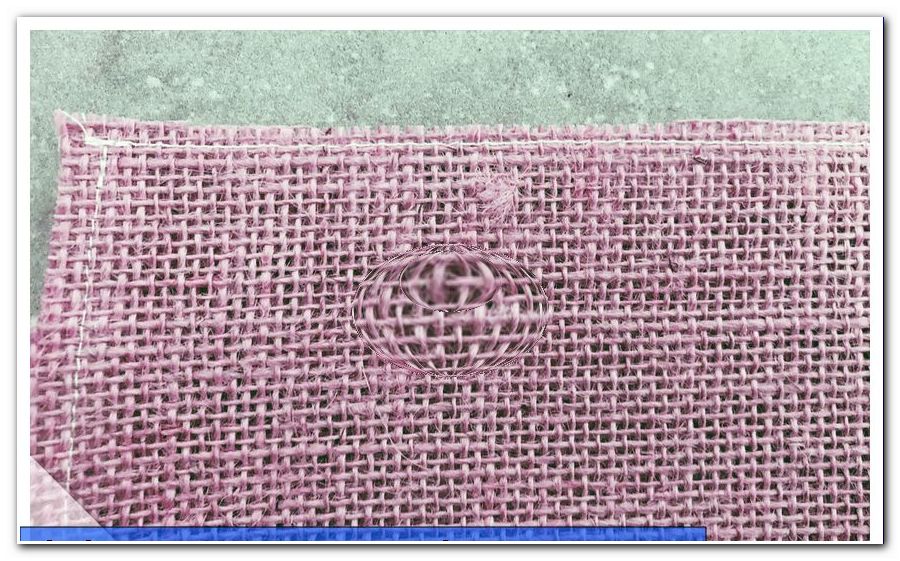
0.5 m jute costs about 3-4 €
Felt as a package 30 × 45 cm costs about 8 €
Time required 3/5
5h
You need the following materials:
To build
- Handkreissäge
- jigsaw
- Digger
- protractor
- sanding belt
- screw
- 3 x pine boards 2 m
- 1 x square post pine
To decorate
- Classic sewing machine
- Jute maybe cotton
- Felt in different colors
- decorative ribbons
- Brackets with numbers or possibly number stickers
- Hot glue gun
- Fairy lights LED 200
- Needle, yarn
- wadding
- scissors
Tip: If you can not find numbers brackets, you can simply attach twenty-four nails to the finished tree. Then of course you have to stick or sew on the numbers on the jute bags.
The material selection & material quantity
In the hardware store you will find a wide selection of different boards. We decided on 2m long pine boards and took 3 pieces home. Our tree should be 1 m tall and that's why we bought the square post in the size of 2 m.
We would like to sew the sacks for the advent calendar out of jute and felt, because we would like to make the bags with as an owl and an elf. The jute fabric is versatile and the natural color goes well with the pine. The colored felt is so great too.
Tip: If you want, you can of course also just sew cotton sacks. It is worthwhile to buy a fabric with a Christmas pattern.
We need different colors from the felt and can also work with scraps of fabric here. We bought 1.5 m jute.
Note: How many jute you need, decides the size of the gifts. For that reason, it would be nice to buy the 24 gifts before you start sewing.
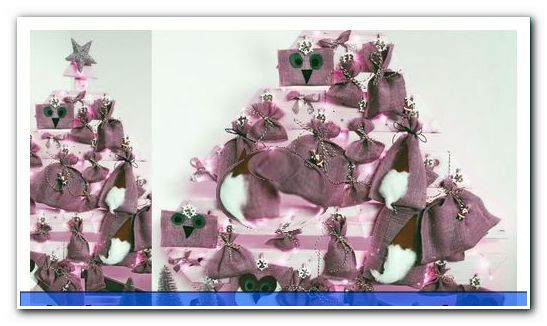
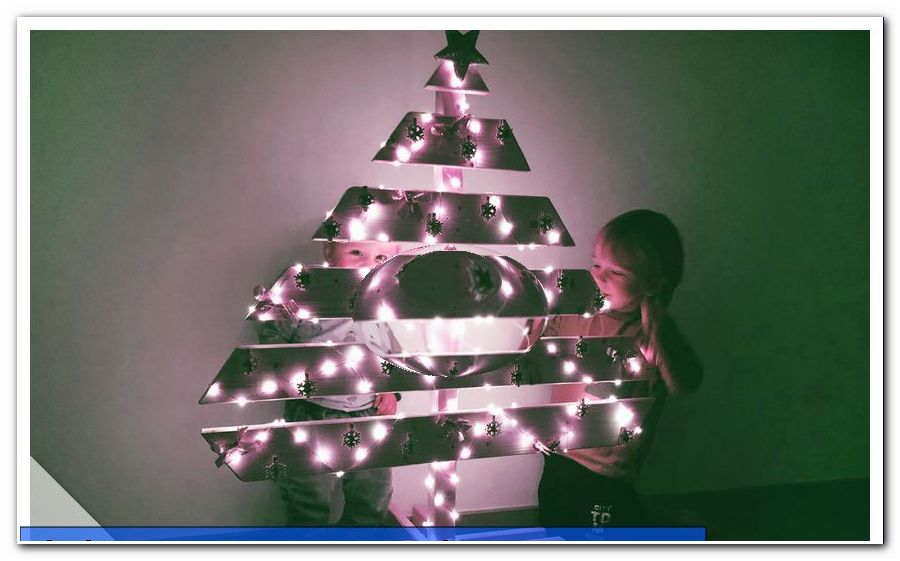
The tree
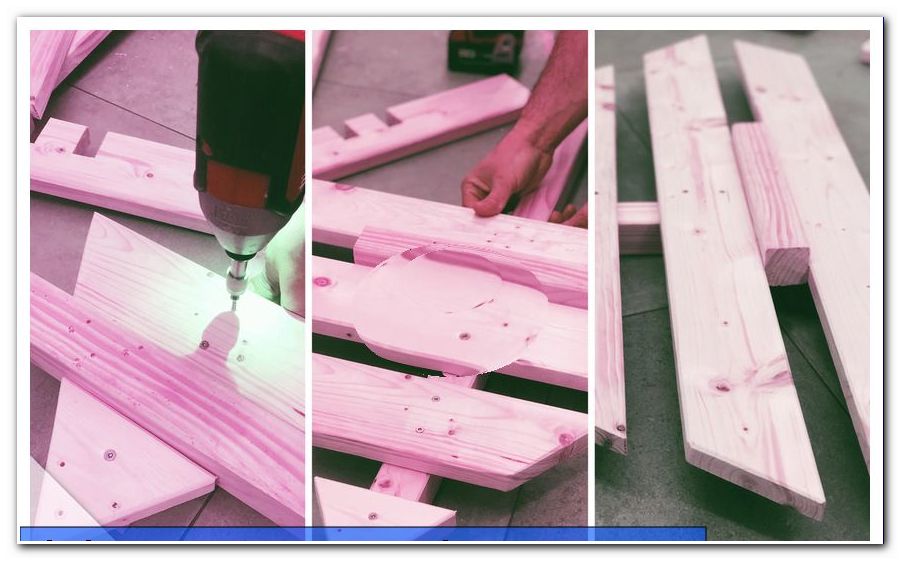
Our tree, as an advent calendar, becomes a simple triangle. We place the square post on our work surface and measure the length of 1 m. We shorten it with the saw and the remaining 1 m we divide again to 5 small pieces. These pieces are used to measure the gaps between the boards.
Now come the boards on it. We divide it with the saw in half. Then the 6 boards are placed on the work surface and between the individual boards, the 5 small pieces of the square post are placed.
Next, the middle of the tree is marked with a pen. When we are finished, we consider how wide the tree should be. The 24 gifts also need a lot of space. For this we need the protractor, since the angle should be the same on both sides.
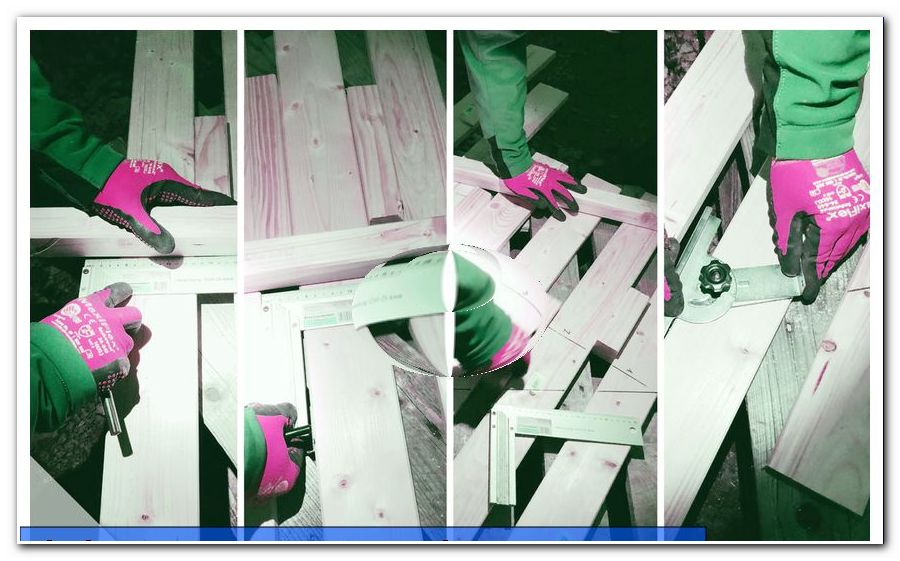
Now the boards are cut with the saw and then the edges are cleaned immediately on the sanding belt.
When we are done, we mark two holes in the middle of each board. Then the holes are pre-drilled with the screwdriver for the screws.
Now we use again our 5 small pieces of the square post and place them between the boards. We can attach our boards to the 1 m long square pole with the screws.
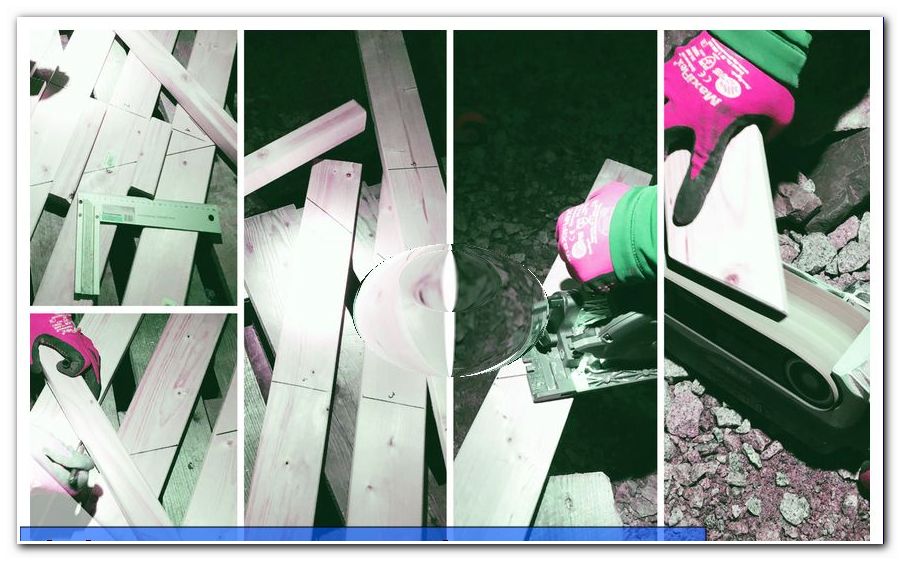
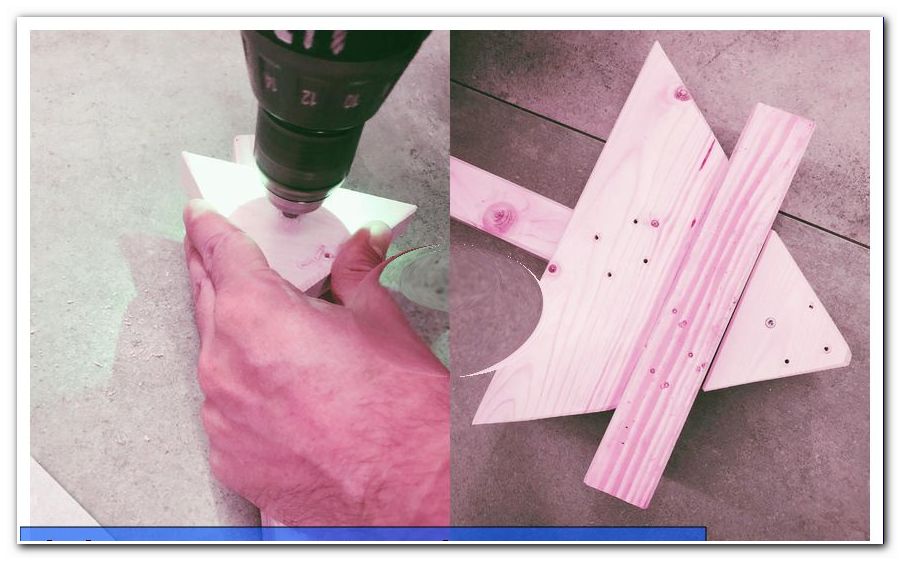
The advent calendar in tree form is not finished yet! From the remnants we build a frame that holds the tree. We need four of the same 50 cm long boards. We mark the middle and then 2 cm on each side (because the square post is 4 cm wide) and then 2 cm (= the width of the board).
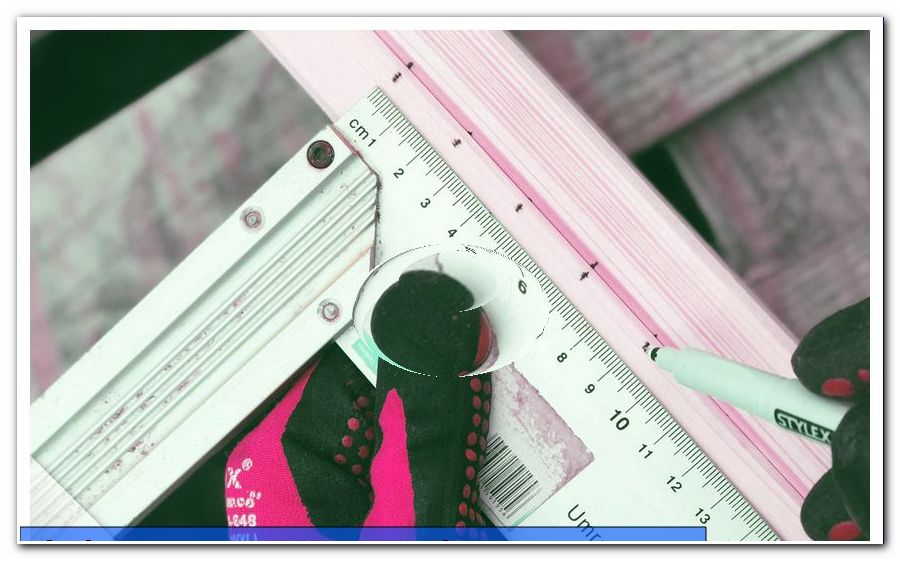
This means we now have 5 points (markers) on each board. Now we draw a 5 cm long right angle for all markings. We only ignore the middle. Then the small rectangles are best cut out with the circular saw and then the edges again serged.
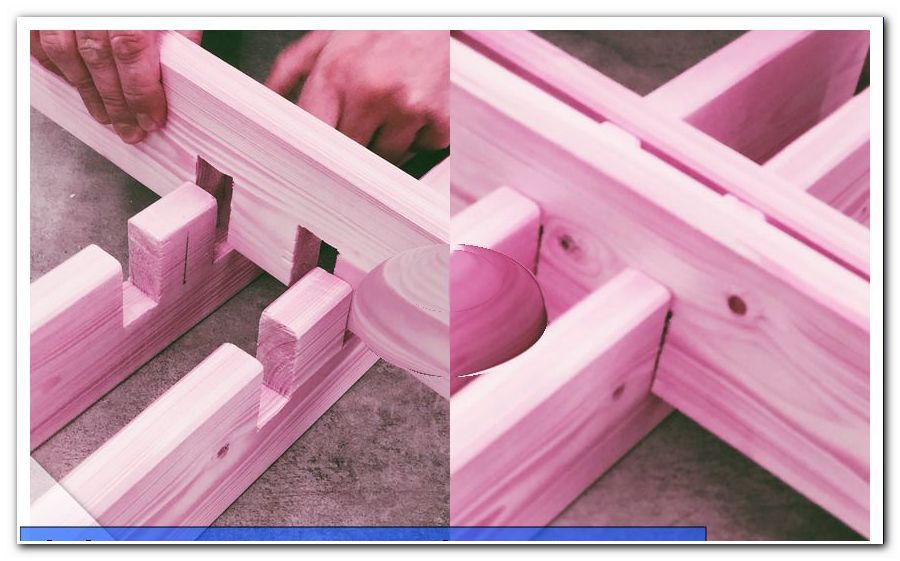
When we are done, we put two boards with the cut out rectangles up. The two remaining boards are placed with the cut-out rectangles facing down, creating a cross. Now our frame is ready and we can decorate our tree!
We stick now the wooden clips with numbers and the hot glue gun irregularly on the advent calendar in tree form. That's great! We still take a string of lights with 200 LEDs and try to distribute the fairy lights regularly. This length is perfect for the whole tree!
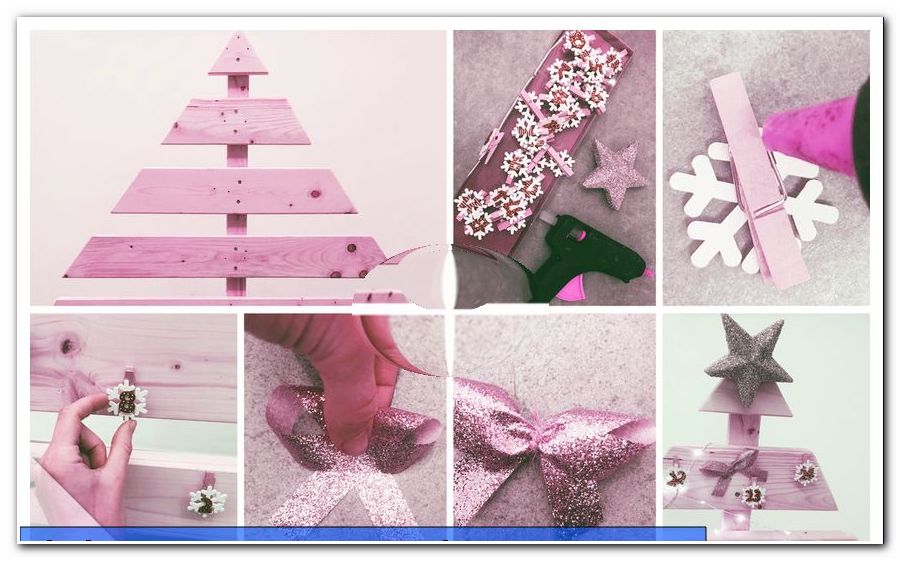
Tip: If you could not get hold of the wooden clamps with the numbers, now attach the twenty-four nails!
At the top there is another star, which of course is also glued on and we are almost done with the advent calendar!
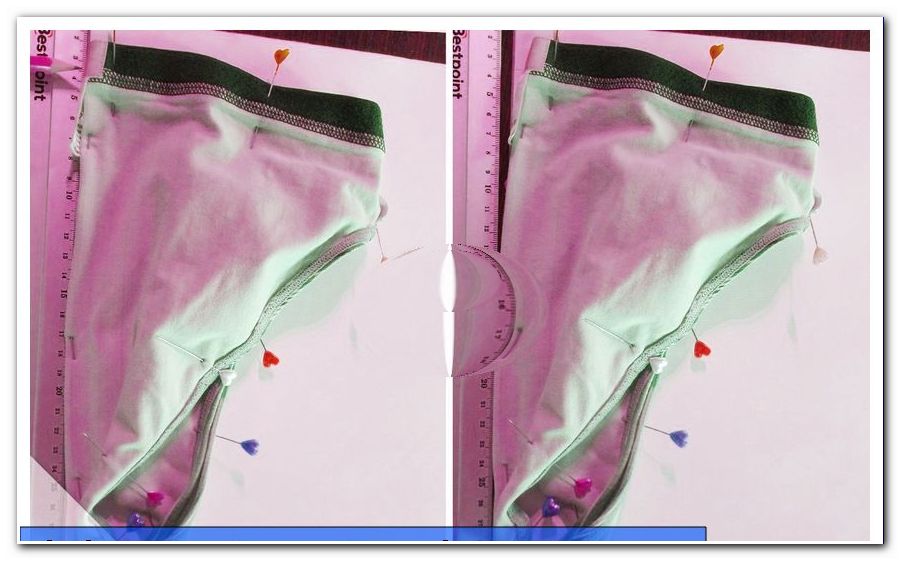
Sew the bag
owl
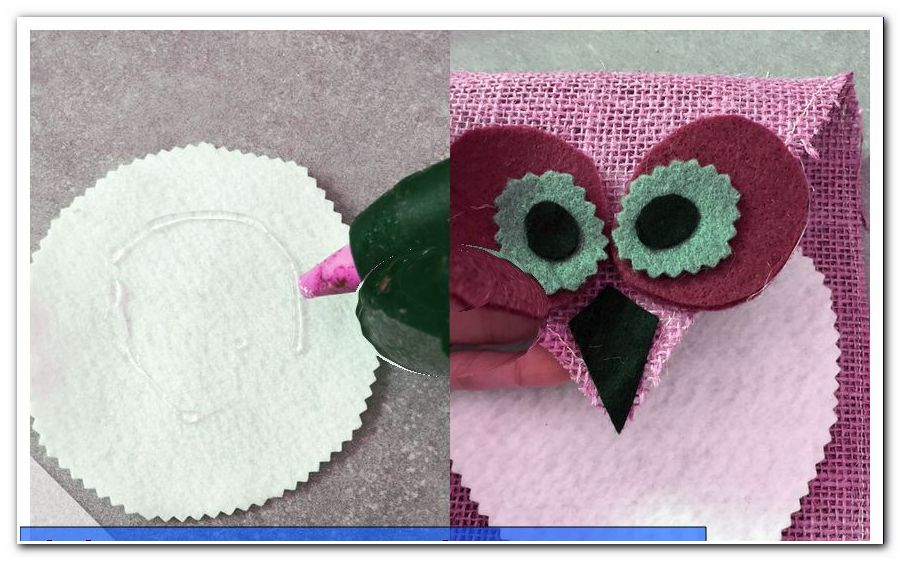
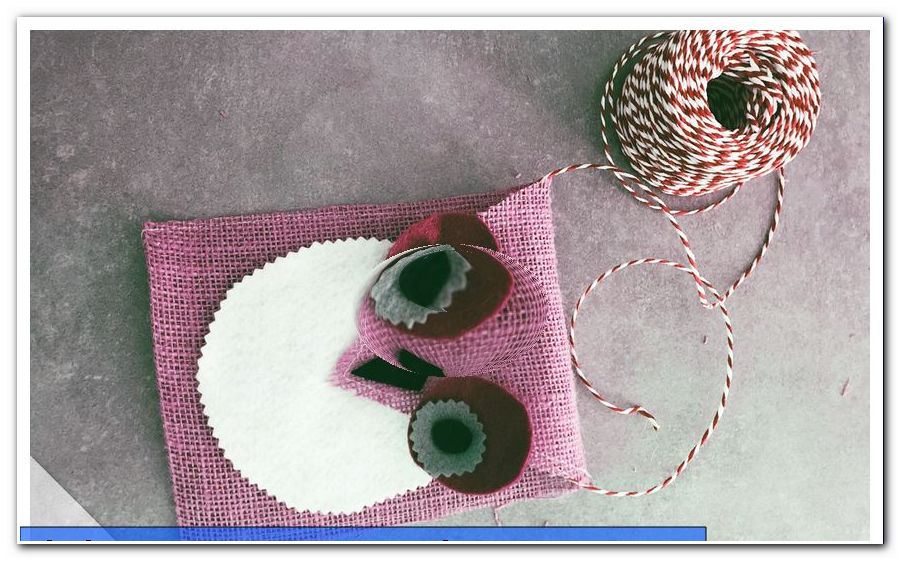
First, we need to know how big our owl should be. Then we cut the jute. The front is a rectangle and the back has the shape of a house.
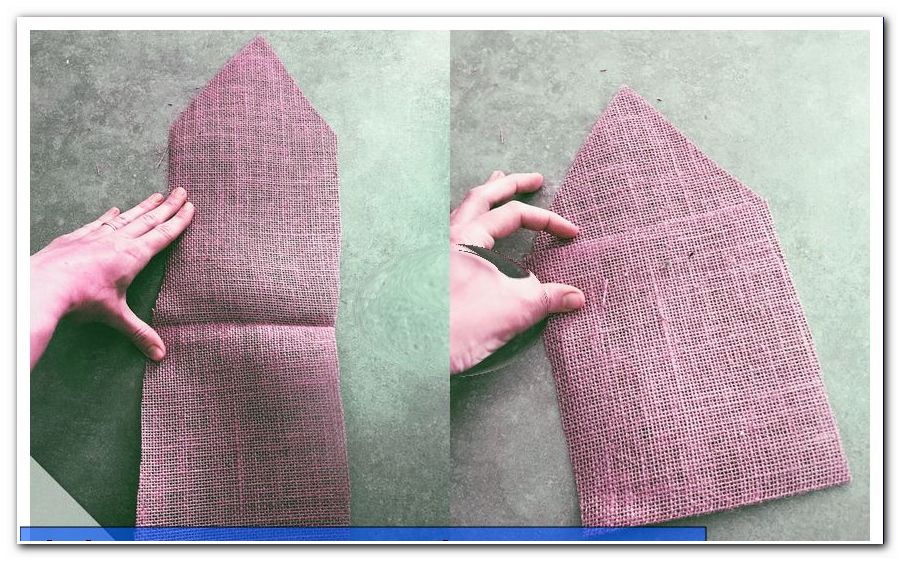
Now the open edges are sewn with a simple degree stitch, ie the upper edges. Otherwise the jute would fray. Then we put the front and back left to left and sew the remaining three edges together. We can finish the edges with scissors.
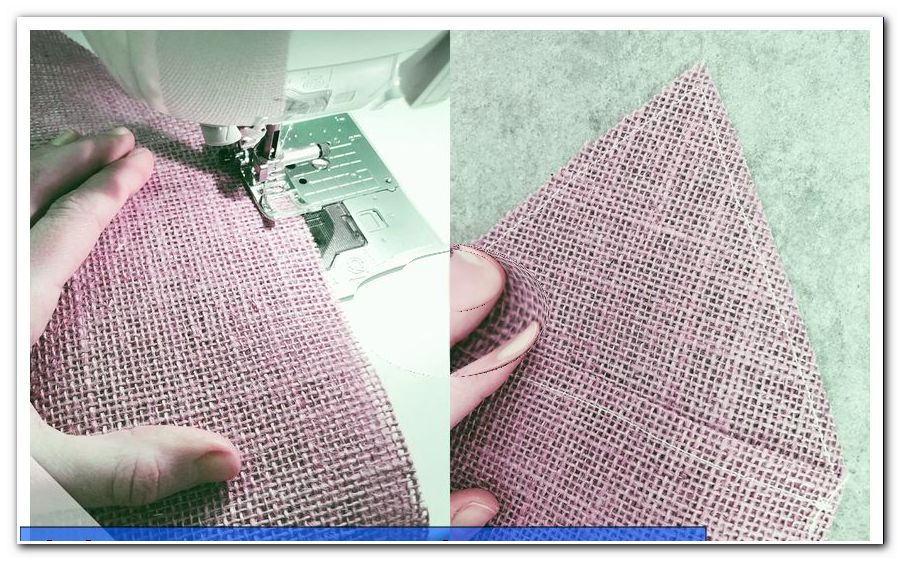
Note: If you want, you can put the front and back sides right side up, sew them together and then turn them over.
We now pick up the felt and close our eyes to the owl. Two large rings (brown), two smaller ones (gray) and then the pupils (black). Then the eyes are glued together with the hot glue.
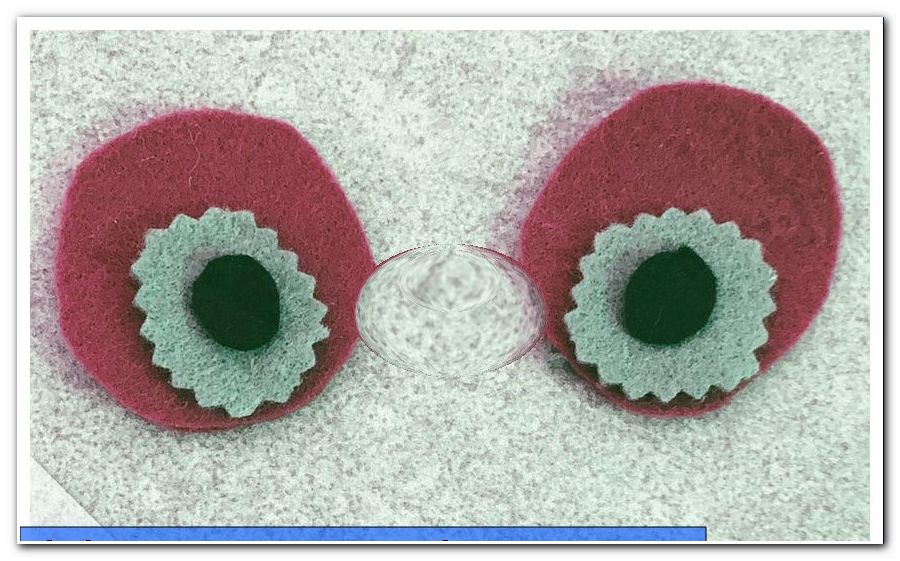
Note: You can of course also sew on the eyes.
Finally, the belly (white) and the beak (black) are cut out. First, the belly is glued to the front, then we flip the top of the back and glue the eyes and beak on it.
Note: If you have the nails attached to the tree, you will need a hanging tape to stick to the back.
Now our owl is ready for the advent calendar!
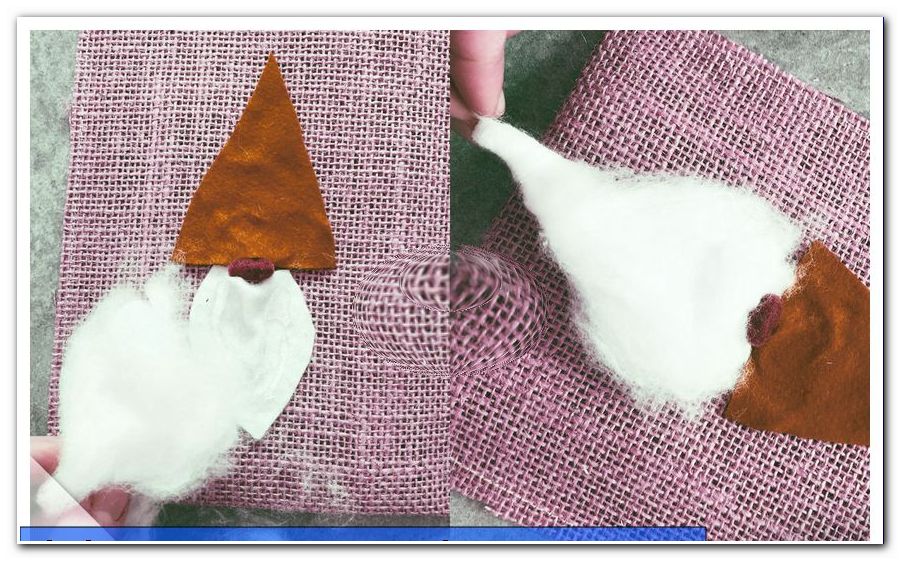
Sew bag with gnome
First, let's see how big the gift is and put it on the jute. We cut a rectangle twice. First we sew the top edge with a simple degree stitch so that the fabric does not fray. Then the back and front are sewn together and the edges are serged with scissors.
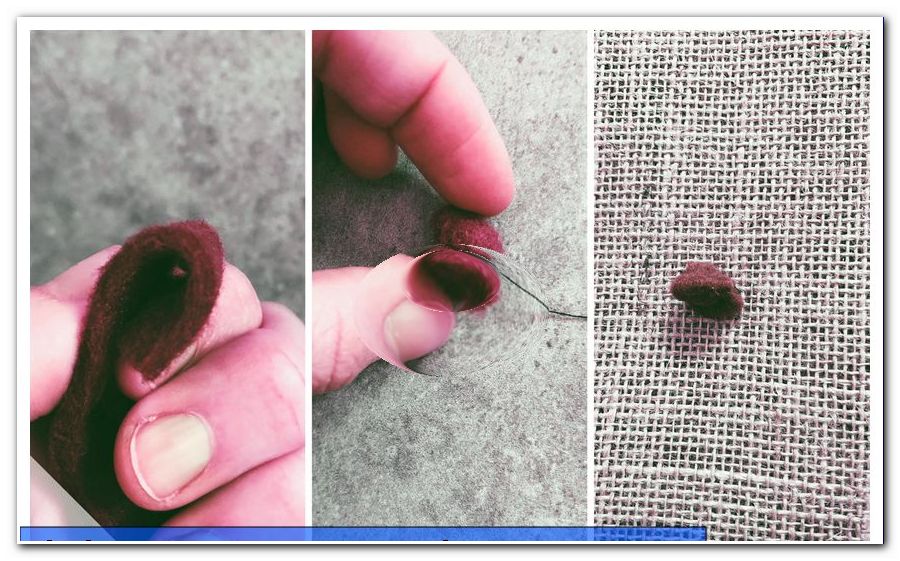
From the felt, a triangle for the pointed cap is cut out and glued onto our bag. Then it's his turn. We take a strip of felt in brown and put it in half on each other. Then tie it with a yarn and cut the felt under the knot. We glue the little nose just under the pointed cap.
Now we cut a small piece of felt in white in the form of a beard. The white felt serves only as a so-called pad for the cotton wool. We glue the felt right under the nose with the hot glue gun. Finally, we take some cotton wool and stick it on the white felt. We form the cotton wool that looks like a beard. Now only to tie the bag with a yarn and our bag of gnome is done!
Note: We sew another owl and two bags of gnome. The rest will be small bags that are felt with chocolate or stickers.
Quick guide
01. Cut 2 m long boards and the square post with the saw in half.
02. Lay six boards on the work surface at regular intervals.
03. Draw the tree (note the angle!) And cut.
04. Overcast edges.
05. Mark two points for each board in the middle and drill holes.
06. Fix boards at equal intervals.
07. Mark four 50 cm long boards in the middle and mark 2 cm on each side.
08. Mark again 2 cm for each board and draw a right angle (5 cm).
09. Cut out and assemble the rack.
10. Decorate the tree.
11. Cut the front and back of the bags from the jute.
12. Sew the upper edges together.
13. Sew the remaining three edges together.
14. Cut the eyes, beak and felt belly.
15. All sticking.
16. Cut two rectangles twice.
17. Sew the upper edges together.
18. Sew the remaining three edges together.
19. Zip on cap, stripes and a beard.
20. Halve the strips and tie them with the yarn to form a small nose.
21. All sticking.
22. Stick cotton wool on the white felt beard.
23. Bind the bags with a little bit of yarn.
Have fun with the aftermarket and Nachnähen!