Tinker paper bags yourself - in 7 steps

- Fast paper bag
- Instructional Video
- Elaborate gift bag
- Mark dimensions
- Folding and gluing
- Decoration and usage ideas
Paper and gift bags are very easy to make and DIY. Especially if you do not have the time and urgently need a gift packaged, the paper bag is a useful and decorative alternative. In our tutorial we will show you how to quickly make a paper bag or how to easily create the perfect gift bag for any occasion.
Whether for birthday, Easter or Christmas, paper bags are among the classics among gift packaging. But do you know how to quickly make even such colorful bags "> Fast paper bag
If it should be a little faster - this guide can help you out of trouble. Did the wrapping paper go out and you just do not know how to pack a gift and do it as quickly as possible? Folding a simple paper bag yourself with little effort can be the answer.
Everything you need for this:
- A4 sheet of paper or cardboard
- glue
For the individual decoration and design of the bag, you can always find something in the household. Gift ribbons, pens, clips or stickers can do a lot.
And so you fold a paper bag in just 7 steps:
Step 1: Lay the DIN A4 sheet in front of you. At the beginning, fold the left half of the paper straight onto the right, so that you can see a 2 cm wide margin on the right.
Step 2: Now fold this strip to the left and tighten the fold firmly with your fingers. Stick the strip with a glue stick.


Step 3: Now fold the bottom of the bag. To do this, fold the lower edge of the paper upwards and back by approx. 5 cm.
Step 4: The left and right corners of the bottom are now folded up to the fold line. Apply the bag and repeat this procedure on the back.


 Step 5: Now reach into the opening from underneath and unfold it - retighten each fold with your finger so that the floor is flat.
Step 6: To close the floor, fold the upper and lower half of the floor downwards respectively upwards. Be sure to fold a piece over the center line, otherwise you will have a hole in the bottom. Stick the tips tight.

After this step the bag is already finished and can be filled. For gussets that make them look more professional, you still need a seventh step.
Step 7: Fold the bag on the left and right about 2 cm and back again. These folds are then pressed inwards when opening the bag. Finished!

Tip: If you have a DIN A4 sheet you will receive a bag with a size of about 10 cm x 18 cm at the end. If you remove a few centimeters for the closing edge, you can pack objects of 10 cm x 15 cm in the bag.
Instructional Video
A simple paper bag can also be a practical Christmas bag without any additional effort. Just choose a Christmas paper with motif and finish: 
Elaborate gift bag
This bag variant is ideal if you have a little more time. Likewise, you have more room here in terms of the size of the bag. Once you know what you want to give away, you know the size of your gift bag. Your creativity knows no limits.

For this you need:
- 1 sheet of construction paper or cardboard (DIN A4 or DIN A3)
- ruler
- pencil
- scissors
- glue
- possibly punch or punch
- possibly folding bone
For the decoration of the bag, handle or the fastener tape all materials are suitable. You can become creative as you please and as occasion demands.
 Mark dimensions
 Mark dimensions
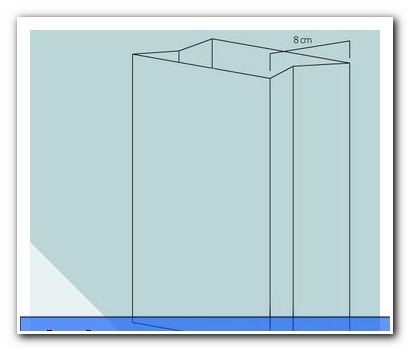
 Step 1: At the beginning you must mark the dimensions of the gift bag. You only measure the width of the four sides. For our bag we need a DIN A3 sheet.
The dimensions of the side surfaces of our paper bag are:
12 cm - 8 cm - 12 cm - 8cm

To do this, mark the respective points on both long sides of the paper. At these dimensions, then a remainder of the sheet remains over. We will need this later as an adhesive surface.

Step 2: Now mark a 1 cm wide strip starting from the lower long side. This is then later folded over and needed for a clean final edge of the bag opening.

Step 3: Now the measurements for the ground are drawn. This has in our case a size of 12 cm x 8 cm. To set a mark on the upper long side after 8 cm.
Folding and gluing
Step 4: Now move all newly marked side lines long with a ruler and a weatherstrip. This makes it even easier to fold the bag. Now fold these four pages, the shape of the bag is already recognizable.

Tip: If you do not have a shinbone, another sharp object works very well, such as a wooden skewer.
Step 5: Now trace the lines for the bottom and for the trailing edge with the ruler and folder. Fold it over properly.

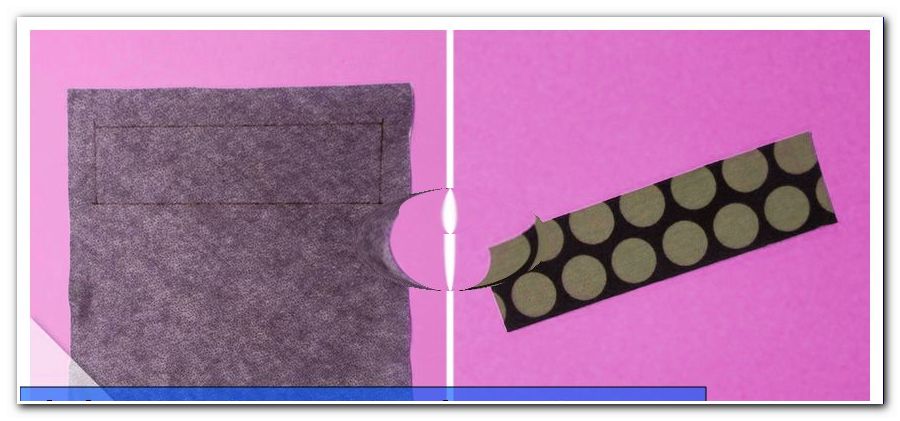
Step 6: Now pick up a pair of scissors. Cut out the areas marked on the image.

Step 7: Now it's time to glue. To do this, place a piece of paper in the inside of the bag to protect the bag. First, glue the rest of the rest on the outside and fold the left side of the bag onto the right. These two edges must now finish flush, you have everything sized correctly.

Step 8: Now the floor has to be closed. Set up the bag properly, with the bottom up. Now fold in the two smaller floor areas and then the two larger ones. The top bottom flap is now coated with glue inside and glued together with the underlying surface.

Step 9: Turn the bag over and press the bottom from the inside.
Step 10: Now fold the edge of the opening clean. Similarly, the four corners must be brought once again with the fingers in the form.
Step 11: Now only the gussets are missing. These simply form out evenly with both hands. Simply press both sides of the center in with your fingers.

The gift bag is now ready and only needs to be decorated, painted, decorated and finally filled.
Decoration and usage ideas
Making a gift bag does not just mean having a gift box. Use the paper! If you have opted for a monochrome paper, the paper bag can be painted, pasted or even texted. A saying about the birthday or even a poem about Christmas can be offered. So give the recipient something personal.


The straps that seal the gift bag can be made of any solid strip material - for example, gift ribbon, twine or wool. For the holes, you simply take a punch or a punch, if you have one. Four holes, two front and two rear, may suffice. Thread the tape through and the bag is already closed. Or you decide for two handles. Decorative wooden clips are also a good closure option, as well as simple sample bag clamps.
Decoration paper does not need much. In every craft shop you can find colorful and patterned papers that you can all fold into shopping bags.
You can also design small labels yourself, which can be subsequently attached to the paper bag.
 Sandwich paper can also be easily folded into paper bags. The benefit of this is that you can pack unpacked food in it. Would you like to give away your own baked goods - whether cookies, Christmas cookies or sweets - the paper bag adds a touch of individuality to any candy.
Now you have come to know two variants, as well as you can easily fold and tinker paper bags at home. In other words, the advantage of this alternative, the design and the design of the bag are entirely up to you. Each gift becomes more individual and personal. Try it and you will see that giving presents is so much more fun.