What is a Rigole? Cost, structure and instructions for building
- Advantages and disadvantages of a Rigole
- Types of triplets
- Functioning and calculation
- Cost of a Rigole
- Building a Rigole
- Costs and benefits
- Tips for quick readers
A rigging tank is a storage reservoir for rainwater. It serves to supply accumulating precipitation water by seeping into the earth. With an intermediate cistern, the rainwater can also be used for their own purposes. In this guide, learn everything you need to know about rigging and its construction.
Ground sealing problem - For decades, buildings were equipped with roof drainage systems that were directly connected to the sewer system. However, this extremely simple and convenient solution has led to ever greater problems in the past. On the one hand, the duct systems must be designed to absorb rainwater. In view of the frequently flooded roads in heavy rainfall events, it can be seen that billions in investment would be necessary here. On the other hand, too fast drainage of rainwater leads to a sinking of the groundwater level. The water derived from the roof, roads and parking lots ends up in the next river and not among the fields and forests where it is urgently needed. The soil sealing and too fast discharge of rainwater is therefore regarded as a real problem that can be countered well with technical measures.
In addition to roof greening, the underground rig tank is an increasingly popular means of countering soil sealing. In many regions, the installation of a rigging is already mandatory for new construction projects. Where a house without a trench was built, retrofitting is possible in most cases. Many cities and municipalities can also afford to do something about this: savings or elimination of canal fees are a common way in which municipalities make the installation of a rigging tank tasty to owners of single- and multi-family dwellings.
Advantages and disadvantages of a Rigole
With the installation of a rig, many advantages can be achieved. These are:
- Use of rainwater (when interposing a catch basin)
- Saving of canal fees
- Contribution to ecology
- Increase the value of the building.
- Invisible installation with very low maintenance.
- Easy installation by own power
- Sophisticated technology
Disadvantages of a Rigole:
- Earthwork required for installation
- High initial investment (about 2000 euros - these pay for themselves again after about 3-4 years by the saved channel fees)
Types of triplets
One distinguishes between open and closed trenches.
Open trenches are also called channel or Muldenrigolen. They consist of a depression whose bottom is filled with gravel or lava. Open trenches are designed so that the accumulated rainwater quickly seeps away. They can therefore not be used as a garden pond. The advantage of open rigs is their easy installation. Their biggest disadvantage, however, is their large footprint: The land area, which is blocked by an open trench, can not be used any other way. This is why closed rigs are much more popular and define the standard of these built-in buildings.
Closed trenches consist of an underground tank with open bottom. The rainwater from the roof, and ideally all other sealed surfaces, is introduced. There it accumulates something, but then gradually seeps into the ground. The advantage of closed rigs is that the land area used for them can still be used. Underground trenches can easily be covered with grass again. Once installed in the garden, they are invisible and largely maintenance-free. However, maintenance is a drawback to the underground rigging. It must be meticulously prepared and equipped with all anti-salsification measures. For this purpose, the installation of sand traps or solid collectors are necessary. However, an interposed rain barrel or cistern can already prevent a large part of the washed-up solids. The advantage is that the rainwater is initially available as free-use water before it infiltrates the rig. The installation of a maintenance shaft for the trench is not obligatory but strongly recommended. A once sent in rigging can usually be cleaned only by digging out, if no possibility for maintenance was installed.
The closed, ie underground and invisible trenches again differentiate between open and semi-open systems. Open systems must be conscientiously wrapped with filter fleece. This is the only way to prevent laterally flushed sand from entering the rig tank. Semi-open rig tanks have only one open bottom. To the side they are waterproof. The costs for both systems are comparable.
Functioning and calculation
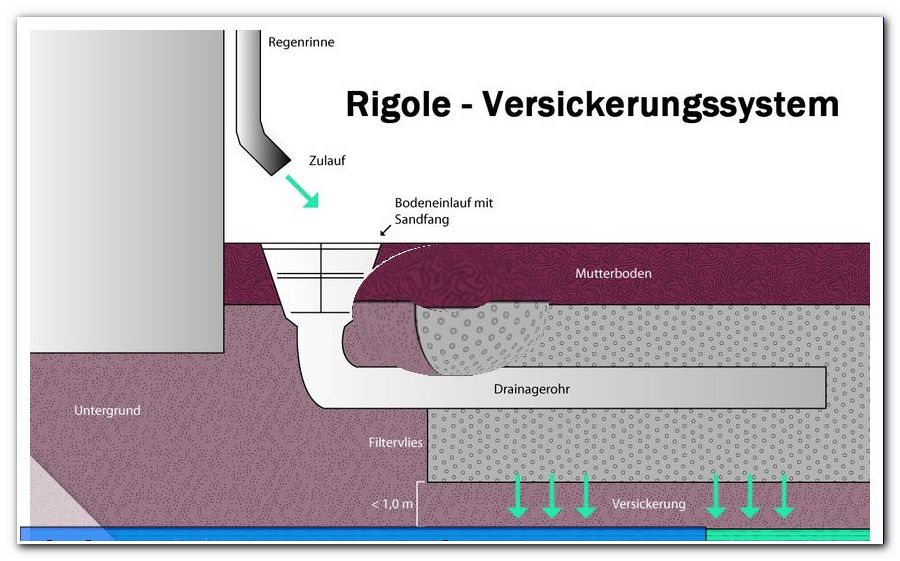
Rigs are connected to the roof drainage. The incident precipitate is collected from the roof surface and passed through the downpipes into the trench. There, the rainwater collects and gradually seeps into the ground. So that the trench does not overflow, it must be large enough. The required formula is quite complex. It is easier to use an online tool: //expert.hauraton.de/rig_drainbloc.php
For this, the following data must be known:
- Average rainfall on site (are stored in the online tool)
- Rigolentyp
- Height of the memory
- Width of the memory
- Height of the cover above the Rigolenspeicher
- Sum of all sealed surfaces from which rainwater is to be directed into the trench storage
- kf value (soakability of the soil)
- Averaged choke outflow from the trench storage
The determined value specifies a volume. Since volume is equal to length times width by height, it is easy to find the right rig for the plot by switching. The manufacturers now offer a wide range of different types.


Cost of a Rigole
Basically, it's not hard to wall a rig tank yourself. It is only questionable whether, given the wide selection of cheap finished products worth the effort. In addition, the thin-walled piles made of PVC or Bakelite offer a larger usable volume. They are installed faster anyway, so we would advise you to buy a finished product here. The most common trenches consist of a shaft system, which is designed as a cylindrical tube. The circular cross-section guarantees the best length-to-width ratio and minimum installation area. However, this solution must also be appropriately deep-welled. Since a mini excavator is the most sensible solution anyway, it is ultimately only a question of a few additional working hours compared to a cuboid rig tank.
Common stakes start at about 100 euros. However, these solutions usually only offer a small useful volume. A typical price list about trenches can look like this:
- Block Rigolenblock useful volume 840 liters: 300 euros
- Block Rigolenblock useful volume 1680 liters: 510 euros
- Block Rigolenblock useful volume 2500 liters: 720 euros
- Block Rigolenblock useful volume 3400 liters: 950 euros
It does not matter which rig type is used. The price / volume ratio is usually very similar.
In the case of a trench block, the base used is usually the same, only the height of the tank varies depending on the volume. This makes it easier to choose a larger tank.
The trenches are usually delivered in the complete set. An inspection shaft costs another 100 euros. The pits for flat, rectangular pylons are easier to excavate than for deep, cylindrical pylons. A mini excavator costs about 150 euros per weekend. Here you can easily choose the smallest model, in order to be able to set a rigging even in hard-to-reach areas.
Building a Rigole
In this step-by-step guide, we'll show you how easy it is to build a rig storage.
You need:
- Shovel,
- rake
- spade
- 4 x wooden slats, rods or fence posts
- heavy hammer
- wheelbarrow
- rope
- Rigolentank
- protection fleece
- Drainage pipe
- Large spirit level
- Sand trap or upstream rain barrel / cistern
Step 1: Measure and stake out
Before you start with the construction, you have determined the necessary size of the rig storage and calculated the necessary construction area. After that you can stake out the place where the rigging tank with the battens and the rope. When planning the construction, make sure that the distance between roof drain and rigging tank is as straight as possible.
2nd step: remove the lawn
The lawn is now made rectangular with the spade. With most surfaces for the construction of a rigging tank a single mat is sufficient. It can then be rolled up and put aside. With a larger structure, you can cut out squares of about 1 meter edge length. Lay the grass with the grass side up. In dry weather, pour the punched out lawn. It dries up very easily. This will avoid additional costs for a new lawn.
3rd step: digging the pit
Now it is dug. Depending on the size of the rig tank, the mini excavator can now be used. Otherwise, muscle power is needed for the construction. The pit must be about 100 - 130 cm deeper than the trench module. The topsoil is 30 cm thick enough to close the lawn. The cover of 100 cm soil ensures freedom from frost. A frozen rig tank is usually destroyed and must be replaced. That causes high, additional costs.
4th step: Leveling from the ground
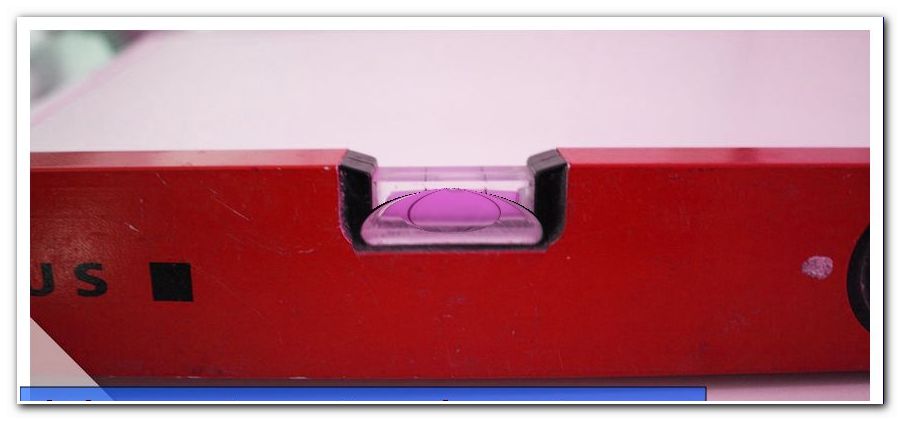
The construction of the rig tank requires a level surface. Therefore level the bottom of the shaft with the help of the spirit level exactly.
Step 5: Lay the fleece
The trench elements are not placed directly on the ground, but require a protective fleece for the structure. This is now placed in the pit. It is dimensioned to enclose and overlap the entire tank. This is very important for the open "Bierkasten-Rigolenelementen". Semi-open systems only need a degree of non-woven downwards. This should also be used if not explicitly required in the instructions. There is simply an added plus in safety.
Step 6: Install the trench elements
At this point in the tutorial it will be exciting: The elements are now installed. For large rig tanks, the mini excavator is also helpful in building. The open "beer box elements" are designed so that they can be moved manually. The instructions are self-explanatory: they can be put together.
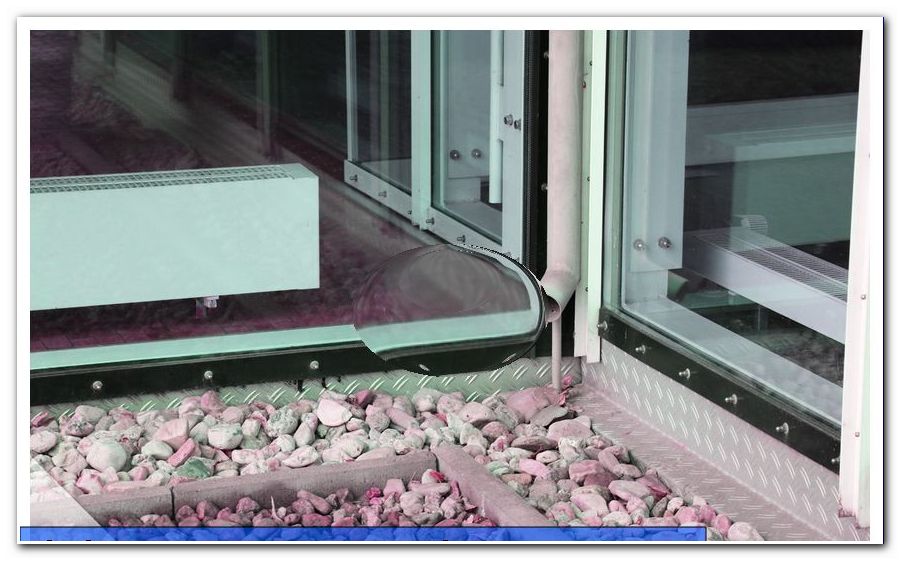
Step 7: Make the supply line
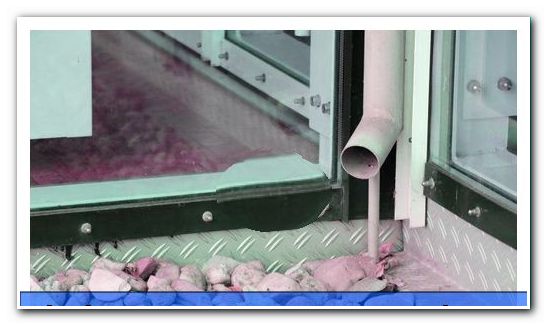
Now the downpipe from the house is separated from the sewer. A guide is hardly necessary for this: The downpipe is supplemented by a curved piece. The inlet to the channel is closed with a blanking plug. Below the bow piece a small chess piece is grown. This is connected to the drainage pipe, which leads to a rigging tank via a specially dug channel. The instructions here recommend a drainage pipe instead of a continuous sewer pipe, since even in this perforated drainage pipe a part of the rainwater can seep away. In addition, the rigging tank is not running so fast. The costs are approximately the same for both types of pipe. The slope of the ditch should be about 2%. This prevents backwater and silting up. Ideally, the drainage pipe is also placed in a pre-bed of fleece. This excludes that sand can penetrate.
Step 8: Install sand trap
The sand trap comes in the construction of the rigging tank behind the drainage pipe. The sand trap is an easily accessible shaft that collects all solids before the rainwater runs into the trench storage. This is highly recommended, even if it is not in the manual of the finished product. The Rigolenspeicher can sit down otherwise and becomes unusable.
Step 9: Finish construction by closing the pit
Now the pit can be closed and covered with the lawn probes again.
Costs and benefits
When self-installation of a rig tank you must expect a cost of about 2000 €. Depending on the size of the plot, the saved canal fees can bring these costs back in just a few years. From then on money is earned - not a little. The more you do yourself, the lower the cost. It is important that you make no mistakes in the manual. Nothing is worse than having an attached Riggle memory because you have made mistakes in constructing by failing to follow the instructions. Instead of percolating, the rainwater floods the property if the rigging tank is over-damaged or silted up. Since a full-blown rig tank can only be removed by destruction, the costs for the new construction also increase. The instructions must therefore be followed.
Tips for quick readers
- Always use fleece
- Excess deep enough
- always follow the instructions and seek advice from a specialist
- Ready-made rig tanks save costs and are installed faster.