Make Eggcups - Instructions & Ideas from Paper, Wood & Co.

- Ideas for DIY egg cups
- Origami egg cup
- Easter Bunny Egg Cup
- Wooden egg cup
- Make concrete egg cups
- Clay pot cup
Easter is a festival in which the right decoration may not be missing. Whether easter baskets, flower arrangements or Easter eggs - for craft fans there is always something to do at Easter. There are also numerous variations and ideas on how to make eggcups - create your own DIY eggcup to match your Easter table. We show you in this guide how.
Ideas for DIY egg cups
Origami egg cup
You need:
- Origami paper (15 cm x 15 cm)
- bonefolder
manual
Step 1: Fold the bottom edge up to the top edge.
Step 2: Rotate the paper 90 ° and fold the bottom edge up again on the top edge. Then open this fold again.

Step 3: Then fold the lower edge up to the middle, horizontal fold. Repeat this process with the top edge as well, fold it downwards. Open both folds again.

Step 4: Lay the paper in front of you with the open side facing down. Move your left finger between the two layers. Flip the top layer to the right, which makes it possible to flatten a triangle above it.
Step 5: Repeat step 4 on the right side.

Step 6: Pick up the paper now. Then fold the left side backwards, along the first vertical fold. Repeat this on the right side.

Step 7: Afterwards fold the two lower corners, but only the first layer, inwards and up to the middle.
Step 8: Turn the paper over on the back and repeat step 7.
Step 9: Now fold the triangle pointing downwards, again only the upper layer upwards. Repeat this on the back as well.

10th step: Now the Origami egg cup is set up. To do this, run your fingers into the bottom, the side of the paper that is still open, and pull the cup apart. This creates four peaks that point upwards. And the patterned surface forms thereby a kind Kuhle. Make them with your fingers to make them nice and round. Therein the egg is placed. The Origami eggcup is ready

Instructional Video
Easter Bunny Egg Cup
In this tutorial you will learn how to use a cardboard box and colored paper to make a rabbit-shaped egg cup in no time.
required materials:
- scissors
- Craft paper in the colors orange and red
- Glue stick or craft glue
- black fiber pencil for painting
- Wackelaugen
- Ruler and pencil
- duct tape
Step 1: First, you need a strip of colored paper, as this is the basis for your egg cup. The paper should not be too thick or too thin, just so that stability and formability are guaranteed. Cut out a piece of paper 18 cm long and 5 cm wide.

Step 2: Once you have made your paper strip the right size, you can move on to the next step, the design of the face. Now draw the rabbit's nose, mouth and hair on the paper. When designing the face, you can let your creativity run wild and do not necessarily have to stick to our template.

Tip: So that the face is also in the middle of the body, you can put a marker at 9 cm with a pencil and from there, eg. start with the drawing of the nose.
Step 3: Now make your ears, because the big "spoons" make an Easter bunny but first. Simply cut two larger and two smaller, oval rabbit ears, these do not have to be completely symmetrical. Then glue the small ovals, relatively in the middle of the large and finished is the pair of ears. It is best to tape the ears with tape on the back of the paper strip on which the rabbit's face was recorded. Glue would work less well here as the ears would peel off again as a result of the subsequent bending.
Step 4: After fixing the ears, attach the wobbly eyes to the front of the paper strip. Now you can bend the paper strip until it closes. Check with an egg or egg-shaped object if you have placed the paper strip tight enough so that no egg could slip through and tape the transitions of the paper strip with tape. The egg cup made of paper is ready and Easter can come.

Wooden egg cup
You need for the eggcup:
- Wood min. 6 x 6 cm and 1.5 cm thickness
- Pen, ruler
- Drilling machine (drilling machine)
- Hole saw or Forstner drill 3 to 3.5 cm in diameter
- Sandpaper, multitool, grinding wheel or similar
- saw
- obligatory: Router
- Glaze, hard wax oil
- Safety equipment (gloves, goggles, hearing & respiratory protection)
Wood for egg cup: The wooden egg cup will be a great upcycling project. You can actually make an eggcup out of every piece of wood. Once we have taken the sawn circle (6 cm diameter) of our DIY smartphone speaker (speaker build) and taken a piece of a disused swing armchair (glue wood).
But it can also be a Stückastscheibe or be glued together boards of disposable or Euro pallets. Take a look at your workshop and see what suitable remnants can still be found there.
Step 1 - Mark:
Mark the middle for the hole. If you want it to be just an eggcup, it's best to place it right in the middle. Who wants to make it a little more elaborate, another opening for the salt shaker or a tray for the egg spoon and the bowl bowl, should make before a plan and sketch. Here also a larger workpiece is needed.

Step 2 - drilling or milling:
To make our eggcup easier to grind, polish and clean later, we decided to go with the hole saw.
Clamp the hole saw with the appropriate size. Hold your workpiece firmly and drill until the drill on the underside looks out into the wood (about 2/3). Then turn the wood and drill from the other side into the hole and drill it through completely. This will prevent the hole from flaring or breaking out at the edge.
Tip: It is always advisable to put a piece of wood (waste) under it, so that the drill or the milling teeth never work in the void, thus preventing ugly breakouts in the body. You would later have to laboriously try to lend it again or drag it away. In the worst case, you can dispose of your workpiece immediately.

Step 3 - Grinding:
Actually, your wooden eggcup is already finished, to avoid injury, or to tear pieces from the wood has to be ground. Depending on how rough your piece of wood is, you must now deburr and grind all corners and edges.

Intermediate step - decoration:
With a router and various routers, you can still customize the edges. With a glaze you can color the eggcup. A brandy glass can also be used to personalize wooden egg cups with fonts and drawings.

Step 4 - Protection:
To keep the wood long we recommend to protect the eggcup. Here you can use lacquer or wood wax or similar agents. Thus, you avoid that the wooden egg cup during cleaning (always only by hand!) Absorbs water - swells - breaks.

Tip: Make sure that the products you choose are at best food safe and contain no hazardous ingredients.
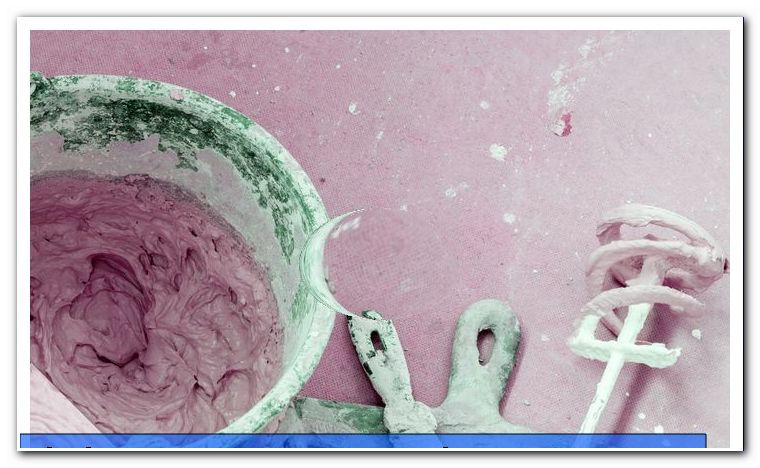
Make concrete egg cups
You need:
- Creative concrete (or cement and quartz sand)
- Gloves and mask
- old wooden spoon
- old plastic bowl for mixing
- Paper cup as a form
- oil
- Eggs, plastic eggs or table tennis balls
- duct tape
- cutter
- abrasive paper
- possibly acrylic paint or varnish
Step 1: Before starting the concrete mixing, the mold for the eggcup should be prepared. Cut a paper cup about half way. The paper cup must not be too small in diameter. An egg should fit in well. Make a small line inside the cup, this should mark the height of the egg cup. So you know exactly where the concrete has to be filled.

Now cut several strips of tape and attach them to a corner at the edge of the table. You will need them later.
Step 2: Then the creative concrete is mixed. For this you need cement and quartz sand. There is also already ready mixed mixed concrete to buy. All you have to do is add the required amount of water. If you would like to learn more about crafting concrete, we recommend this manual: Crafting with concrete
If you would like to make your own creative concrete, mix cement and quartz sand in a ratio of 1: 1.5 . Stir the powder with the sand well with an old wooden spoon in the bowl. Always wear gloves and a mask when working with concrete. Even with small amounts, the powder can be harmful to the skin and respiratory system.
Then add water. Add enough water to the bowl until the consistency resembles a thick yoghurt.
Step 3: Pour the concrete into the paper cup until it reaches the mark.

Then take the plastic egg (table tennis ball) and rub it with a little oil. Push the egg into the concrete from the top until the bottom of the ice has completely disappeared. Use the adhesive strips to attach the egg above, over the sides of the cup. So it stays with enough pressure in the mold. Shake the cup back and forth to allow the concrete to spread well around the egg and avoid any bubbles.

Now it's time to wait. The concrete takes a few hours to dry properly.
You can take the plastic egg out of shape after only 3 hours. The resulting Kuhle should then no longer deform. But then wait until the next day.
Step 4: Once the concrete has dried properly, you can remove the paper cup. In itself, the egg cup made of concrete is already finished. It only lacks some fine tuning.

With fine sandpaper you sand the edges smooth, as well as the Kuhle. Thereafter, the concrete can be painted or painted at will. But in itself the concrete look in this context is exactly what should be achieved. The concrete egg cups are ready!

Clay pot cup
Simply create your own egg cups yourself. All you need is a few materials and you can do all sorts of nice things with them. How about eggcups made of clay pots "> 
You need:
- three small clay pots about 4 cm high and 4 cm in diameter
- Newspaper as a document
- small colored felt balls (pompons) in green and pink as an ornament
- Brush in different strengths
- Acrylic paint in orange and yellow
- possibly acrylic paint to seal the painted clay pots
- Full tone and tinting color in white and petrol
- small containers for mixing the color and washing out the brush
- as desired felt as a felt glides for the foot of the eggcup
- scissors
- hot glue
manual
Step 1: Paint the small clay pots. First, the first small clay pot completely in white, give on the bottom of the clay pot also something of the white color. Then let it dry for a moment.

Step 2: Now alternately add some of the acrylic paint orange to the second clay pot. Then pick up some of the yellow acrylic paint on the brush. Spread the colors across the clay pot. Also paint the floor with paint in this clay pot eggcup. Set the clay pot egg cup on its side to dry.

Step 3: Now pick up the third small clay pot and paint it with the corner pattern in the colors white, petrol and yellow.

Step 4: After drying, paint the second clay pot egg cup with little flowers made of dots in the color petrol and after drying again put white dots in the small flowers. Finish with a paintbrush with a brush in the color petrol around the clay pot egg cup and then paint the white border on the top clay pot edge.

Step 5: Now decorate the first white clay pot with the pompoms. Stick them with hot glue on the small clay pot as you like.

Tip: Spray the clay pot egg cups with acrylic varnish to give them a protective layer. At the very end, you can cut out of some felt even small circles and stick them as felt glides on the bottoms of the clay pot egg cups.
The small, colorful clay pot egg cups are now ready for use, whether as a decoration, a small souvenir or, of course, at the dining table. If you still have not enough and would like to make even more beautiful and individual eggcups ">