Sewing boxer shorts - Instructions & patterns for men's underwear

- Material and preparation
- material selection
- Material quantity and cut
- Sewing retro shorts
- patterns
- Nähanleitung
- Sewing boxer shorts
- patterns
- Nähanleitung
After the instruction for ladies underpants from the last contribution I would like to devote myself today to the men underpants, because also our gentlemen are underneath nicely wrapped up. One would think that with the men in their underwear, the choice of motive would not be so important, but far from it: Whether mid-twenties or just before retirement - our gentlemen value harmonious designs!
Two patterns with instructions for a cool "downstairs"
In this guide, I'll show you how to make the pattern of a boxer shorts by simply separating them and describing in a detailed guide how to sew them together nicely. On the other hand, the classic trousers should also be mentioned in the subject of underwear, as these retro shorts are still extremely popular.
Look for a sewing instruction for women's underwear "> Sewing women's underwear
Difficulty 1.5 / 5
(suitable for beginners with this guide)
Material costs 1/5
(depending on fabric selection from EUR 0, - from the remainder utilization)
Time expenditure 2/5
(for beginners including pattern creation per model about 1h)
Material and preparation
material selection
As already mentioned above, underwear for men - especially in boxer shorts and retro shorts - plays a much underrated role in the selection of motifs. I'm not a fan of stereotypes and my kids are allowed to wear what they want, but our men do not think so. A pink underpants? A boxer shorts with butterflies? A retro shorts with hearts? "No thanks! I'll never put it on! Save the work! "Even the green monster fabric did not inspire, but at least it is worn at home. XD
But back to the topic: I chose jersey fabrics because they are stretchy and comfortable to wear. In addition, many underpants in the clothing are also made of jersey fabrics. Of course you can also use other stretchy fabrics for underwear. For synthetic fabrics, however, wearing comfort is severely limited on a case-by-case basis. Also firm fabrics made of woven fabric are basically possible for underwear, but you should already have skills in cutting and grading. Exception: the original pattern is also made of a non-stretchy fabric.
Material quantity and cut
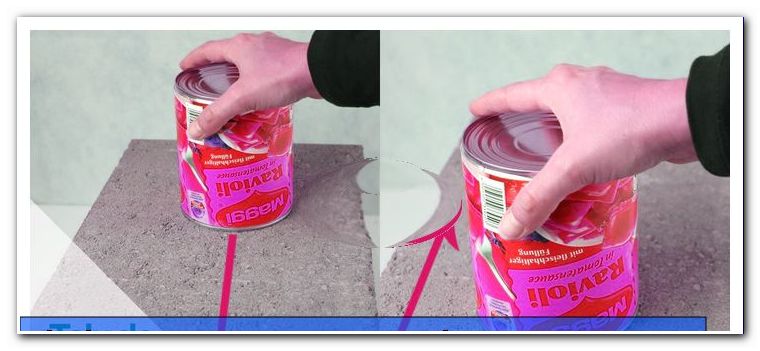
Depending on the model and body shape, you will need up to 1 x 1 m for the boxer shorts. As a template, I take a discarded underpants, which should be created exactly the same again. That's why I can split them and take over the pattern 1: 1. Since I would like to sew them more often, I will bring the pattern but also on paper.
The second underpants is the classic model, nowadays called retro shorts. Here I have also received a favorite model as a template for my guide, which, however, I should return intact. So I will just cut the pattern - as in the last instructions for underwear for women - as accurate as it gets.
Sewing retro shorts
patterns
Slimming cut from a well-fitting retro shorts
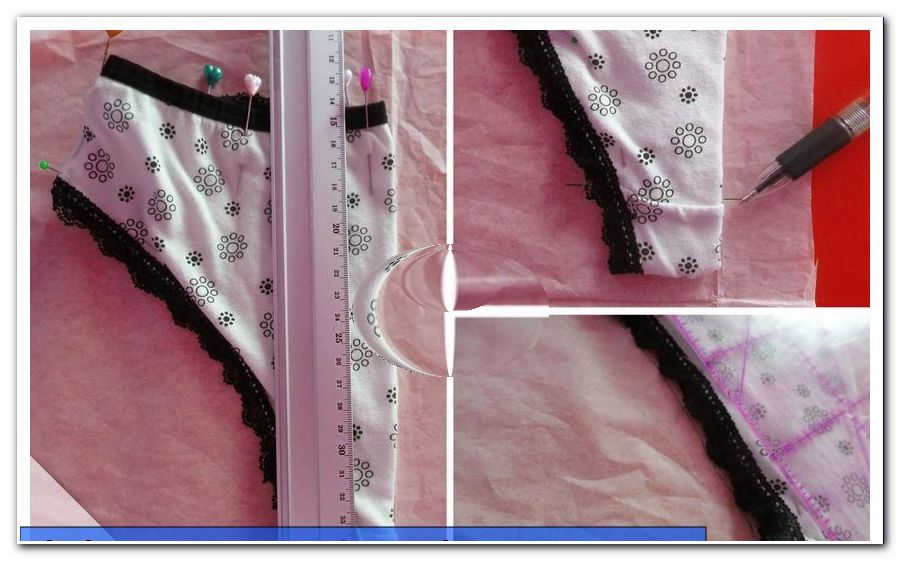
In the first step, you put the side seams of the retro shorts together. In contrast to the instructions for the ladies basic pattern, however, these underpants directly lie on the right side of the fabric (ie the "nice" sides together) so that the seams are better recognized later when drawing in the gusset. First attach the waistband of the underpants several times and then also the leg openings. Make sure that all seams meet exactly.

Now place the bow of the back side against the edge of your cut-sheet or fold a bow into the paper to which you can align. Mark each of the waistband and the gusset seam how long your cut piece should be for the back. Use a pencil to very easily draw in the rounding of the leg as exactly as possible. Measure how long the top edge is to the side seam and draw this point at right angles to your bow. From this point down, measure the height of the side seam and also lower it at right angles. Now draw the width of the gusset seam below.
For the front of the underpants you need no help line, as our gentlemen need a bit more space here and therefore at many shorts in the middle of the front a rounding is sewn. At this point, then a seam is needed, so the front of the pants can indeed be cut in two layers, but just not exactly in the material break. Apart from that, you can transfer the front as well as the back.
Tip: If you place the front pattern straight on the side seam of the rear pattern, the shape of the leg cuffs can be adjusted immediately and the height of the side seams will be the same. You only have to pay attention to the correct width at the gusset.

The gusset here corresponds to a part of the front pattern and therefore need not be drawn separately. Mark the seams and draw a straight line between them with a ruler.

Tip: When cutting the gusset, simply fold the paper over the sloping line.
The pattern is now finished and can be cut out.

For better clarity I have used a different shade of green for the later inside lying and thus not visible when wearing gusset.

Nähanleitung
First, attach the curves to both the front of the trouser and the gusset and sew them together with a stretch stitch. The fabrics are each right to right.

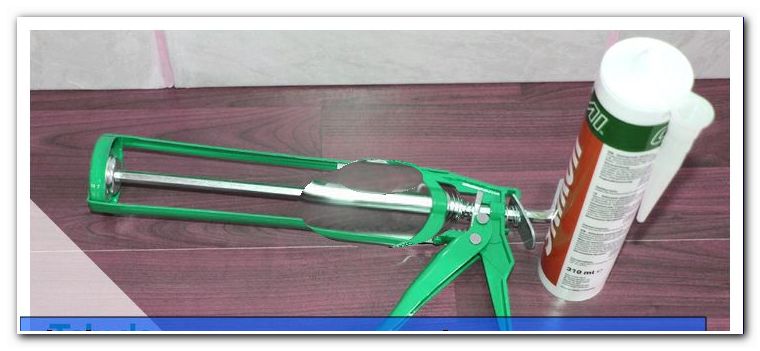
Now put the two parts together left to left and insert them firmly. At the marked mark with the blue rubber band you can stick together both pieces of cloth with blank tape, so that nothing slips. At these places I attach visible decorative seams from the outside.

Tip: To make the seam nice and straight, you can draw a guideline on the fabric with a tailor's chalk or a trick marker.
Sew the side seams and the gusset seams from the front and back side together. Fold the seam allowance of the gusset seam to the rear and sew again with a large zig-zag stitch, so that the gusset seam does not impair the wearing comfort.

As with the instructions for underwear for ladies, you can now border at will. For the federal government has proven in the retro shorts a rubber band with a width of 2 cm.
Tip: If you are unsure, generally sew all layers of fabric at the waistband and at the leg openings with a stretch stitch under the edging allowance, then nothing slips. To attach the cuff, I recommend Wondertape, because the rubber band is sewn on from the outside and it otherwise slips and thus is not partially hit by the needle. Of course you can also work with pins as usual.
Unlike the women's trousers, neither the belly nor the leg are stretched when sewing.

Sewing boxer shorts
patterns
This variant is of course much more accurate! Unfortunately, it takes a lot longer, if you do not want to accept inaccuracies and just cut open the seams of the selected boxer shorts. "> 
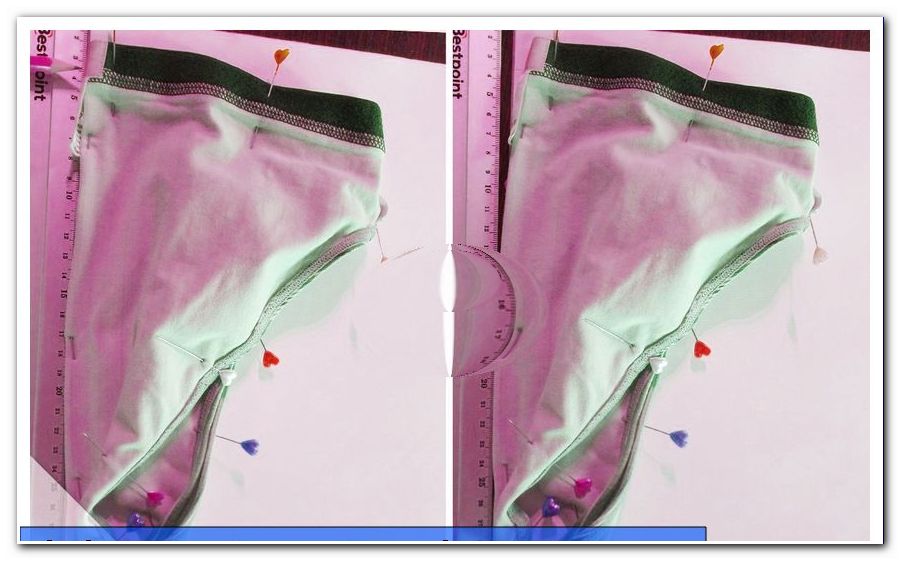
But that can vary from cut to cut. In the field of men's underwear, there are an incredible number of variations. So I first draw the larger front part against the edge of the paper and draw the outlines. For a better finish, use rulers.

For the back of the boxer shorts: The leg seams, I put flush to the bottom edge of the paper directly on my patterns for the front, then the Zwickelrundung is in the same curve. As a result, I immediately see all deviations and I can draw these colored.

Tip: Not only applies to men's underwear: Make a note of your cuts immediately, whether a seam allowance is included or not. If you pick up the pattern again after many months, you do not have to think twice.
Unfortunately, the rear gusset is very wrong with my flagship model. Unfortunately this often happens in the confectionery. I think it's because so many layers of fabric are cut at the same time, something can slip. Here I fold the gusset as centrally as possible and draw it in the break at the edge (fig. 9). At the bottom of the first few centimeters a right angle should be considered. Optimally adjust the curves again with the curve ruler.
The front "gusset" (here can also be an engagement with and without closure or a decorative element to be processed) is bent back in the middle and therefore can not be drawn in the fraction. Put it in the middle and draw it as exactly as possible. Here you write on the cut also where the middle seam is. This pattern is cut in two layers.

This is how the finished pattern of my boxer shorts looks with all the cut parts.

Cut all parts twice. For the back just fold the markers to the side. At the front gusset note directly on the fabric, where the front center seam is to be set. Alternatively, you can put together the two layers of fabric at the same time with pins. Put all the pieces of the cropped fabric into boxer shorts and you'll see if they've worked exactly enough.

Nähanleitung
First, assemble the front gussets. These are now connected to the rear gusset.

Now, when you place the front and back pieces sideways, you can see where the two leg openings collide. Now sew these two short connectors between the front and rear parts on both sides right to right on each other.

Now you can attach one side to the gusset.

Tip: When cutting, it is a good idea to mark the front and back sides with a "V" or "H". Since the cut parts are so similar, you can save yourself a lot of work and headaches in this way. When sewing, make sure that both seams are at the same height between the legs.
Now fold your workpiece right to right and join the side seams together. After tacking, the boxer shorts are almost done.

Another variant for attaching a rubber band:
For the boxer shorts I use a rubber band with a width of 4 cm. First, I measure the original rubber and add about 3 cm. Thus, on the one hand, I have included the seam allowances and, on the other hand, I have made sure that the original rubber is already worn out. The rubber is now a bit shorter than the boxer shorts. I lay the ends of the rubber band slightly overlapping each other, making sure that the pattern looks continuous. Now I sew both ends together with wide, elastic stitching.

I put the rubber band with the left side up in front of me and lay the waistband with the right side up on it. I am stuck (like sewing a cuff) on the side seams and in the middle front and back both layers of fabric together. Between these fixed points, the rubber band must be stretched during sewing so that the jersey no longer curls. After sewing you can see these wrinkles, of course, as the rubber band contracts again.

Then I fold out the rubber band and bring from the outside still edged 1-2 stretchy seams to make everything more stable. Again, it must be stretched again while sewing. As a result, it can happen that the seam does not become exactly straight. However, if you have chosen a suitable sewing thread, nobody will notice. Of course you can already see it here in the close-up.

The leg cuffs I have completed with a rubber band without stretching.
And done!

Quick Guide Retro Shorts
1. Remove cut
2. Cut to size with NZ (if the leg openings are edged here and at the waistband without NZ)
3. Sew front center and gussets together
4. Sew the gusset inside with a seam from the outside to the front
5. Attach the back with three seams and turn.
6. Fold back the NZ at the gusset seam and sew on
7. Line or hem leg openings
8. Sew on the elastic band on the waistband
And done!
Quick guide boxer shorts
1. Remove cut
2. Cut to size with NZ (if the leg openings are edged here and at the waistband without NZ)
3. Sew front gussets in the middle, then sew on the back gusset
4. Sew one front and one back piece together at the leg ends
5. Attach front / rear lane tracks on the right and left sides of the gusset lane
6. Turn right to right and close side seams, turn
7. Line or hem leg openings
8. Sew on the elastic band on the waistband
And done!
The twisted pirate