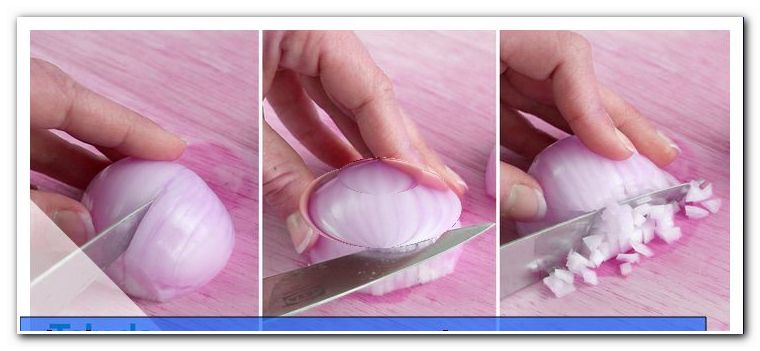
Knit Slippers - DIY Instructions for Puschen / Slippers

- Material for a pair of slippers
- preparation
- Strickanleitung
- The cuff
- The back of the foot
- The pages
- The sole
- Slippers sewing together
Who does not need them: cuddly-warm slippers ">
Many knitters have already knit a pair of socks during their creative career. But only a few have tried proper pushes. They are easier to knit than socks. In addition, you can enjoy homemade slippers much more often: socks disappear under the pants and in the shoes. Slippers carry you at home visibly open all the time. It's also not that knitted slippers would not be stable. With the right wool, they can last a very long time. In this guide, we'll tell you how to knit warm, individual and stable slippers nimbly yourself.
Material for a pair of slippers
- 2 balls of 6-thread sock yarn with at least 100 g
- 2 knitting needles 5mm
- 1 woolen needle

Knitting needles are rarely used. When knitting slippers, however, they have proven to be very practical. This will allow you to comfortably rest a few stitches at the end of the string as you continue to knit some stitches with the needles. At the top of the puschen it can be a bit tight when knitting. Also there, the long strings of the knitting needles are worth gold. If you do not have the needles suggested in the manual, circular needles also do a good job. Another alternative is quick-knitting needles. But these are rather to be regarded as a stopgap.
preparation
- right stitches
- left stitches
- Knit 2 stitches together to the right

In this tutorial, we knit the slippers down the cuff. The second part after the cuff is the instep. This is followed by the sides and finally the sole. The slippers are knitted open and must be sewn together at the end of the sole and the rear shaft. The figures regarding the mesh size in this manual refer to size 38 pushers. They also fit the sizes 37 and 39 without problems.
Tip: If you want the slippers to be slightly larger, use thicker knitting needles, for example 5.5 for size 40.
Strickanleitung
The cuff
We knit these slippers with a double thread. So you take the thread beginning of both balls. When knitting, just pretend it's a single thread. The double thread makes the slippers particularly stable.
For the cuff of the slippers you suggest 51 stitches. Let it pass 50 cm thread. You will need it later for sewing. Now knit a rectangle with 32 rows in pattern 1 on the right, 1 on the left.

The back of the foot
The back of the foot is worked out only from the middle third of all stitches. For this, in the 33rd row, first knit 2/3 of the stitches, ie 34 pieces in the cuff pattern. Apply the knit and knit back 17 stitches. In this series, you switch from the rib pattern to the pearl pattern. This means that you knit all the stitches that appear on the right, and knit all the stitches that appear on the left to the right. After the 17 stitches turn again and knit back. These middle 17 stitches will knit a total of 44 rows in a pearl pattern. Be sure to pattern the stitches the opposite way they appear.

After 44 rows, take a few stitches to give the shoe a point. To do this, knit the first and last two stitches together on the right in the 45th row. The back row knit as usual all stitches in the bead pattern. The acceptance row repeat 2 more times. After the third row with declines you do not knit back.

Now you should still have 11 stitches on the needle. The back of the slippers is now finished.
The pages
This part of the manual probably requires the most concentration. The point is to reconnect the first and last third of the cuff stitches to the middle stitches at the top of the back of the foot. For this you have to work out new stitches from the sides of the foot, 1 per 2 rows. That means 25 new stitches on each side of the foot.
Take the left knitting needle for this. Starting from the cuff, pick up one stitch at a time from the side edge of the back of the foot. In the photo you can see how it works. If all the stitches are on the needle, you can knit them right. It is best to pull the working needle completely out of the last 11 stitches. So the needle is free to work.

Now knit all new stitches on the right one after the other. Then knit the 17 stitches from the cuff to the right. Both sides and soles are knit at the crotch right. This means that from now on you only knit right stitches - on the back and the back rows.
Turn the knit and knit all 53 stitches to the right. In the end you arrive on the other side of the foot. There must also be first taken with the free needle, the 25 stitches from the side edge. Finally knit it to the right. Also the other 17 stitches from the cuff you knit right.
For the sides, knit a total of 20 rows on the 95 stitches you now have on the needles.

The sole
To the bottom of the puschen you have to take off a few stitches again. The acceptance scheme may seem confusing at first, but if you follow the instructions carefully, it will work just fine.
1st order of acceptance:
Knit the first stitch on the right and then knit 2 stitches on the right. Knit the next 38 stitches as normal. Now you have reached the area of the toe. There you knit 2 stitches on the right side, then 3 stitches on the right, another 2 stitches on the right side and 3 stitches on the right side and one last time 2 stitches on the right side together. This is followed by 39 stitches knit right. At the end of the row knit 2 stitches on the right and the last stitch on the right.
The back row knit as usual with right stitches.
2nd order of acceptance:
This series is very similar to the 1st collection series. The only difference is the number of right-hand stitches between the decreases. So start again with a right stitch. Knit the following two stitches together on the right. Knit 37 stitches until the top picks off. Now knit 2 stitches on the right, 2 stitches on the right side, 2 stitches on the right side, 2 stitches on the right side and another 2 stitches on the right side. This is followed by 37 stitches on the right, 2 stitches on the right and 1 stitch on the right.
Knit the back row as usual on the right.
3rd order of acceptance:
This series follows the scheme: 1 right, 2 right together, 35 right, 2 right together, 1 right, 2 right together, 1 right, 2 right together, 36 right, 2 right together, 1 right.
Repeat the back row with right stitches.
4. acceptance series:
The 4th collection row is also the last row at all. They knit according to the scheme: 1 right, 2 right together, 34 right, 2 right together, 2 right together, 2 right together, 34 right, 2 right together, 1 right.
You have now arrived almost at the end of our guide for slippers. As a next step, chain all stitches. Make sure you pass 50 cm of thread, with which you will sew the sole together.

Slippers sewing together
For sewing, you should decide which side of your slipper should be outside. Then sew the slipper from the other side, which will be inside later. First, sew the sole together. Place the edges exactly on top of each other and insert into the middle of both opposite stitches. In the photo you can see the exact needle guide. Sew stitch by stitch up to the top. At the top, sew the thread aside and knot it a little above the sole. If the knot were on the tread, you would feel it later while running in the fuzz.

Now the back has to be sewn together. Use the remaining thread from the stitch fence. Sew row after row down the cuff as shown on the photo. Continue sewing each row down the heel until you arrive at the closed sole. Again, you should sew the thread for a final knot a little to the side.
Your slippers are ready!

Tip: If you would like to make your wallet safe, you will find a variety of sock brakes available in the retail trade, which are usually glued to the sole of the slippers.