Make leather bracelet yourself - instructions for braiding

- Craft wild leather bracelet with fabric and pearls yourself
- material
- manual
- Elegant leather bracelet made of a wide leather strip
- material
- manual
Leather bracelets are among the most popular pieces of jewelry worn by both women and men. You can find them in shops and department stores as well as on Christmas and Christmas markets - in the most different variants and price ranges. But who wants to buy (more expensive), even if he (cheaper) can lend a hand: Be creative and make your own leather bracelet. We provide you with two practical instructions!
Due to its enormous durability and optical elegance, leather is extremely popular as a material. It is especially popular for making shoes and bags. But leather is also often used in the production of fine jewelery. There are many great ways to create a quality looking leather bracelet yourself. Inspire inspirations "> Make a wild leather bracelet with fabric and pearls yourself
The first leather bracelet we would like to bring closer to you acts as a colorful combination of leather and fabric ribbons as well as pearl and / or button elements that give the band and its wearer a bold, playful look.

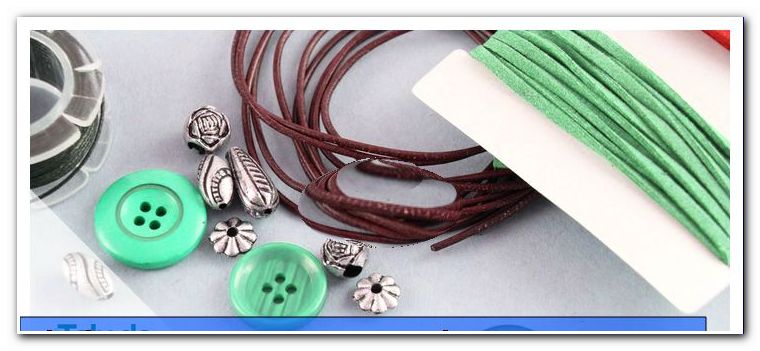
material
- Leather straps (about 1 m long, for example, two thin and one thick band)
- belting
- Pearls and buttons
- big button as a closure
- scissors
manual
Step 1: Obtain the required materials. These can usually be found in any (well-stocked) craft shop.

Step 2: Lay all straps (leather and fabric) side by side. Best in this order:
a) thin leather strap
b) thick leather strap
c) wide leather strap
3rd step: Make two knots at the top. The distance between the two knots should be chosen so that you can push through the button (with some resistance) later.

Step 4: Braid a small piece - just as you would braid a hair pot. If you have more than three tapes available, put them together so that you only have three tape parts that you can weave together normally.

Tip: With adhesive tape, you can attach the tapes to the table and weave the ends taut and neatly.
Step 5: After braiding about four to five centimeters (look at the width of your wrist!), Complete your weave with a knot.
Step 6: The "leftovers" (ie not braided parts) of the four tapes leave you untreated for the time being. Think about how long and wide your bracelet should be. Our suggestion: Measure the length so that the bands fit twice around your wrist (excluding the braided area). So you end up with a band that basically consists of three groups. Cut the bands at the desired location.
Tip: Leave the tapes a little longer so as not to fail later on a measuring error. So do not cut it too close.
Step 7: Thread beads and / or buttons as you like. For example, you can push a silver pearl over two thin leather straps and a mother of pearl button on the fabric tape.

Tip: To prevent the beads and / or buttons from slipping, make a knot in front of and behind each one.
Step 8: After the last bead and / or the last button you must always make a knot.
Step 9: Start braiding again and continue this step until the knot closure is level with the "braid" at the end from the beginning (you can see this by repeatedly looping the wristband around your wrist for testing purposes) lay).

Step 10: Slide the lock button onto the thick leather strap.
Step 11: If necessary, weave a little bit further and finish with a knot.

Step 12: Shorten the overhanging ends with scissors. Your leather bracelet is ready!

Tips:
- If you prefer a rather simple leather bracelet, you can simply skip the 7th step.
- In general, you have the opportunity to vary the individual steps: for example, braiding everything or nothing at all, use other colors, with more or less beads and buttons tinker etc. - let your imagination run wild!
Cost: about 5 to 10 euros
Time required: about 15 to 20 minutes
Elegant leather bracelet made of a wide leather strip
With this leather bracelet, a broad leather strip forms the base material. Its center is braided, resulting in an elegant accessory that can be worn anytime, anywhere.
material
- 1 wide leather strip
- sharp knife or scalpel
- Closure (preferably a push button)
- Lochzange
- sheet of paper
- pen
manual
Step 1: Cut the leather strip in the required length and width.
Step 2: Pick up the punch and make one hole at each of the two narrow edges.

Step 3: Attach the push button as a closure.
Tip: Alternatively, you can use two thin leather straps instead of the push button. For this you have to attach a band in each of the two holes.
Now you have two options: Either you leave the band just as simple as it is now. Or take a few more steps to make your leather bracelet even more interesting. This is done by braiding the middle part of the leather strap. We explain how to do it!
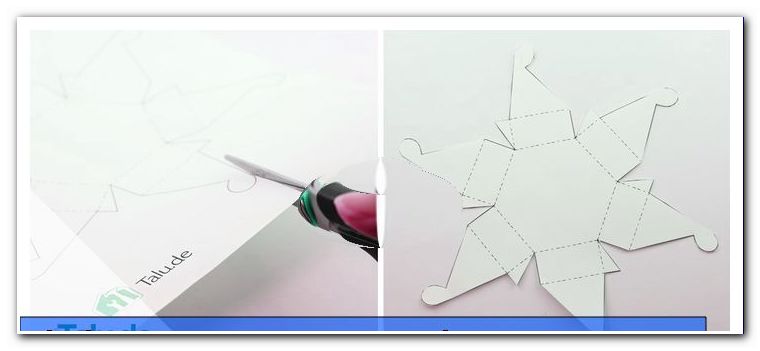
Step 4: For a braided leather bracelet with five even strands, you'll need to cut four cut lines each with the same distance. Do this with a sharp knife or scalpel. Be sure to work with care and use a stable base!
Step 5: Now place a piece of paper under the leather band and write the numbers 1 to 5 over the individual strands. On the outside is strand 1, on the right outside strand 5, in between are strands 2, 3 and 4.
Step 6: Cross the two outermost strips, ie strip 1 and strip 5, together. Strip 5 should lie over strip 1. In this way, the strip, which originally enthroned on the far left, becomes the second strip from the right. Conversely, the strip, which was at the beginning right outside, turns into the third strip from the left. Take a look at the whole thing on the basis of our clear presentation: 
Step 7: By crossing the two stripes, the leather band has twisted at the bottom. To resolve this twist, you must now pull the lower end of the tape between the strips 3 and 4 (ie 5 and 1, since these are after the 6th step on the positions 3 and 4) to the right.
Tip: Take another look at our illustration if you are unsure where to go through the lower part of the tape.
Step 8: Cross the two outer strands - that is, the strands 2 and 4, which now hold the outer positions - three times on top of each other.
Step 9: Pull the lower end of the ribbon between the now second and meanwhile third stripes to the right - underneath the braid. In this way, all existing twists are resolved automatically.
Step 10: Now you just have to pull the band into shape a little bit. Finished is your artfully braided leather bracelet!
Note: If you want to weave your band from three instead of five strands, you basically do the same. However, the following differences should be noted:
- They braid like a traditional braid.
- In order to dissolve the distortions that occur with this variant, pull the lower end to the right after the first braiding. This step remains as usual. After three more weaves, however, you have to act differently: you do not lead the lower end back to the right, but to the left between the stripes. This is followed by two more plaits before pulling the lower end to the left again. After the next two braids, pull the bottom end to the right.
Cost: about 5 to 10 euros
Time required: about 15 to 20 minutes
They are chic, durable and durable: Not least for these reasons, self-made leather bracelets, such as the braided variants that we presented to you in this detailed DIY guide, wonderful as individual, made with love gifts for female or male friends, Relatives and acquaintances. The great choice of colors and the freedom to make the width of the tape at your discretion, you can customize the present perfectly to the taste of each recipient. Of course you can also do something good yourself by braiding yourself a leather bracelet for your own wrist. We wish you a lot of fun!
Tips for quick readers:
- Create your own leather bracelet in just a few steps
- Braided ribbons as the most elegant variants
- Maximum 15 to 20 minutes of work
- Maximum of 5 to 10 euros in material acquisition costs
- Materials: leather straps, clasp, scissors, knife and punch pliers
- Possible fabric ribbons, beads and / or buttons for decoration (variant 1)