Make clay-colored figures - paint flowerpots / clay pots
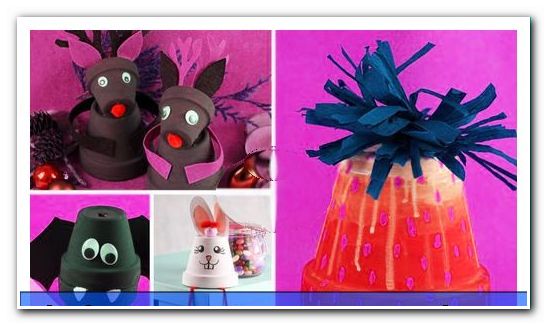
- Spring: Make clay pot bunny
- Summer: clay pot strawberry
- Autumn: Making a bat
- Winter: Make clay pot reindeer
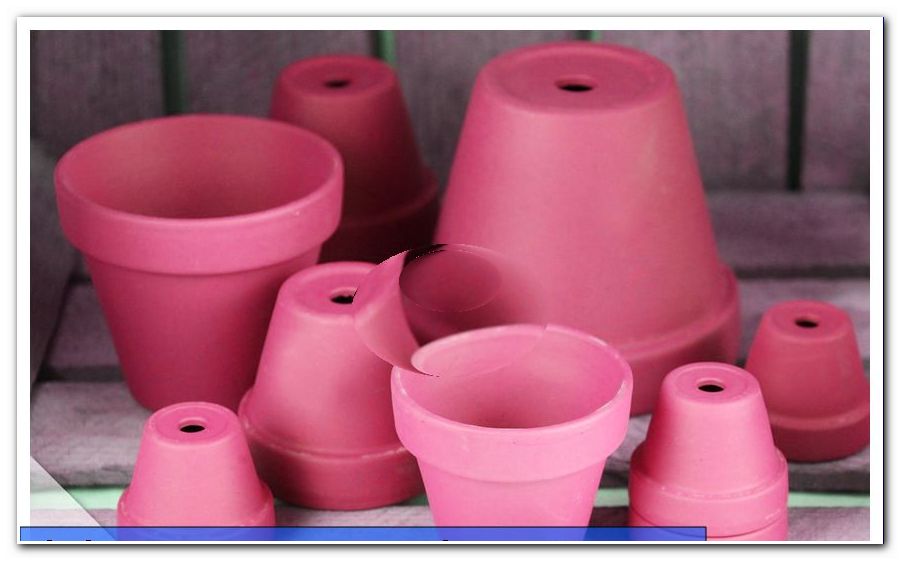
Flower pots can not only give beautiful plants a safe home. They also showcase excellent craft materials. We'll show you how to paint clay pots and make great clay pattems as pretty decorative elements for all seasons!
Simple clay pots are anything but expensive, but they do make excellent basic utensils to create beautiful to funny clay poppies. With a bit of acrylic paint you can paint clay pots and some additional materials help you to make truly attractive accessories to decorate your own four walls!
Spring: Make clay pot bunny
For tinkering with flower or clay pots no season seems more appropriate than the spring. Motives are some in question. We have chosen a personality that shapes this season like no other: Create a sweet Easter bunny with dangling legs with us.
You need this:
- big clay pot
- two small clay pots
- Acrylic paints and brushes
- thick wool or string
- Construction paper in white and pink
- Glue
- edding
- three wooden beads
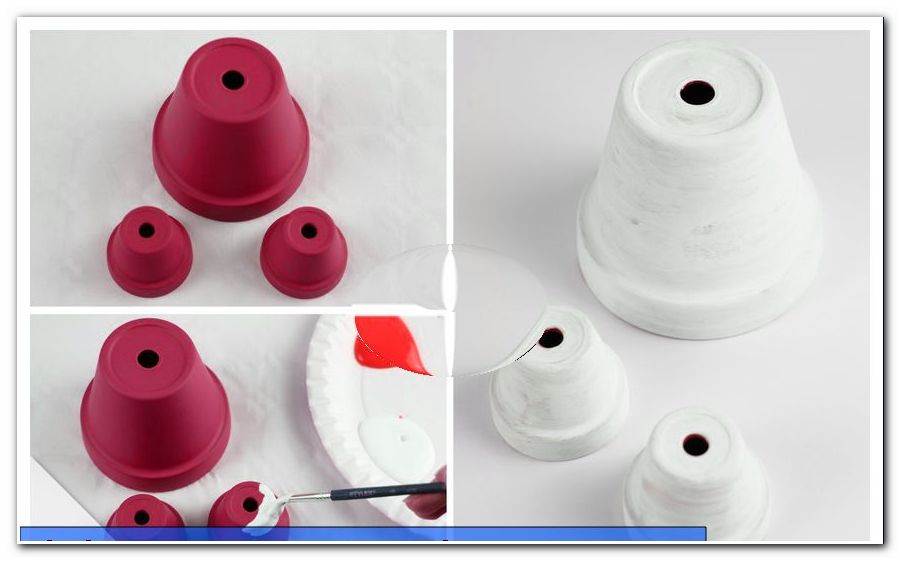
Step 1: At the beginning, the three clay pots are completely painted with white acrylic paint.
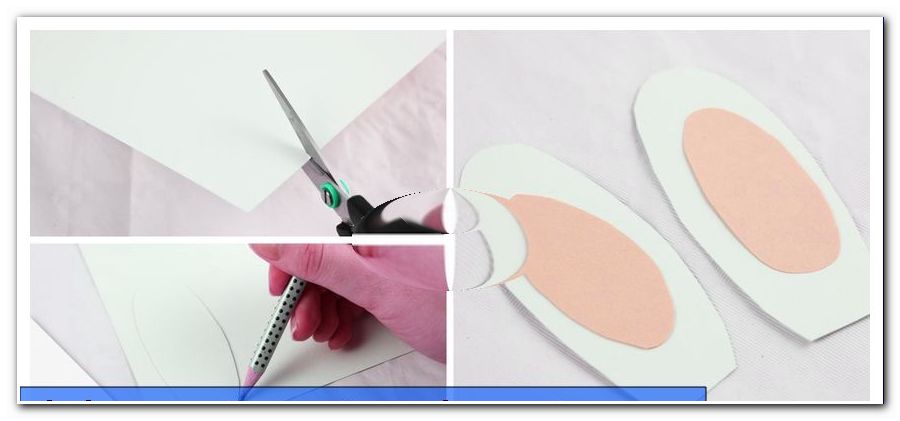
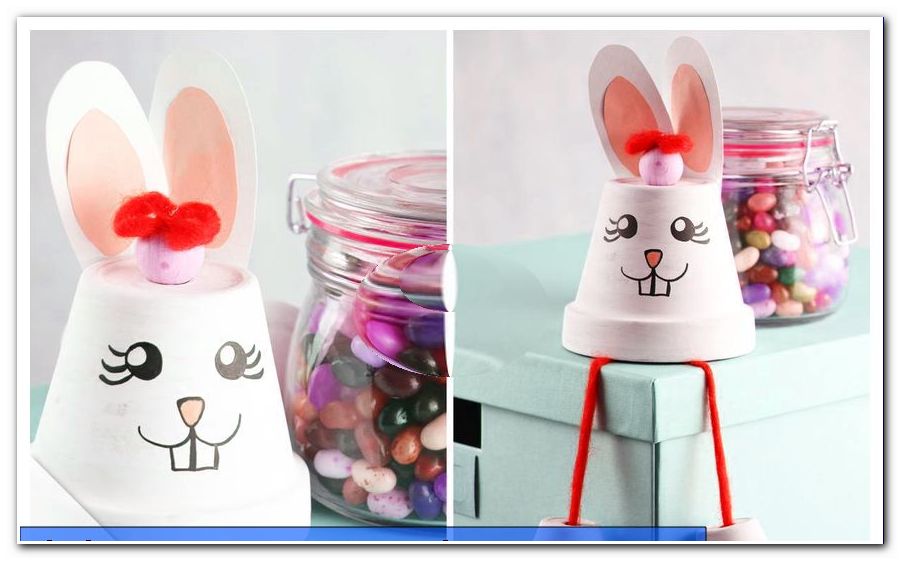
Step 2: After everything has dried, the rabbit ears are prepared. Simply cut out a long, round piece of construction paper. For the other ear to be the same, use this shape as a template. Then the ears need two smaller ellipses in a different hue - we use pink. These are now stuck on the two white ears in the middle.
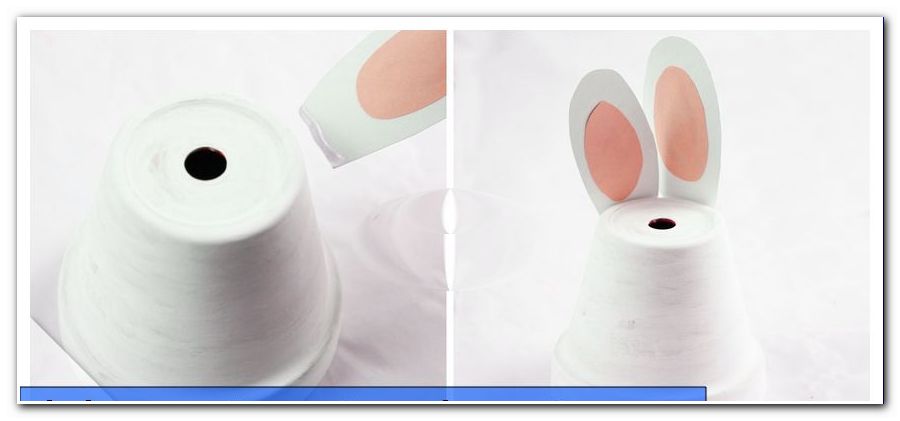
Step 3: Fix the ears with glue at the back of the large clay pot.
4th step: Then we take care of the rabbit's face. Paint eyes, nose and teeth with a thin edding.
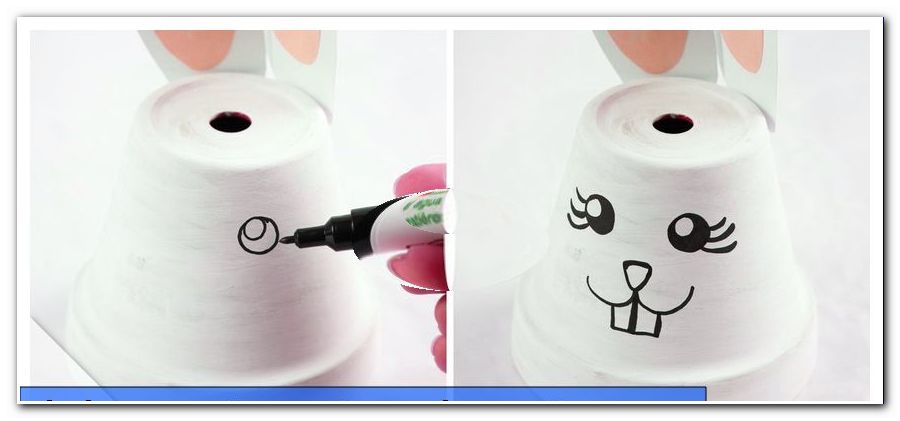
Tip: For eyes you can of course also use Wackelaugen from the craft business.
Step 5: Once everything has dried, the feet are attached to the large pot. Cut two pieces of the same length from the wool or twine. Then pull the two threads through the hole of the big pot and attach them to the top with a thick bead. The pearl must not slip through the hole. The two ends are now each pulled through the small pots and also attached from the inside with a bead.
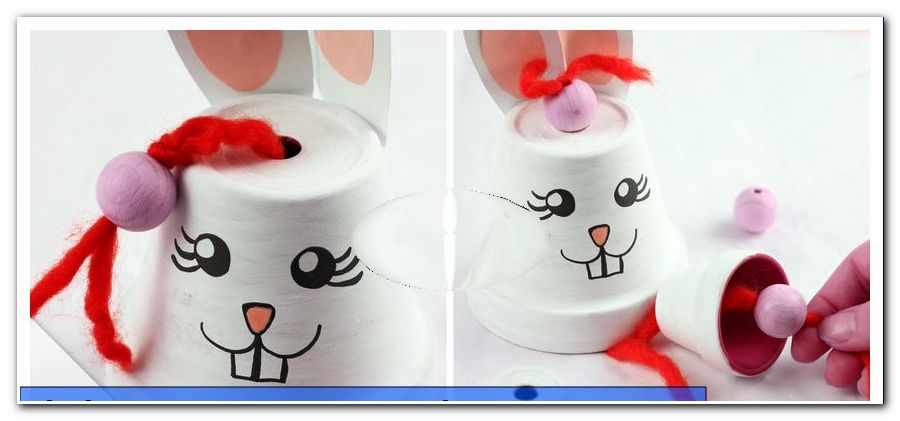
Done is the cute bunny! Now it can be set up immediately and integrated into your spring decoration.
If your spring decoration is still missing something, then you will find here other spring-like crafting ideas: Spring crafts
Summer: clay pot strawberry
The summer is (ideally) characterized by heat and long days, where the nibbling on delicious fruit comes just right. To embody the fruity pleasure decorative, you can, for example, a crunchy strawberry!
You need this:
- a clay pot
- Acrylic paint (red, white, yellow)
- thin and thick brush
- Twistart paper tape (dark green) or crepe paper
- craft glue
- scissors
How to proceed:
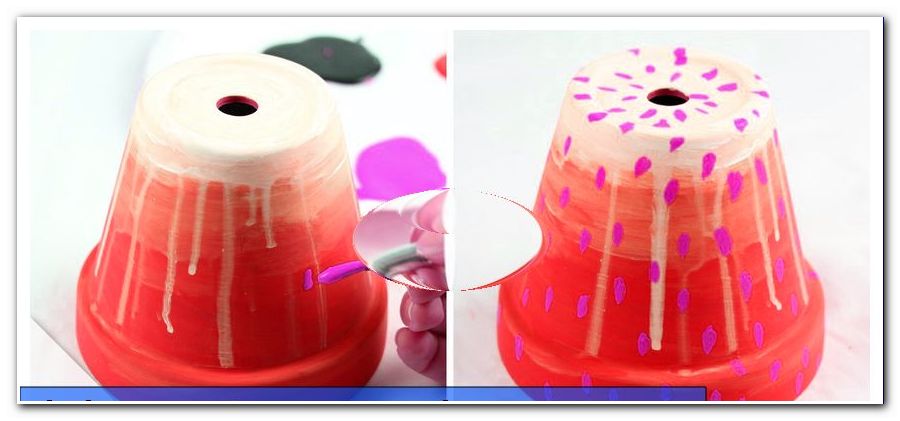
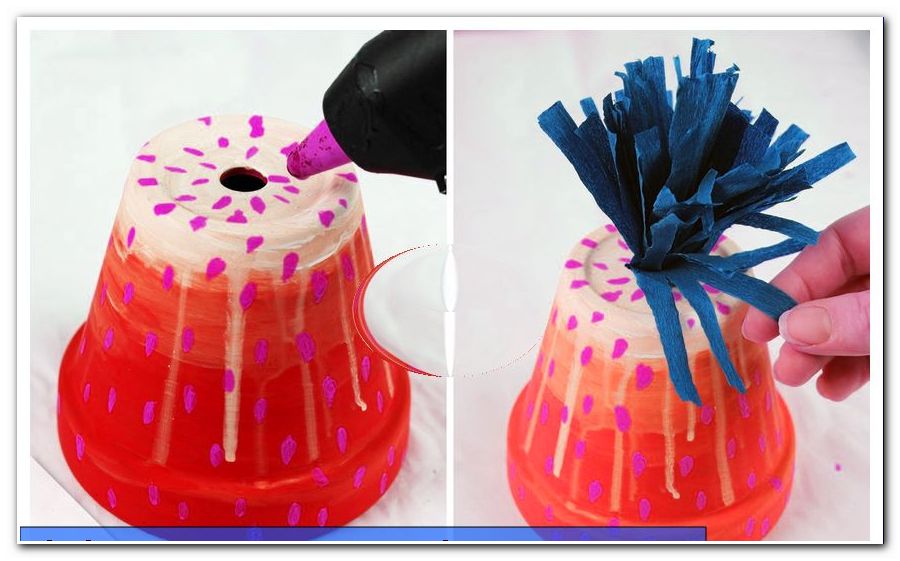
Step 1: Prime the clay pot with a thick brush in red. Now you can leave the pot as you like, or you can paint a color from white to red. To do this, paint the top of the pot with a white stripe. Then you just take up water with the brush and blur the transitions. A few drops that flow down, look great too. Then let everything dry well.
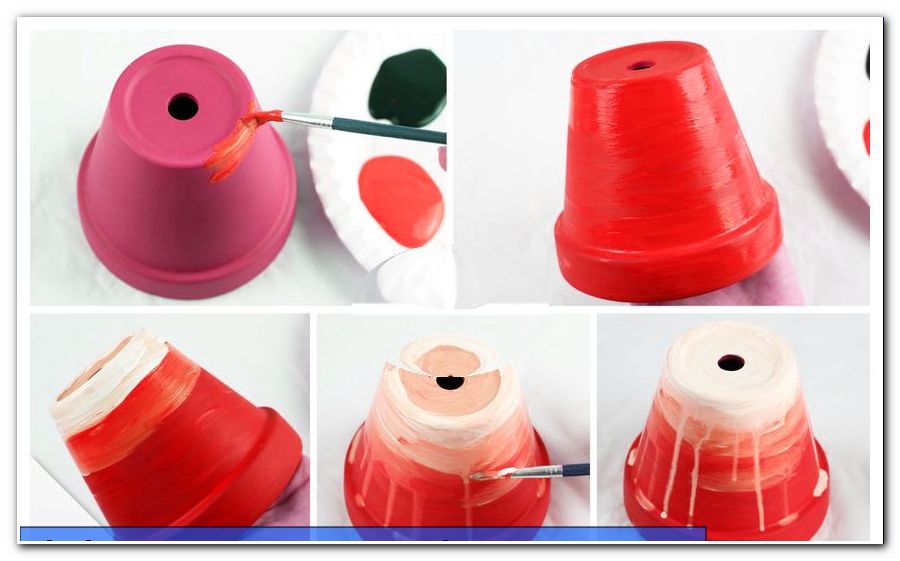
Step 2: Provide the now red pot with small yellow dots. To do this, use a thin brush.
Step 3: Now make a leaf crown for the strawberry from dark green crepe paper. Cut a strip about 5 cm long from the roll. This is cut in from the one side to the 2/3 a few times.

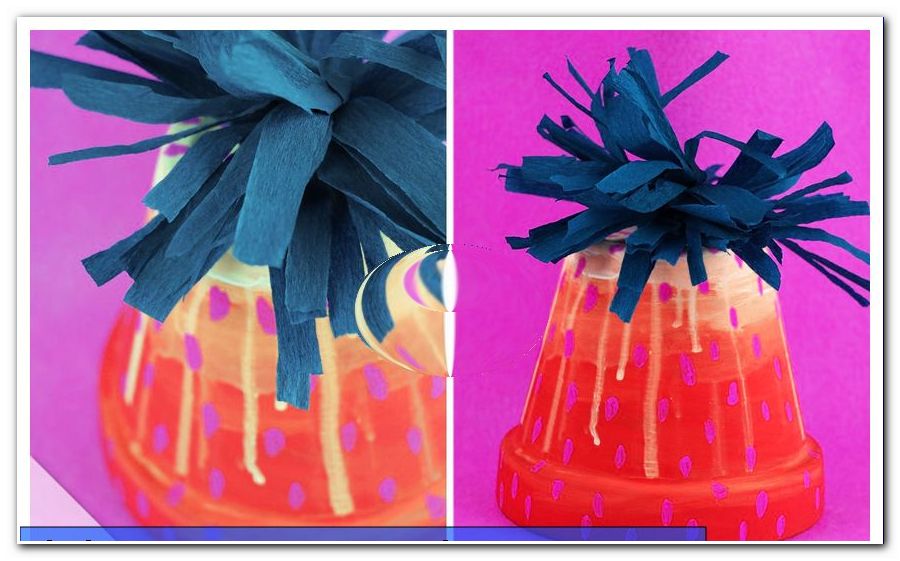
Step4: Then put the whole end in the hole of the pot and fix everything well with glue. Drape the individual strands and the strawberry is ready.
And you can set up the strawberry - the whole thing will be especially decorative if you add strawberries of different sizes.
Autumn: Making a bat
Colorful leaves dancing through the air and delicious pumpkin creations on the table: No question, autumn is a very sensual time - and the seasonal organizer of the popular Halloween festival. We'll show you how to make a more or less scary bat out of clay pots.
You need this:
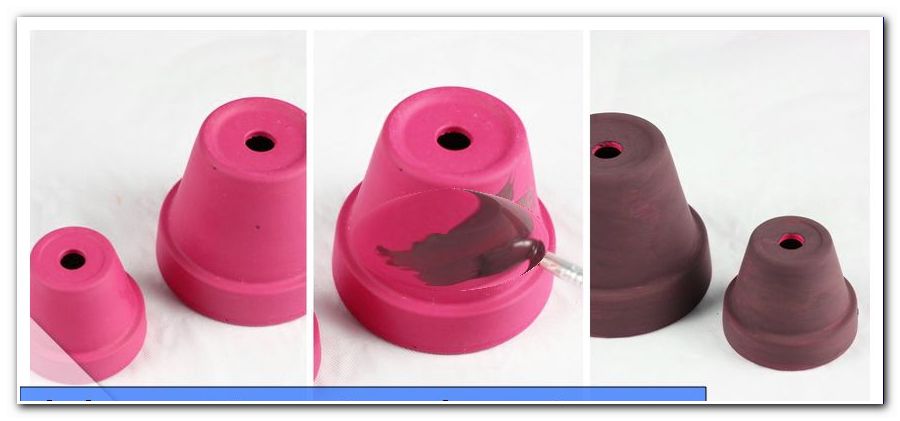
- 2 clay pots (each 5 cm in diameter)
- Acrylic paint (black, white and red)
- brush
- Clay board (black)
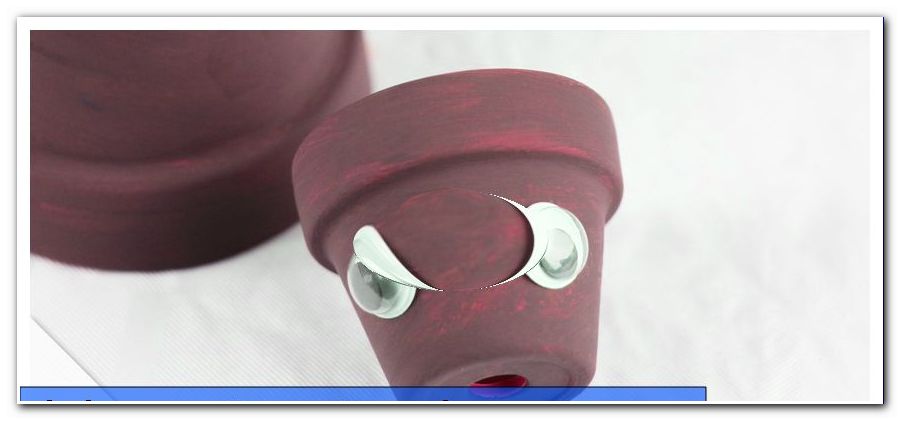
- 2 wiggle eyes
- craft glue
- scissors
How to proceed:
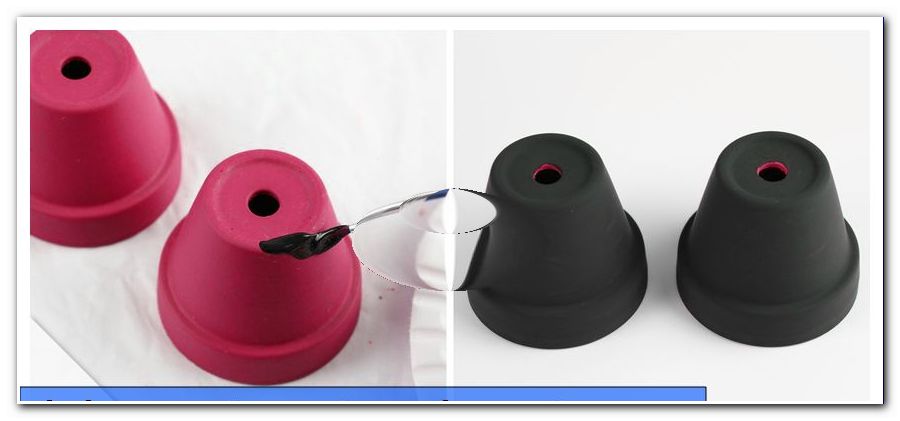
Step 1: Paint the two clay pots with black acrylic paint and let it dry well.
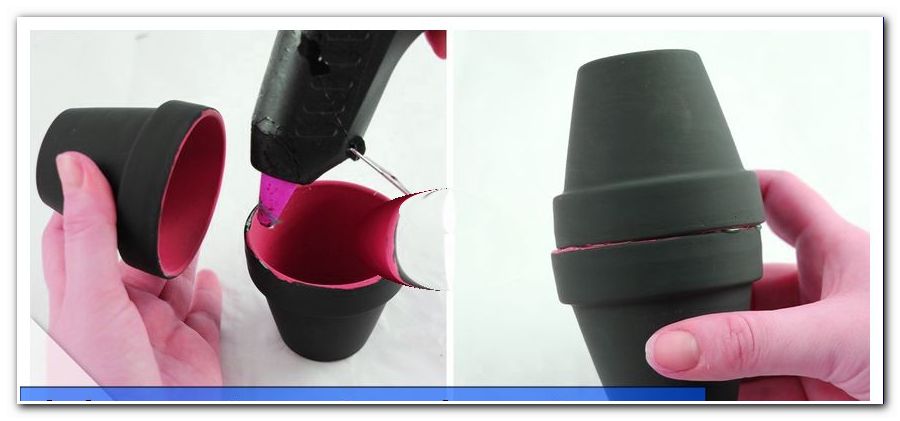
Step 2: Glue the pots together with craft glue. The upper one stands on the head.
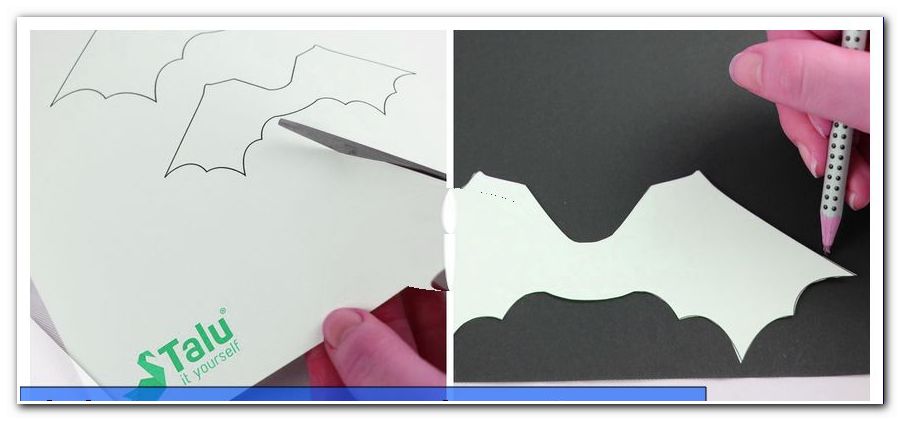
Step 3: Cut two wings out of black cardboard.
Here you can directly download and print our used bat wings. Then they are only cut out and transferred to black construction paper as a template:
Click here: To download the template
Step 4: Attach the wings to the pots with glue.
Step 5: Paint the mouth and especially the teeth with white acrylic paint. Let it dry well.
Tip: Depending on whether you want to make a sweet or terrifying bat, paint a friendly or "malicious" mouth on the clay pot body.
Step 6: Finally, glue the two wobbly eyes on. Finished!
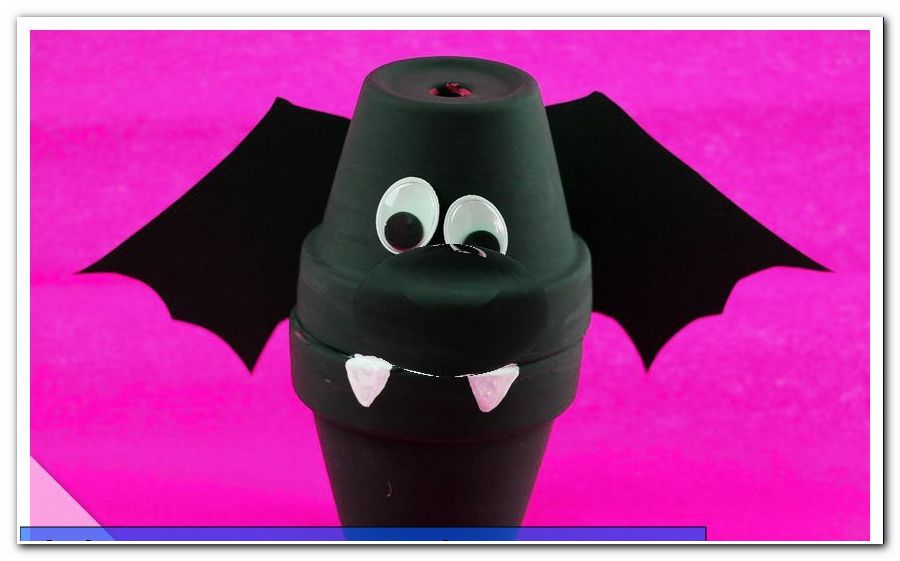
Tip: If you want, you can add two pointed ears.
Still looking for other great ideas for home-made bats "> Making bats
Winter: Make clay pot reindeer
Of course, Santa Claus is one of the most classic symbols of the winter time. But basically, the figure only belongs to a single day in about three months. A more comprehensive role in terms of time already plays the reindeer. That's how you bring your own Rudolph to life!
You need this:
- 2 clay pots (one should be slightly smaller than the other and fit well on the bigger pot)
- Acrylic paint (brown)
- brush
- red pompom (pipe cleaner ball)
- Leather or felt remnants (in two different shades of brown)
- scissors
- hot glue
- Wackelaugen
Note: The larger clay pot forms the body, while the smaller one is designed as a head with a prominent nose.
How to proceed:
Step 1: Paint the clay pots with brown acrylic paint. Let it dry well.
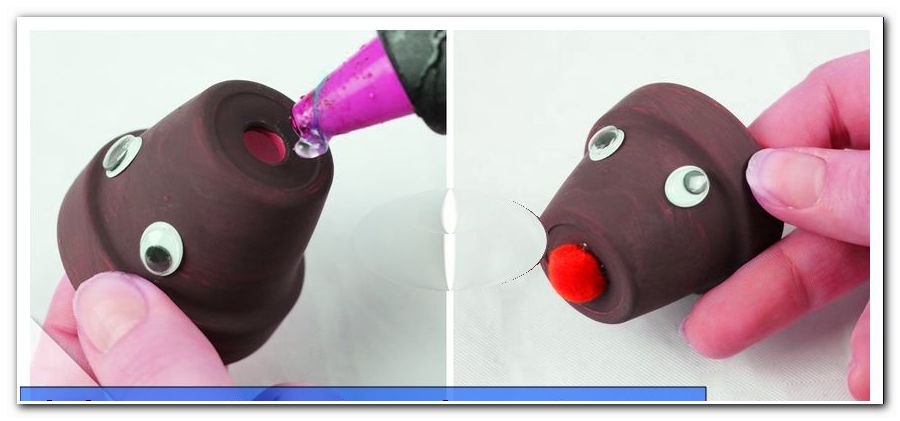
Step 2: Now stick the wobbly eyes on the smaller clay pot exactly like this:
Step 3: Glue the red pompom directly over the hole of the pot. That's the famous red nose.
Step 4: Then cut out of brown leather or felt remains the antlers and ears of the reindeer. Then glue them to the upper area of the smaller clay pot. Here you can print our craft sample for antlers and ears directly:
Click here: To download the template
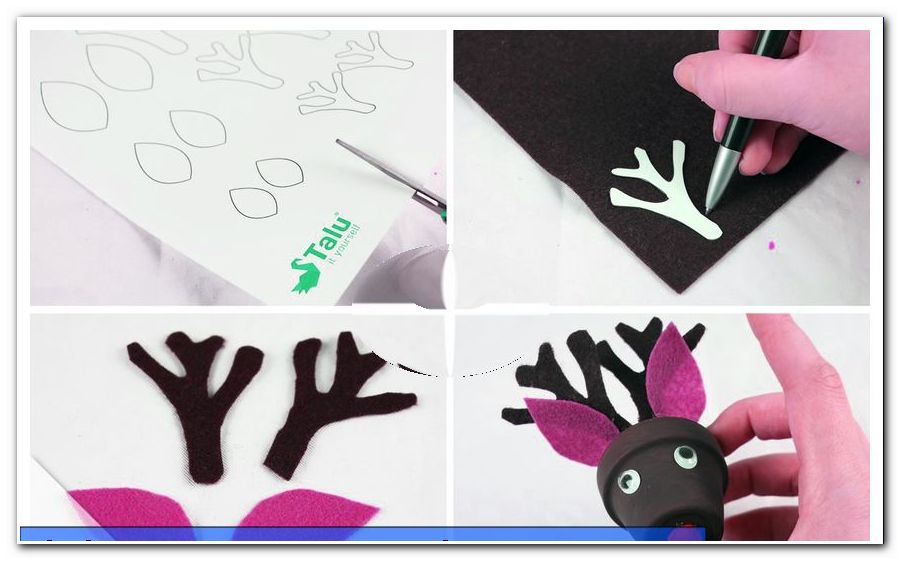
Tip: It looks especially nice if you use two different shades of brown for antlers and ears (once lighter, once darker).
Step 5: Glue the head on the body. Orient yourself in our picture.
Step 6: Finally, Rudi still wants to get arms. To do this, you cut strips of brown leather or felt remnants sufficiently long. These are then glued to the back and front of the center of the body.
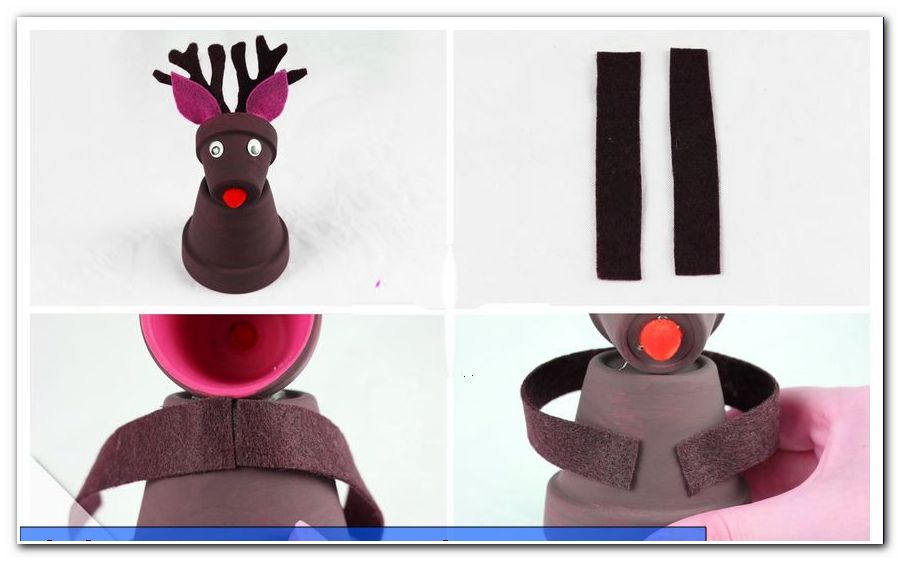
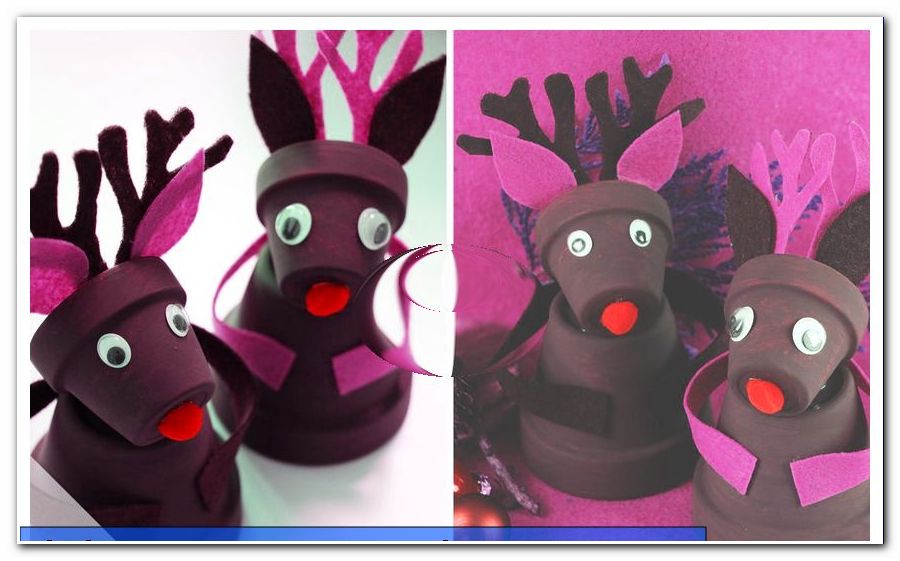
And already Rudolph is finished. So he does not feel so lonely, you can still make a companion and the winter decoration is perfect.
Paint clay pots and make funny clay-hair figures in this way is neither difficult nor time-consuming or expensive. Try it!