Origami Mouse Fold - Instructions with pictures

- Instructions - Origami Mouse
- Video Tutorial
Do you already know origami ">
You need for an origami mouse:
- a sheet of origami paper (15 cm x 15 cm or even 20 cm x 20 cm)
- bonefolder
When choosing the paper you can get creative. There are a variety of colorful origami papers in selected craft shops - with patterns, one-color or two-color. So the classic mouse does not necessarily have to be gray or brown.
Instructions - Origami Mouse
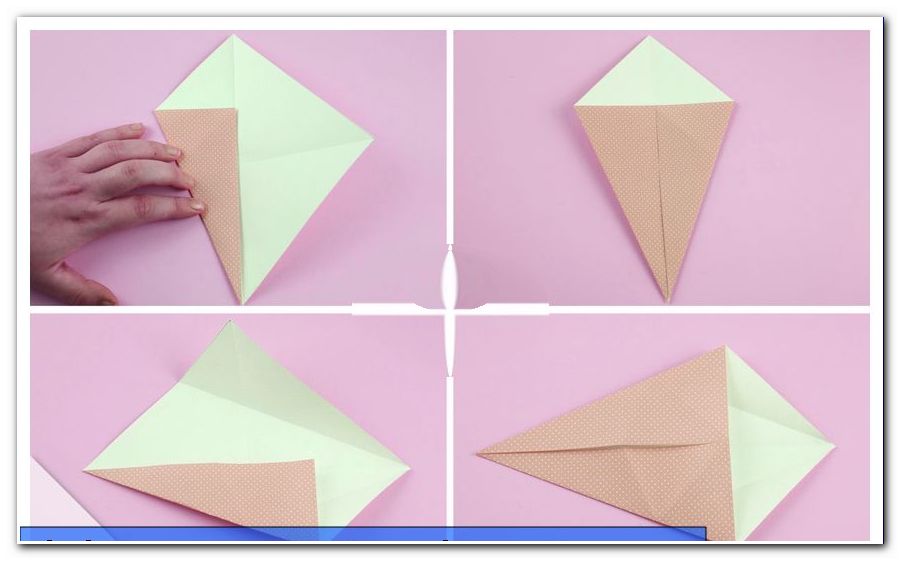
Step 1: Lay the origami paper on the table with the beautiful outside facing down. Fold the two diagonals of the square and then open these folds again.

Step 2: Turn the paper over in front of you as a rhombus. Then fold the left and right points inward along the centerline. Open the folds.
Step 3: Now turn the paper 90 ° to the left and fold the down-facing, as well as the upward pointing tip towards the center line.
Step 4: Drive your right index finger into the lower tab and push the outer edge inwards so that a small point is formed. Fold this tip to the right. Repeat the process with the upper side.
5th step: Flip the two tips to the left again.

Step 6: Rotate the paper with the tips pointing up and down. Then fold the right tab up, along the center line. Repeat this process on the left side. Then both tips are folded up.

Step 7: The paper is turned on the back side. Fold down the up-facing tip so that it protrudes 2-3 cm above the horizontal centerline.
Step 8: Now the whole thing is turned back. Think of the following fold lines on the right and left and fold them over.

Step 9: Now fold the origami mouse together on the vertical. Both tabs stand up as ears.
Step 10: First fold one ear down and then the second in the same way.

Step 11: The ears of the origami mouse are now formed.

12th step: Then the tip of the tail is hit at any point so that it points vertically downwards.
Step 13: Now repeat the process again, with the tip of the tail pointing horizontally to the left.

Step 14: Now look at the mouse from below. The tail tip is unfolded again. Then the left and right side are knocked inwards, so that the tail gets even sharper. Now the mouse can be set up.

The Origami Mouse is done! It can now serve as a decorative object or as a topping for special gifts that fit the mouse theme.