Scrap fabric scraps - Sewing from leftovers - 3 ideas

- Process fabric remainders
- Pincushion from scraps of fabric
- Shoelaces - Shoelaces
- Egg warmer - egg bonnet
It is always a challenge to find new ideas to make meaningful use of fabric scraps. And it is fun! So I sew things that I would never have come before: socks, underpants, stuffed animals, decorative objects and much more. I am an avowed Upcyclerin and Resteverwerterin, because this topic hits me every time exactly in the heart!
Today I would like to introduce you to three ideas that can be sewn from fabric remnants with not too much time expenditure. I will start with the most elaborate project of these three proposals: a self-sewn pincushion "to go". Immediately afterwards, colorful shoelaces or laces follow and at the end I show you how to keep your breakfast eggs cuddly warm.
Difficulty level 1-2 / 5
(suitable for beginners)
Material costs 1/5
(between EUR 0, - from fabric residues n up to EUR 10, - per workpiece)
Time required 1-2 / 5
(depending on workpiece and ability variable)
Process fabric remainders
Pincushion from scraps of fabric
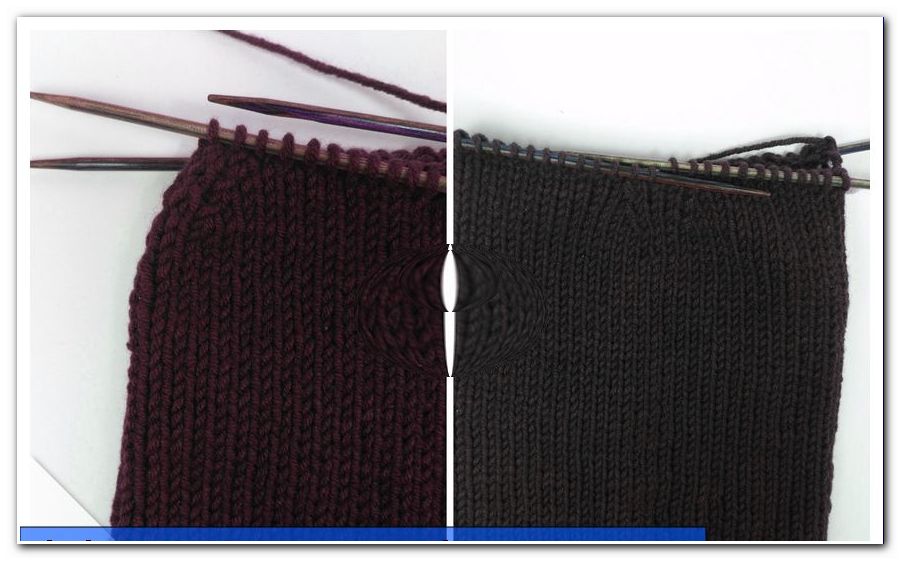
For the pincushion, it is best to use cloth remnants made of woven fabric, ie non-stretchable fabrics. If you want to process jersey scraps or other stretchy fabrics, you must reinforce them with ironing insert necessarily. However, this makes the uppermost layer of the pincushion more difficult to penetrate.

Think in advance how big your pincushion should be. Then draw a circle of the desired diameter and cut it out twice plus seam allowance. I use two different fabrics for my pincushion. If your scraps are too small for the circles, half, quarter, sixth or even eighth circles are a wonderful solution. To do this, cut out the appropriate parts with seam allowance and sew them together to form a complete circle.
I like to save time by misusing everyday objects for my workpieces. My pincushion should have about 11 cm in diameter, I just put the money box of my children on the fabric and once drawn around it, because it is about as big. I then cut in addition to a seam allowance of about one centimeter.

You can also cut the circle out of all other patchwork combinations that you sewed together from the fabric remnants, be it classic squares or crazy patchwork.
Now place the two circles right to the right (ie with the "nice" sides facing each other) and fix the two layers, so that you do not slip when sewing together. With circles as small as mine, a pin in the middle is enough.
Tip: As you can see in the photos, I cut out my circles with zig-zag scissors so that the edges do not fray.
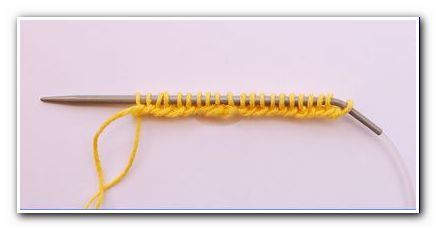
Now sew both layers of fabric together around and leave a turning opening free. I like to use the triple straight stitch, as this is particularly robust. Sew at the beginning and end of the seam well. Before turning, cut several more times in the seam allowance, all around, so that the seam allowance can fit nicely into the curve. Make sure that you do not cut through the main seam!

Now turn the circle and fill the resulting bag.

Tip: For the pincushion, I really recommend to use filling wadding and no scraps, because otherwise the needles can not be easily inserted depending on the fabric type.
Close the turning opening with an invisible seam by hand, also called ladder seam or magic seam. Here is a guide: Sew by hand
For the subdivision you now need a string. You can use thin package tape or different thicker yarns. I chose buttonhole yarn. This is slightly thicker than normal sewing thread and very durable. In addition, I have picked out of my fund still two beautiful buttons.
Clamp the string or yarn around your pillow so that even subdivisions are created. I chose 8 subdivisions in this tutorial, as this is the easiest to do: halve first, then quarter, then halve between the already laid threads. Tighten the cord or yarn correctly and knot well. To make it a pincushion "to go", there is still an important component missing: the rubber band for the wrist. Place a rubber band around your wrist and cut it so that the ends meet exactly. Sew it together with about 1.5 cm overlap. To make sure it lasts a long time, you can stitch back and forth more often, even with different stitches.

Place the rubber band with the seam facing down on the center of the bottom of your pincushion. Then put a button, the second button comes in the middle of the top. Now sew both buttons through the rubber band and the pincushion with a hard-wearing yarn and pull well on the yarn so that these indentations are created under the buttons.

Tip: Use a thimble: It's not easy to sew together under pressure and tension, without sticking your finger.
And already the first sewing idea is finished!

Shoelaces - Shoelaces
This was my first time with shoelaces, so I can tell you one thing right away: with slippery fabric remnants that you can not iron hot, it is indeed possible to sew beautiful laces, but it is not easy. Preferably use cotton woven fabric. Also fabric remnants of jersey fabrics are great, but here you need about 10% less in length.
Let's get started: first you have to determine the length of the laces. Simply take the laces you want to exchange and measure them. Most Schubänder are about 120 to 150 cm long. I would rather stick to fabric remnants of jersey and other stretchy fabrics rather 120, because they give even further.
Shoelaces are folded and stitched like bias binding and that's all the magic. That means they are folded and ironed in the middle, opened again and then both edges are laid to the middle and folded again, then ironed again. And finally quilted edged on the open side.

After the length is fixed, the width is still missing: think about how wide the finished lanyard should be or measure the "predecessor" from. Calculate this value times 4. My Schubänder should be at most 1 cm wide.
Tip: I'll make it easy again: my metal ruler is about 3.5 cm wide, which is perfect for my shoelaces.
I draw on my scraps of cloth on the edge a straight line. At it I put on the lower ruler edge and draw a line at the upper edge and so on. Then I cut the fabric on these lines and get many equal width stripes.

Of course, my fabric remnants are not 120 cm long and 150 cm certainly not. That's why I have to piece: I just sew the ends together until my volume is long enough. Then I iron the seam allowances apart and begin ironing the folds as described above.

Tip: If you occasionally make bias binding yourself, you may already have the practical bias band shaper at home. These are perfect for this sewing project.
After the edges are stitched together, only the final touch is missing.

Basically, you can use the laces so already, but they could still fraying. It does not make much sense to fold the ends inward before sewing them together, otherwise they will become too thick and will not fit through the holes. That's why I rummaged a bit in our electrical workshop and picked out a few heat shrink tubing. In my case, they are black (electrical workshop halt), but they are also transparent.
Cut the hose to the desired length. You need two pieces of hose per shoe. Now insert one end of the tape into a hose until the edges finish.
In order for the tube to contract, it must be heated. I took him with the tweezers and kept close to the hot iron (highest level) and slowly turned. I do not know how much heat heat shrink tubing can withstand, so it was too risky for me to iron on it. Besides, the fabric I used is not very heat resistant. Nevertheless, I am completely satisfied with the result.

And this is how my shoes look like: right in the front, the old, boring, white shoelace and on the left in the picture the beautiful, loud, new shoelaces.

Egg warmer - egg bonnet
Here comes another tutorial, which is great especially for children - and it can also be sewn by children (with some support, of course) and a fun way is to use your scraps: Eierhäubchen!
I used jersey for the caps, but all other stretchy fabrics work as well. From non-stretchy scraps of fabric is to be advised in this project, since there are eggs in a variety of sizes and the caps should fit on all.

I chose a medium-sized egg as a base and measured it for you: 15 cm. This will be the size of our hat and at least the scraps of cloth must be so wide. You do not need to add any seam allowance here. For jersey bonnets without cuffs, you usually expect about 10% off, so that they fit nicely, this corresponds to 15 cm wide seam allowance of 1.5 cm. So here is the seam allowance already included.
The height should be about 15 cm, if your scraps are higher, but they need not be cut extra. Depending on which shape they want to give the top, the fabric remnants may also be a few inches longer or shorter. The first piece of my fabric remains about 18 cm high.
For the first cap, I sew a "lazy room". For this I fold the bottom edge (note the motive - where is above and below "> 
Then I fold the fabric right to right (the beautiful pages together) and draw a slanted line on which I stitch. Then I cut away the excess fabric and turn the cap. I put a knot in the top to make it look funnier and put it on my painted egg, which is already dozing in the eggcup.

You've probably seen a "tip" sticking out at the back. It does not bother me with such little fun projects, but I'll show you how to avoid it in the next variant: Sew down just the last centimeter. The second cap I also just lined up, that makes another picture on the egg.

For the third egg, I have thought of something else again: a division in the upper middle. To do this, draw a line from the top center. He should be a bit closer to the bow than to the open edge, because this is still sewn together. Then sew from top to right and left of this line and cut the two "ears" apart.

Now just turn and you can decide whether to let the two "ears" stand out straight, knot them (as I pictured) or knot them one by one.

Have fun sewing!
The twisted pirate