Autumn crafts with children - 3 ideas and instructions
- Colorful pleasure: 3 ideas for autumn crafting
- Mysterious lantern
- Playful foliage curtain
- Owls as an autumnal table decoration
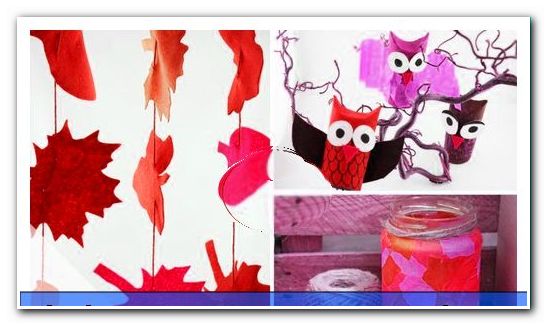
The weather is getting cooler, but the colors are even brighter: perfect conditions to be creative to your heart's . This makes fun for all ages and helps against boredom. And the three very different works can be seen: a romantic curtain of leaves, a mysterious lantern and cute owls as a table decoration. All these autumnal creations are literally easy to do by yourself - with very little material and effort!
Colorful pleasure: 3 ideas for autumn crafting
Hardly a season offers itself so much to tinker like autumn: After a colorful walk in the colorful nature, the senses are full of inspiration. The body, on the other hand, is happy to be warm again. It is through this intensity of light and color and the balance of cool temperatures that recede that children are particularly enthusiastic about self-made artwork in the fall - especially if they are allowed to direct it themselves.
Our three ideas can be designed so easily that the adults only have the assistant role. For safety, so that when one or the other use with needle or scissors nothing goes wrong. And of course, because it makes twice as much fun together. A very adult note before it finally starts: The approximate prices, of course, refer only to the specifics of every tinkering and assume that basic things such as scissors, pencils or ordinary glue are already in the household in stock.
Mysterious lantern
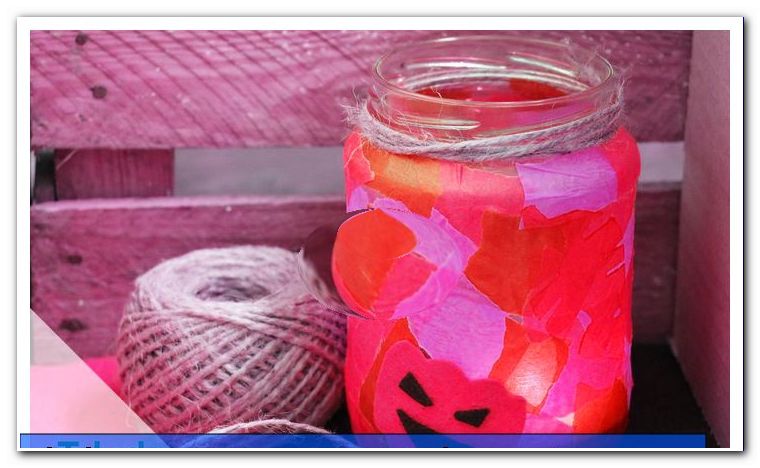
In the dark season nothing is as important as beautiful light. With the atmospheric wind light, you create the right feel-good atmosphere - whether for a spooky Halloween party or simply for storytelling. And one thing is for sure: designing yourself is much more fun than just buying a similar lighting element!
Difficulty level: 1/5
Time required: about 30 minutes
Material costs: max. 10 Euro
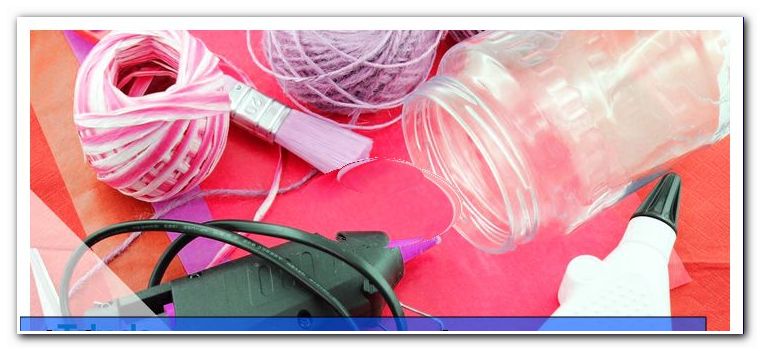
You will need that:
- a large mason jar (or empty XXL jam jar)
- Transparent paper in orange
- White glue
- Hot glue gun
- self-adhesive film (eg Creapop)
- dark green raffia or corresponding bow ribbon
- Decoration fabric with autumnal motive (leaves, pumpkins, etc.)
- alternatively to the decoration fabric: even dried leaves in appropriate size
- Scissors (best very fine - nail or better: silhouette scissors)
- brush
How to proceed:
Step 1: First tear the translucent paper into small pieces - depending on the size of the glass you will need about one or two A4 sheets.
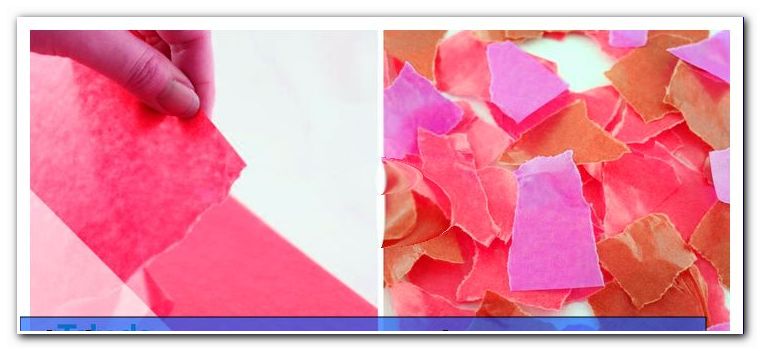
Tip: The paper scraps do not have to be even or "perfect". A great task for kids!
Step 2: Brush the glass - or your child - generously with the white glue.
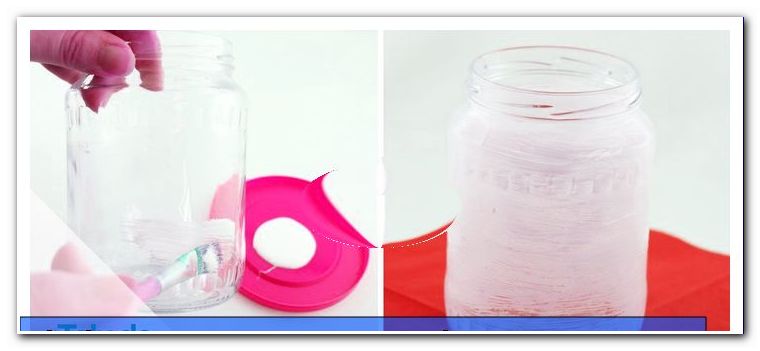
Step 3: Then dab the pieces of paper piece by piece on the glass, as follows: First take up with the brush and press on the glass and then paint again with white glue.
Tip: Children like to do this step with their hands - without a brush. A great glutinous but fun factor!
Step 4: Now let the glass dry well while doing the following instructions together. Then there is a surprise! (The glue is no longer white, but invisible!)
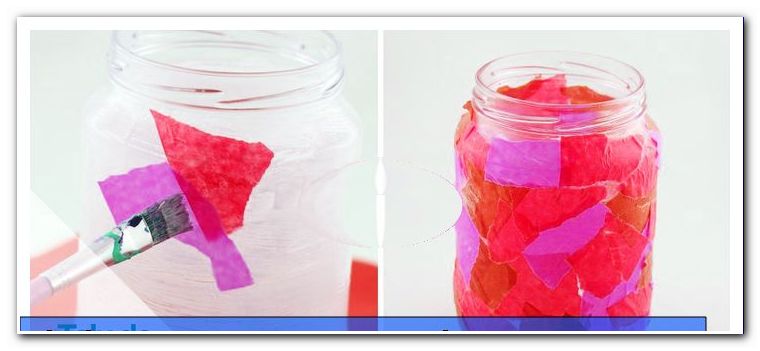
Step 5: Now cut out your favorite motifs from the autumn decoration fabric. Alternatively, pick up the dried leaves.
Step 6: Then apply the leaves on the glass in the same way as the pieces of paper in advance: stick on first, then brush over.
Attention: Who uses real foliage, should be extra careful, so that the porous leaves do not tear! That's what the adults do better.
Step 7: In addition, for an interesting effect, stick two or three fabric or leaves on the self-adhesive film. These fasten later as 3D elements at the upper edge (the former screw cap of the glass) - simply by hot glue gun!
Or this variant: with a homemade stamp we have stamped leaves on the lantern. We will show you here how you make foam rubber stamps yourself: //www.zhonyingli.com/stempel-aus-moosgummi-basteln/

Step 8: When everything has dried well, crown your lantern with a bow: Tie the dark green raffia or gift ribbon thread around the top and form a pretty bow.
9th step: Of course, with the hot glue gun, of course, even more autumnal ornaments can be added: For example, feathers or autumn fruits and small nuts or twigs.
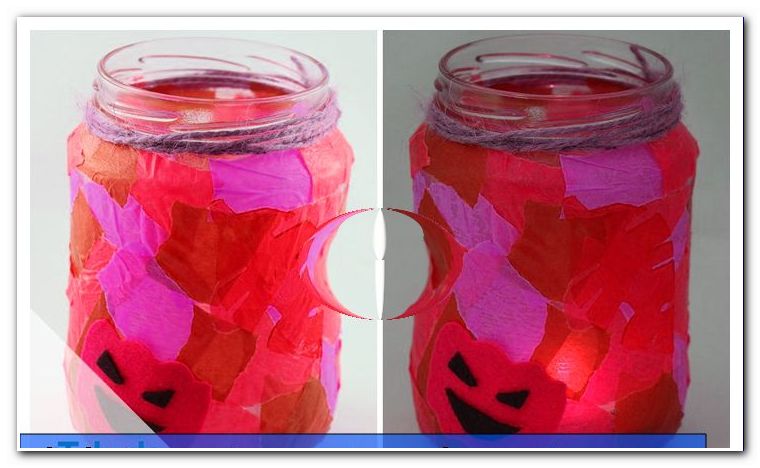
10th step: Now you only need a tealight - maybe even with the autumn needles - and you can start with the handmade autumn atmosphere.
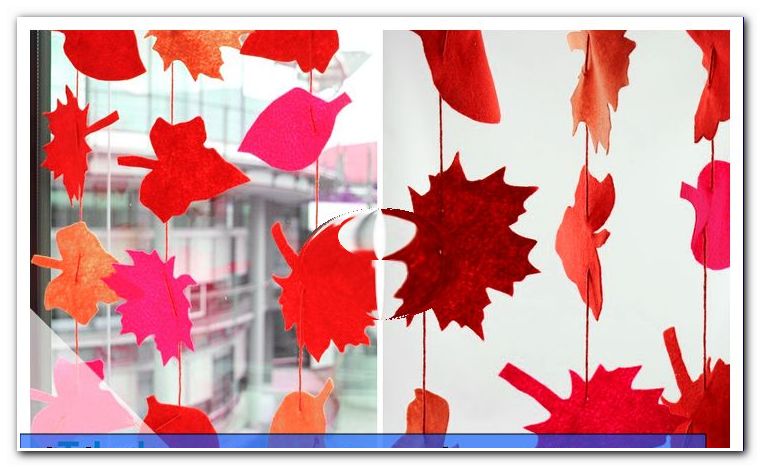
Playful foliage curtain
This romantic autumn curtain does not just fit in the nursery. The noble red and orange tones give each room an autumnal atmosphere. Our various sheets templates make it easy for you and your children to do crafting. Of course, your own creativity is always in demand - so let your children create their own leaf creations, then the curtain becomes even more individual.
Difficulty level: 2/5
Time required: 1-3 h (depending on the size of the curtain)
Material costs: less than 10 €
You need:
- dry, stable branch
- Craft felt in red, orange, purple, pink or yellow
- scissors
- pen
- Wool
- wool needle
- Fishing line or yarn
How to proceed:
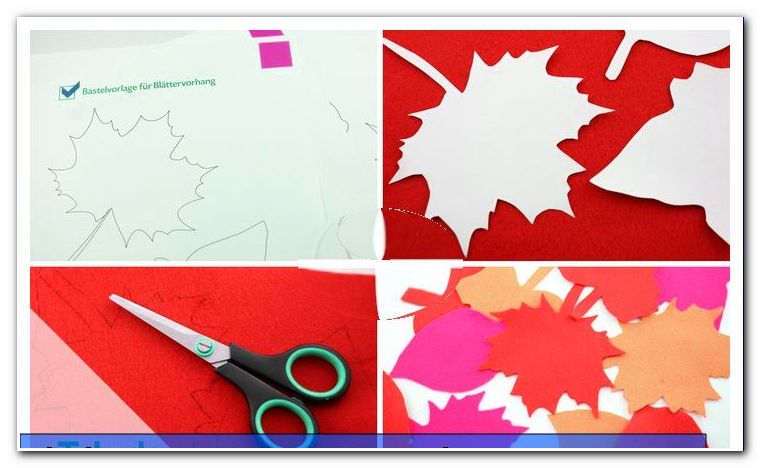
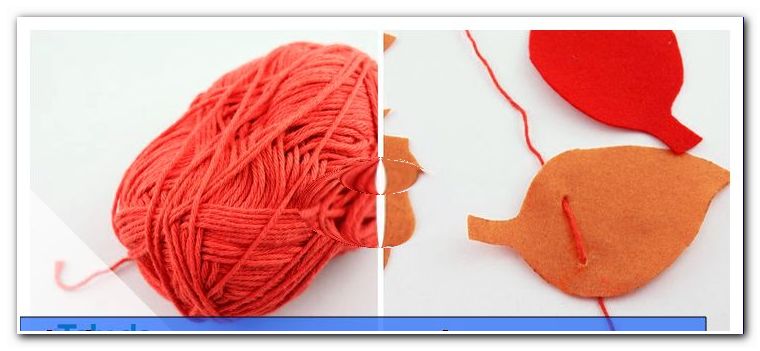
Step 1: At the beginning, print out our leaf templates - we have prepared different leaf shapes for you. Of course, you and your children can also become creative and create their own leaf shapes.
Carefully cut out the individual leaves.
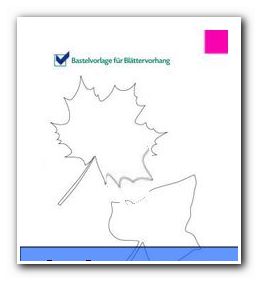
Click here: To download the craft template
Step 2: Now transfer the outlines of the individual sheets to the craft felt - with a pen, the edges are simply repainted. Then cut out these leaves as well. For a large window curtain you can already make over 80 leaves. Therefore, this step is the most time consuming.
Step 3: Cut 10 threads of wool of different lengths but not too short. Their length depends on the window height. The longest thread should be about as long as the window is high.
Step 4: Now thread the felt sheets onto the threads with the woolen needle. For this purpose, prick it out into the leaf and on the same side again - so the leaf is stretched in the right place. Leave a space between the leaves of 10 - 15 cm.
Step 5: At the end of each woolen thread, tie a knot just below the last leaf.
Step 6: Knot the upper ends to the branch. Even there you can evenly between the threads space.
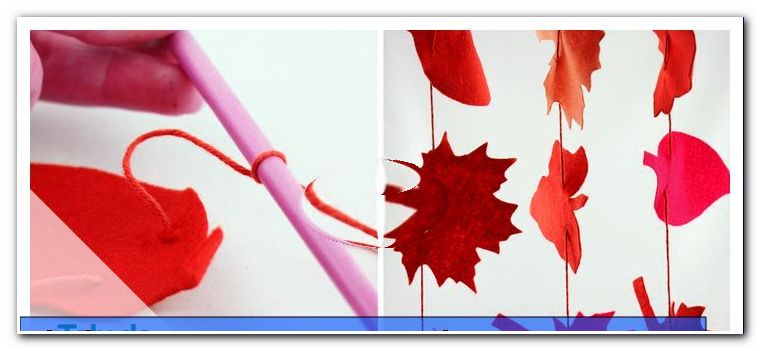
Finished is the autumnal felt sheet curtain!
Step 7: For fixing, drill two holes in wall over the window. Pay attention to the distance of the holes - this should be a little shorter than the branch.
Then insert a dowel into each hole and attach two eyelets in it.
The fishing line bind on both sides of the branch. Now only tie two loops and the curtain can be hung.
Owls as an autumnal table decoration
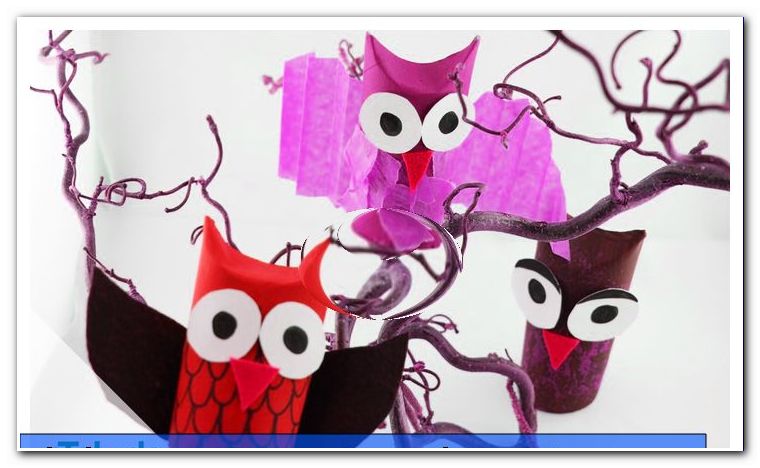
Whether Halloween celebration or autumn festival with friends and family: with a matching table decoration makes the fun twice as fun. Our pretty owls are ideal as a card holder for name or designation of the food. Of course, owls are not only found in autumn, their legendary wisdom harmonizes well with this mysterious season.
Difficulty level: 2/5
Time required: about 20 minutes
Material costs: under 5 euros
You will need it (for an owl):
- empty toilet paper roll
- Acrylic paints and brushes
- Craft paper, crepe and felt
- scissors
- black felt-tip pen
- pen
- compasses
- possibly wobbly eyes
- PVA glue
How to proceed:
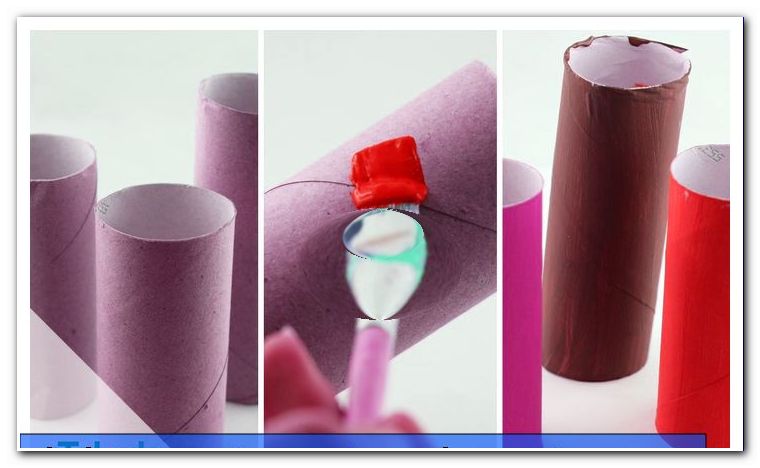
Step 1: Paint the roll with the color you want - outside is enough, because the inside will not be visible later.
Tip: do not forget the painting pad and thin disposable gloves, then it does not matter if the kids are a bit wrong. In addition, the little ones can keep the brushed rollers better, because sometimes even directly into the already colored areas may be used!
2nd step: let it dry well - at least 10 minutes.
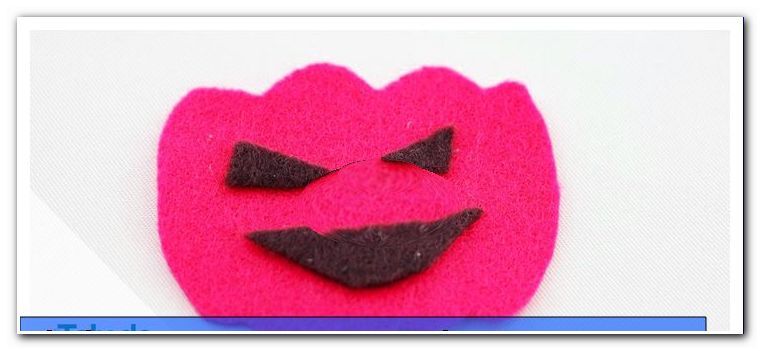
Step 3: Now the eyes and the beak are cropped - for the eyes simply draw two circles on white paper with the compass and cut out - then paint the pupil with the felter in the middle. The beak we made from craft felt - just cut out a small triangle.
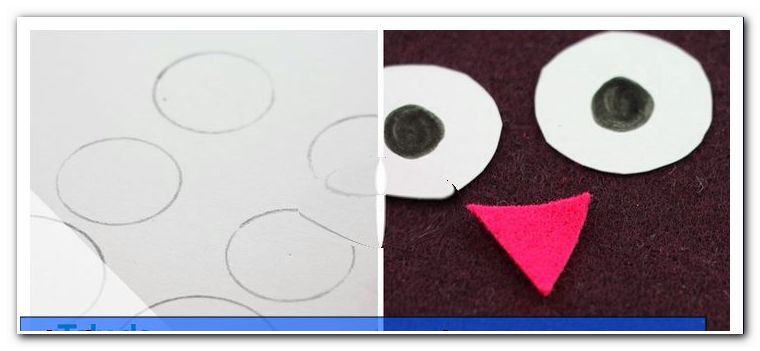
Let your creativity run free and design your eyes and beak as you wish.
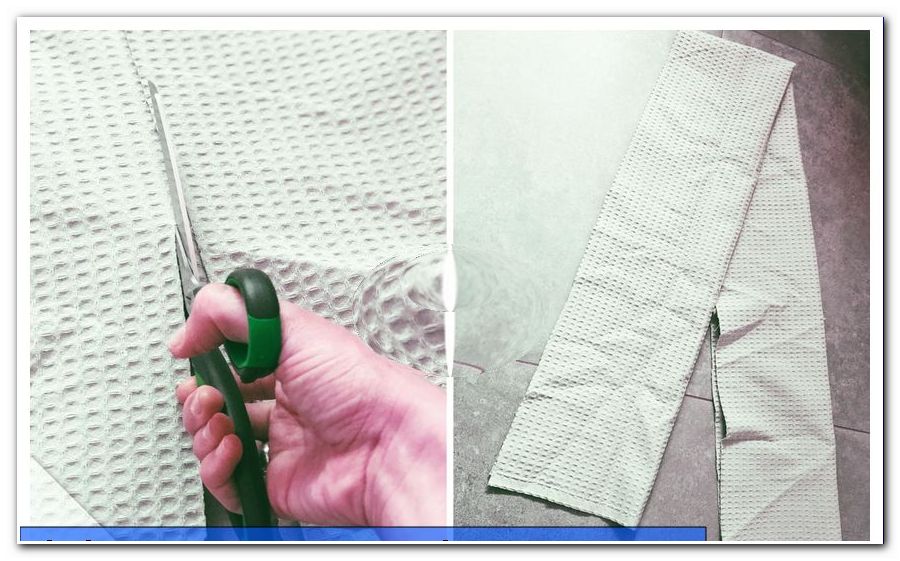
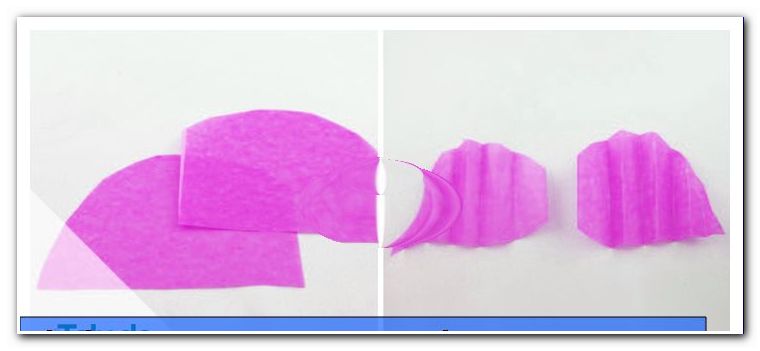
4th step: Just as you do with the wings. We cut them from transparent paper and folded them a few times.
Step 5: If the cardboard tube is now dry, the owl gets its ears by gently folding the upper edges inwards toward the middle and pressing firmly.
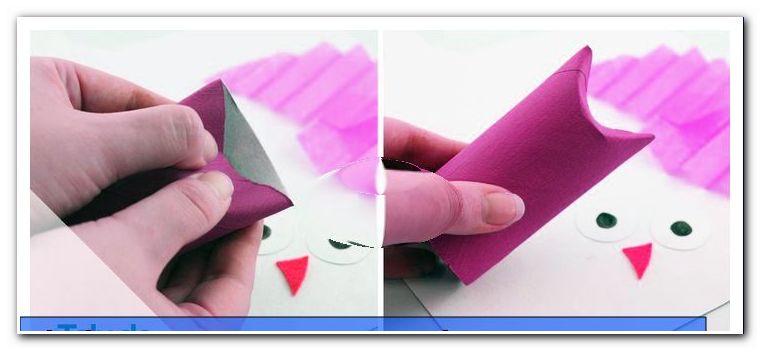
Step 6: And the body is ready and the decoration can begin. Glue eyes, beak and wings to the tube. The plumage we designed in these variants with small paper snippets, which we have glued.
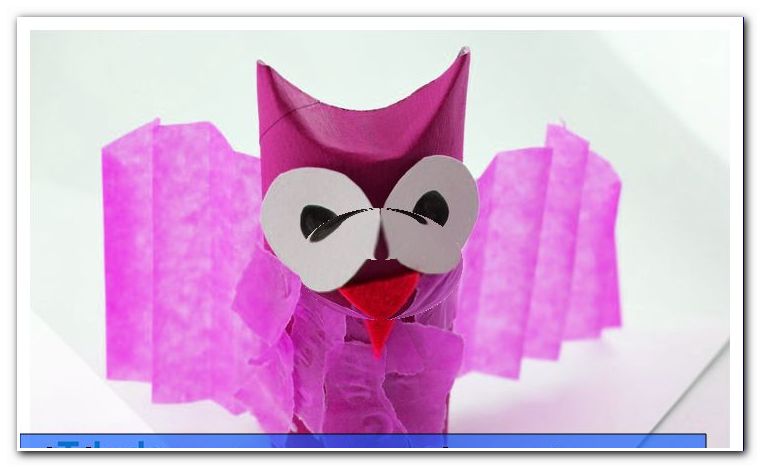
Tip: Instead of painted eyes, glued-on loose-eyed eyes can make a funny effect. In order to highlight the plumage even more clearly, many small Vs or points on the back and belly are suitable.
Step 7: Now the decorative owls are ready for use: simply stick name tags on or lean against them and you're done. But many more creative decorating options exist: glue on proper feathers (glue gun) or bows and tie small ties around the neck, etc ...
Tips for quick readers:
leaves curtain
- Print template and transfer to felt
- Thread on auged leaves
- Attach the curtain to the branch
- Fix the curtain to the wall
Autumn lantern made of mason jar
- Glue with tracing paper
- let it dry well
- Attach decorative elements
Owls as place card holder / table decoration
- paint empty toilet rolls white
- Sponge up fine gold with a sponge
- Fold the upper edges parallel as ears
- Paint eyes and beak
- possibly add more ornaments