Crochet summer hat - free instructions for a breezy beanie

- Summer cap - material and preparation
- Crochet pattern for beginners
- Crochet lace pattern
- Crochet children's hat
- graduation
- quick start Guide
A summer cap not only protects against wind and too much sun, a summer cap is also a cool accessory. It should therefore be missing in any wardrobe. Whether big or small, this hat with its simple pattern and the instructions described is crocheted quickly. And with the right yarn, it's certainly not just a model.
Simple crochet pattern for beginners - Our summer cap is so easy to work on, that even beginners with this guide can easily crochet a hat. Step by step, we will show you how to quickly come to a self-crocheted cap. Even before the lace pattern beginners do not have to worry. Our crochet pattern is easy to understand and easy to implement. The pictures also explain the individual rounds and make crocheting easier.
With a beautiful summer yarn, a simple lace pattern, chopsticks and small mesh you will make it in one afternoon to crochet this summer hat.
Our crochet pattern has a special plus: It does not matter if you want to crochet a summer hat for yourself or for the little daughter, on the instructions and the pattern changes almost nothing.
Summer cap - material and preparation
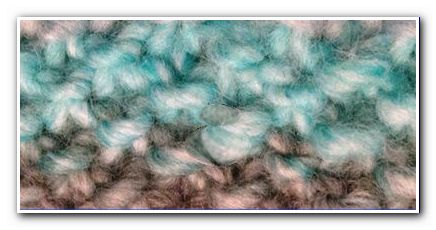
Each summer cap gives your own character with the yarn and crochet hook thickness. It's not just the simple lace pattern that makes the summer cap summery. Therefore, use a light summer yarn. This can be a cotton blended yarn, even thin ribbon yarns can be easily processed into a summery hat. And who likes it very noble, decides for the luxury yarn silk.
We decided on a cotton-bamboo blend yarn. It is a very soft and light yarn.
Tip: Before starting to work, be sure to do a knit with different crochet hook strengths. The strength of a crochet hook not only changes the overall picture of your work, it also determines the size of your summer hat. The pattern always stays the same.
You need so much yarn in our crochet pattern:
- Our pattern cap for beginners was worked for a head circumference of 58 centimeters. For this we needed 70 grams of cotton blended yarn, which has a running length of 250 meters / 100 g of wool.
- We crocheted this summer cap with a crochet hook of strength 5.

Crochet pattern for beginners
The pattern we have chosen for this summer cap is very easy to crochet. It consists only of chopsticks, air meshes and chain stitches. So even beginners can easily rework this cap and look forward to the first crochet cap quickly.
The hole pattern, which is incorporated in the cap, consists only of rods and air meshes. Simple as it gets.

No matter what crochet hook size you are working with, the beginning of the hat is always crocheted the same way. The increases will always work the same until the 10th round. From this round, you can then adjust the cap on your head directly, whether a further increase is necessary, or whether you have already reached your head circumference.
Tip: When crocheting a summer cap, keep in mind that it does not fit very close to your head. It should not restrict, but rather protect and therefore sit loosely.
1 round:
- Insert a magic ring / thread ring.
2nd round:
- 5 sticks are crocheted into this Magic Ring.
- The first chopstick is replaced by 2 air meshes
- Close the round with a chain stitch.

Basically, each round ends with a chain stitch and starts with 2 air stitches as a substitute for the first chopsticks. These 2 aerial stitches at the beginning of each round are not always listed separately in the description. But you have to crochet.
Tip: The stitch crocheted after these two stitches will be stitched directly at the first stitch, directly at the air stitch. Even if this looks more like this mesh still belongs to the air mesh.
3rd round:
- Work 2 sticks in each chopstick
- The round is closed with a chain stitch.
This round now counts 10 sticks .
4th round:
- Crochet 2 sticks in each chopstick.
- Close the round with a chain stitch.
You now have 20 sticks in the round.

5th round:
- 2 sticks in the 1st stitch
- 1 stick in the 2nd stitch
- 2 sticks in the 3rd stitch
- 1 stick in the 4th stitch
- Repeat this order the entire round.
- 2-1-2-1-2-1-2-1 ....
- Finish the round with a warp stitch
You now have 30 stitches in the round.
Tip: Do not over-tighten the first two stitches that replace the first one in a new round. You can then easily pierce the warp stitch at the end of the round.
6th round:
Here every third stick is doubled
- 2 sticks in the 1st stitch
- 1 stick in the 2nd stitch
- 1 stick in the 3rd stitch
- 2 sticks in the 4th stitch
- 1 stick in the 5th stitch
- 1 stick in the 6th stitch
- 2 sticks in the 7th stitch
- Crochet the entire round in exactly this episode.
- 2-1-1-2-1-1-2-1-1-2-1-1 ... ..
- slip stitch
After this round, the crocheted circle counts 40 sticks .

In the 7th - 8th - 9th - 10th and 11th round, 10 stitches / sticks are added.
7th round:
- Each 4th stitch is doubled - that is, every 4th stitch is crocheted with 2 sticks.
- 2-1-1-1-2-1-1-1-2-1-1-1-2- ....
- slip stitch
This round counts 50 sticks .
8th round:
- Every 5th stitch is doubled
- 2-1-1-1-1-2-1-1-1-1-2-1-1-1-1-2- ..........
- slip stitch
The round now has 60 sticks .
9th round:
- Every sixth stitch is doubled
- 2-1-1-1-1-1-2-1-1-1-1-1-2-1-1-1-1-1-2- ......
- slip stitch
70 sticks count this round.
10th round:
- Every 7th stitch is doubled
- 2-1-1-1-1-1-1-2-1-1-1-1-1-1-2-1-1-1-1-1-1-2- ...... ..
- slip stitch
This round now has 80 sticks .
11th round:
- Double every 8th stitch
- 2-1-1-1-1-1-1-1-2-1-1-1-1-1-1-1-2-1-1-1-1-1-1-1-2- ...... ..
- slip stitch
90 chopsticks have this round.
12th round:
- Double every 9th stitch
- 2-1-1-1-1-1-1-1-1-2-1-1-1-1-1-1-1-1-2-1-1-1-1-1-1- 1-1-2- ...... ..
- slip stitch
100 stitches count this round.

13th round:
You start the round again with 2 air meshes - like the whole rounds before - and crochet 1 stick in each stitch of the preliminary round.
Crochet lace pattern
14th round:
- 2 air meshes as a rod replacement
- 2 more air meshes, they serve as the first air mesh arch
- Skip 1 stitch from the preliminary round
- 1 stick in the next stitch of the preliminary round
- 2 air meshes (for the air mesh arch)
- Skip 1 stitch
- 1 stick in the next stitch
- Crochet this order the entire round
- Crochet the warp stitch at the end of the round in the bow.

15th round:
- 2 air meshes as a rod replacement
- 2 air meshes - for the first air mesh arch
- 1 stick in the next loop of air mesh
- 2 air meshes
- 1 stick in the coming air mesh bow
In this order, the entire round is crocheted. The chain stitch always closes in the air mesh arch of the first 4 meshes.

The 16th, 17th and 18th rounds are worked exactly like the 15th round.
Tip: You now decide yourself whether you will continue to crochet 1 or 2 rounds in the pattern. This is a matter of taste and does not change the pattern of the entire summer cap.
19th round:
- The round starts again with 2 air mesh as a chopsticks substitute.
Crochet 1 stick in each stick and in each bow. - slip stitch

20th round:
- 2 air meshes as a rod replacement
- Crochet 1 stick in each stick of the preliminary round.
The round still counts 100 stitches .

From this round you can now decide how you want to continue crocheting.
You can extend the cap size with even more rows of rods, then the summer cap stays flat on the head.
We have decided to give the summer cap the shape of a summer hat. For this we crocheted 5 more rounds in this order. The crochet pattern looks like this:
21st round:
- 2 air meshes as a rod replacement
- Double every 5th stick.
- 2-1-1-1-1-2-1-1-1-1-2-1-1-1-1-2- ......
- slip stitch
The round now counts 120 sticks .
22nd and 23rd round:
- 2 air meshes as a rod replacement
- Crochet 1 stick in each stitch of the preliminary round
- slip stitch
So that the wreath of the cap is a little bit bigger, we crocheted another round of rounds.
24th round:
- 2 air meshes as a rod replacement
- Record 10 air meshes throughout the entire round.
- That is, crochet 2 sticks in every 12th stitch of the preliminary round.

25th and 26th rounds:
These two final rounds are only worked with chopsticks. Without increase.
Crochet 1 stick in each stitch of the preliminary round. The summer cap is ready. All you have to do is sew on the beginning and end threads.
Crochet children's hat
What can be crocheted as a big hat also works for small hats for little girls.
We worked with the same number of stitches, we just crocheted with a thinner crochet hook. "> 
Round 12 and Round 13:
- 2 air meshes as a rod replacement
- Crochet 1 stick in each stitch of the preliminary round. Without increases.
- slip stitch
- From the following rounds we crocheted only 1/2 sticks instead of whole sticks.
Important: Even with 1/2 sticks, the first stick of a round is always crocheted with 2 air stitches.
How to crochet 1/2 sticks according to our crochet pattern:
This means: put a working thread on the crochet hook, cut into the stitch of the preliminary round, pick up a working thread and pull through all three stitches that are on the needle.
Round 14:
- This round corresponds to round 14 of the big cap.
- 2 air meshes as a rod replacement
- 2 air meshes as air mesh arch
- Skip 1 stick
- In the next stitch work 1/2 chopsticks
- 2 air meshes (for the air mesh arch)
- Skip 1 stitch
- 1/2 stick in the following stitch
- Crochet this order the entire round.
Round 15:
- Also this round corresponds completely to the instructions of the round 15 of the big cap.
- 2 air meshes as a rod replacement
- 2 air meshes - they are the first air mesh bow
- 1/2 stick in the next loop of airmesh
- 2 air meshes
- 1/2 sticks in the upcoming air mesh arc
In this order, the entire round is crocheted. The chain stitch always closes in the air mesh arch of the first 4 meshes.
We worked a total of 5 hole pattern rounds. That is, rounds 16, 17, 18 and 19 all correspond to the pattern of round 15.

Round 20, 21 and 22:
These three rounds we crocheted only with 1/2 sticks. No increases. The rounds end again with a chain stitch.
graduation
This cap for little girls we give a nice edge as a conclusion.
They start like this:
2 mesh, then do the work. This means that you are no longer crocheting on the right side but in the inner part, ie on the left side of the cap. The pattern on the right side is more beautiful.
- After the air mesh, crochet a slit stitch on the left side.
- In the next stitch is a chopsticks, then again a chain stitch.
The order looks like this:
Chopsticks-Chopsticks-Chopsticks-Chopsticks-Chisel ... until the end of the round.

This children's cap can be adapted to all children's heads. If the cap should be smaller, then work as in the instructions the first rounds of the recording only until the turn 8 or 9. You can easily measure the head of the child, whether you still need to increase or not.
Then follow the hole pattern and the two final rounds.

quick start Guide
- Magic ring / thread ring
- 5 sticks - Kettmasche
- 2 sticks in each stick
- 2 hours - 1 hour - 2 hours - 1 hour - ... ..
- 2 h - 1 h - 1 h - 2 h - 1 h - 1 h - 2 h ....
- In rounds 7 to 12, increase 10 stitches evenly in each round
- Crochet only chopsticks
- 2 aerobics, skip 1 stick, 1 stick
- In rounds 15 to 18, always crochet the chopsticks in the air-mesh bow. 1 St - 2 Luftma - 1 St
- In each stick and in each sheet 1 sticks
- In each stitch 1 chopsticks
- Double every 5th stick
- On rounds 22 and 23 only crochet chopsticks
- Pick up 10 sticks evenly distributed
- Crochet only chopsticks for 2 rounds