Make dough yourself - recipes and DIY instructions

- Make dough yourself
- Important instructions
- manual
- Make edible plasticine
- Important instructions
- manual
Feel the soft mass with your fingers and make something creative from it: kneading is great fun for children and adults alike. Now you can of course buy plasticine in the trade, but it is particularly beautiful and also still easily and inexpensively possible to produce the necessary for the exciting activity putty itself. We show you a recipe for pure crafting dough and another for the edible counterpart that promises enjoyment right down the line! So you can make dough yourself:
Kneading is not only a source of tremendous joy, it also promotes a range of skills, especially for children. While working with the play dough different senses are directly addressed: especially the smelling and touching . In addition, the pressing, rolling, cutting and modeling of the play do fine hand skills in the hand as well as their own imagination and creativity to train. Make the dough yourself - possibly with the support of your children. Our comprehensively described recipes including numerous tips and tricks lead you step by step to pure crafting material from salt dough or edible clay, which you can consume directly after your work!
We present you two ways to make clay yourself. Once putty results, which is intended only for crafting. It is commonly referred to as salt dough, as it contains a lot of salt. The second recipe, on the other hand, turns you into edible play dough. It is more comprehensive and therefore more complex to implement, but brings the kneading in the end enjoyment for all the senses. And here we go!
Make dough yourself
For about 500 g of craft dough you need:
- 400 g of wheat flour
- 200 g salt (uniodinated!)
- 2 tablespoons alum, tartaric or citric acid
- 500 ml of boiling water
- 3 tablespoons cooking oil
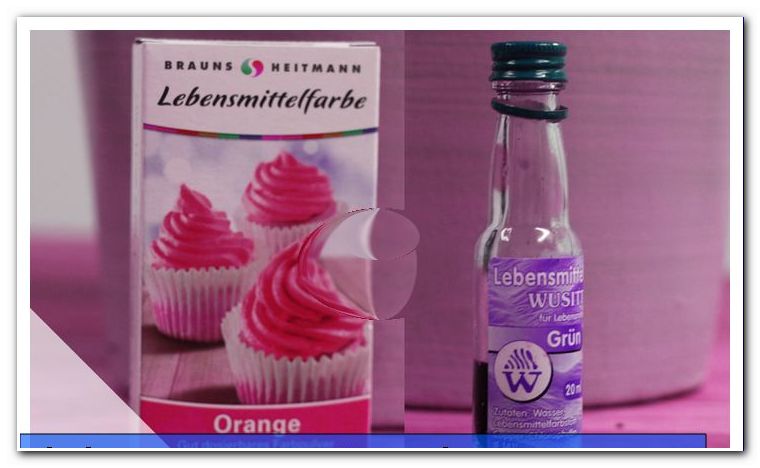
- Food coloring (s) in powder or gel form

aids:
- big bowl
- hand mixer
- tablespoon
- Food or kitchen scales
Important instructions
Only use one ingredient from the triad of alum, tartaric acid and citric acid! Although alum is poisonous, it is the most convincing in terms of smoothness and durability of the final clay. If you want to make the salt dough for very small children, you should resort to tartaric acid or citric acid. So there is no serious danger when your offspring put the clay in their mouths. Alum and tartar are available in the pharmacy, citric acid in the supermarket.
Depending on whether you want to have the craft clay only in a single color or more piles in different shades, buy one or more food colors.
Attention: It is recommended to use them in powder or gel form. Very liquid food color is often accompanied by a disgusting slippery kneading result. And nobody wants that.
manual
Step 1: Pour flour, salt and the two tablespoons of alum, tartaric acid or citric acid into the large bowl. Mix well with the hand mixer.
1 of 6


Step 2: While stirring vigorously, add half a liter of boiling water.

Step 3: Add three tablespoons of cooking oil to your previous salt dough. Continue stirring until a plasticine has formed. Too dry "> # td_uid_5_5d5c109fe551e .td-doubleSlider-2 .td-item1 {background: url (// www.zhonyingli.com/wp-/uploads/2016/02/Knete-selber-machen-10-1-80x60 .jpg) 0 0 no-repeat} # td_uid_5_5d5c109fe551e .td-doubleSlider-2 .td-item2 {background: url (// www.zhonyingli.com/wp-/uploads/2016/02/Knete-selber-machen- 11-80x60.jpg) 0 0 no-repeat} 1 of 2 

Step 4: Color the salt dough at will. If you want to get just one color, you can add it directly and mix it with the mixer. If, on the other hand, you wish to create several piles in different tones, first distribute the dough on a few small bowls. Then drip the various food colors on the piles and knead neatly.
1 of 4


Caution: Use the food colors very sparingly, since they are extremely productive!
Step 5: Knead what it takes! Make a lot of funny motives with your children.
Tip: If you want, you can keep the kneaded figures durable. To do this, let it dry on the heater for a week and then bake in the oven for 30 to 60 minutes (depending on the thickness of the figurines) at 150 degrees Celsius.

By the way: If you want to pick up some or all of the modeling clay, you have to package it well and above all airtight and put it in the refrigerator. She then holds about half a year.
Cost and effort for the salt dough: low
Make edible plasticine
Before we present you the list of ingredients, we would like to warn you: The recipe contains two ingredients that you usually do not find in the simple supermarket: whole egg powder and maltodextrin. Now we had to realize, however, that these exotic-looking supplements improve the kneadability of the mass in terms of smoothness and dimensional stability so much that we can not do without it. Look online for the cheapest egg powder and maltodextrin. Very small packs are enough, because you do not need too much of it. But see for yourself:
(possibly pictures of whole egg powder and maltodextrin packs)
| For a small amount (about a fist-sized lump) to try out you need: | Ingredients list for a larger quantity: |
| 50 g wheat flour (405) | 250 g wheat flour (405) |
| 25 g of powdered sugar | 125 g powdered sugar |
| 10 g whole egg powder | 50 g whole egg powder |
| 10 g cornstarch | 50 g cornstarch |
| 10 g of milk powder | 50 g milk powder |
| 5 g maltodextrin | 25 g of maltodextrin |
| 1 packet of vanilla sugar | up to 5 packets of vanilla sugar |
| 1 pinch of salt | 3 - 5 pinches of salt |
| a few drops of lemon flavor | ½ - 1 vial of lemon flavor |
| 2 teaspoons oil | 10 teaspoons oil |
| 20 ml of water | 100 ml of water |
| 15-30 g of cornstarch | 70 - 150 g cornstarch |
| Food coloring (powder, paste or liquid) | Food coloring (powder, paste or liquid) |


Click here: Download the list of ingredients
aids:
- large to very large mixing bowl
- tablespoon
- teaspoon
- Food or kitchen scales
- hand mixer
- clean worktop or backboard
- baking sheet
- baking paper
Important instructions
The vanilla sugar, the salt and the lemon flavor are solely for the taste.
When reading our recipe carefully, you will surely notice that we first listed some dry and then liquid ingredients before eating cornflour on the penultimate item. This is not a mistake, but full intention on our part. The somewhat extravagant explanation: Our experience has shown that the dough easiest and best succeeds when it is first touched a little damper than it should be at the end (otherwise the liquid spreads more bad than right and the dough remains friable for a long time). By subsequently added dry powder it gets the desired consistency. And for this subsequent "drying" cornflour is ideal. Alternatively, flour would be considered, but the dough with cornflour is much smoother and velvety.
The amount of food coloring depends on several factors:
- how much the color used colors
- how strong the color of the kneading dough should become
For this reason, it is not possible to give precise details. Always start with very little color and gradually increase the amount until you are satisfied with the result.
Attention: If you want to use color powder (such as turmeric or beetroot powder) instead of paste or liquid, as with the salt dough described above, you must mix this with the other dry ingredients. This way, you can only make one color per dough creation. In this case it is advisable to stir several small amounts according to the list of ingredients for the fist-sized lumps to obtain different colored putty. Also keep in mind that you always need a trace of water when using color powder. In contrast, use paste or liquid, nothing changes and you have the opportunity to make colorful pieces out of the big picture.
manual
Step 1: First weigh the dry ingredients and gradually add them to the mixing bowl in the order of the ingredients list.
Tip: Sieve the icing sugar. He is then better to work in the dough.
Attention: Add the cornstarch (15 - 30 g or 70 - 150 g) mentioned in the last but one place of the long list of ingredients - NOT for the time being.
2nd step: Mix the dry ingredients carefully with the hand mixer.
Step 3: Add the oil and lemon flavor to the dry mixture.
Step 4: Stir the mixture until the liquids are reasonably well distributed.
Step 5: Add the water.
Step 6: Continue mixing with the hand mixer until crumbly lumps have formed.
Step 7: Knead the dough by hand.
Attention: In this process, the hands are usually very sticky. Prepare a few sheets of kitchen paper or knead with only one hand for the time being.
Step 8: Now the cornstarch retained in the first step is used. Add pieces of it to the dough as needed to make it less sticky.
Step 9: Change the dough to your worktop. Sprinkle with some of the retained cornstarch and work the dough on it until it kneads easily and loosely.
Step 10: Wash your hands. After that, the dough should stick less, if not more, when you touch it. If he does it, knead in a bit more cornstarch. But be careful that the dough does not get too dry.
Tip: It's not easy to find the right balance between sticky and too dry. It takes experience - and therefore some practice. If your dough has become too dry, add tiny drops of water. If it then becomes too sticky again, you must supplement cornflour again. So, gradually approach the optimal consistency. At the end of your experimentation, you can knead a round lump without your fingers sticking to it.
Step 11: If you have not used the food color in powder form and have already added to it at the end of the dry ingredients, it is now time to color the kneading dough. Color paste for food is best. But also liquid food coloring from the supermarket can be used. First sprinkle some cornstarch on your worktop again as the food coloring makes the dough sticky again.
Step 12: Then take part of the dough and use a dipper stick to add a tiny amount of the color to a well in the dough.
Tip: To spread the color better, you can add a few drops of water and mix with the food coloring.
Step 13: Close the dough lump around the color. This will prevent the color from dripping.
Step 14: Knead thoroughly. And that until the color is evenly mixed in the dough.
Attention: If you work with very strong color, you get colorful hands from the current activity. By regularly washing her hands, she loses herself again after one or two days.
Step 15: Repeat steps 11 to 14 if necessary with the other dough lumps and colors.
Step 16: Now the kneading pleasure can begin - a fun for all ages! Create beautiful motifs, such as food (sandwich), animals, funny faces or other characters. Your imagination and your possibilities are endless.
Tip: A bit of snacking is definitely allowed, as the dough is edible even when raw.
Step 17: Once you are satisfied with your kneading results, simply place them on a baking tray with baking paper.
Note: Unprocessed plasticine can be kept in the refrigerator for about three to four days. Although the dough is then a little harder. But with warm hands he can be kneaded supple again.
Step 18: Bake the kneading figures in the oven for about six to eight minutes at 160 degrees Celsius. The exact duration depends mainly on the thickness of the figures.
Tip: Make sure the characters do not turn brown. Otherwise, their color effect is lost. It usually happens very quickly that the figurines assume a brownish note. Therefore, you should follow the process carefully and act swiftly as soon as a first tan indicates.
Finished. We wish you good appetite while eating the clay figures!
Cost and effort for the edible kneading dough: medium
Tips for quick readers:
- Craft craft or edible play dough
- Bastelknete consists of simple salt dough, not edible
- Mix flour, salt, citric acid, water, oil and food coloring
- Make figures and if necessary conserve by baking
- Store any leftovers in airtight containers in the refrigerator
- Edible plasticine with a different composition
- Including sugar, whole egg powder, maltodextrin and cornflour
- Mix dry ingredients, then add liquid
- Knead the dough smoothly and mix in the color (s)
- Form figures, bake in the oven for 6 to 8 minutes and enjoy