Sewing small gifts yourself - 5 ideas + free instructions

- Sew fortune cookie
- Sew on a keychain
- Sew book cover
- Sew bookmarks
- Sew reading corner
Last Minute Sewing Gifts - Every time I imagine that I sew this or that as a souvenir and then just passes the time way too fast. That's why I have selected a few small projects for you today, which can be implemented very quickly and without a pattern even for beginners. And while you're at it, you'll sew several versions of it, and you'll always have your presents in your pocket and no more stress on the road!
In detail, I would like to show you today how to sew happiness biscuits out of fabric (a nice decoration for your dining table too), a fast made keyring that does not require any metal accessories and can be easily attached to the key ring or carabiner, a book cover to give away or at home, as well as beautiful bookmarks and reading corners. It does not always have to be the reading bone ... ???? Together, all the projects have that you can do without special material and the necessary utensils such as fabric remnants are actually present in any household in which much is sewn, anyway. Accordingly, all instructions are suitable for beginners and there are no fixed patterns for these small gifts.
Difficulty level 1/5
(also suitable for beginners)
Material costs 2/5
(per project between EUR 0, - from your fabric remainder compilation and EUR 8, -)
Time expenditure 1/5
(each project is implemented very quickly, depending on the project and exercise 5-30min)
Sew fortune cookie
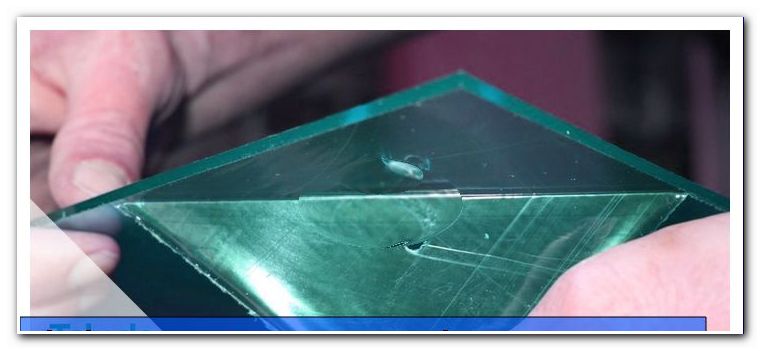
For these small gifts you need a thicker and a thinner fabric, if necessary, some non-woven fabric, a CD as a pattern and a marker.
First reinforce the thinner fabric (if you like) with ironing fleece. The second layer of material may, for example, consist of slightly thicker felt or of other fabric remnants of Walk, Sweat or the like. I opted for coarse felt and a thin cotton fabric with green flowers.

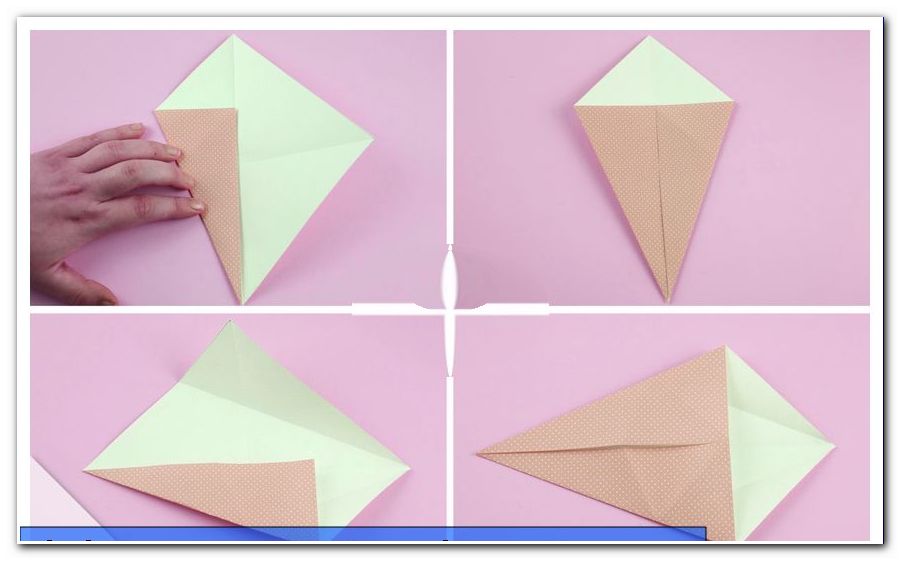
Place the CD on the left side of the fabric and draw the border on the fabric. Now place the fabric right side on the thicker fabric and attach both fabrics in the middle with one or more pins.

If necessary, mark the area for the turning opening. Sew once along your pre-drawn circle line with simple straight stitch or multiple straight stitch and cut back the seam allowances.

Tip: In the area of the turning opening, I allow the seam allowance to last a little longer in this case, so that the wrapping is easier after turning.
So that the seam allowance does not curl, I now cut several times around in the fabric. Make sure that you do not cut the seam!
Turn your work piece, adjust the seam allowance of the turning hole and iron everything once. Now step around with a basting stitch.

Fold your circle together twice and mark the middle. Fold the circle once again so that a semicircle is in front of you. Continue pushing the pin tip until it is two fingers away from the edge. Now sew down from the tip of the needle to the edge.

Now fold the fabric along this last short seam and bring your fortune cookie into the desired shape. And done!

Sew on a keychain
For the key fob, I've come up with a way that works completely without metal, so you do not have to buy eyelets, rings, clamps, screws or the like. This tutorial is also great for beginners. All you need is webbing, a little webbing (to lighten Wondertape to fix) and another 3cm of woven or grosgrain ribbon for the loop.

Tip: Be careful if you want to iron the webbing! It melts! In this case, turn the iron down to a lower temperature and place it between two layers of baking paper to prevent soiling and damage to your iron. Keeping your webbing rolled will save you ironing!
Cut the webbing to the desired length and attach centering tape to the center to fix the weave to prevent it from slipping when sewing.

Tip: If you cut off the strap, you'll "flick" the lighter across both edges for a moment, so it will not come off.
Now stitch the edgeband tightly on both sides.

Place another piece of woven or grosgrain ribbon about 3-4 cm long left to left on one side and attach it to the edge. For my example, I chose a weave with a different design to make it easier to understand. Of course you can also use the same weave for quilting. Now fold the other end upwards and lay the edges together flush.

Sew above all fabric layers - do not forget to sew at the beginning and end! Cut back the seam allowance and round off the corners. Seal the edges again by "wagging" with the lighter.
Turn the key fob and press something on the edges or place it on a table and lay books on it, then it folds nicely.

And your key chain is ready.

Sew book cover
A beautiful book cover also belongs to the ranks of fast-sewn gifts for beginners. For this you also only need fabric remnants and woven or grosgrain ribbon. Small pieces of fabric can also be sewn together in patchwork style to get enough fabric to cut. If desired, wooden or plastic beads can also be attached as an ornament. This book cover is unconventional because it is designed to be stitched as quickly as possible.

That's why there's no pattern in that sense. You can easily make this yourself:
Measure your book and add 3 cm seam allowance and margin both in height and width. Additionally in the width still 10 cm for the impacts .
Cut out of two different (or the same, if you like) pieces of fabric once each of your calculated dimensions and put them right to right (ie with the beautiful side together) on each other. Now sew around with a simple straight stitch and leave a turning hole in the top center.

Cut the seam allowance in the corners at an angle, turn and iron everything. Push in the seam allowances at the turning opening inwards and also iron these edges straight. Mark the top center with a pin.

If you want to use Webband for the bookmark, you will need a piece that has 2 times the desired length plus seam allowance. Put this together left to left and stitch it on both sides with a short edge. The open end is placed in the middle of the turning opening and stuck it.

Place your book in the middle and fold in the pages. Use pins to mark where the impact begins, remove the book, fix the impact with pins and sew around the entire work piece all around. Thus you also close the turning opening immediately.

Now the book cover is finished!

variations:
- After cutting (ie before you start to sew), you can attach ornaments to the fabrics. For example, attach appliqués, sew on woven ribbons or ruffles and many more.
- As mentioned above, beads can also be threaded for decoration at the bottom of the bookmark. Grosgrain ribbon is better suited for this than woven ribbon. Plan the ribbon a little longer, knot it about 2 cm from the book (below), thread on your decorative beads, knot underneath again, and you're done.
Sew bookmarks
You will need scraps of fabric for this gift idea again. Ideally made of cotton woven fabric or other non-stretchy fabrics. The size can be varied according to your taste, so there is no finished pattern here. I like to have wider, long bookmarks, so I opted for a nice fabric remnant of a cotton sateen girl's dress for a bookmark of 20cm height and 5cm width. In addition I take after the motto "fast and easy" still suitably a few cm dark green satin ribbon. Here you can use what you want: grosgrain ribbon, woven ribbon, cords, thick yarn and much more.
First cut a piece of fabric twice the width. Remember the seam allowances! A reinforcement of the substance is not necessary here, since the bookmark should not be too thick.

Iron the top seam allowance to the left (ie to the "back" of the fabric). Fold the piece of fabric lengthwise on the right side and iron over the edge. If you are unsure, pinch both layers with pins so that nothing slips. Now sew the open long and the short side short.

Cut the corners at an angle, apply the bookmark and iron it. Above is now the turn-around. Fold your desired tape together once, put it in the middle of the turning opening and put it firmly.

Now you can either stitch completely around - either with a matching color or in contrasting color is taste sack - or you just quilt the turn-only opening to edged.

And already a beautiful unique bookmark has been created!

Sew reading corner
How about a little monster tagging the page "> 
Here I show you the simplest version with rickrack and eyes for gluing:
Cut 2 squares with 9 cm side length for the "body" and one with 10 cm side length for the "head". Cut the larger square diagonally apart and place the rickrack slightly away from the edge on one side so that it can not slip.

Here you can also work with Wondertape instead of the auxiliary seam. Now place the second triangle right to right on it and sew all three layers together. Turn and iron.

Now place the triangle between the two smaller squares, pin everything tight and mark a turn-around opening. Sew around, turn around and iron on - iron in the seam allowance of the turning opening!

Quilt the lower part (including turning opening) with a short edge. Attach your eyes.

And many gifts are ready, which even beginners can easily implement - without any pattern!
The twisted pirate